These resin coasters are SO PRETTY and fun to make! Follow our beginner friendly step by step photo and video tutorials, and read below for helpful tips about working with resin.
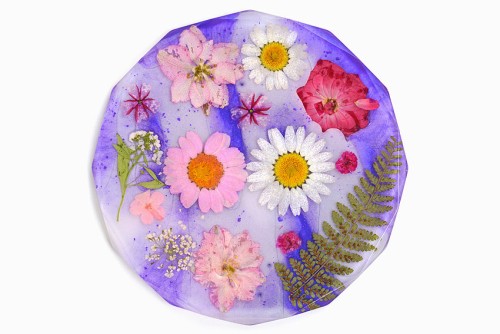
Add pressed flowers to your resin coaster and color them to match your home decor! It’s such a fun and easy DIY project, and these homemade coasters also make an awesome homemade gift.

This post contains affiliate links. If you use these links to buy something we may earn a small commission which helps us run this website.
How to Make Resin Coasters
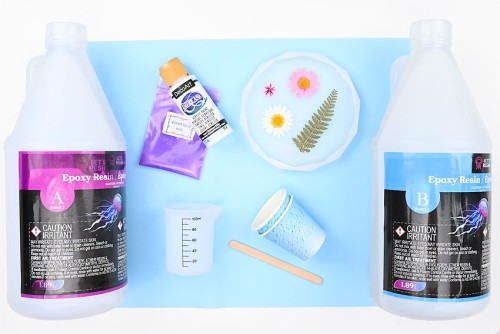
Materials:
- Casting resin
- Pressed flowers
- Mica powder (colour of choice)
- White acrylic paint
Equipment:
- Jumbo popsicle stick (or silicone stir stick)
- Rubbing alcohol (in spray bottle; optional)
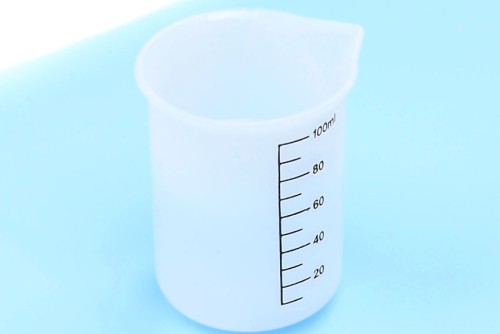
- 2 Dixie cups (or small silicone measuring cups)
Watch the step-by-step video tutorial:
Instructions:
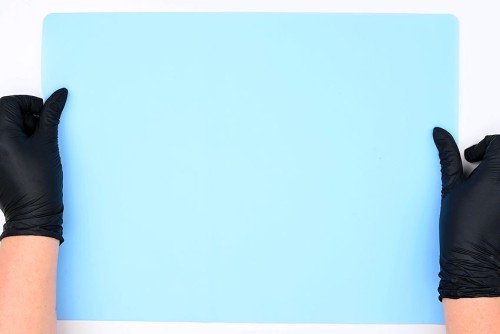
Step 1: Find what you need
- Gather your supplies and materials.

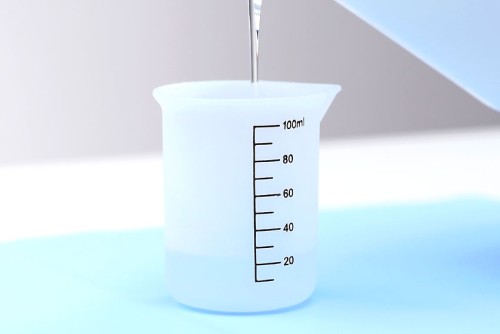
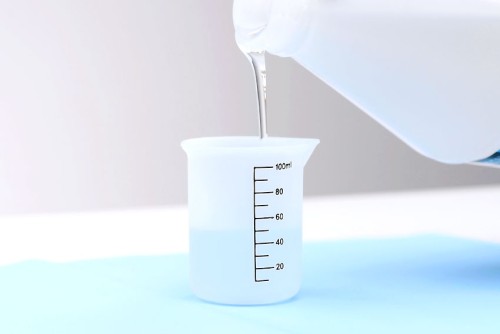
Step 2: Mix the resin
- Make sure you protect your working surface with a silicone mat, wear protective nitrile gloves, and eye protection.Depending on the resin you may also need to wear a respirator.
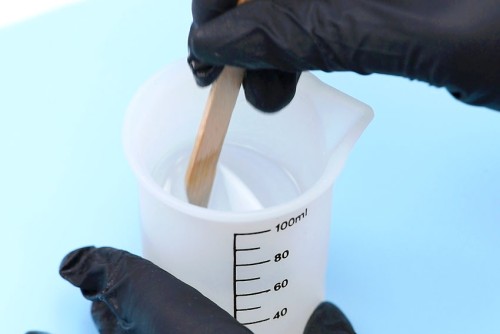
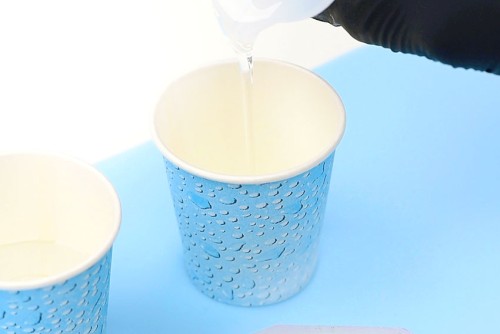
- First, mix enough resin to fill about 1/2 of your mold.Start by adding 1 part of Part A to the silicone measuring cup.Follow your specific resin’s instructions for ratios, drying times, and curing times.
- Add an equal amount of Part B to the measuring cup. (Or whatever ratio your brand of resin suggests.)
- Mix the resin and hardener together with a popsicle stick or a reusable resin stir stick.Stir slowly, scraping down the sides and bottom of the measuring cup. Continue mixing for 3 minutes or until the mixture is clear.
- Allow the resin to sit for 5 to 10 minutes.
Step 3: Pour the resin and add flowers
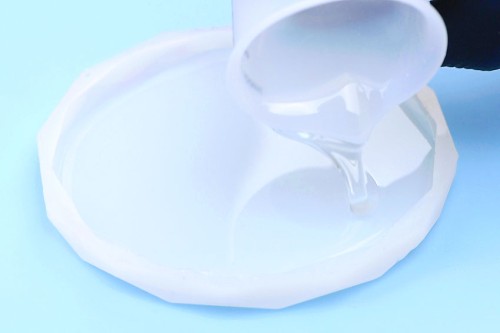
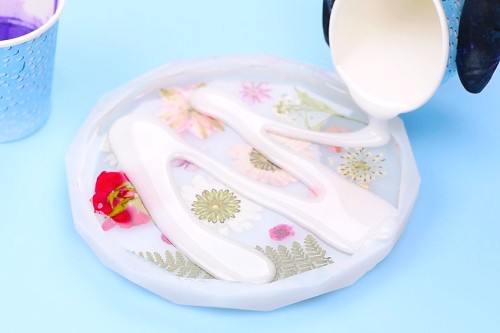
- Pour about 3/4 of the resin into the silicone coaster mold.

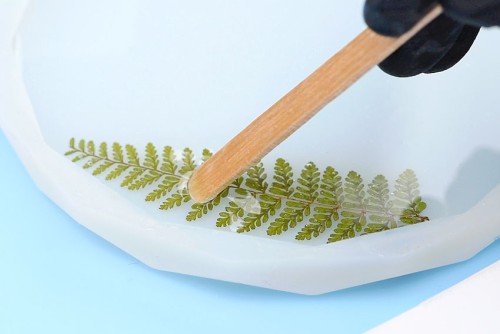
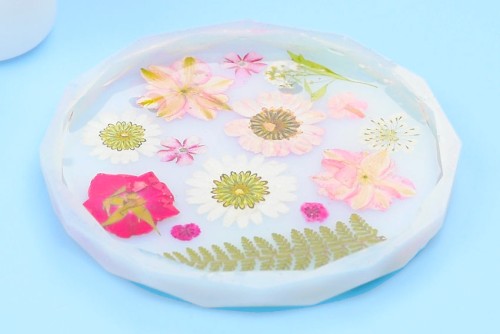
- Add a pressed flower or piece of dried greenery into the resin, face down, pushing it down below the surface.To do this you can use tweezers, or you can wet a popsicle stick with resin to pick it up.
- Repeat until you’re happy with the amount of flowers added and their arrangement.
- Pour the last 1/4 of the resin on top.
- If any bubbles surface, spritz the resin with rubbing alcohol to remove them.
- Allow the resin to sit for the recommended layering time. Our resin suggests 5 hours.Keep an eye on the flowers for the first 1 – 2 hours, as they can float up or drift out of position. Use the popsicle stick to put them back in place.
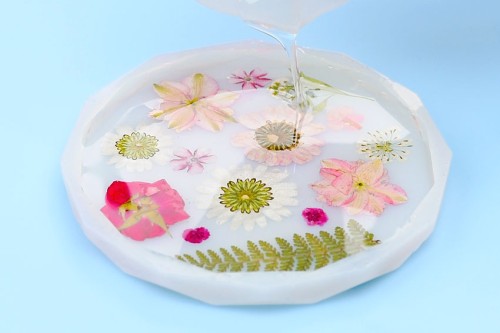
Step 4: Add a second layer of coloured resin
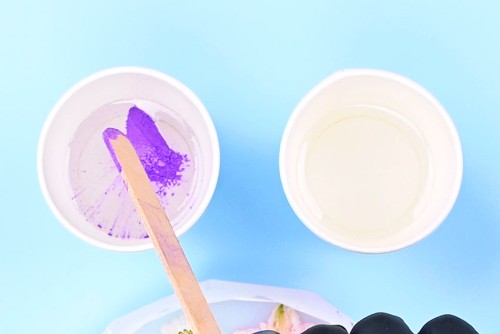
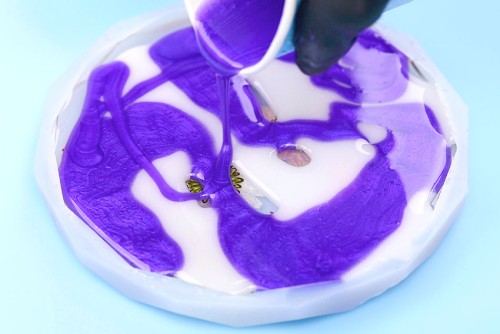
- Mix another batch of resin to fill the remaining 1/2 of the mold, following the instructions above.Pour an equal amount of resin into two Dixie cups (or small silicone measuring cups).
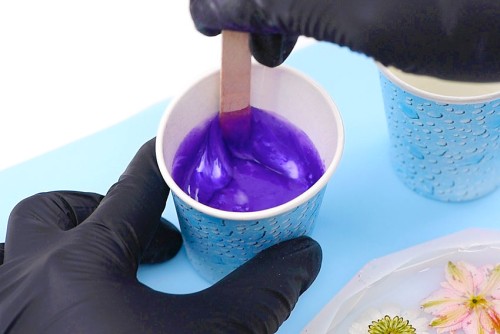
- Add coloured mica powder into one of the cups. Start with a small amount and continue to add pigment until you reach the colour you’re looking for.It’s recommended that your pigment is less than 6% of the volume of your resin.
- Stir, mixing well to combine the pigment and resin.
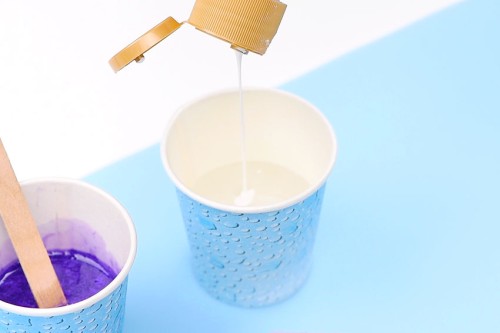
- To make a white colour we added acrylic paint to the second cup. Again, stir well until combined.
- Drizzle the white resin into the coaster mold.
- Add the coloured resin in the areas where the white resin hasn’t spread.
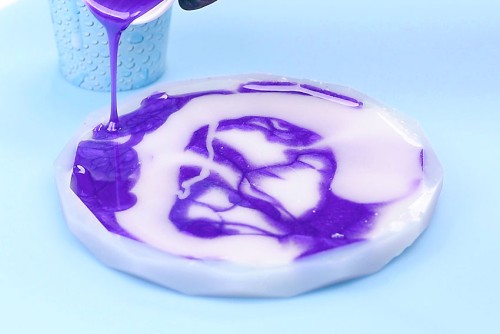
- Pour more white, and then coloured resin, continuing until you reach the top of the mold.Deal with any bubbles on the top, if necessary.
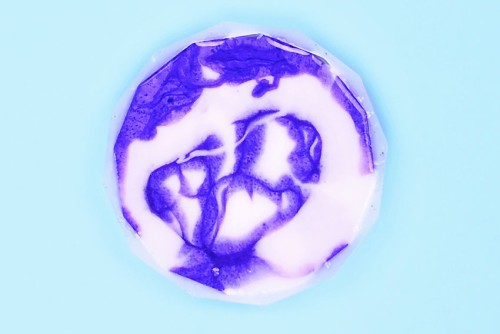
Step 5: Allow to dry and demold
- Let the resin coaster sit, untouched, for the recommended dry (or demold) time.Our resin’s dry time is 8 to 12 hours, but we recommend waiting 24 hours.
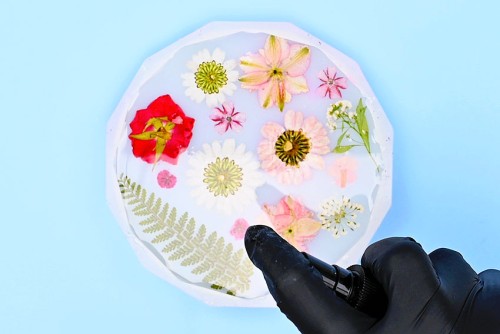
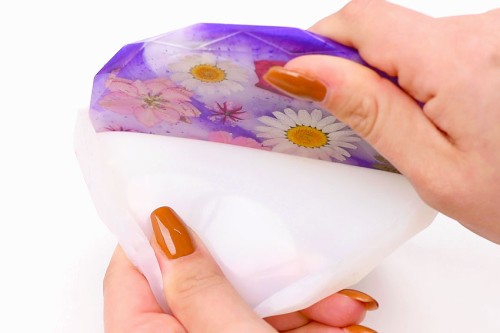
- Once your resin coaster is dry you can unmold it.Grab the side of the mold and stretch it a bit as you pull it back. The coaster should come out easily.
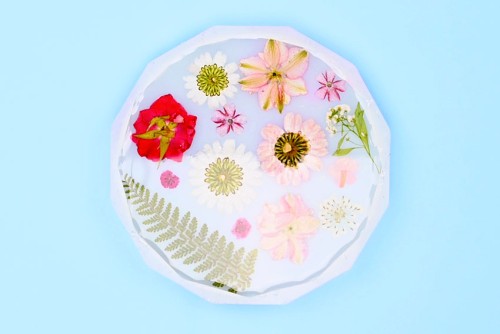
- Your resin coasters are complete!You can use the coasters after the recommended cure time is over (72 hours for our resin). Sand off any rough edges from the bottom of the coaster, and enjoy!
Helpful Tips:
- Do your resin pours in a well ventilated area and protect your working surface. Make sure that you also wear basic PPE: nitrile gloves, eye protection, and long sleeves. Some resin also requires wearing a respirator.
- To keep your coasters free of dust particles, wipe the mold with rubbing alcohol and a lint free cloth before using them.
- To be extra precise with your pouring, add the two parts of resin into separate measuring cups before combining them.
- For help preventing and removing air bubbles from resin, check out our preserving flowers in resin post.

Do I have to add colour to my resin coasters?
We love the look of the coasters with the coloured background, but you can also make a coaster with just pressed flowers and clear resin. We still recommend doing two pours, because it helps the flowers stay in place.
What can I use to colour resin coasters?
We used both mica powder and acrylic paint to colour our coasters, but you can also use alcohol ink, glitter, or food coloring. You can even buy special dyes specifically made for resin, in either liquid or powder form.

How much resin do I need for 4 coasters?
The amount of resin needed will depend on the size of your silicone mold. We used about 100 ml for each of our coasters, meaning you’ll need 400 ml of resin to make a set of 4 coasters.
We prefer making a batch of resin a little bit bigger than what we might need, rather than running out before the mold is full. So try to have some small silicone molds ready for the extra resin. You can make resin gummy bears or even create your own beads!
What resin is used for coasters?
We used casting resin to make our coasters. Deep pour resin is recommended for any objects thicker than 1/2 inch, so if you’re going to buy one type of resin, casting resin is the one to choose. Even though these coasters are thinner, the casting resin works well and has a fast drying time.
Since the coasters are fairly thin, you can also use a tabletop resin. Tabletop resin cures a bit harder than casting resin, which is nice for coasters, but it can also take longer to cure.

Can you use fresh flowers in resin?
No, fresh flowers cannot be added to resin, since moisture and resin don’t mix well. The water content in fresh flowers stops the resin from curing properly, and the flower will eventually turn brown and rot in the resin.
Flowers need to be dried or pressed properly before they can be added into resin.
How to press flowers for adding into resin coasters?
We recommend pressing flowers in a flower press or a book. It’s a bit of a time consuming process, but it results in beautifully pressed flowers that retain their colour.
If you don’t want to press your own flowers, you can also buy pressed flowers on Amazon or Etsy.

These resin coasters are SO EASY to make! We love useful crafts, and these DIY coasters are great for both decorating and protecting your furniture. Add colour to your coffee table with these simple and beautiful resin coasters!

Here’s even more DIY coaster ideas:


Our book Low-Mess Crafts for Kids is loaded with 72 fun and simple craft ideas for kids! The projects are fun, easy and most importantly low-mess, so the clean up is simple!

Where to buy:
You can purchase Low-Mess Crafts for Kids from Amazon, or wherever books are sold:
Amazon | Barnes and Noble | Books-A-Million | Indiebound | Amazon Canada


Leave a Reply