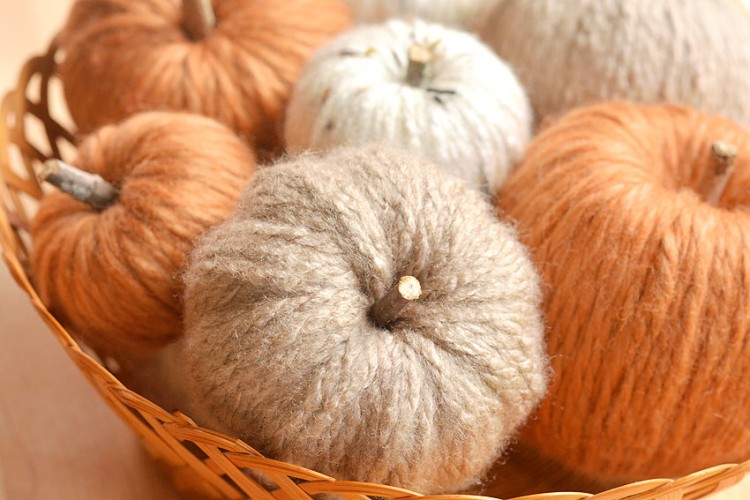
These yarn pumpkins are such a gorgeous little fall craft project – great for a table centerpiece or even a fall mantle. They’re beautiful on their own, or in a group!
Have you seen that fabulous pin going around Pinterest showing the multi coloured yarn balls? Seriously, take a look at how GORGEOUS these yarn balls are. So I thought, what a fun twist to turn those little balls into pumpkins! And you know what? They ended up looking awesome!

This post contains affiliate links. If you use these links to buy something we may earn a small commission which helps us run this website.
How to Make Yarn Pumpkins
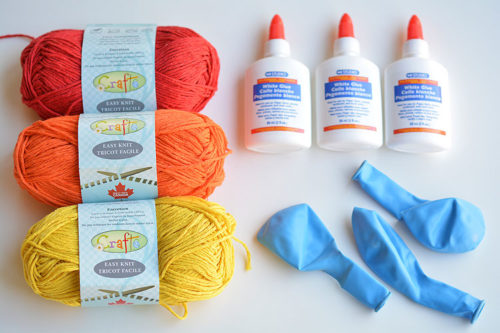
Materials:
- Balloon
- Orange yarn
- White glue (Aleene’s Tacky Glue works best)
- Pipe cleaners (brown and green)
Equipment:
Watch the step-by-step video tutorial:
Instructions:
Step 1: Find what you need
- Gather your materials.

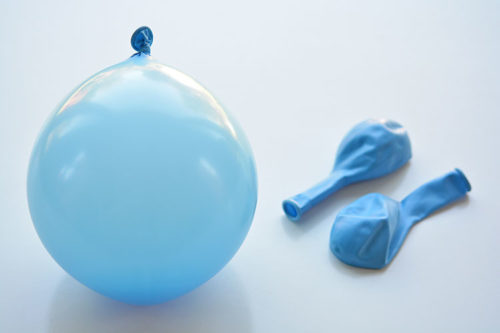
Step 2: Prepare balloon and glue
- Blow up 12″ balloons about half full. The bigger you blow the balloons, the more yarn you’ll need. But the smaller you blow them, the more egg-like the shape will be. It’s a balance.
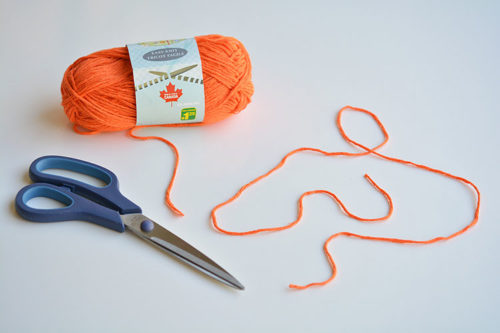
- Cut out about 21 pieces of yarn about 36 inches long. I have a table that’s exactly 36″ wide, so I used the table top to roughly measure. If you make your pieces of yarn too much longer than that, they’ll get tangled when you soak them in the glue.
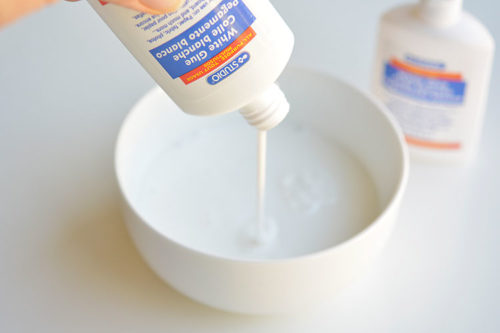
- Pour the glue into a small bowl. It takes about one full 2 ounce bottle of glue per yarn pumpkin. I added three bottles into the bowl at a time just to make it easier.(EDIT: Don’t use dollar store white glue. We’ve made these a few times and found that half Aleene’s Tacky Glue/half water works WAY better than regular white glue. Your pumpkin will be somewhat soft and flexible with other types of white glue.)
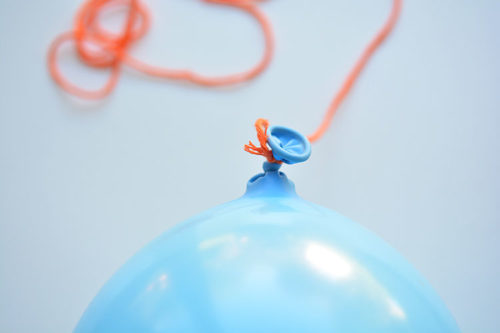
- Tie one of the pieces of yarn to the end of the balloon. Open one of your kitchen cabinets and hang the balloon from the handle. It’s way easier (and cleaner) than trying to manipulate the balloon when it’s lying on a flat surface.
Step 3: Dip yarn and wind around balloon
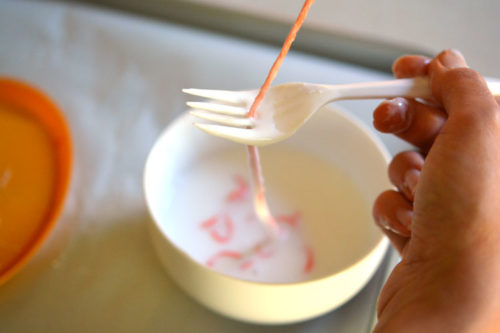
- Dunk one of the pieces of yarn into the bowl of glue, and swirl it around gently with a plastic fork to get it completely covered with glue.Hold the end of the piece of yarn with your fingers, then gently run it between the tines of a fork to remove the excess glue. I found that running it through the fork left enough glue on the yarn that it held its shape once it dried, but not so much glue that it was dripping everywhere.I tried running the yarn through my fingers to “pinch” off the excess glue, but it took off nearly all the glue, and made the yarn ball very soft once it dried. The fork method worked way better.
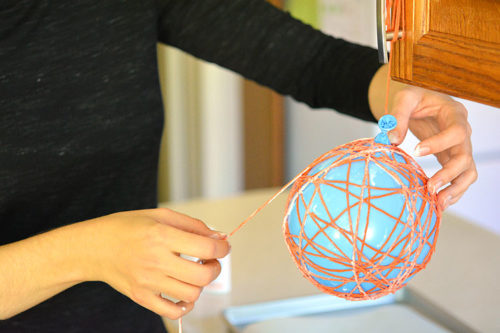
- Take the glue covered yarn strand and press the end down somewhere (I liked to either start at the top or the bottom of the balloon) and wind it around the balloon, making sure the press down the ends of the yarn to secure them when they’re in place.Repeat with the remaining pieces of yarn.
Step 4: Allow to dry
- When you’re done, find somewhere to hang the yarn covered balloons to dry. I squeezed all of our jackets to one side in our coat closet, and hung the balloons there.They did drip a few drops of glue as they were drying, so make sure you put down an old towel, tarp, or dollar store table cloth so you don’t wreck whatever is beneath them.
- It took a full 24 hours for them to dry. But when they did, I was really happy with how firm they were! The glue hardened beautifully!

Step 5: Remove the balloon
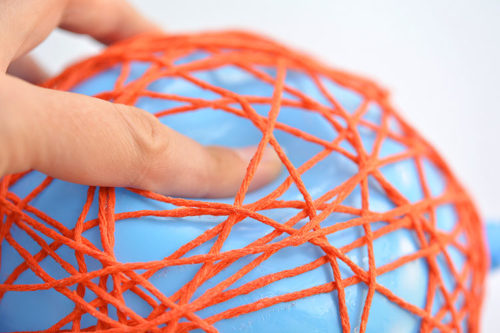
- This is CRITICAL. You need to make sure you press your fingers down under the yarn to detach the glue from the balloon – around the entire surface of the balloon. It’s a little tedious, but if you don’t do it, the balloon will pull the yarn to the inside as it deflates and it may ruin the shape of your pumpkin.
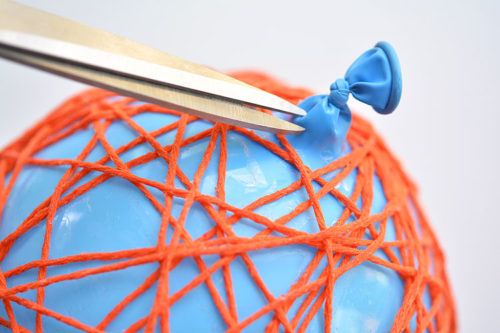
- Make a very small hole in the balloon close to where the knot is (it won’t pop if you cut it near the knot). You want the air to leak slowly so you can detach any yarn that you might have missed as it shrinks.
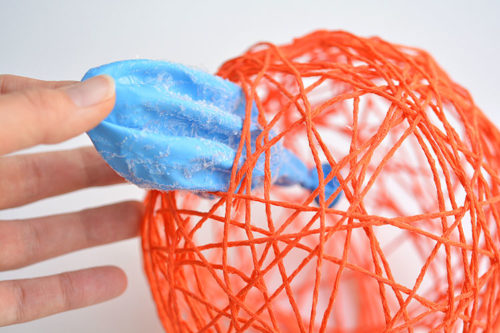
- Then pull the deflated balloon out through one of the openings in the yarn.
Step 6: Add pipe cleaner stem and tendrils
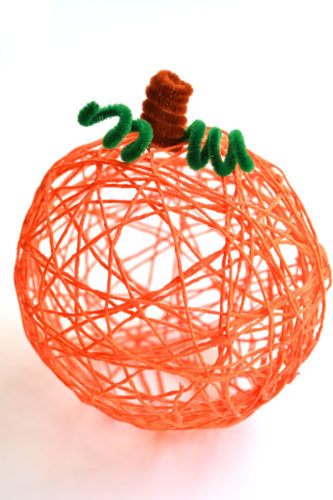
- Make the pipe cleaner stem and vine by wrapping the pipe cleaners around your baby finger. The stem is just a spiral, so I tucked the end of the pipe cleaner into the yarn. I didn’t glue it on, I just tucked it in and it stayed in place.Your yarn pumpkin is complete!

TIP:
- If you use regular white glue, your pumpkin will be somewhat soft and flexible. We recommend using half Aleene’s tacky glue and half water mixed together to get a firmer pumpkin.

What type of glue works best for making yarn pumpkins?
EDIT: We used to recommend using dollar store glue, but have found over the years that dollar store glue gives you soft, flexible pumpkins that may not hold their shape very well.
When we recently re-made this craft (see our video tutorial above!) we decided to use Aleene’s tacky glue, like we did with our twine ball ornaments. We did a mixture of half Aleene’s tacky glue and half water, and it made the pumpkins strong, sturdy, and resilient!
Originally we made this craft with straight white glue from the dollar store. We did not water it down, like a lot of tutorials online will tell you to do.
Using plain white glue, the pumpkins still hold their shape very well, but they can be easily crushed if you accidentally put something on top of them (or let the kids play with them…). The balls aren’t rock solid, so you want to give them as much glue power as possible to hold their shape.
Other glue options include:
- A mixture of corn starch or flour and water. (We haven’t tried this ourselves.)
- Mod podge, slightly watered down. (Just know that if you use glossy Mod Podge the pumpkins will end up with more of a shiny finish when they dry, rather than the matte yarn finish that you get with white glue.)

Where can I get supplies to make a yarn pumpkin?
I found my yarn at the dollar store, which quite honestly, I thought was a little crazy! I was at the craft store last week, and all the yarn was at least $5 to $7 per ball, and it was all acrylic. I really wanted cotton yarn, because somehow I thought it would dry stiffer (no idea if that’s true?), and I managed to find it at the dollar store!
So this craft is entirely from the dollar store – Glue, balloons and cotton yarn… and of course you can get pipe cleaners at the dollar store too, but I had those left over from the pipe cleaner flowers I made.

What colour yarn makes the best yarn pumpkin?
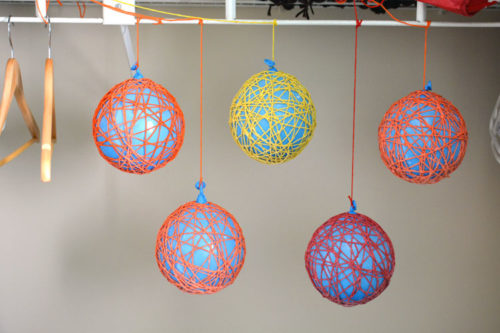
We made orange, yellow, and red pumpkins, and we definitely prefer the orange ones. (I’ll admit that the red one kind of looks like an apple. Ha! Oops…) You could also try making a white yarn pumpkin!

It’s not the quickest project in the world, but I love how they turned out! It took about 20 minutes per pumpkin to wrap the yarn, and then 24 hours to dry.
I tried getting the kids to help out, but they lost interest really quickly. My 6 year old didn’t want to get her hands dirty, so she took a balloon and left. My 4 year old looked really enthusiastic until it came time to touch the glue, then she informed me that she wanted me to make it for her. Maybe older kids would do better?
These yarn pumpkins are such a fun fall craft idea! They’d make a beautiful centerpiece or mantle decoration, or you could even use them to decorate for Halloween.
This post was originally published on September 19, 2016.

Here’s even more pumpkin craft ideas:


Our book Low-Mess Crafts for Kids is loaded with 72 fun and simple craft ideas for kids! The projects are fun, easy and most importantly low-mess, so the clean up is simple!

Where to buy:
You can purchase Low-Mess Crafts for Kids from Amazon, or wherever books are sold:
Amazon | Barnes and Noble | Books- A- Million | Indiebound | Indigo | Amazon Canada


Leave a Reply