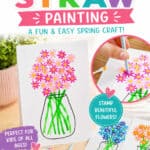

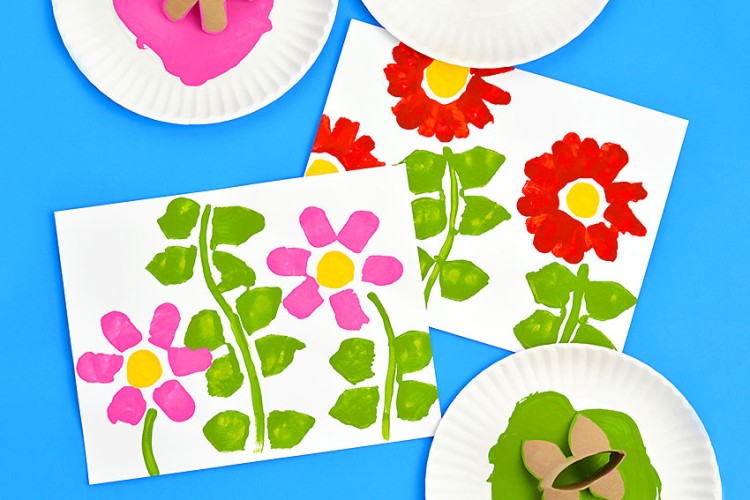
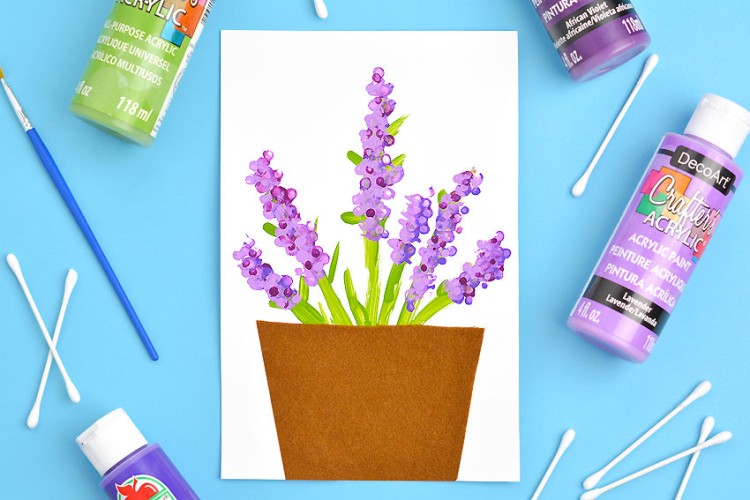
Flower straw painting is such a fun and easy spring art project for kids! Using a straw as a paintbrush creates the prettiest flower shapes, and the finished bouquet looks so bright and cheerful. It’s a simple painting technique that feels a little bit different from regular brush painting, which makes it extra fun for little artists (and grown-up ones!) to try.
This straw flower painting is perfect for spring, classroom art, or homemade Mother’s Day cards and gifts. Kids will love stamping and layering the flowers to fill their vase, and each picture turns out a little different in the best way. It’s an easy craft to set up, uses simple supplies, and the finished artwork is sweet enough to display or turn into the front of a handmade card.

This post contains affiliate links. If you use these links to buy something, we may earn a small commission at no extra cost to you. This helps support our website and allows us to keep creating fun, free content.
How to Make a Flower Straw Painting
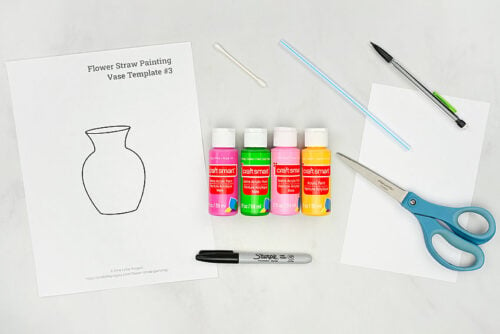
Materials:
- Printable Vase Template (find more links below)
- White cardstock
- Acrylic paint (green, 2 flower colours, yellow)
- Black Sharpie marker
Equipment:
See the craft in action:
Instructions:
Step 1: Find what you need
- Gather your supplies and materials.

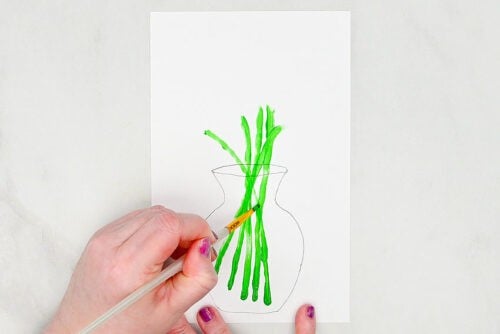
Step 2: Draw a vase and paint flower stems
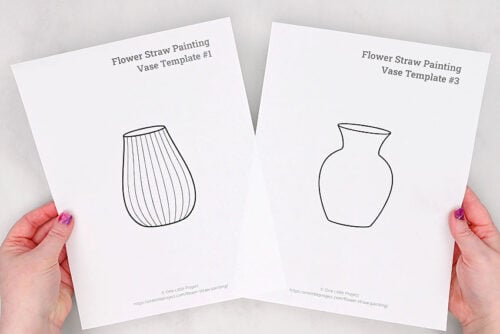
- Print one of our free vase templates. We have 4 vases to choose from!Find one link in the materials list above, with more links and details below the tutorial.
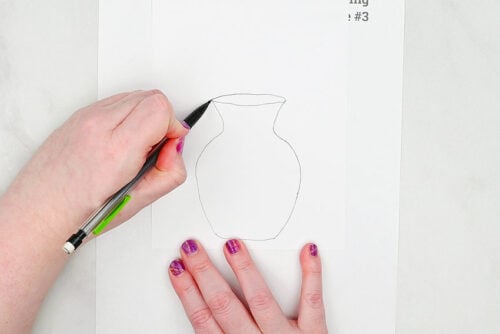
- Place a piece of cardstock on top of the template and trace the vase shape.You can use a light pad or hold the papers up to a well lit window if you can’t see the lines clearly.
- Then use green paint and a paintbrush to paint flower stems coming out of the vase.
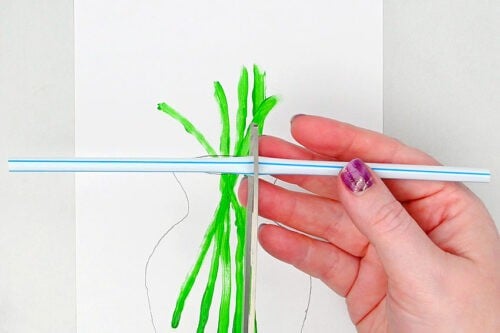
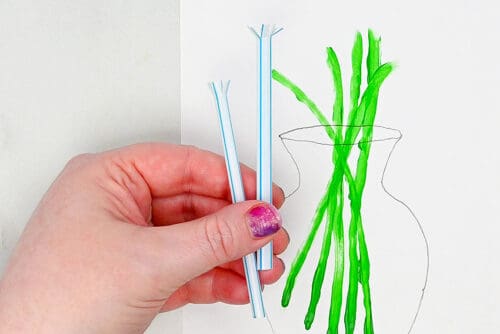
Step 3: Make a straw paintbrush
- To make the flowers we’re going to use a cut straw as a paintbrush. Begin by cutting the straw in half, so you have 2 “brushes” to work with.

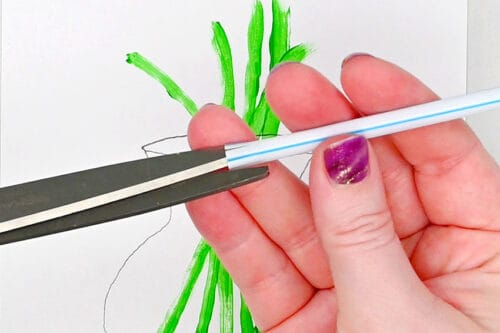
- Begin by making 4 even cuts around the end of the straw, going down about 1/4 inch. If your straw is striped, like ours, you can use the lines as a guide. Otherwise, do your best to make the cuts even.Then cut in-between the previous cuts, so you have 8 thin strips at the end of the straw.
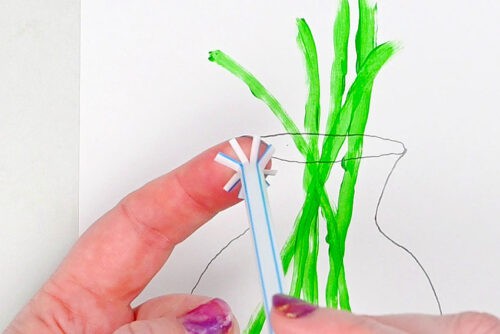
- Use your finger to press the straw pieces outwards. Once you get the cut pieces pressed outward you can also press the straw down on your working surface.
- Repeat with the 2nd half of the straw. Now you have 2 “paintbrushes”, so you can create 2 different colours of flowers.
Step 4: Paint flowers
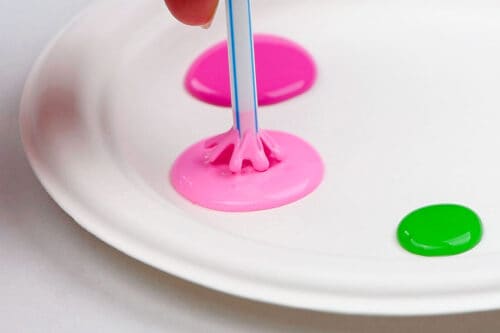
- Dip the straw into some flower coloured paint. You want to make sure the cut parts of the straw are well covered, but try to avoid getting paint in the middle.If you get a lot of paint on your stamp, you can stamp it onto scrap paper first to test it.
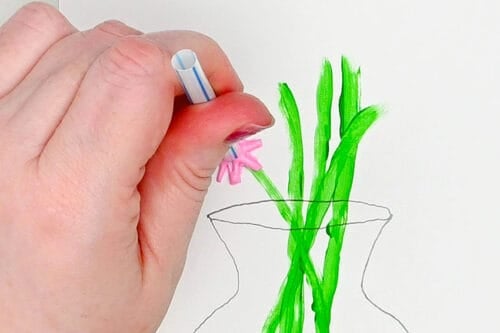
- Then, when you’re ready, stamp the brush down onto the paper.You can place it at the end of a stem, or wherever you’d like a flower to go. Wiggle the straw back and forth a bit, so that the paint transfers evenly.
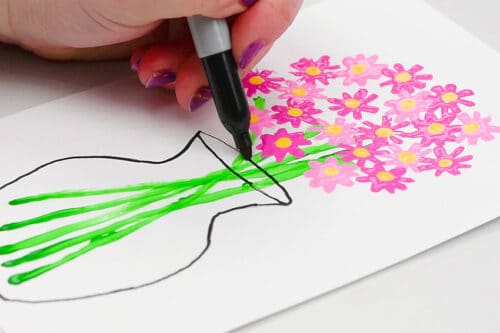
- Repeat, adding flowers of the same colour across the top of the vase, leaving space in-between them.
- Choose a second colour of paint (or use a different shade of the same colour) and add more flowers to fill out the bouquet.

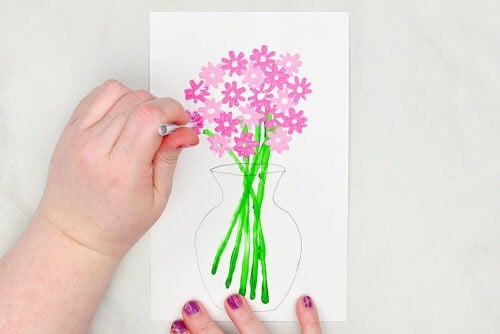
Step 5: Add flower centers and finish the vase
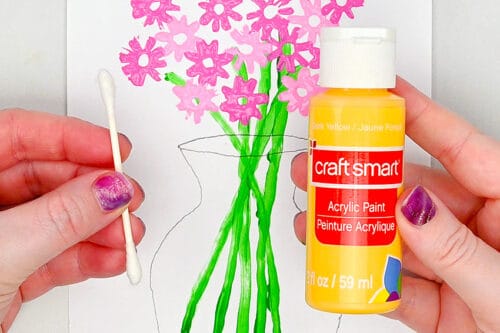
- To add a center for the flower, use yellow paint and a Q-tip.
- Dip the Q-tip in the paint and then dot down into the middles of the flowers.We found it was fine to add the centers while the flower petals were still wet, but younger artists may want to wait for the paint to dry first.
- Then use a black Sharpie to trace the vase outline. Erase any pencil lines that show through, if needed.
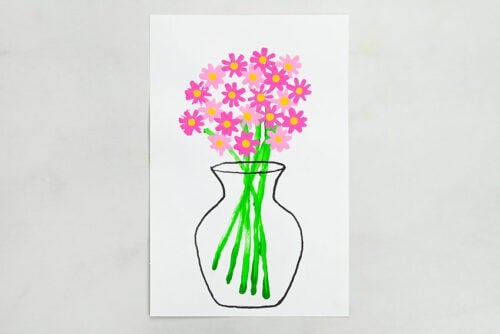
- Your flower straw painting is complete!

Helpful Tips:
- Use our vase templates (linked below), or draw your own flower vase. You can even create your own flower garden instead!
- Fold a piece of cardstock in half and do your flower straw painting on the front to create a thoughtful homemade card for Mother’s Day, birthdays, and other special occasions.
- The vase templates are sized to fit on half of an 8-1/2 by 11-inch sheet of paper. If you’d like to use a different paper size, you can scale the template up or down in your printer settings before printing.

Download our free vase templates:
Click on the links or images below to download our free, printable vase templates! The PDF files will open in a new window. Then simply print the template of your choice on 8.5 x 11 (letter size) printer paper or cardstock.


My flower stamps are uneven or blotchy. How can I fix this?
If the end of the straw is not cut perfectly evenly, the flower stamps can come out a little uneven. You can usually fix this by gently rocking the straw back and forth on the paper as you stamp, so all of the paint touches the page. Try pressing a little more on one side, then the other, to help the full flower shape transfer.
We found that the best stamps happen after using the straw “brush” a few times, once the cut pieces have opened up but are not pressed completely flat. If your flower still doesn’t look the way you want, add a bit more paint and stamp over it again, or layer another flower on top.
If your stamp looks blotchy, there’s probably too much paint on the straw. Try stamping once on scrap paper or on the side of your paint palette first to remove the excess. This usually gives you a cleaner, more defined flower shape on your project.

What paint is best for making a flower straw painting?
Acrylic paint works best for this project because it gives bright, vivid colour and shows up nicely on the paper. We like using inexpensive dollar store paint for a lot of crafts, but for this technique we recommend using a slightly better-quality craft paint, since the pigment is usually stronger and the flowers stamp more clearly.
We used Craft Smart acrylic paint from Michaels, which is still very affordable, but has great colour payoff. Thicker paint tends to work better than very runny paint, since it helps the flower shape hold its detail.

What paper do I need to make this straw stamped flower painting?
Regular printer paper is too thin for this project and will get soggy quickly. Cardstock or mixed media paper works best for flower straw painting. You want a paper that’s thick enough to hold the paint without bending, wrinkling, or warping too much as it dries.
If you’re making a card, a piece of white cardstock is a great choice. It’s sturdy and gives the paint a smooth surface to stamp onto. Simply fold the cardstock in half first and ensure you’re creating on the front of the card. You’ll want to open up the card while you’re painting, or place another piece of paper in the card to ensure the paint doesn’t transfer to the inside.

This flower straw painting is such a fun way for kids to try a different painting technique and create something bright and beautiful at the same time. The stamped flowers are simple to make, but they come together into a bouquet that looks cheerful and special, whether you hang it up for spring decor or turn it into a handmade card.
It’s an easy art project to set up with just a few supplies, and every bouquet turns out a little different. This makes it a great choice for kids of different ages, classrooms, or a sweet homemade Mother’s Day craft.
Here’s even more fun painting ideas:

Cherry Blossom Painting with Q-Tips


Now available
Low-Mess Crafts for Kids Book
72 cute and fun crafts that kids and parents alike can enjoy. All with as little mess as possible!
Where to buy:
You can purchase Low-Mess Crafts for Kids from Amazon, or wherever books are sold:
Amazon | Barnes and Noble | Books-A-Million | Indiebound | Amazon Canada


Leave a Reply