
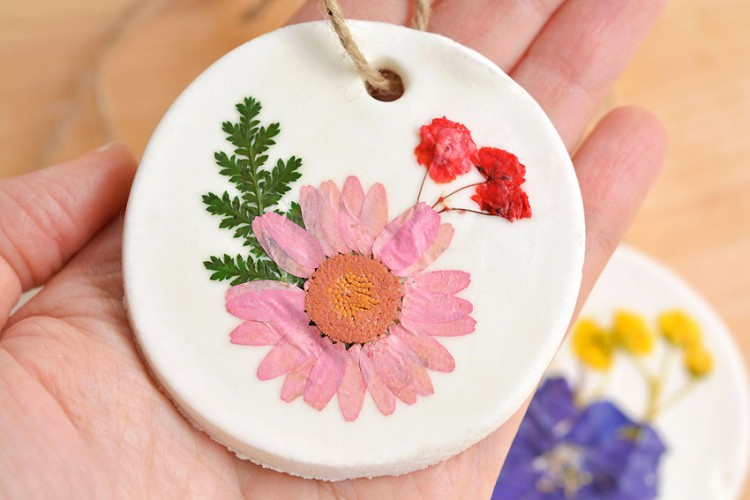
Add a touch of nature to your decor with this flower imprint clay dish! Made with air dry clay and real flowers, this beginner-friendly DIY craft is both beautiful and functional. Whether you use it to hold jewelry, keys, or little keepsakes, this delicate floral dish makes a stunning handmade accent.
And the best part? You don’t need a kiln or any fancy tools to make this clay trinket dish! With just a few simple supplies, you can create a custom floral imprint and add hand-painted details to bring your design to life. It’s a relaxing, creative project that makes the perfect gift—or a lovely little treat for yourself!

This post contains affiliate links. If you use these links to buy something, we may earn a small commission at no extra cost to you. This helps support our website and allows us to keep creating fun, free content.
How to Make a Flower Imprint Clay Dish
Materials:
- Air dry clay
- Acrylic paint (green and flower colour)
- Metallic acrylic paint (gold)
- Matte Mod Podge
Equipment:
- Fresh flowers
- Bowl of water
Watch the step-by-step video tutorial:
Instructions:
Step 1: Find what you need
- Gather your supplies and materials.


Step 2: Create the flower impression
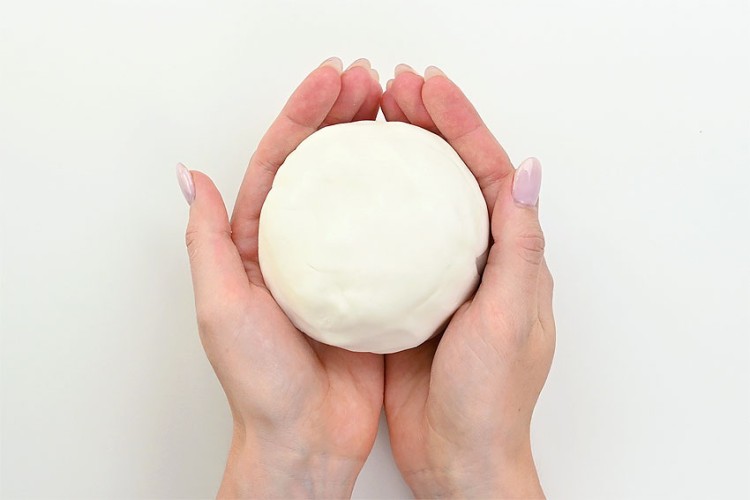
- Place a piece of plastic wrap on a cutting board. Add a ball of conditioned clay to the center of the plastic wrap and cover it with another piece.This ensures the clay won’t stick to the cutting board or your rolling pin.
- Roll the clay until it’s about 1/4 inch thick.
- Remove the top piece of plastic wrap and press a flower into the center of the clay.
- Roll on top of the flower to leave its imprint in the clay.


Step 3: Shape the bowl
- Remove the flower, then center a bowl or plastic container over the imprint. A see-through container works well since you can see exactly where your flower imprint is.
- Use a craft knife to cut around the container.

- Remove the container and the excess clay.
- Create the dish’s shape by placing the clay circle in the bottom of a paper bowl (or a regular bowl with the bottom layer of plastic wrap).
- Dip your finger in water and smooth out any rough edges on the clay.
- Allow to dry for 24 hours. Then remove from the bowl, flip the dish over, and allow the bottom to dry.It can take up to 72 hours for the trinket dish to dry completely.


Step 4: Paint the flower imprint
- Once the trinket dish is totally dry, fill in the bottom parts of the flowers and the stems with green acrylic paint.
- Choose a flower colour (you can use the same one your actual flower had, or pick another favourite) and fill in the flower imprints with paint.
- Then paint the rim of the dish with gold (or another metallic) paint.


Step 5: Seal the dish
- Once the paint is completely dry, apply a thin coat of matte Mod Podge and allow to dry.(You can also use glossy Mod Podge if you want a shiny look.)
- When the front is dry, add a coat of Mod Podge to the back of the dish as well.
- Your flower imprint clay dish is complete!
- Have fun making more clay trinket dishes in multiple colours or with different flowers.


Helpful Tips:
- Use sturdy flowers for your impression, as delicate petals may not leave a strong imprint. We used carnations, but other flowers like daisies, lavender, or Queen Anne’s lace will work well. You can also use ferns, other types of greenery, or herbs.
- If your dish edge looks rough or uneven after the clay dries, you can use an emery board before painting to smooth it out. You can also do this after if the outside of the golden edge gets smudged.

Can I use artificial flowers for my clay flower imprint instead of real ones?
Yes! While we think that fresh flowers give our clay jewelry dishes a delicate, organic texture, you can also use artificial flowers. Replicate the look by choosing detailed fabric flowers with sturdy petals. These will give you a defined imprint.
You can also use other botanical elements (real or artificial) to make your imprints: leaves, twigs or other little flowers – whatever you find at the craft store or in your garden should work.

What’s the best way to seal my DIY clay trinket dish?
A thin coat of Mod Podge (matte or glossy) will help protect the paint and keep your clay dish looking beautiful over time. If you want extra durability, try an acrylic spray sealer like Krylon Crystal Clear Spray.
But remember that air dry clay is not waterproof, even if you seal it. Your trinket dish should still be kept away from water and excess moisture to prevent damage.

What’s the best way to paint my botanical clay art?
Using fine-tip paintbrushes is the best way to paint delicate floral details. A thin, pointed brush allows for better control, helping you fill in the fine veins and imprinted textures without smudging outside the design.
You can also paint the flowers in layers if you want to add shading to different areas of the floral impression. Just be sure to let each layer dry fully before adding the next.
Paint markers are another easy way to add colour if you don’t feel comfortable painting fine details with a brush.

This flower imprint clay dish is a beautiful and functional DIY craft that makes a great keepsake. These pretty dishes make wonderful, thoughtful gifts for Mother’s Day, birthdays, or “just because”. Whether you create a single dish or a whole matching set, each one is a unique work of art!
Here’s even more flower craft ideas:

How to Preserve Flowers in Resin


Now available
Low-Mess Crafts for Kids Book
72 cute and fun crafts that kids and parents alike can enjoy. All with as little mess as possible!
Where to buy:
You can purchase Low-Mess Crafts for Kids from Amazon, or wherever books are sold:
Amazon | Barnes and Noble | Books-A-Million | Indiebound | Amazon Canada


Leave a Reply