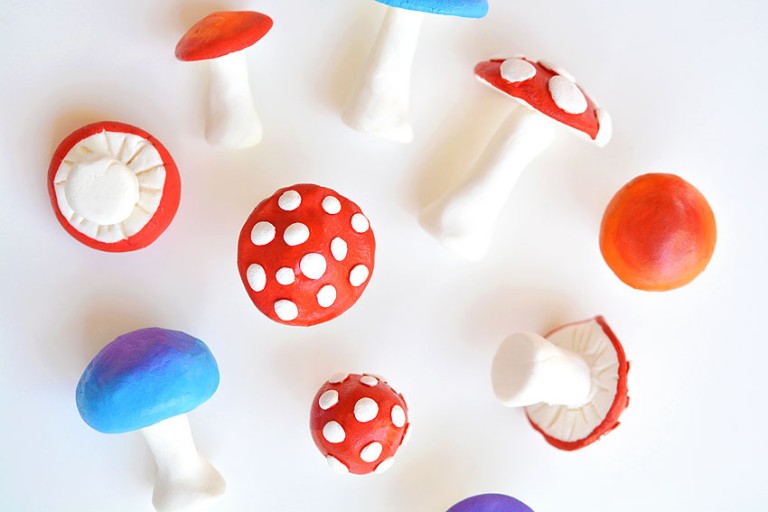
These clay mushrooms are so cute! Add a touch of whimsy to your next fairy garden with mushroom clay sculptures that are SO SIMPLE to make! Even beginners to working with clay can easily sculpt them.

Clay Mushrooms
Did you know that the fly agaric – a red capped mushroom similar to our clay mushrooms – is considered good luck in Germany and other European countries? To find one is considered a blessing for the new year!
Mushrooms, also known as toadstools, have a deep connection to magic and folklore. That makes these clay mushrooms the perfect addition to any fairy garden.
We made these mushrooms with our homemade clay recipe, which is super simple to make and easy to work with. And no special sculpting tools are required – simply form the mushrooms with your hands and mark the caps with a toothpick!
Check out our Clay Mushrooms video tutorial:
*Note: Scroll down for the step-by-step photo tutorial.
Looking for more clay craft ideas? Here’s some of our favourites:

Here’s what you’ll need:
This post contains affiliate links. If you use these links to buy something we may earn a small commission which helps us run this website.
The full printable instructions are at the end of this post, but here’s a list of products on Amazon and Target that are similar to the supplies we used:

What clay should I use to make my clay mushroom?
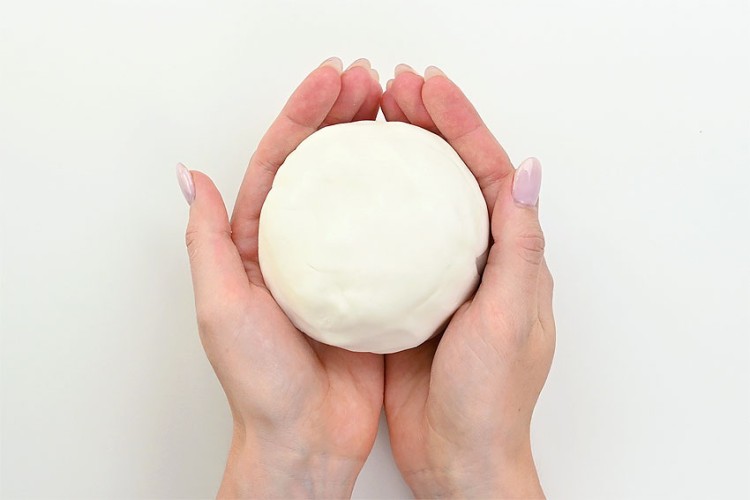
Learn how to make clay and use our air dry clay recipe! This clay has only three ingredients, comes together quickly, and is really nice to work with.
If you don’t feel like making clay, you can also purchase air dry clay from Amazon, a craft store like Michaels, or at an art supply store. You could even purchase coloured clay, and skip painting the mushrooms.
What paint is best for air dry clay mushrooms?
Acrylic paint is perfect for painting clay. The colours of acrylic paint are vibrant, and it’s very durable.
If you’re painting these mushrooms with kids then you might want to use tempera paint. The coverage won’t be quite as good as with acrylic, but it’s washable – which is a big plus.

What can I do with a mushroom clay sculpture?
These mushrooms look so cute in a terrarium or as part of a fairy garden. You could also stick a toothpick (or heavy gauge wire) in the stem before the clay is dry to easily add them to a pot with soil and/or rocks.
Since the red spotted mushrooms are sometimes known as “Christmas mushrooms”, it’s only fitting that these clay mushrooms become ornaments! Stick a jump ring in the mushroom cap while the clay is still soft and then, once the mushroom is dry, thread a ribbon or twine through the jump ring.
What else can I make with air dry clay?
You can make little pinch bowls or jewelry holders. Clay is also great for many styles of ornaments, including our dried flower ornaments.
Air dry clay is also the perfect medium for sculpting little animal figurines – like a clay turtle or clay frog.

How to Make Clay Mushrooms
Materials:
- Air dry clay (link in tips section below)
- acrylic paint
Equipment:
Instructions:
Step 1: Form the mushroom parts
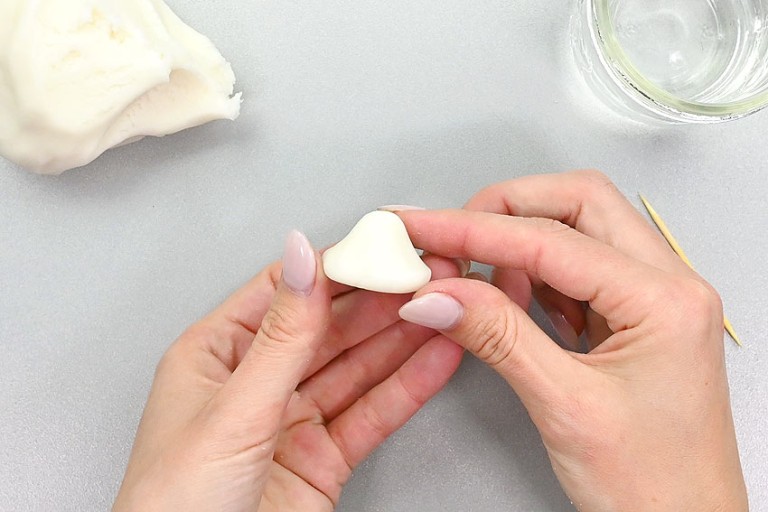
- Roll out a small ball of clay and flatten it on the bottom so it has a 1-1/4 inch diameter.Taper the edges toward the middle to create a domed mushroom cap about 3/4 inch high in the centre.

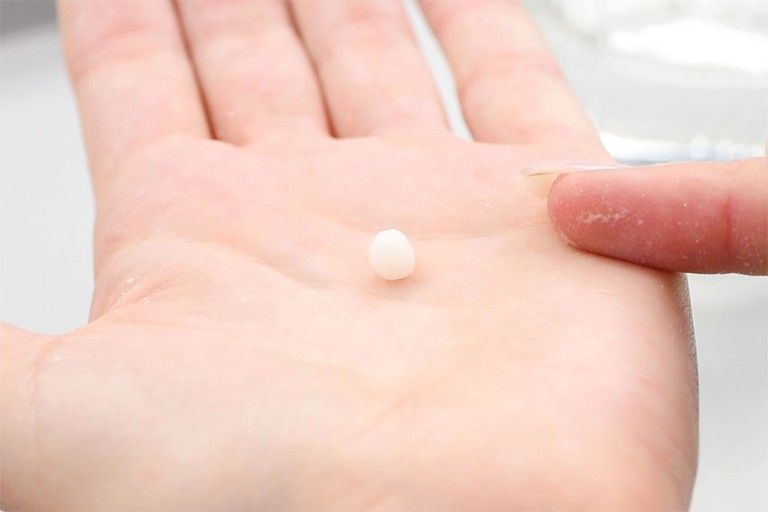
- Roll out a tiny ball around 1/8 inch in diameter.
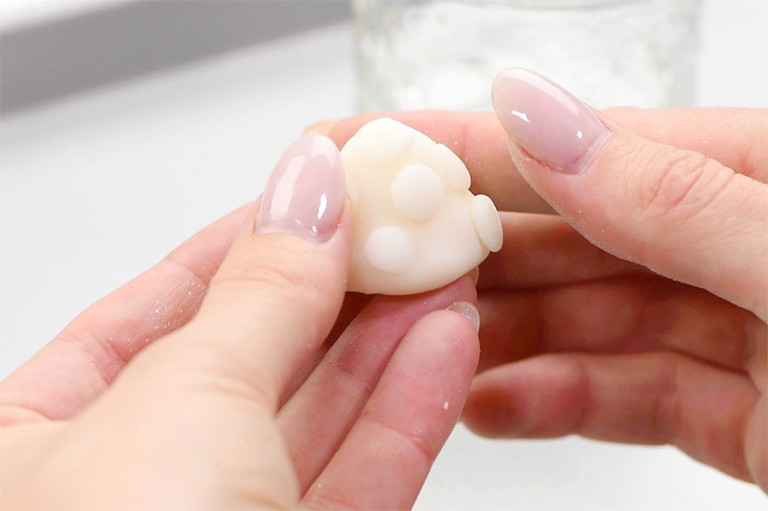
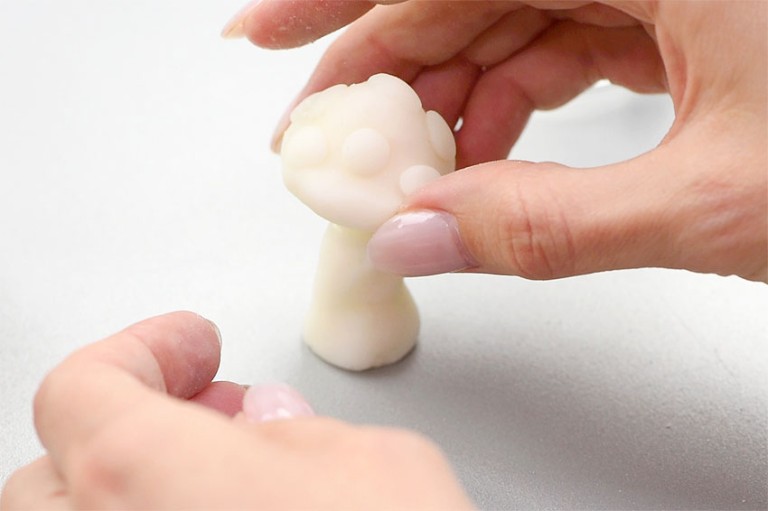
- Press the ball flat onto the mushroom cap (it should be around 1/4 inch in size now). Continue creating spots on the mushroom cap until you have a number you’re happy with. We made 8 spots for this mushroom.

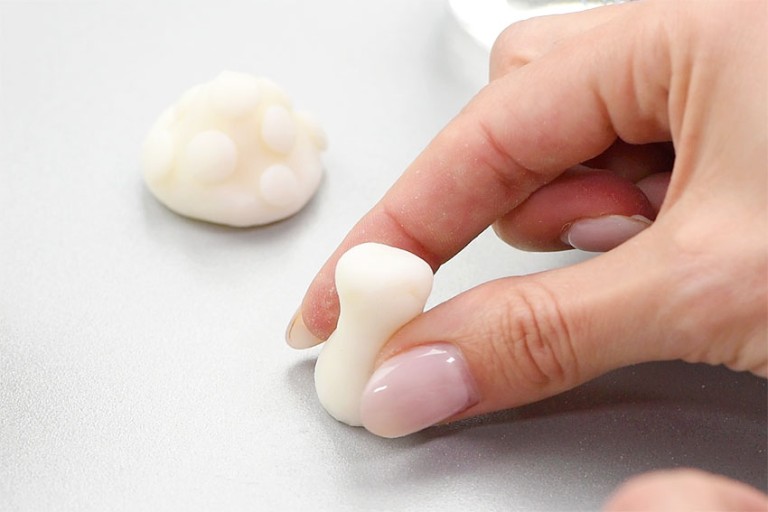
- Create a stem for your mushroom. Roll out a small piece of clay so it’s thicker at the bottom. Create a flat bottom for the stem that’s 3/4 inch in diameter. The stem should be around 3/4 inch tall and taper up to 1/2 inch diameter (where the stem will attach to the cap).
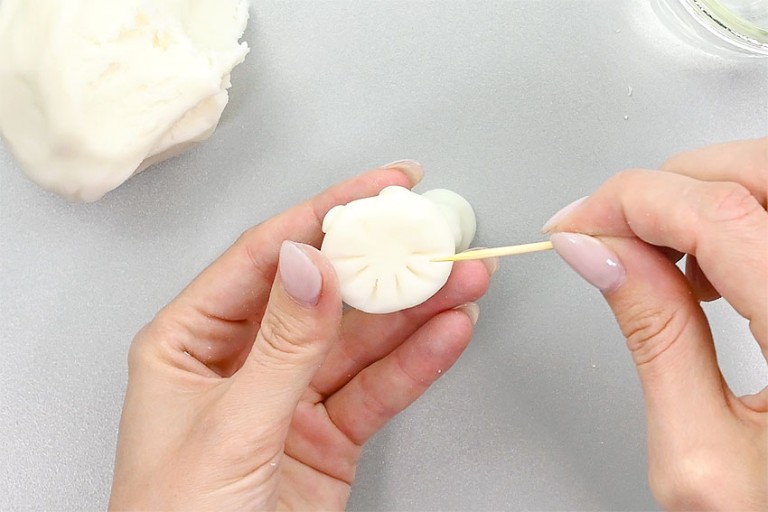
- Using a toothpick, carve lines on the bottom of the mushroom cap from the edge toward the centre, leaving a circle untouched in the centre. The lines should be around 1/4 inch apart, but they don’t have to be perfectly even – every mushroom is unique!
Step 2: Connect the mushroom
- Add a dab of water on the top of the stem and in the centre of the cap’s bottom.
- Centre the cap on the stem, pushing down gently to connect the two pieces.Allow to dry. If using our air dry clay recipe the mushroom will take 2 – 3 days to dry at room temperature. You can also place the mushroom on a parchment lined baking tray and bake it at 200F for around 1 hour. If using store bought clay, follow the directions on the package for drying time.

Step 3: Paint the mushroom
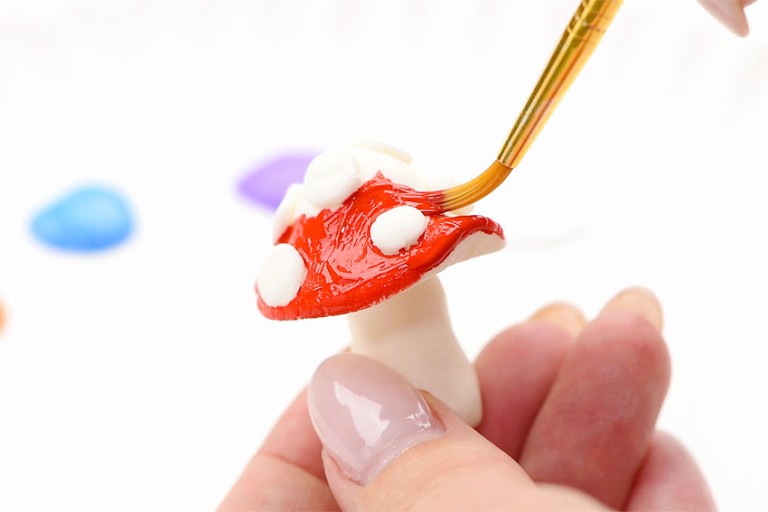
- Use red paint (or whatever colour you’d like!) to paint around the spots on the mushroom cap.
- Instead of spots, you can make a flat capped mushroom and use a colour blending technique (see tips section for details).
- Allow paint to dry.Your clay mushroom is complete!
Helpful Tip:

If you’re new to working with clay these mushrooms are the perfect first project! They’re SO EASY to make, and you can’t get it wrong — each mushroom is unique, and you don’t have to worry about perfect lines.
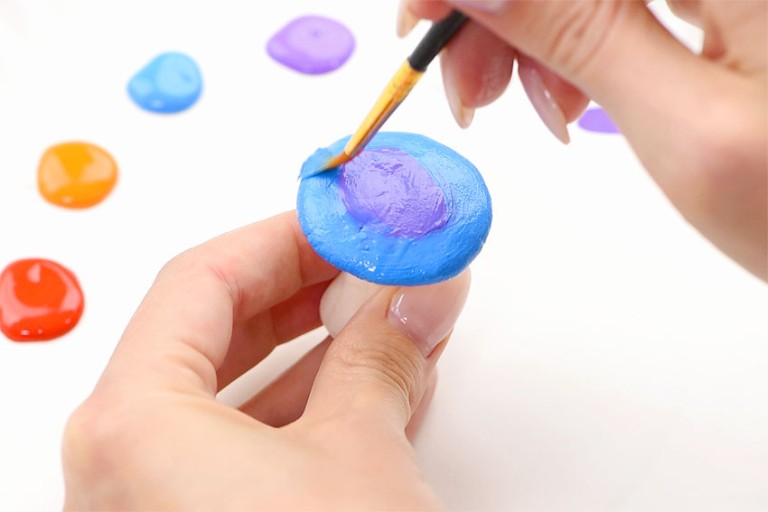
Paint your clay mushrooms natural colours, or make them more magical in purples, blues, or greens. Either way, this project allows you to embrace your creativity!

Here’s even more clay craft ideas:


Our book Low-Mess Crafts for Kids is loaded with 72 fun and simple craft ideas for kids! The projects are fun, easy and most importantly low-mess, so the clean up is simple!

Where to buy:
You can purchase Low-Mess Crafts for Kids from Amazon, or wherever books are sold:
Amazon | Barnes and Noble | Books- A- Million | Indiebound | Indigo | Amazon Canada


Leave a Reply