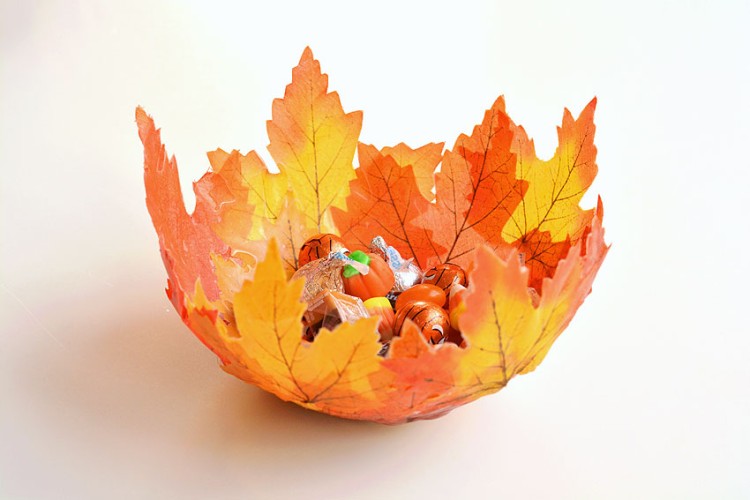
Capture the beauty of nature with a DIY clay leaf bowl. This leaf shaped trinket dish is SO PRETTY and it’s really easy to make!
Create an imprint of a leaf in clay and then paint the bowl your favourite autumn colours. This homemade fall decor looks so beautiful on the mantel or as part of a centerpiece for the Thanksgiving dinner table. So grab a leaf from outside and let’s get crafting!

This post contains affiliate links. If you use these links to buy something we may earn a small commission which helps us run this website.
How to Make a Clay Leaf Bowl
Materials:
- Leaf (freshly fallen)
- Air dry modeling clay
- Acrylic paint (base colour and a metallic shade)
Equipment:
- Small bowl (to give the leaf bowl its shape)
- Sand paper (or nail file)
Watch the step-by-step video tutorial:
Instructions:
Step 1: Find what you need
- Gather your supplies and materials.


Step 2: Roll out the clay
- Break off an orange sized ball of clay. Place it on a cutting board between 2 pieces of plastic wrap.Be sure the plastic wrap is large enough to cover the clay once it’s rolled out.

- Roll out the clay until it’s about 1/4 inch thick.


Step 3: Create the leaf impression and shape
- Remove the top layer of plastic cling wrap and place your leaf onto the clay. Set it right side up, so the more textured bottom side is touching the clay.
- Press the leaf into the clay gently using your rolling pin. You want to stamp the leaf into the clay, rather than rolling it out further.
- Use a craft knife to cut out around the outside of the leaf.
- Cut the clay leaf’s stem wider than the actual stem, and make it shorter if the stem is too long.
- Carefully peel the leaf off the clay, and then remove the excess clay from around the leaf shape.


Step 4: Allow the clay to dry
- Grab the edges of the plastic wrap to pick up the clay leaf. Place the leaf (with the plastic wrap still on the bottom) in a bowl, smoothing it down to create the dish’s shape.
- Allow the clay to air dry about 72 hours total.After 24 hours you can remove the clay leaf from the bowl and set it upside-down. This will allow the bottom of the leaf dish to dry properly.
- Once the clay is completely dry, use sandpaper or a nail file to remove any rough or sharp edges.


Step 5: Paint the clay leaf
- Paint a coat of acrylic paint onto the inside of the bowl.
- Gently wipe some of the paint off with a paper towel. This will give the dish an antique, textured look.
- Paint the side and back of the dish with the same colour. Allow the paint to dry completely.
- Choose a metallic shade of paint to complement the base colour (we used gold). Brush a light coat of this colour onto the bowl, so you can still see the base colour underneath.Cover the sides and back with this paint as well.
- Allow the paint to dry completely before handling.
- Your clay leaf bowl is complete!


Helpful Tips:
- Try to find a leaf that’s at least 6 to 8 inches across. This will give you a nicely sized leaf bowl.
- Even with a sealer, air dry clay is not waterproof. Be sure to keep your clay leaf trinket dish indoors.

What type of clay is best for making a clay leaf bowl?
We used DAS air dry clay to make our leaf dish. This clay is really easy to work with and gives great results.
You can also use a different brand of air dry clay, or make your own baking soda clay. This craft would also work well using salt dough.

What can I use to cut out the clay leaf shape?
We like the precision of a craft knife, but you can also use a paring knife from your kitchen. If you don’t want to use a sharp knife you can use a butter knife, though it doesn’t cut the clay quite as cleanly.
Or try using a plastic clay scraper or a toothpick.

Do I need to seal my clay leaf bowl?
We left our leaf dishes as is, but you can definitely brush on a coat of Mod Podge or use an acrylic spray sealer. These will add durability to your leaf bowl, protecting the paint from scratches. It will also make the dish easier to clean and give it some water resistance, stopping moisture in the air from warping it.
Choose a glossy sealer if you want a shiny look, or a matte sealer if you just want to enhance the look of the finished piece.

The metallic, antique sheen of these clay leaf bowls is so beautiful! Use your air dry clay leaf prints to hold keys, jewelry, or coins. Or even use it as a tealight holder!
These clay leaf dishes are fun to make for yourself, but they also make an awesome personalized homemade gift.

Here’s even more clay craft ideas:


Our book Low-Mess Crafts for Kids is loaded with 72 fun and simple craft ideas for kids! The projects are fun, easy and most importantly low-mess, so the clean up is simple!

Where to buy:
You can purchase Low-Mess Crafts for Kids from Amazon, or wherever books are sold:
Amazon | Barnes and Noble | Books-A-Million | Indiebound | Amazon Canada


Leave a Reply