These dried flower ornaments are perfect for any time of year! Make a pressed flower ornament to give as a gift, add as a gift topper, or to hang on display. These ornaments made of dried flowers and homemade clay are SO PRETTY and so simple to make.

Pressed Flower Ornaments
Enjoy summer flowers year round with these beautiful dried flower clay ornaments! I firmly believe that ornaments aren’t just for Christmas time!
These ornaments look pretty hanging on the wall, in the window, or on a garland or mobile. They make beautiful gifts, especially if you use them as a gift topper along with the gift tag. They’d also look pretty tied to the top of a bottle of wine as a hostess gift.
We made these ornaments using our homemade clay recipe, which is so nice to work with! I love crafts that are simple enough for kids to complete, but pretty enough that adults will enjoy making them as well. Don’t forget to carve the year on the back before your clay dries!
Check out our Dried Flower Ornaments video tutorial:
*Note: Scroll down for the step-by-step photo tutorial.
Looking for more fun crafts? Here’s some of our favourites:

Here’s what you’ll need:
This post contains affiliate links. If you use these links to buy something we may earn a small commission which helps us run this website.
The full printable instructions are at the end of this post, but here’s a list of products on Amazon that are similar to the supplies we used:
- Rolling pin
- Round cookie cutter
- Air dry clay (check out our post for How to Make Clay!)
- Paintbrush
- Mod Podge
- Dried flowers
- Twine

Where can I get pressed flowers?
One option is to press your own flowers! If you have a garden or wildflowers near your house, it’s easy to dry your own flowers. One popular method is to put the flowers in wax or parchment paper and close them in a heavy book. You can find more information in our how to press flowers post.
If you don’t want to wait for flowers to dry, you can buy pressed flowers from a number of stores. Michaels or other craft stores will have a small selection, but Amazon sells a wide variety. Other online stores like Etsy also sell a lot of dried flowers.
What air dry clay should I use?
We highly recommend that you check out our recipe for Homemade Air Dry Clay. It’s so simple to make, using only baking soda, cornstarch, and water. It’s so soft and nice to work with, and it dries a beautiful crisp white.
If you don’t want to make clay, you can buy air dry clay on Amazon, at a craft store like Michaels, or at an art supply store.

What if I don’t have a rolling pin or cookie cutter?
If you don’t have a rolling pin, you can use the side of a drinking glass or mason jar to roll out your clay. Then, use the mouth of the glass or jar to cut out your ornament shape!
Do I have to use mod podge?
Mod podge acts as a sealer and gives the ornaments a nice durable finish. I’d highly recommend using mod podge for projects like this.
You can, however, thin out regular school glue and use that instead. Keep in mind that school glue will peel and yellow after a period of time, while mod podge won’t.
Another option if you don’t have mod podge is to press the flowers directly into the soft clay. If you choose this option, I would recommend letting the ornament air dry instead of baking them, since heat will make the flowers fade.

How to Make Pressed Flower Ornaments
Materials:
- Air dry clay (see recipe link in tips section below)
- Pressed flowers
- Mod podge (matte)
- Twine (or string or ribbon)
Equipment:
- Round cookie cutter (3 inches, or other size)
Instructions:
Step 1: Form ornament
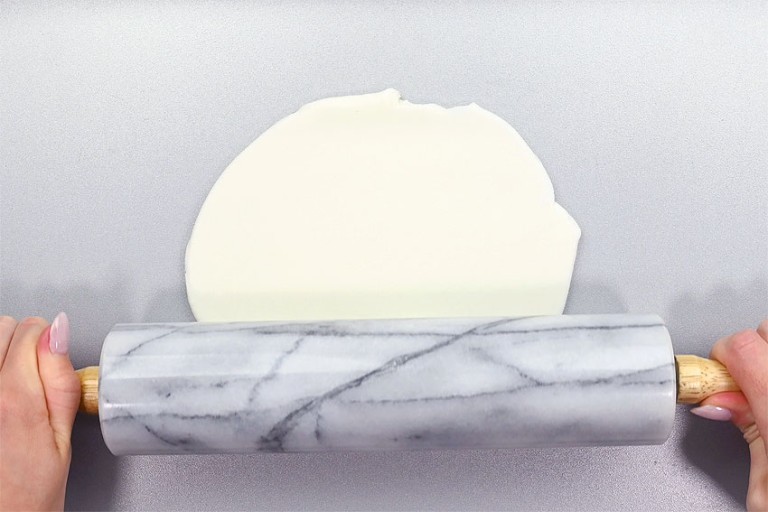
- Using a rolling pin, roll out clay to about 1/4 inch thickness.

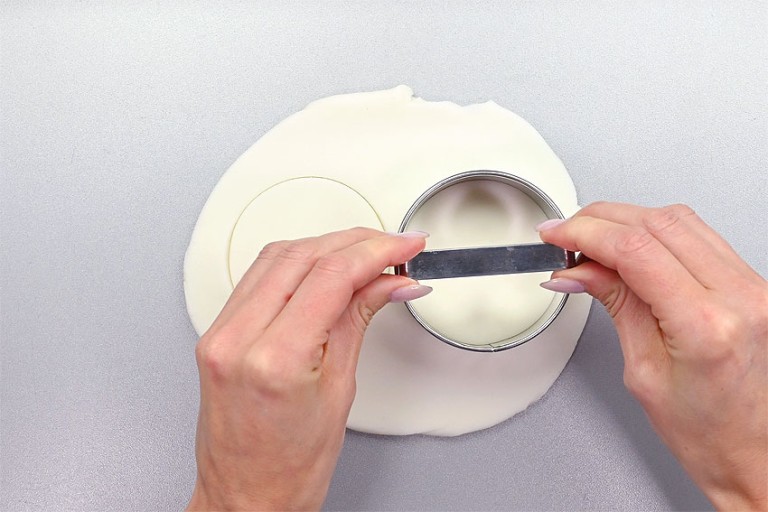
- Use a cookie cutter to cut a round shape out of the clay. Ours were 3 inches across.
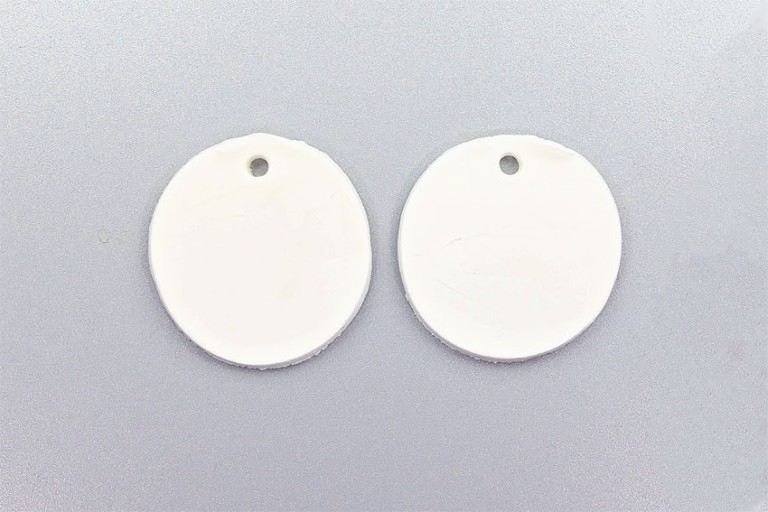
- Make a hole for hanging the ornament by pushing the end of a drinking straw into the clay. Make sure the hole is at least 3/8 inch away from the outside edge.
- Let the clay air dry for at least 3 days, or until hard. Drying time will vary based on the temperature and humidity of your room and the type of clay used.If using our air dry clay recipe (link in tips section below), you can bake the clay at 200 degrees Fahrenheit for 1 to 1 1/2 hours. Flip the ornament once and allow it to cool in the closed oven until it reaches room temperature.

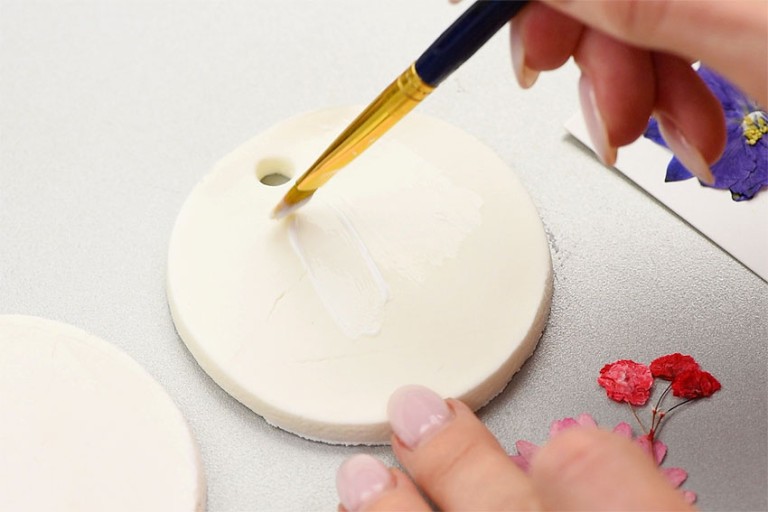
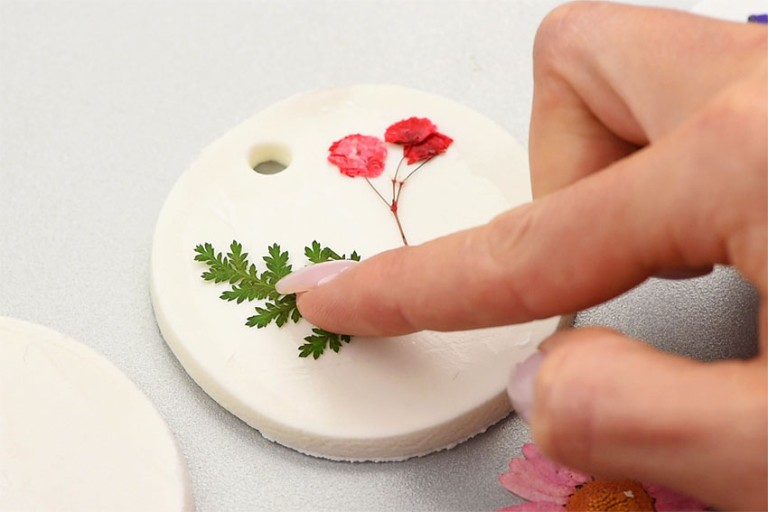
Step 2: Decorate ornament
- Apply a thin layer of Mod Podge to the front of the ornament.
- Gently press the dried flowers onto the Mod Podge in whatever design you’d like!Groups of three (one large flower, a bit of greenery, and a cluster of small flowers) work nicely.
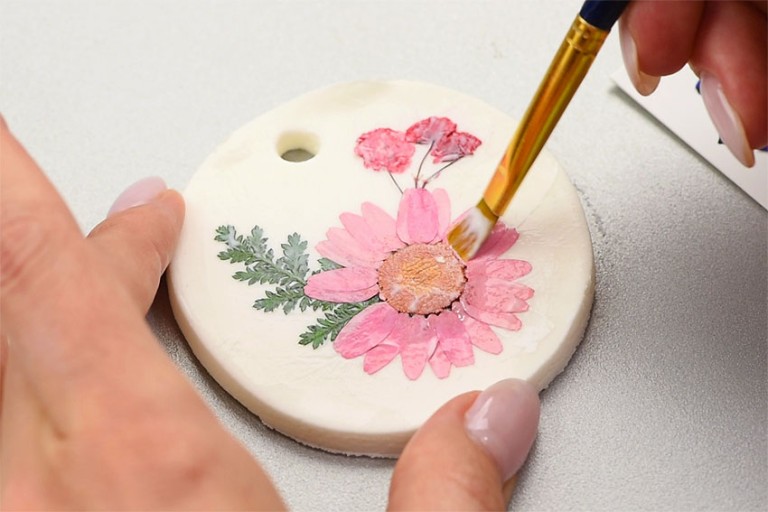
- Apply a thin layer of Mod Podge over top of the arranged flowers.
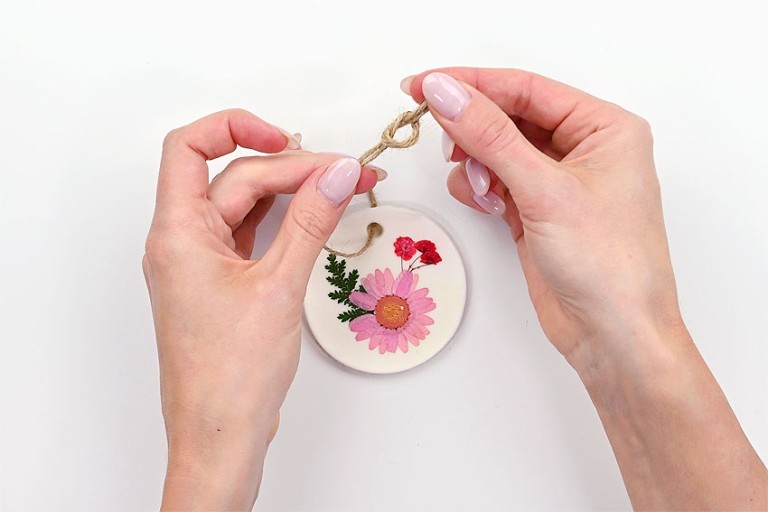
- After the ornament is dry, cut a 9 inch piece of twine. Push the twine through the hole in the ornament and make a knot.
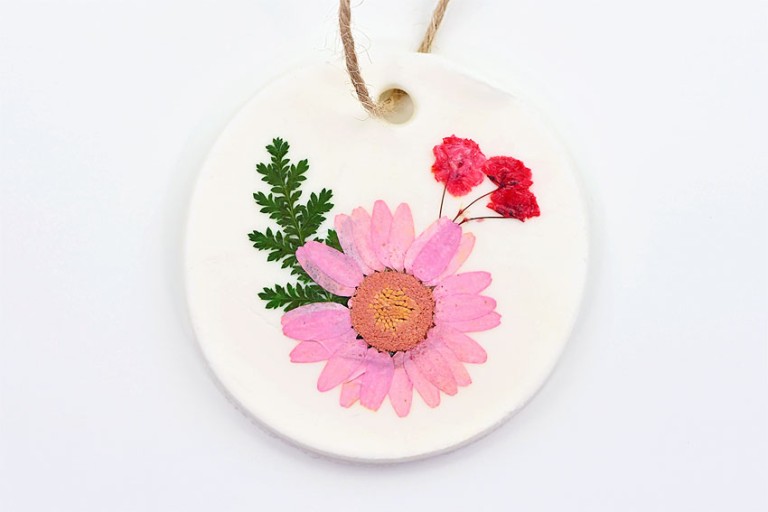
- Your pressed flower ornament is complete!
Helpful Tip:

These dried flower ornaments are pretty by themselves, but they also make great additions to a garland or mobile. The colours of summer can be enjoyed year round with these pressed flower clay ornaments.
They’re a wonderful nature themed craft that will bring a touch of colour to your Christmas tree or home décor.

Here’s even more fun crafts:


Our book Low-Mess Crafts for Kids is loaded with 72 fun and simple craft ideas for kids! The projects are fun, easy and most importantly low-mess, so the clean up is simple!

Where to buy:
You can purchase Low-Mess Crafts for Kids from Amazon, or wherever books are sold:
Amazon | Barnes and Noble | Books- A- Million | Indiebound | Indigo | Amazon Canada


Leave a Reply