Discover the magic of tissue paper art! This process art project for kids is SO EASY, and the results are so pretty! It’s an easy enough craft for young kids to make themselves, but it’s also a lot of fun for experienced artists.
Have you ever worked with bleeding tissue paper? It’s a special type of art tissue paper that transfers colour like a dye when water is added to it! Use it to make beautiful and colourful art on its own, or in combination with an oil pastel. The end result is so cool!

This post contains affiliate links. If you use these links to buy something we may earn a small commission which helps us run this website.
How to Make Tissue Paper Art
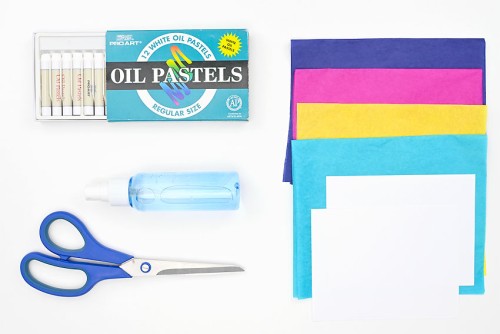
Equipment:
- Spray bottle (with water)
Check Out The Video Tutorial:
Instructions:
Step 1: Find what you need
- Gather your supplies and materials.

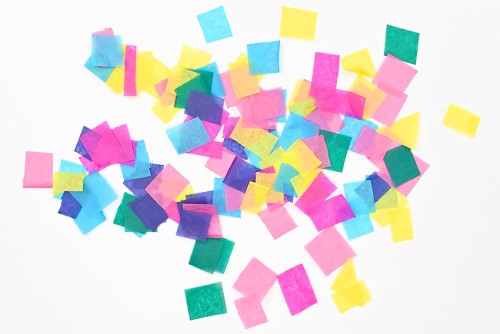
Step 2: Cut the tissue paper
- Cut the bleeding tissue paper into small squares.You can also cut longer strips of tissue paper, depending on what look you're going for.
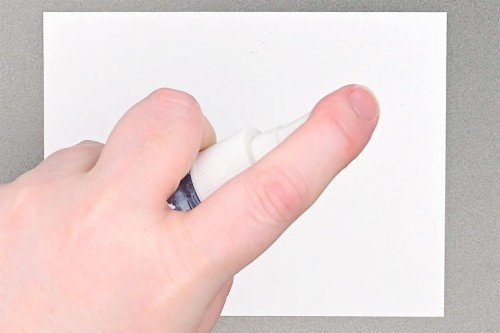
Step 3: Draw your picture
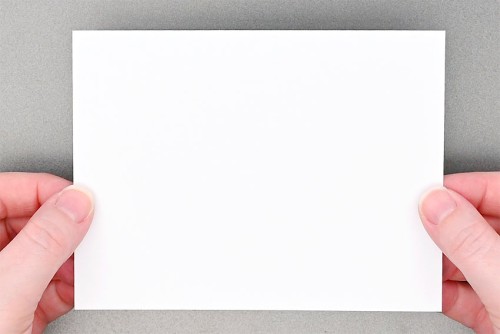
- Set a piece of cardstock on a baking sheet or other protected surface you don't mind getting wet.We cut our 8-1/2 x 11 inch piece of cardstock into 4 pieces, but you can use whatever size you'd like.
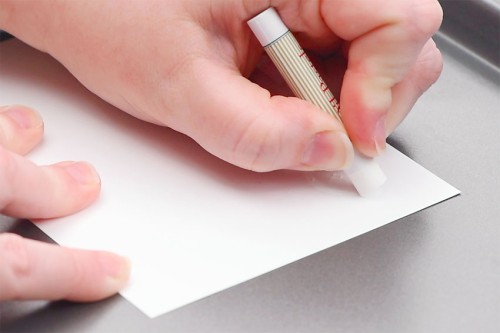
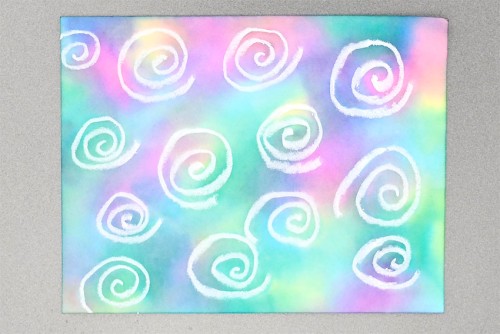
- Use a white oil pastel to draw a design or picture on the cardstock.Whatever you draw will show through the colour later.

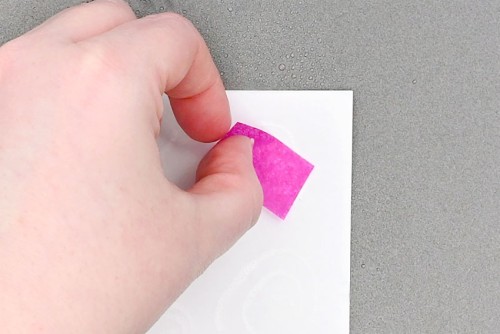
Step 4: Add tissue paper and water
- Spray the cardstock with water. You can also use a paintbrush and brush water on.The paper might curl up at first, but it should flatten out by itself.
- Set a piece of tissue paper onto the paper. You can place it wherever you'd like.
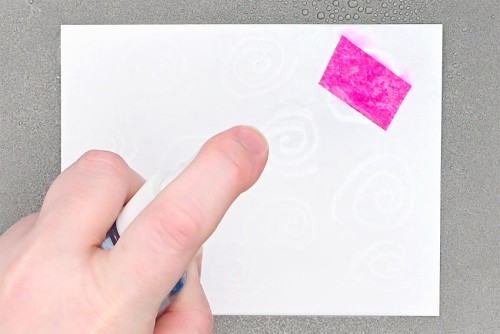
- Spray the tissue paper with more water to help it stick down. You'll also be able to see some of the colour coming off the tissue paper.Make sure each piece of tissue paper is flat against the cardstock, or else you might end up with white spots.
- Repeat, covering the entire paper with tissue paper.You can create a random mosaic look, do stripes with longer pieces of tissue paper, or form an ombre pattern with different shades of the same colour.
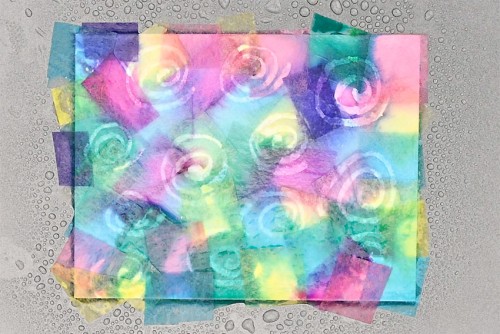
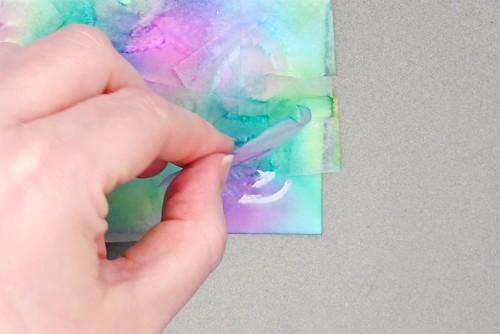
Step 5: Remove the tissue paper
- Allow the tissue paper to sit on the cardstock for at least 10 minutes. For a less messy experience, allow the tissue paper to dry for 1 to 2 hours before removing it from the paper.When dry, the tissue paper will slide right off the paper. If it's still a bit wet you can peel it off.
- Allow the cardstock to dry.You can also carefully remove it from the tray and set it on a piece of paper towel to help it dry.
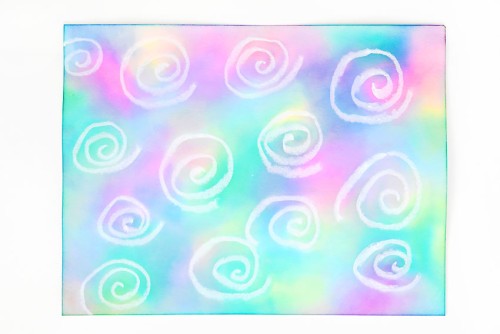
- Your tissue paper art is complete!
Helpful Tips:
- Make sure the bleeding tissue paper is really saturated and stuck flat to the paper. You can use a paintbrush to flatten it down, if needed.
- Bright colours of tissue paper show up a lot better on the paper than lighter pastel ones do.

What type of tissue paper do you need to make tissue paper art?
We used “bleeding tissue paper” to make our tissue paper paintings. This is a special art tissue paper that’s meant to release its dye onto paper when water is added.
You can also use crepe paper to make this style of art. We tested inexpensive crepe paper streamers from the dollar store and they transferred colour quite nicely!
Can I use regular tissue paper to make tissue paper art?
We tried using regular dollar store tissue paper (the kind for gift wrapping) and it didn’t “bleed” at all. Some cheaper tissue paper might, so it’s worth trying if you have some at home.
But in general we definitely recommend buying a tissue paper that’s specifically labelled as “bleeding” and is meant for art projects.

What type of paper is best for tissue paper art?
You definitely need a thicker paper, like cardstock, for this craft — something that can handle a decent amount of water without falling apart or warping too badly.
We like how the colours of the tissue paper combine on cardstock. The colour also goes through to the back, giving you a two sided decoration!
You can also use watercolour paper, which is meant to absorb moisture. This means it doesn’t warp at all, which is nice. However the colours don’t spread and combine quite as well compared to the cardstock.
Or you can do your tissue paper painting on an art canvas. You can buy inexpensive ones at the dollar store!

Do I have to draw with oil pastels to make tissue paper art?
Oil pastels work the best if you want your white design to show through consistently. We tried white crayon and the colour from the tissue paper soaked through the crayon and we couldn’t see what we drew (when using cardstock).
However, the white crayon did show up on the watercolour paper. But the tissue paper colours don’t look quite as nice on the watercolor paper so you have to choose what’s more important to you.
Instead of making a white design, you could create a colourful drawing on a plain piece of paper using crayons, black sharpie or pencil crayons. You could even skip the drawing part all together, and use the tissue paper alone on paper then cut it into different shapes when it’s dry (try using a flower outline or star template).

Tissue paper art is such a fun process art project! There’s no expectation for what it should look like, so it’s a great craft for all ages. It’s all about having fun, creating, and experimenting with colour!

Here’s even more fun art ideas:


Our book Low-Mess Crafts for Kids is loaded with 72 fun and simple craft ideas for kids! The projects are fun, easy and most importantly low-mess, so the clean up is simple!

Where to buy:
You can purchase Low-Mess Crafts for Kids from Amazon, or wherever books are sold:
Amazon | Barnes and Noble | Books-A-Million | Indiebound | Amazon Canada
Let us know what you think: