These bleeding tissue paper Easter eggs are SO PRETTY! Have you ever heard of bleeding tissue paper?! It’s a type of tissue paper that transfers colour like a dye when water is added to it!
This Easter craft is so much fun to make for both kids and adults. Use white oil pastel to draw a design on a paper Easter egg (find free templates linked below!) and then add colour with the bleeding tissue paper. It’s so cool to see the design emerge once the tissue paper is removed!

This post contains affiliate links. If you use these links to buy something we may earn a small commission which helps us run this website.
How to Make Bleeding Tissue Paper Easter Eggs
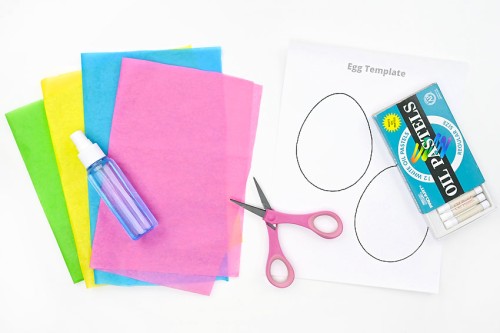
Equipment:
- Spray bottle (with water)
Watch the step-by-step video tutorial:
Instructions:
Step 1: Find what you need
- Gather your supplies and materials.

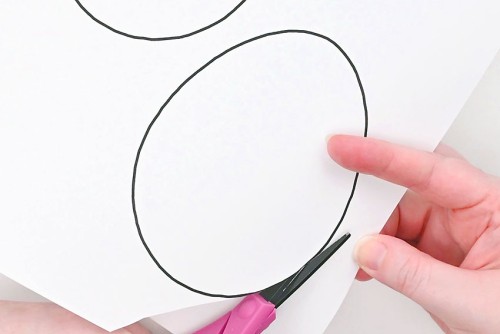
Step 2: Cut your paper Easter eggs and tissue paper
- Print the free Easter egg template (link in the materials list above!) on white cardstock and cut it out. Repeat for as many Easter eggs as you’d like to decorate.

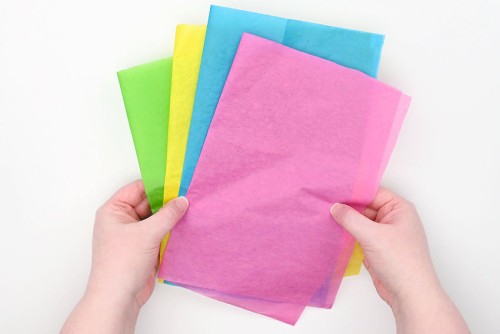
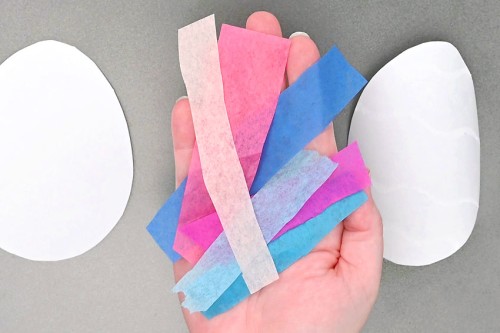
- Gather all the colours of bleeding tissue paper you’d like to use.
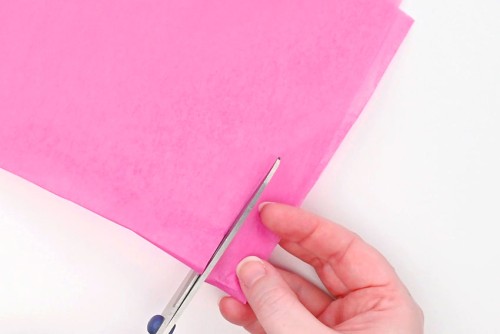
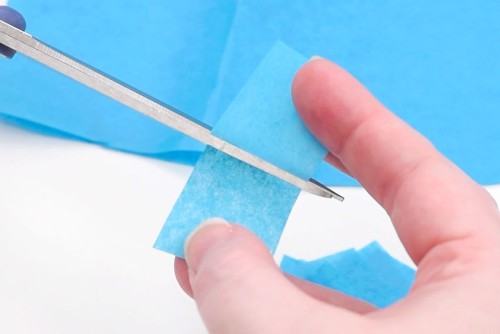
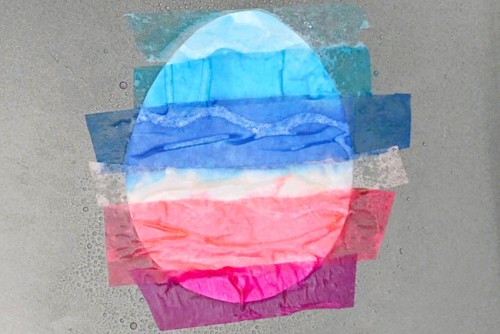
- For some of the Easter eggs you may want to cut strips of tissue paper. The strips of paper make the craft really easy and quick to make.
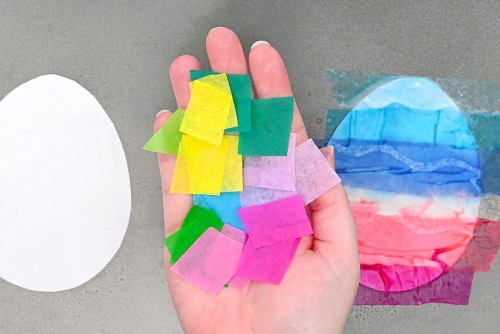
- You can also cut smaller squares of tissue paper for a collage style Easter egg that creates a multi-coloured tie-dye effect on the paper.
Step 3: Draw on the paper eggs and add water
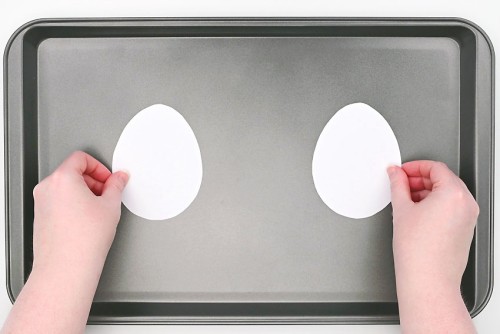
- Set the paper eggs down on a baking sheet or another protective surface that you don’t mind getting wet.
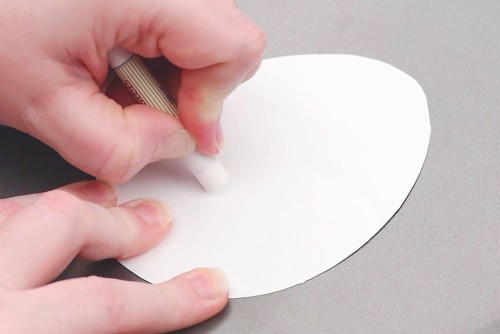
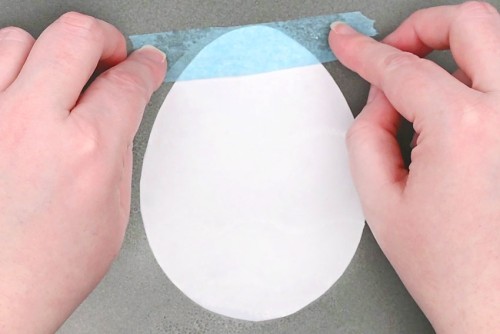
- Use white oil pastel to draw a design on the Easter eggs. Whatever you draw will show through the colour later.
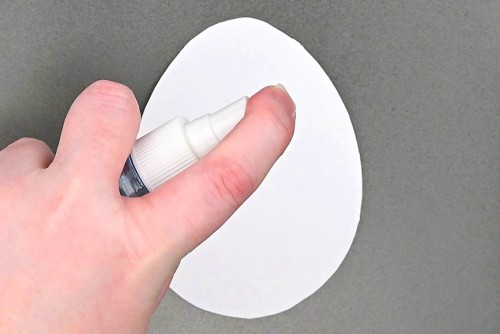
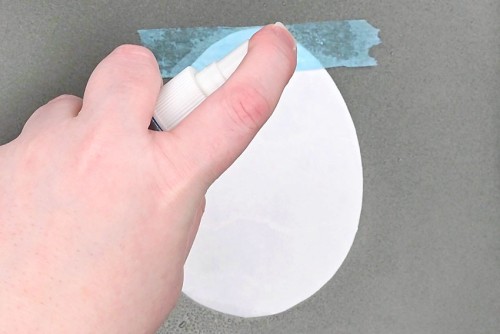
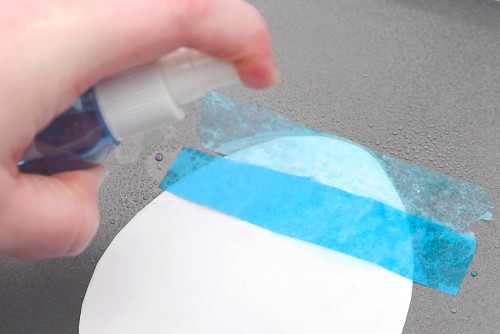
- Spray the egg with a layer of water. The paper might curl up at first, but if you wait a minute it will flatten again.
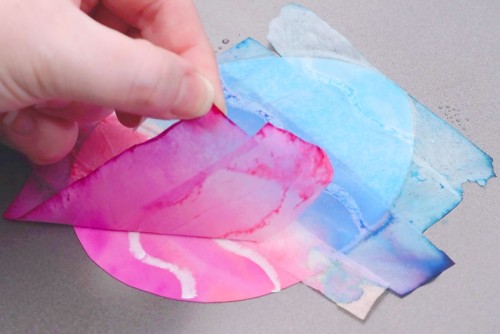
Step 4: Add bleeding tissue paper
- Gather tissue paper in the colours you’d like to use. We find it helps to plan your colour and design ahead of time.
- Place your first piece of tissue paper down. You can start at the top of the egg, or wherever you’d like.
- Spray the tissue paper with more water to stick it down.
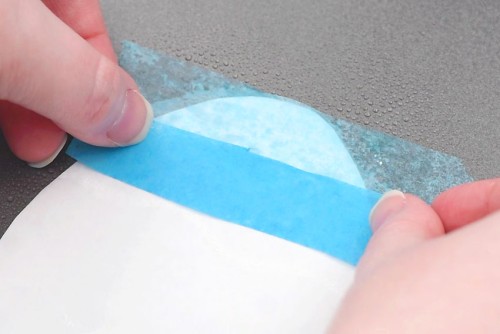
- Place the next piece of tissue paper. Overlap the pieces a bit so there won’t be any white space left.
- Spray this second piece of tissue paper with water.
- Repeat until the egg is covered with wet tissue paper. Make sure the tissue paper is flat to the egg, covering all of it.
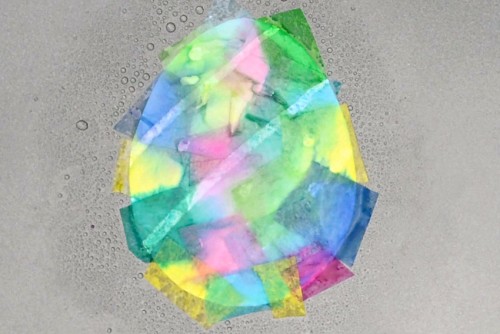
- Gather pieces of tissue paper for your next egg design. For this Easter egg we’ll be using small squares of tissue paper in multiple colours.
- Draw the oil pastel design on the second egg and add tissue paper randomly across the egg.Especially with the small pieces, make sure they’re stuck down well with water, or else spraying the next piece will move them out of place.
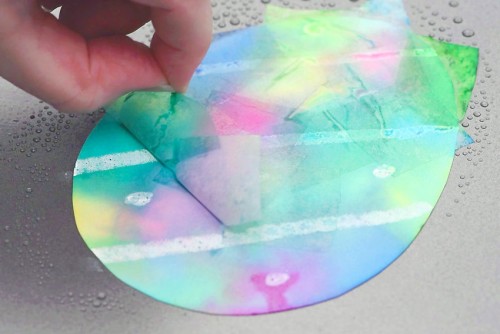
Step 5: Reveal your bleeding tissue paper coloured Easter eggs
- Allow the tissue paper to sit on the paper eggs for at least 10 minutes. For a less messy experience, allow the tissue paper to dry fully (at least 1 hour) before removing it from the paper.When dry, the tissue paper will slide right off the paper. If it’s still a bit wet you can peel it off.
- Repeat for any other eggs you made, and allow the cardstock to dry.It will dry more quickly if you move it off the wet tray, but be careful not to damage the edge of the paper if you move it.
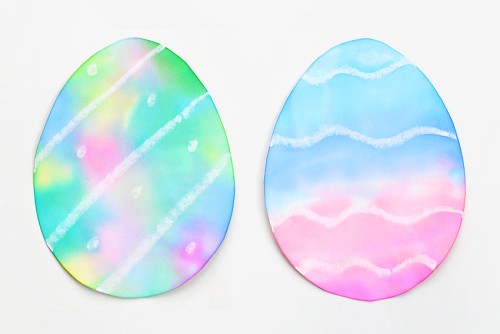
- Your bleeding tissue paper Easter eggs are complete!
Helpful Tips:
- Make sure the bleeding tissue paper is really saturated and stuck flat to the paper. You can use a paintbrush to flatten it down, if needed.
- Experiment with different colour combinations! You can do stripes in different colours, or create an ombre pattern. Or add smaller pieces of tissue paper to create a random tie-dye look.
- Bright colours of tissue paper will add the most colour to your paper Easter egg. Pastel colours don’t show up as much on the paper, and the oil pastel design shows up better where there’s darker colours.
- You can also buy bleeding tissue paper pre-cut into squares or circles.

Free templates for bleeding tissue paper Easter eggs:
Click on the link below to download a free, printable Easter egg template! The PDF file will open in a new window. Then simply print the template on 8.5 x 11 (letter size) cardstock.
>>> Tissue Paper Easter Egg Template <<<

Looking for more Easter egg designs? We have a whole post filled with 12 different Easter egg templates in many different sizes. And they’re all FREE to download and print!
What type of tissue paper do you need to use?
Bleeding tissue paper is a special tissue paper made for arts and crafts. Place the tissue paper onto your paper or canvas and then add water with a spray bottle or paintbrush.
The colour from the tissue paper transfers over to the paper, creating a watercolor look! Remove the paper after a few minutes, or when it’s dry to reveal the beautiful results.
Can I use regular tissue paper for this craft?
No, we tested regular dollar store tissue paper (from the gift wrapping section) and it didn’t “bleed” at all. Some cheaper paper might, but we didn’t find any that did.
So we recommend buying tissue paper that’s specifically labeled “bleeding tissue paper”, or one that has a warning about dyes running when wet.

What type of paper to use for the Easter egg template?
We really like the look of how the tissue paper colours combined on cardstock. The colour also goes through to the back of the paper, which is nice if you want to hang the Easter eggs up as decorations.
The cardstock does, however, warp quite a bit, so you’ll need to flatten the eggs after they dry. You can place them under a stack of heavy books or iron them on a low temperature, sandwiched between parchment paper with the oil pastel side facing down.
Watercolor paper also works nicely for this craft and it doesn’t warp, because it’s meant to absorb water. However, we found that the tissue paper colour didn’t spread and blend quite as much as it did on the cardstock.

Do I have to use oil pastels to make designs on bleeding tissue paper Easter eggs?
We found that oil pastels worked the best and showed up nice and clearly on our paper eggs. We tried white crayon at first and you couldn’t see the designs on the cardstock when they were done — the water and the dye from the tissue paper saturated the paper too much and the crayon marks were barely visible.
If you use watercolor paper, a regular crayon does work, but the design still doesn’t show up as much as it does with the oil pastel. Or you can leave your eggs plain and just colour them with the tissue paper!

Play around with different Easter egg designs and colour combinations, and enjoy the watercolor look of these paper eggs!
Hang your bleeding tissue paper Easter eggs from twine or ribbon to create a banner, or place them in a paper Easter basket. Either way it’s a cute and easy craft that kids of all ages will enjoy!

Here’s even more Easter craft ideas:

Watercolor Easter Eggs (with Food Coloring!)


Our book Low-Mess Crafts for Kids is loaded with 72 fun and simple craft ideas for kids! The projects are fun, easy and most importantly low-mess, so the clean up is simple!

Where to buy:
You can purchase Low-Mess Crafts for Kids from Amazon, or wherever books are sold:
Amazon | Barnes and Noble | Books-A-Million | Indiebound | Amazon Canada


Leave a Reply