Learn how to make a paracord dog leash using our step by step photo and video tutorials. This paracord leash is really fun to make, and it’s also lightweight and durable!
Whether you’re going on a hike in the forest or a walk around the city park, this stylish DIY paracord dog leash is perfect for your four legged friend! Use simple, beginner friendly knots to make this leash in your (or your dog’s!) favourite colours.

This post contains affiliate links. If you use these links to buy something we may earn a small commission which helps us run this website.
How to Make a Paracord Dog Leash
Materials:
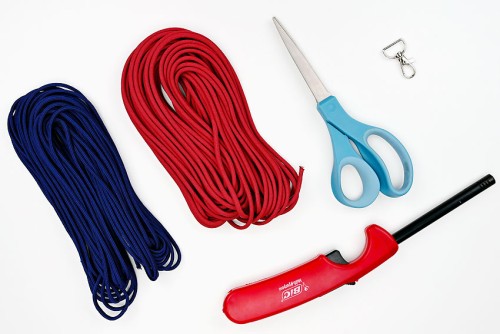
- Paracord (2 colours)
- Dog leash clasp
Equipment:
Watch the step-by-step video tutorial:
Instructions:
Step 1: Find what you need
- Gather your supplies and materials.

Step 2: Start off the paracord leash
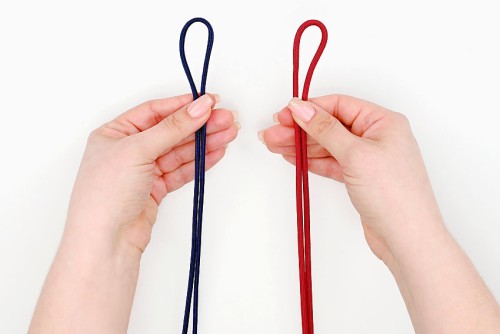
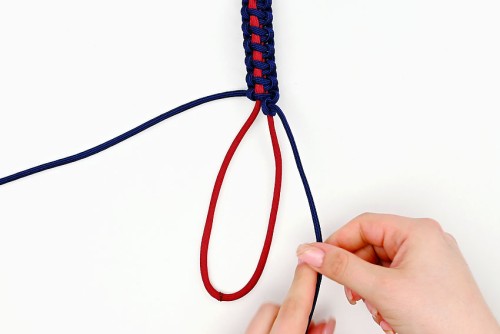
- Start with a 50 foot length of your main colour of paracord (colour A, blue). Cut a 10 foot length of the second colour (colour B, red).Read more below the tutorial for how much paracord is needed for a leash.Fold each of these lengths in half.
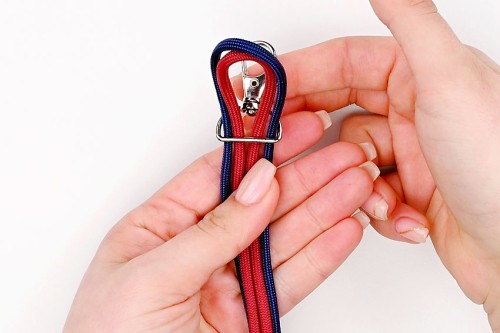
- Place the center loop of colour B inside the loop of colour A, and slide them through the d-ring of the clasp.We highly recommend using a strong swivel clasp made for a dog leash, especially for larger dogs.

- Bring the loops down over the cords. Pull the cord ends through the loops and pull tight.Tape the clasp to your working surface.

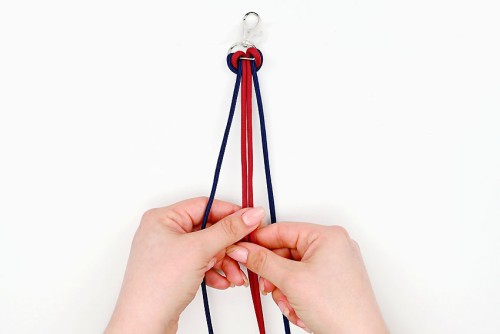
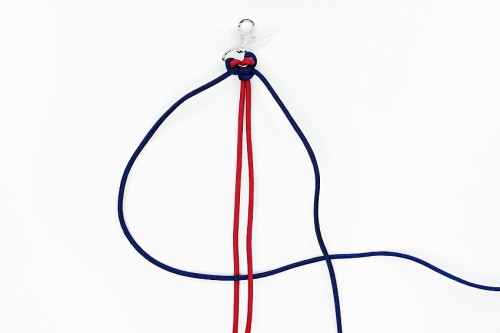
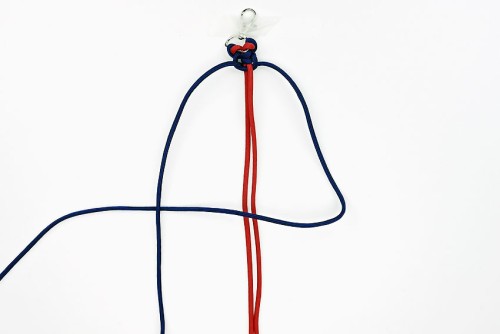
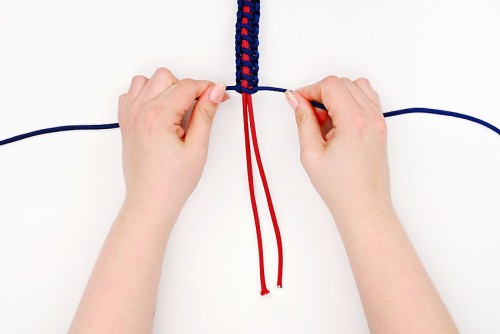
- Arrange the cords so that colour A is on the outside, with 2 colour B strands in the middle.Colour A (blue) will be the working cords, used to tie the knots around the stationary cords of colour B (red).
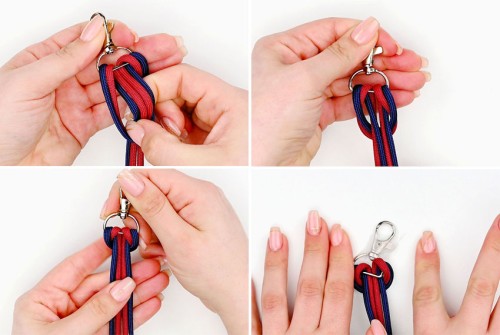
- Begin by bringing the left working cord over the middle 2 stationary cords.
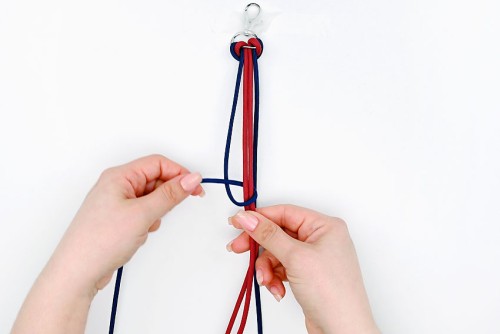
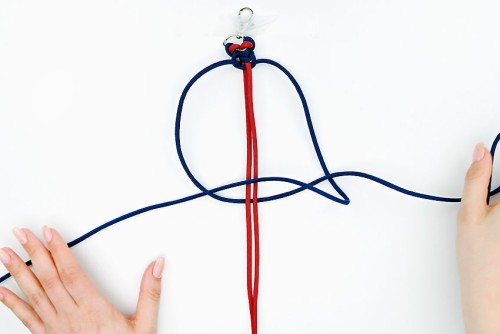
- Bring the left cord back to the left under the stationary cords, pulling it up through the loop created.
- Pull the knot tight, up next to the clasp.
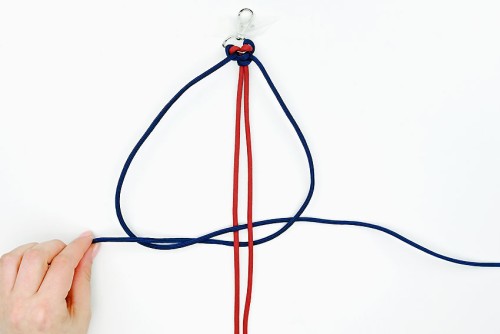
- Repeat this same knot using the right cord.To do this, bring the right cord over the center cords and then back to the right up through the loop. Pull to tighten the knot.These knots will make it easier to start our pattern for the rest of the leash.

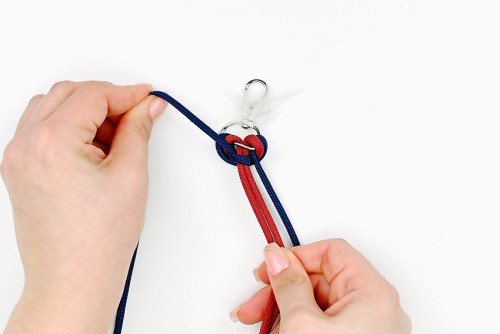
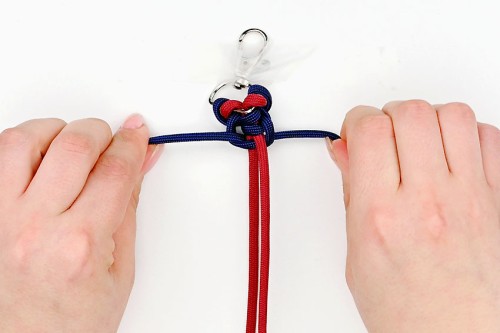
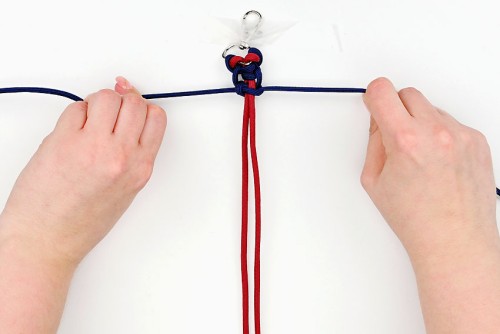
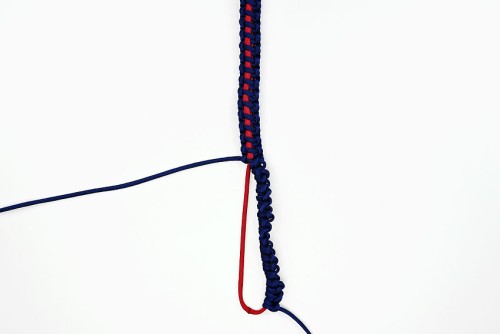
Step 3: Tie a thin line solomon bar knot
- Bring the left working cord over the left stationary cord and under both the right stationary cord and the right working cord.Make sure to leave a loop at the left.
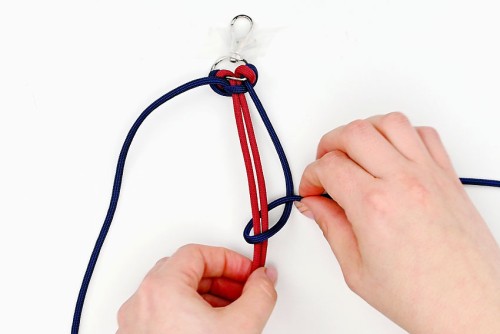
- Bring the right working cord to the left under the stationary cords and up through the loop.
- Pull on the knot to tighten.
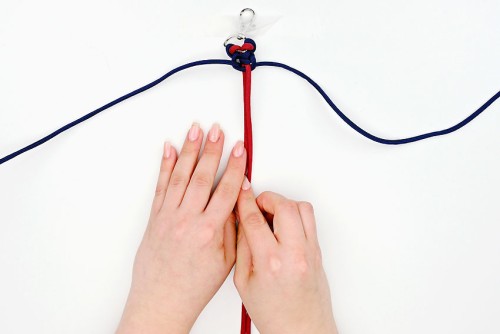
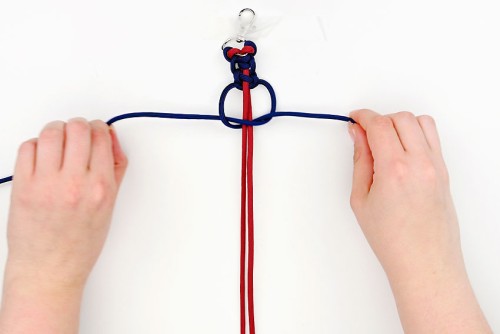
- As you tie knots, adjust the stationary cords so that they sit on top of one another.Place the right cord on top of the left so that only 1 stripe of cord will be visible in the pattern.
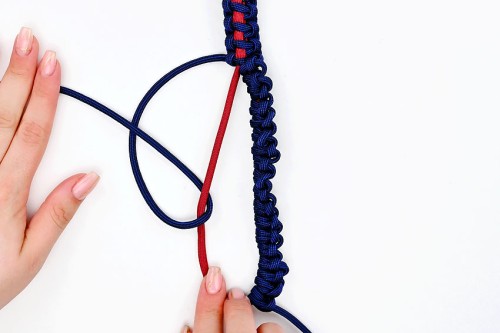
- Now bring the right working cord over the center stationary cords and under the left working cord.
- Bring the left cord under the stationary cords and up through the right loop.
- Pull on the knot to tighten.
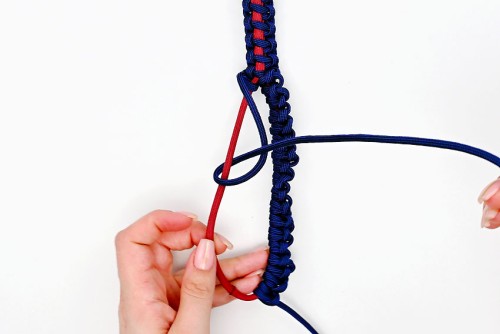
Step 4: Repeat the pattern
- Repeat the knots in step 3, starting with the left knot.
- Continue this same pattern until the leash is your desired length, or until you have just enough left of colour B to form the leash’s handle (about 6 inches of each cord).
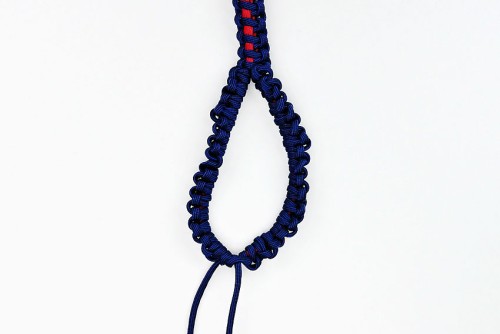
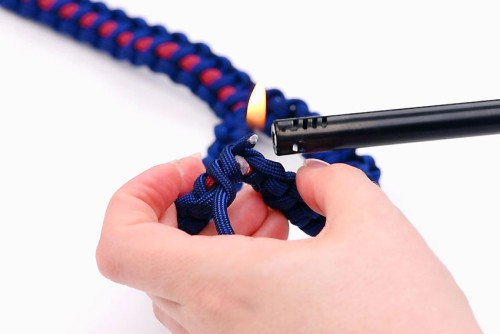
Step 5: Connect the base of the handle
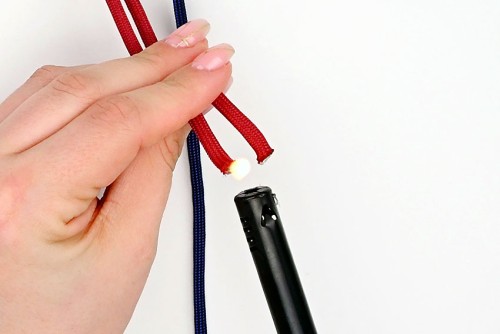
- Melt both ends of the stationary cords by holding a BBQ lighter over the cords for 3 seconds.Be careful, as the melted cord is very hot.
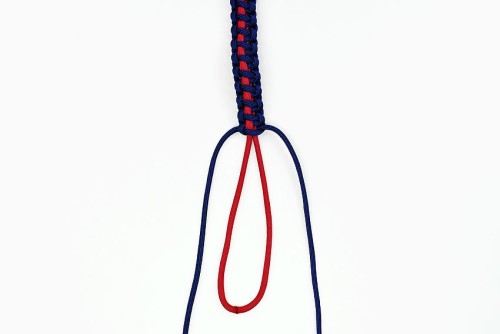
- Immediately push the 2 cord ends together, fusing them and creating a loop.
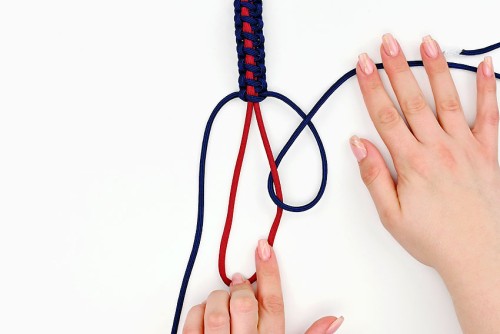
- Arrange the loop so that the top cord is back on the right, with the 2 working cords on either side.
Step 6: Tie knots to form one side of the leash handle
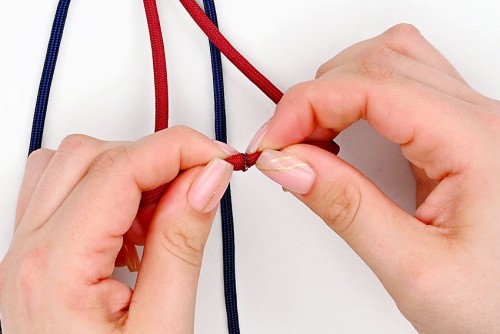
- Bring the right working cord over the right part of the stationary cord loop, creating a loop with colour A.Pull the cord back to the right, bringing it up through the loop created.
- Pull the knot tight.
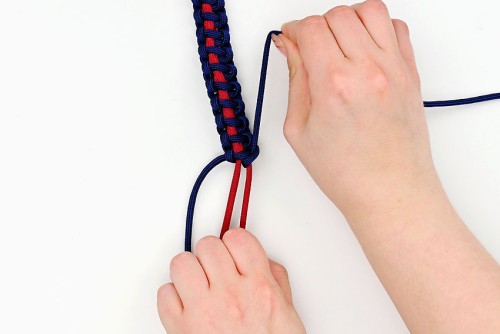
- Now bring the right working cord over to the left side.
- Place the cord over the right part of the center loop and then bring it up and through the loop created by colour A.
- Tighten the knot, pulling the working cord back to the right.
- Repeat these two knots until you get to the bottom of the handle and you’re almost at the end of the right working cord.
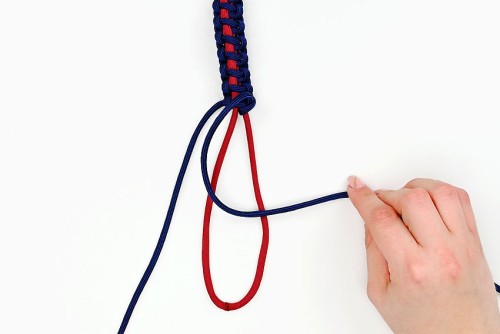
Step 7: Create knots on the other side of the handle
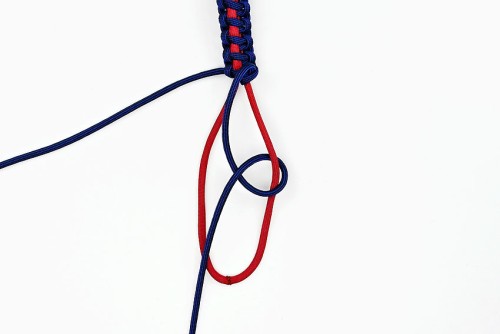
- Start back at the top left of the handle and repeat the same knots from the opposite direction.Bring the left working cord over the remaining stationary cord and bring it back up through the loop to the left.Pull the knot to tighten.
- Hold the working cord to the right. Place it over the handle cord and then bring it up through the loop.Again, tighten the knot and bring the working cord back to the left as you do so.
- Continue these 2 knots down the left side until the 2 sides meet.
Step 8: Finish off the working cords
- Cut the right working cord until it’s about 1/2 inch long. Hold the BBQ lighter over the ends of the two cords for about 3 seconds to melt them. Then carefully press the two melted ends together to fuse them.
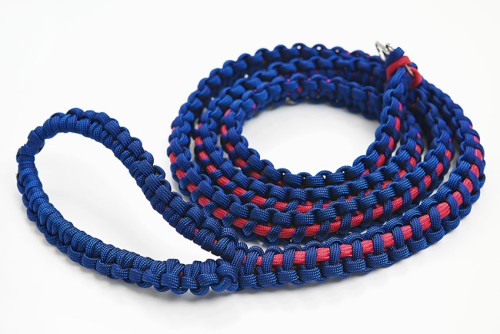
- Your paracord dog leash is complete!
Helpful Tips:
- It’s always better to start with extra cord, rather than run out, especially with such a long project!
- CAUTION: Paracord gets really hot when melted and can burn your skin. Be VERY careful as you melt the cords, and keep your fingers away from the melted areas until they’ve cooled.

How many feet of paracord is needed for a paracord dog leash?
The exact amount of paracord needed will depend on what knot is used to make the leash. If you use the knot we showed in the tutorial above, you’ll need approximately 10 feet of cord per 1 foot of leash for the main colour. We started with 50 feet of colour A (the main colour, or the working cords).
You’ll also need at least 10 feet of colour B (the stationary cords, or thin line showing through the pattern).
What length of paracord dog leash does this pattern make?
Our paracord dog leash is just over 4-1/2 feet long. Start with longer strands of cords if you’d like a longer leash.

What’s the best way to make knots with long lengths of paracord?
Pulling the long strands of paracord through the loops can be time consuming and difficult, so we found it best to create bundles. Wrap the ends of the paracord up and hold those bundles in your hands to keep them together.
Creating shorter lengths of paracord makes it a lot easier to tie the knots. You can even wrap an elastic band around the paracord to keep it together more easily, pulling out more of the cord as needed.

What knot is used to make a paracord dog leash?
We used a thin line solomon bar knot to make our paracord dog leash, which is a variation of the cobra weave. The cobra knot is often used to make paracord bracelets.
However, you can use a different knot if you’d like. A four strand diamond braid will create a round paracord leash.
Can a paracord leash be used to tie up a dog outside?
While this leash is very strong for normal walking purposes, we don’t recommend tying a dog outside with a paracord leash. If left alone, a dog can chew through the paracord.

Crafting your own paracord dog leash not only results in a tough and strong accessory, but it’ll also strengthen your bond with your furry BFF! Handmade with care, a paracord leash is all about creating something for your beloved pet that’s both functional and beautiful.

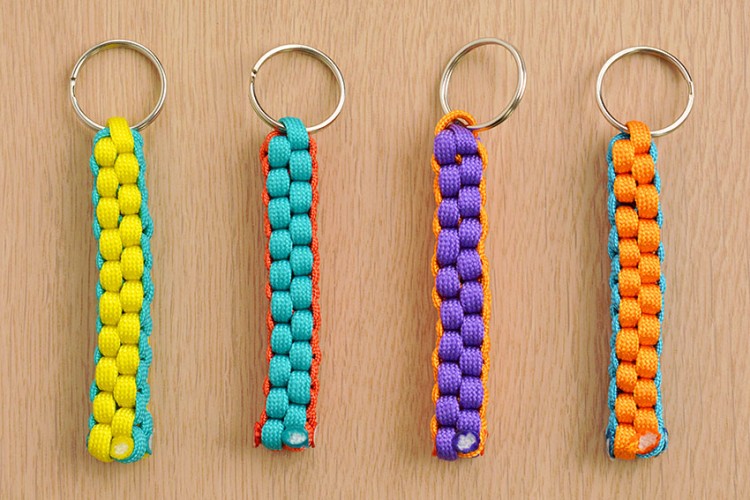
Here’s even more paracord craft ideas:


How to Make a Paracord Bracelet

Our book Low-Mess Crafts for Kids is loaded with 72 fun and simple craft ideas for kids! The projects are fun, easy and most importantly low-mess, so the clean up is simple!

Where to buy:
You can purchase Low-Mess Crafts for Kids from Amazon, or wherever books are sold:
Amazon | Barnes and Noble | Books-A-Million | Indiebound | Amazon Canada


Leave a Reply