
How to Make a Paracord Dog Leash
Craft your own stylish paracord dog leash! Dog lovers can learn essential knots and techniques for a durable, DIY leash.
Yield: 1 paracord leash
Cost: $10
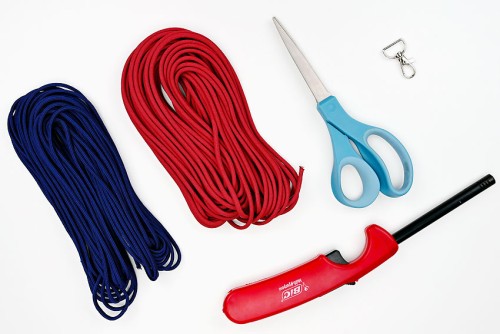
Equipment
Materials
- Paracord (2 colours)
- Dog leash clasp
Instructions
Step 1: Find what you need
- Gather your supplies and materials.
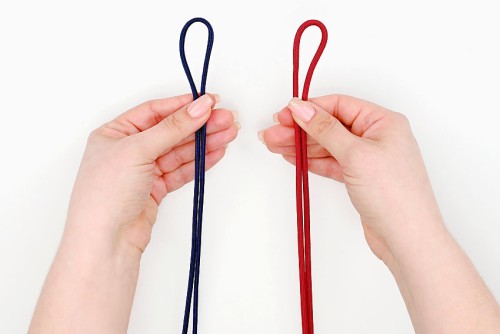
Step 2: Start off the paracord leash
- Start with a 50 foot length of your main colour of paracord (colour A, blue). Cut a 10 foot length of the second colour (colour B, red).Read more below the tutorial for how much paracord is needed for a leash.Fold each of these lengths in half.
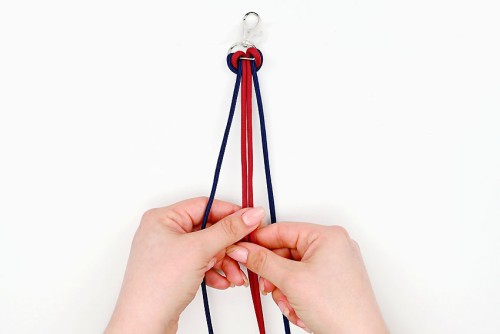
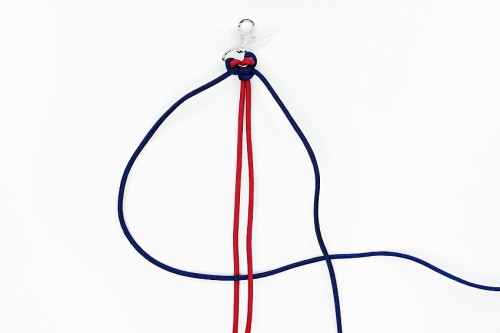
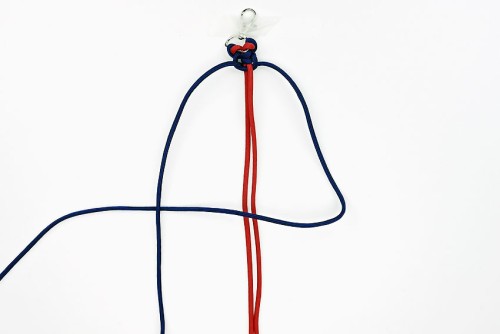
- Place the center loop of colour B inside the loop of colour A, and slide them through the d-ring of the clasp.We highly recommend using a strong swivel clasp made for a dog leash, especially for larger dogs.
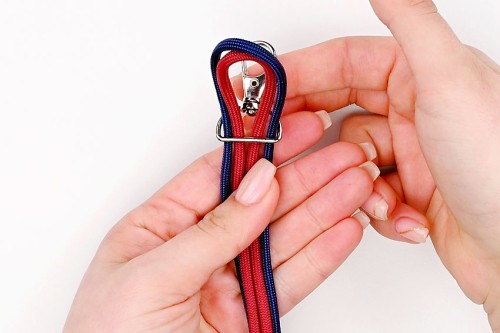
- Bring the loops down over the cords. Pull the cord ends through the loops and pull tight.Tape the clasp to your working surface.
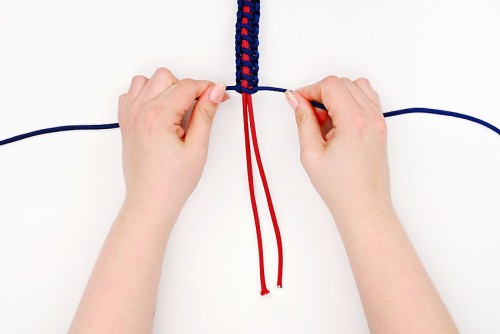
- Arrange the cords so that colour A is on the outside, with 2 colour B strands in the middle.Colour A (blue) will be the working cords, used to tie the knots around the stationary cords of colour B (red).
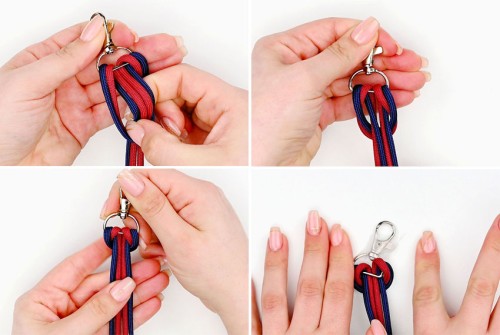
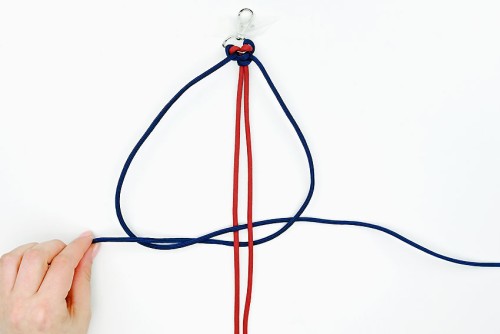
- Begin by bringing the left working cord over the middle 2 stationary cords.

- Bring the left cord back to the left under the stationary cords, pulling it up through the loop created.
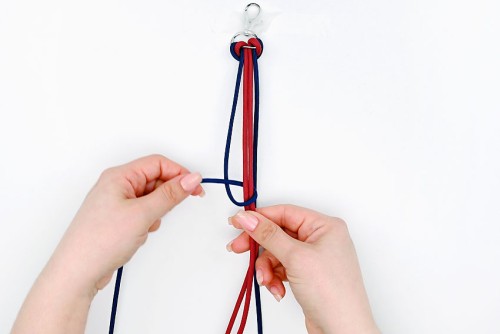
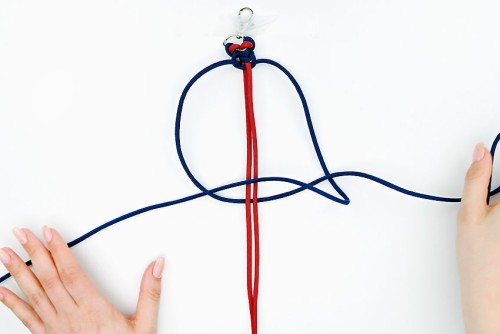
- Pull the knot tight, up next to the clasp.
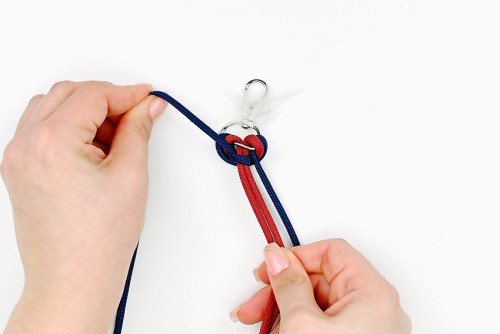
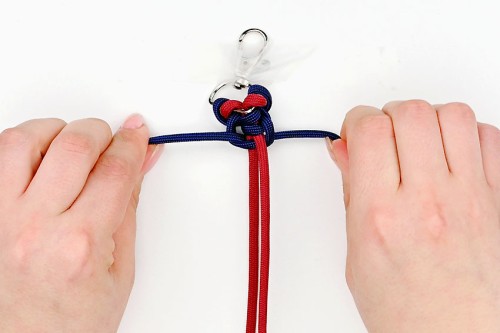
- Repeat this same knot using the right cord.To do this, bring the right cord over the center cords and then back to the right up through the loop. Pull to tighten the knot.These knots will make it easier to start our pattern for the rest of the leash.
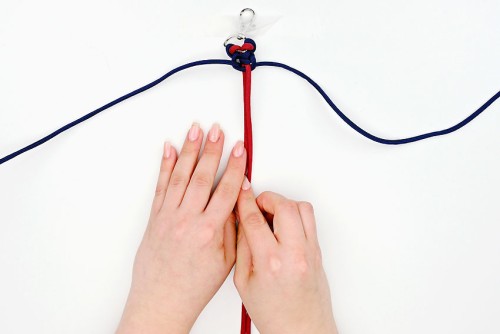
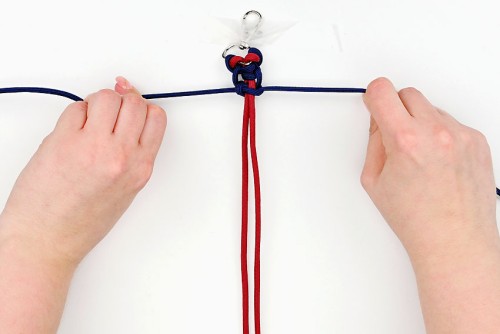
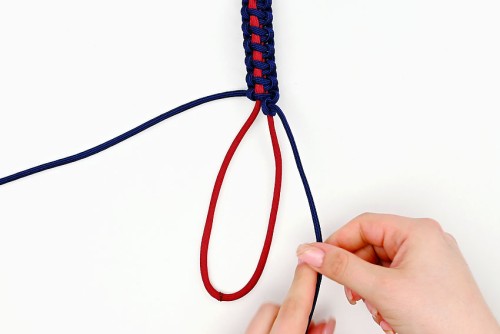
Step 3: Tie a thin line solomon bar knot
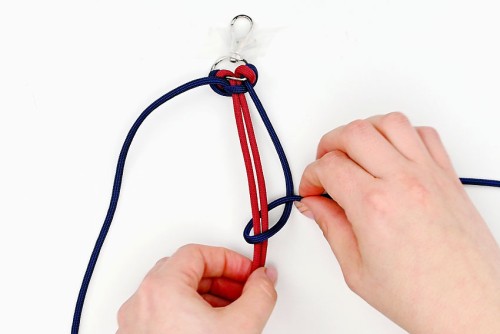
- Bring the left working cord over the left stationary cord and under both the right stationary cord and the right working cord.Make sure to leave a loop at the left.
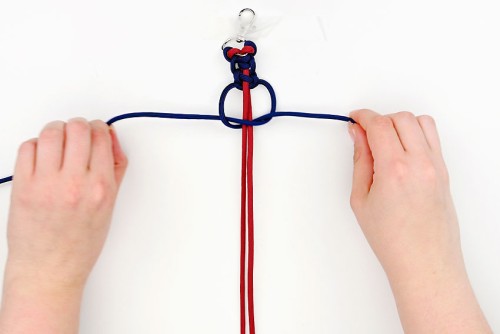
- Bring the right working cord to the left under the stationary cords and up through the loop.
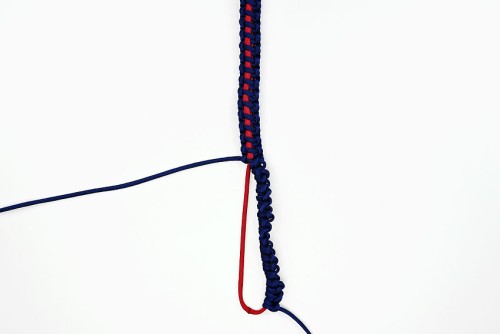
- Pull on the knot to tighten.
- As you tie knots, adjust the stationary cords so that they sit on top of one another.Place the right cord on top of the left so that only 1 stripe of cord will be visible in the pattern.
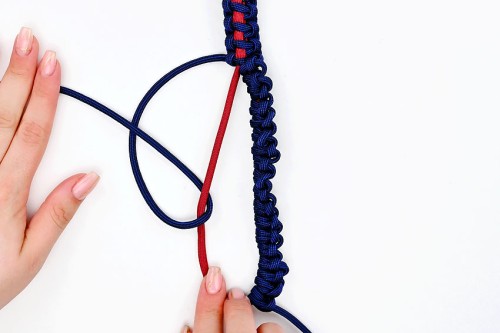
- Now bring the right working cord over the center stationary cords and under the left working cord.
- Bring the left cord under the stationary cords and up through the right loop.
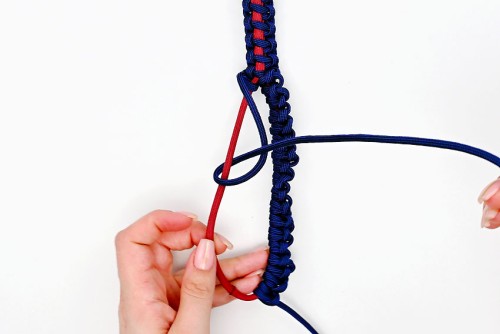
- Pull on the knot to tighten.
Step 4: Repeat the pattern
- Repeat the knots in step 3, starting with the left knot.
- Continue this same pattern until the leash is your desired length, or until you have just enough left of colour B to form the leash's handle (about 6 inches of each cord).
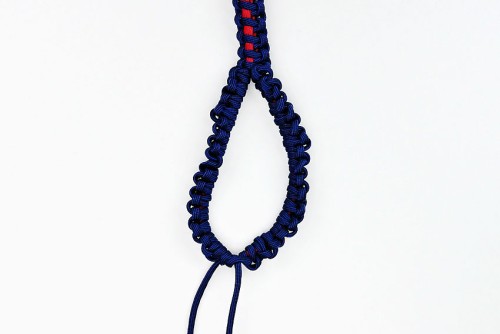
Step 5: Connect the base of the handle
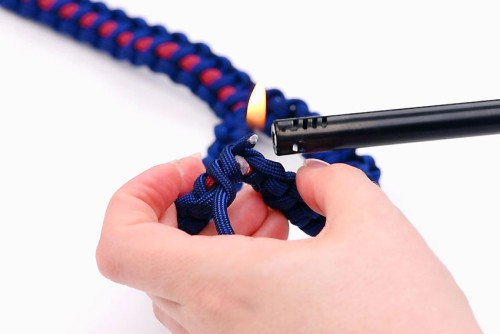
- Melt both ends of the stationary cords by holding a BBQ lighter over the cords for 3 seconds.Be careful, as the melted cord is very hot.
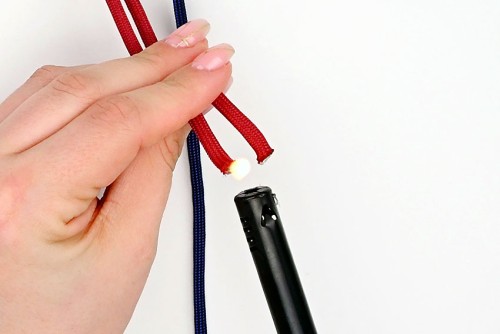
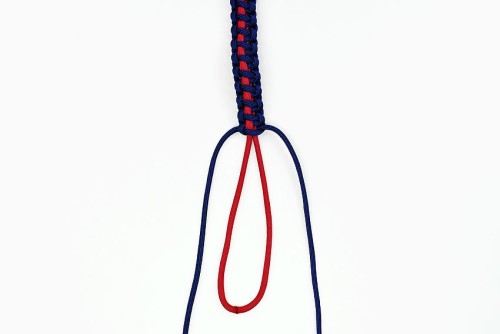
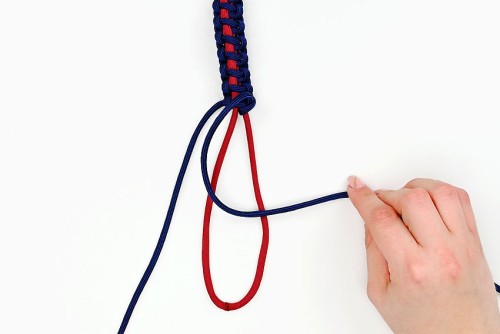
- Immediately push the 2 cord ends together, fusing them and creating a loop.
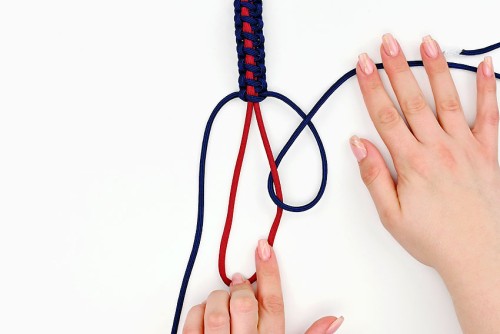
- Arrange the loop so that the top cord is back on the right, with the 2 working cords on either side.
Step 6: Tie knots to form one side of the leash handle
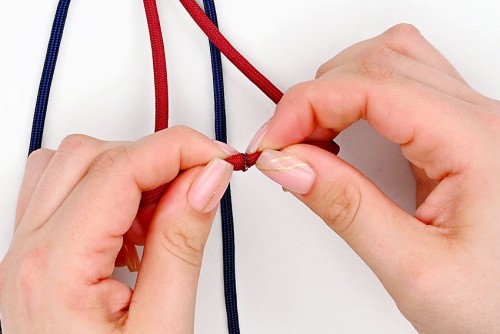
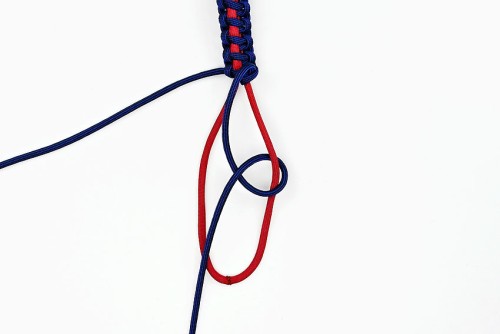
- Bring the right working cord over the right part of the stationary cord loop, creating a loop with colour A.Pull the cord back to the right, bringing it up through the loop created.
- Pull the knot tight.
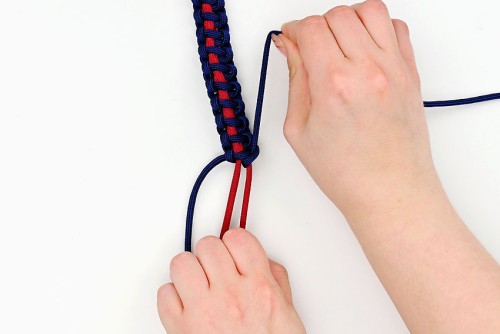
- Now bring the right working cord over to the left side.
- Place the cord over the right part of the center loop and then bring it up and through the loop created by colour A.
- Tighten the knot, pulling the working cord back to the right.
- Repeat these two knots until you get to the bottom of the handle and you're almost at the end of the right working cord.
Step 7: Create knots on the other side of the handle
- Start back at the top left of the handle and repeat the same knots from the opposite direction.Bring the left working cord over the remaining stationary cord and bring it back up through the loop to the left.Pull the knot to tighten.
- Hold the working cord to the right. Place it over the handle cord and then bring it up through the loop.Again, tighten the knot and bring the working cord back to the left as you do so.
- Continue these 2 knots down the left side until the 2 sides meet.
Step 8: Finish off the working cords
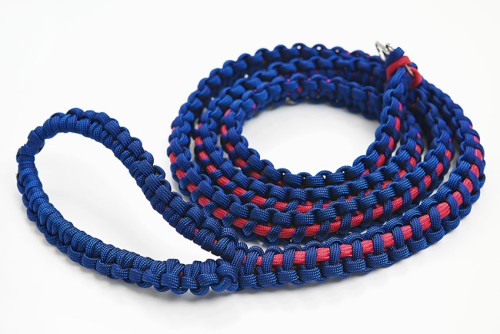
- Cut the right working cord until it's about 1/2 inch long. Hold the BBQ lighter over the ends of the two cords for about 3 seconds to melt them. Then carefully press the two melted ends together to fuse them.
- Your paracord dog leash is complete!
Video
Notes
Looking for more paracord crafts? Here's a few of our favourites:
DIY Paracord Keychain
Paracord Lanyard
Paracord Necklace