Follow our simple step by step tutorial to make a paracord dog collar! These DIY dog collars made from paracord are SO EASY and fun to make. And you only need to learn one simple, beginner friendly knot!
Why buy an expensive collar when you can make a custom one for a fraction of the price? These paracord collars are lightweight, weather resistant, and super durable. Plus they’ll look really cute on your furry friend (see evidence below haha)!

This post contains affiliate links. If you use these links to buy something we may earn a small commission which helps us run this website.
How to Make a Paracord Dog Collar
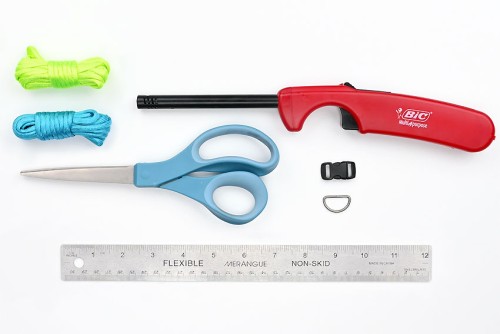
Materials:
- 12 feet Paracord (2 colours; 6 feet of each)
- Bracelet buckle
- D-ring
Equipment:
- Ruler (or tape measure)
Watch the step-by-step video tutorial:
Instructions:
Step 1: Find what you need
- Gather your supplies and materials.

Step 2: Set up your paracord dog collar
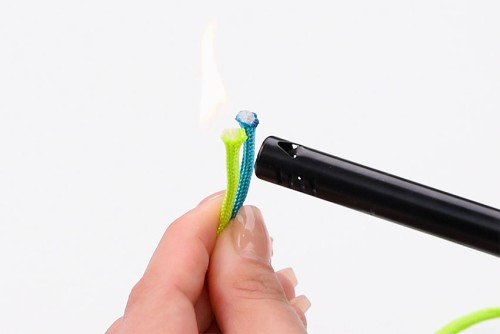
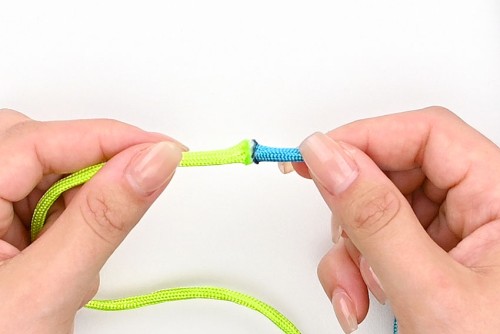
- Cut two 6 foot lengths of paracord from two different colours. Hold a BBQ lighter over the cut ends of both cords for about 3 seconds.(If your paracord is already pre-melted at the end, simply cut the ends off before doing this.)
- Quickly and carefully push the melted cord ends together until they cool off.This creates a 12 foot long piece of paracord.
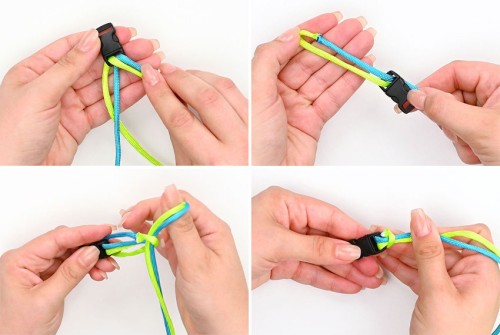
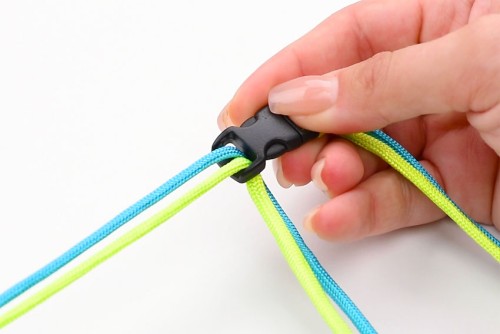
- Push the loose ends of the cord through one side of the bracelet buckle. Pull the buckle over the cord until it’s near the fused loop.Pull the loose cords through the loop and pull the cords tight. This secures the cords onto the buckle.

- Pull the loose cord ends through the other side of the buckle.
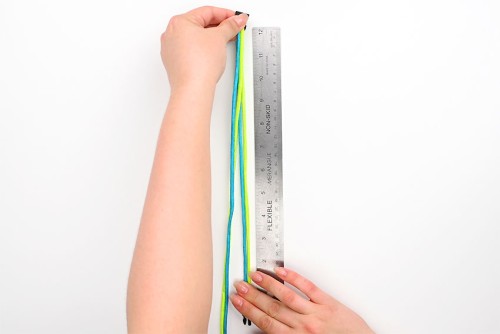
- Unbuckle the buckle and place the side of the buckle with the loose cord (the female end for us) at the top.Measure the length of the collar you need, from bottom to top. You can either base the measurement on your dog’s existing collar, or measure their neck size and add 1 inch.Be sure to include one side of the buckle in your measurement.
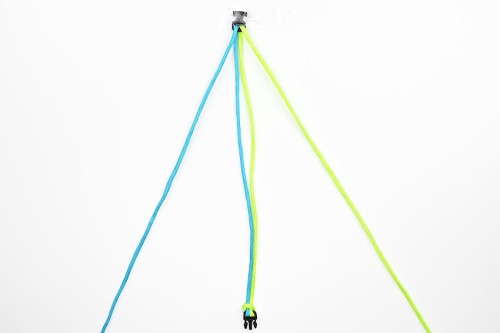
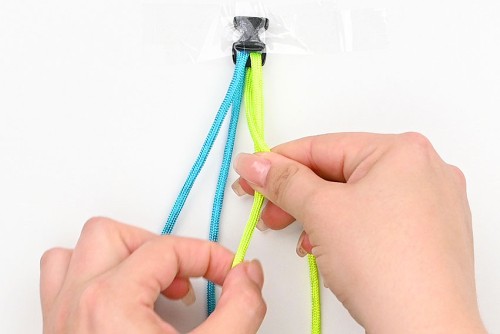
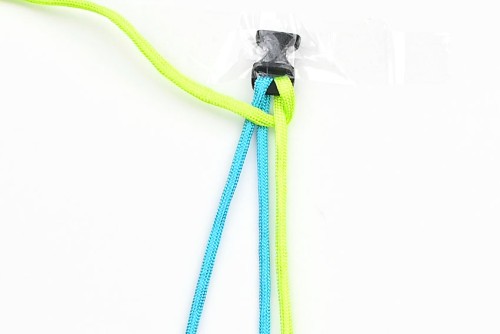
- Once you’ve pulled the top of the buckle to make the center cords a proper length, tape the top buckle to your working surface.Then arrange the loose cords so they’re on either side of the middle stationary cords. These will be your working cords.

Step 3: Make fishtail knots
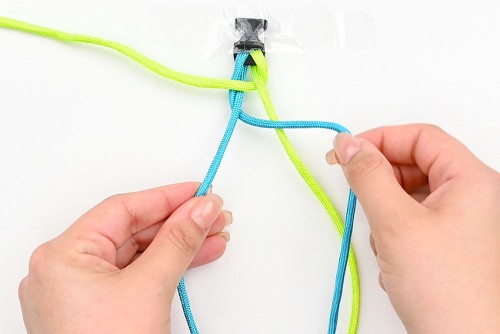
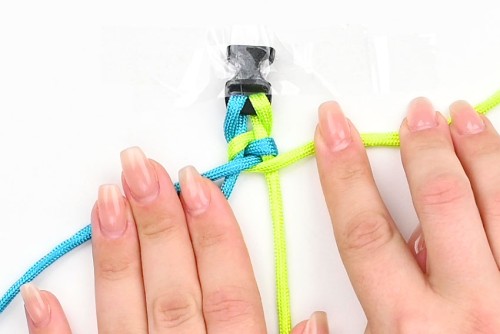
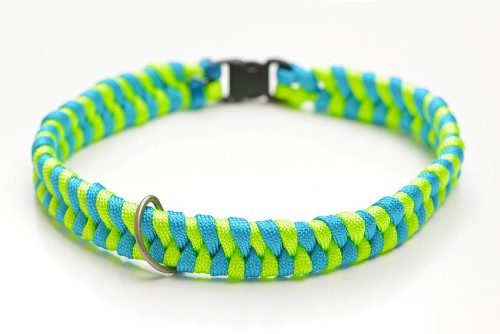
- This collar is made with fishtail knots.To start this knot, place the right loose cord (green, for us) under the stationary green cord.
- Pull this cord through and over the two left (blue, for us) cords. Push it up to the top, close to the buckle.
- Now take the original left loose cord (blue) and bring it under the left (blue) stationary cord.
- Pull the blue cord through and over to the right, overtop of the stationary green cord.
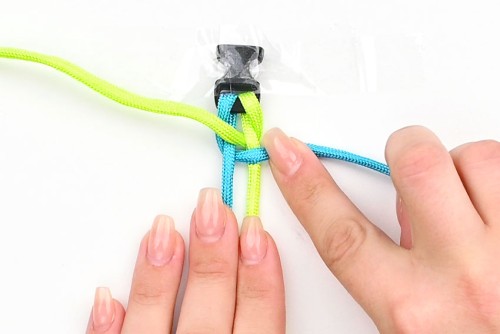
- Now bring the loose blue cord back over to the left, bringing it under the right stationary cord (green) and over the left (blue).
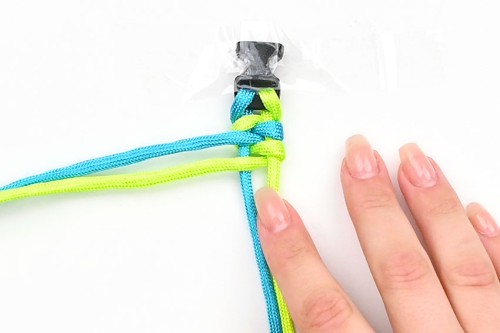
- Take the loose green cord (still on the top left), and bring it under both blue cords and over the stationary green.As you’re working, be sure to push the knots up towards the buckle.
- Bring the loose green back under the right stationary cord (green) and over the left (blue).
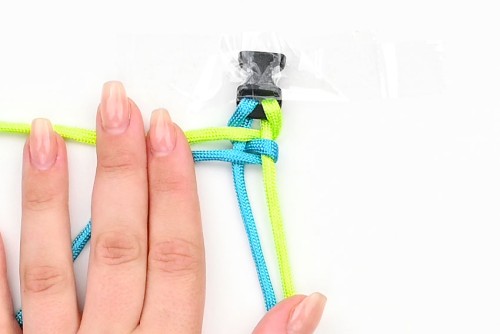
- Continue this same pattern all the way down the collar, alternating colours until you reach the buckle.For the last knot you’ll only do half the pattern, so you end up with one loose cord on either side.
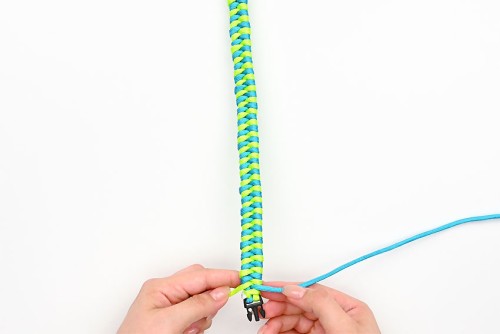
Step 4: Finish off the paracord collar
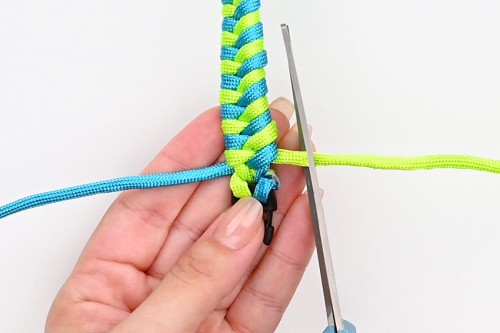
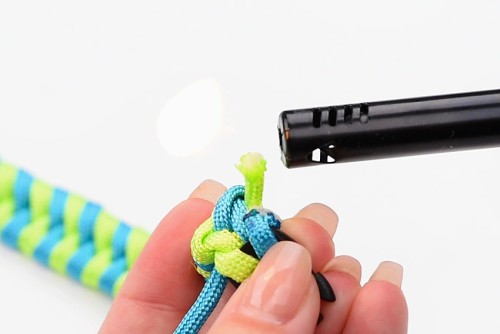
- Flip the collar over and cut one of the loose cords, about 1/2 inch away from the knot.
- Melt the end of the loose cord by holding the BBQ lighter over the cord for about 3 seconds.
- Use the side of the lighter to push the cord end in towards the center of the collar.
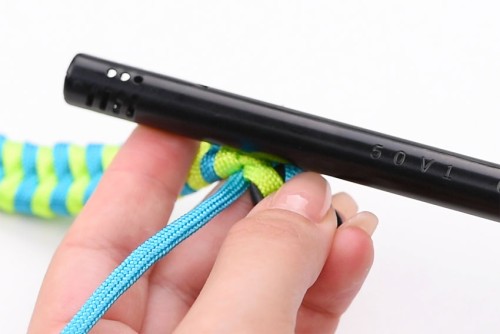
- Cut the other loose cord and use the lighter to fuse and melt the two cord ends together. (Keep your fingers a safe distance from the hot melted ends).
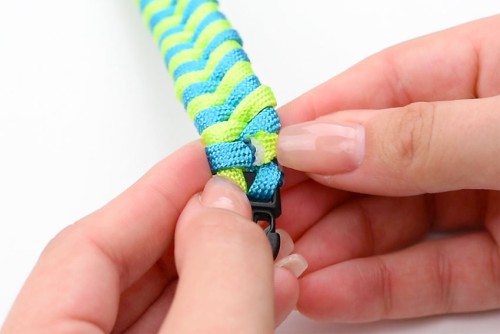
- Slide the d-ring onto the collar with the flat end towards the inside of the collar.
- Your paracord dog collar is complete!
Helpful Tips:
- CAUTION: Paracord gets really hot after being melted and can burn your skin. Be VERY careful when you’re melting the cords and keep your fingers away from the melted areas until they’ve cooled.
- Take your time, making your knots carefully. And try to pull your knots tight, pushing them up the center strands as you’re working. This will create the best looking knots.

How much paracord does it take to make a dog collar?
This will fully depend on how big your collar needs to be. To make a 12 inch collar (excluding the buckle) we used about 11 feet of paracord total (5-1/2 feet of each colour).
You can pretty much count on using 1 foot of paracord for each inch of collar. Plus it’s always better to start with longer pieces and have extra, rather than run out and have to connect extra paracord in the middle of the project!
How wide is this paracord collar?
If you’re using regular (550) paracord, the fishtail knot makes a collar that is 5/8 inch wide.

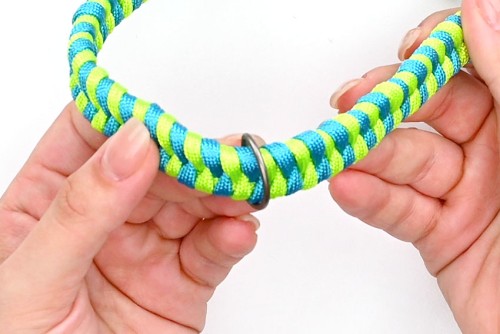
Can I connect the d-ring more securely to the DIY collar?
Yes, if you’d like you can connect the d-ring directly into the collar so it stays in place. To put the d-ring right next to the buckle, slide it onto the middle stationary cords before you start knotting. You can also do this at any time while you’re making the collar.
Where can I buy paracord to make a paracord dog collar?
You can buy tons of colours of paracord on Amazon. You can also find it locally at hardware stores like Home Depot, craft stores, or at camping stores.
Plus there are also paracord specific websites, like Paracord Planet, with a huge selection of paracord!

How can I clean my paracord dog collar?
You can actually put your paracord collar in the washing machine with cool water! Place it in an old pillow case or a mesh laundry bag to keep both the collar and your washing machine safe.
Or if you’d prefer, wash the paracord dog collar by hand. You can scrub it with baking soda and/or dish soap using a soft brush.
Then hang up the paracord collar to air dry!

Choose your favourite colours and make a DIY paracord dog collar! These collars are so cool looking — they’ll make your pup even more adorable than they already are!

Here’s even more paracord craft ideas:


How to Make a Paracord Bracelet

Our book Low-Mess Crafts for Kids is loaded with 72 fun and simple craft ideas for kids! The projects are fun, easy and most importantly low-mess, so the clean up is simple!

Where to buy:
You can purchase Low-Mess Crafts for Kids from Amazon, or wherever books are sold:
Amazon | Barnes and Noble | Books-A-Million | Indiebound | Amazon Canada


Leave a Reply