A paracord bracelet is both stylish and practical. These knotted bracelets are so cool and colourful, and they’re surprisingly simple to make!

Paracord Bracelets
Paracord, or parachute cord, was originally used in World War II as a synthetic replacement for silk. Nylon paracord is known for being durable. It can handle weather and daily use without showing wear.
Bracelets made of paracord were originally created for outdoor enthusiasts as an emergency preparedness item. In an emergency situation you can take the bracelet apart and use the cord for various purposes, such as replacing a shoelace or securing a tent.
Paracord bracelets may be more of a fashion accessory than a functional survival item for most people, but they are still plenty durable. This makes them great for kids because they can take lots of wear and tear.
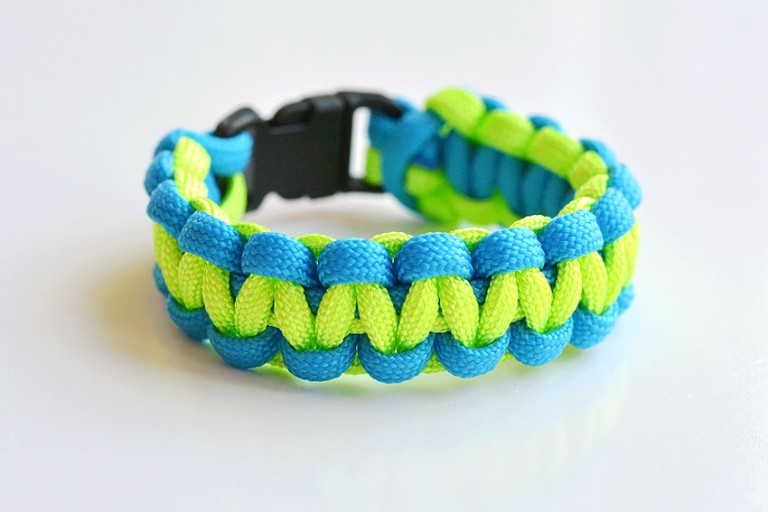
We made these bracelets using the “cobra weave”, also known as a square knot pattern. This is the most recognizable pattern for paracord bracelets, and it’s actually really simple to make.
Check out our Paracord Bracelet video tutorial:
*Note: Scroll down for the step-by-step photo tutorial.
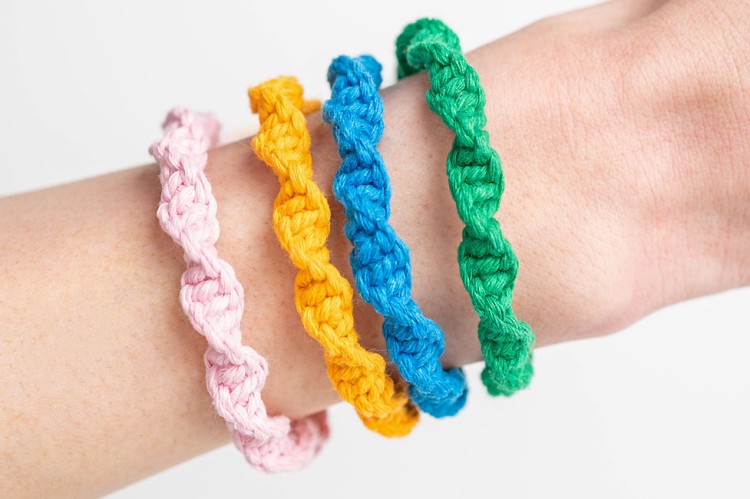
Looking for more knotted crafts? Here’s some of our favourites:

Here’s what you’ll need:
This post contains affiliate links. If you use these links to buy something we may earn a small commission which helps us run this website.
The full printable instructions are at the end of this post, but here’s a list of products on Amazon that are similar to the supplies we used:

Where can I get the supplies to make a paracord bracelet?
You can get paracord and buckles from Amazon, Michaels, or any other craft store. The dollar store and Walmart are other places to look. There are also specialty survival stores online that carry lots of different cord and buckle options. (Try Googling “where to buy paracord”).
We used a paracord bracelet kit from Amazon for the bracelets you see in the photos. The kits come with plenty of paracord colours and lots of bracelet buckles.
Can I wash my paracord bracelet?
Yes, but keep in mind that paracord bracelets will generally shrink by about 1/4 inch the first time they are submerged in water. After that, you are fine to get them wet.
There are several options for cleaning your bracelet. The first option is to scrub the bracelet with baking soda and water.
Another way is to hand wash your bracelet in the sink with dish soap. You can also clip your bracelet to a belt loop and throw it in the washing machine.
Because nylon can melt at high temperatures, you’ll want to avoid putting your bracelet in the dryer. You are best off hanging the bracelet in open air to dry naturally.

What size cord should I use?
When people say “paracord” they usually mean the Type III, or 550 weight, cord. This is the usual type of paracord for making bracelets and crafts. It’s also the size we used for the paracord bracelets you see in the photos.
You can also use thinner paracord such as 325 or micro. These strands will generally be less strong, which is fine if you are only using the bracelet as an accessory.
If you want to use the bracelet as a survival item, such as for fishing or camping, stick with the thicker 550 cord.
What else can I make with paracord?
Paracord has so many crafting uses! You can make keychains, rings, zipper pulls, or belts.
You can also use paracord to make collars and leashes for pets. Some artists have even been using paracord for sculptures!

How to Make a Paracord Bracelet
Materials:
- 8 feet Paracord (4 ft each colour)
- 1 Bracelet buckle
Equipment:
Instructions:
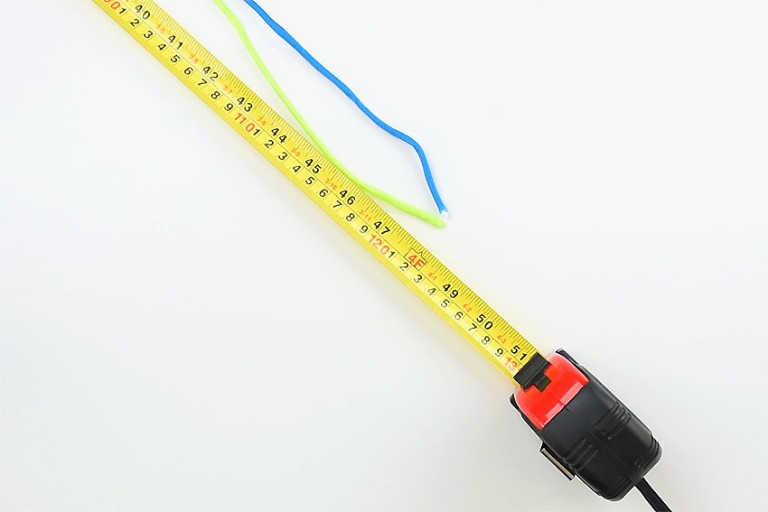
Step 1: Measure cord length & join colours together
- Choose 2 cord colours. Measure out and cut 4 feet of each colour of cord.

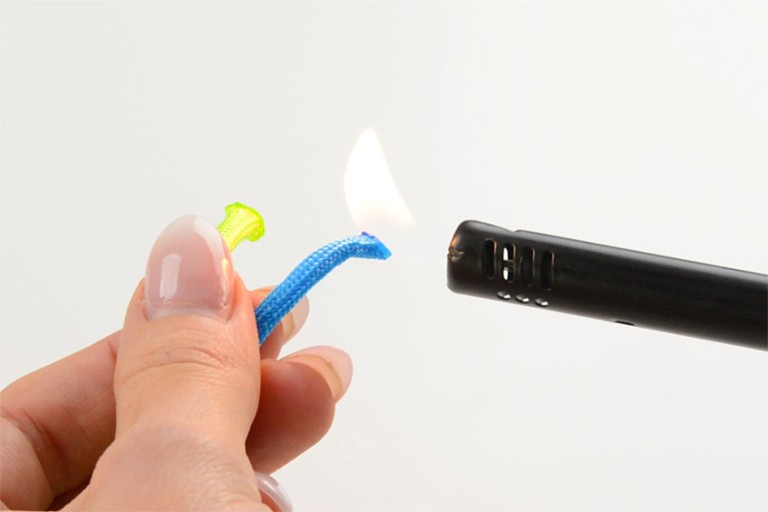
- Carefully hold the flame of a BBQ lighter over one end of each of the 2 cord pieces until they start to melt. The flame on the lighter will be on the cord end for about 3 seconds each.
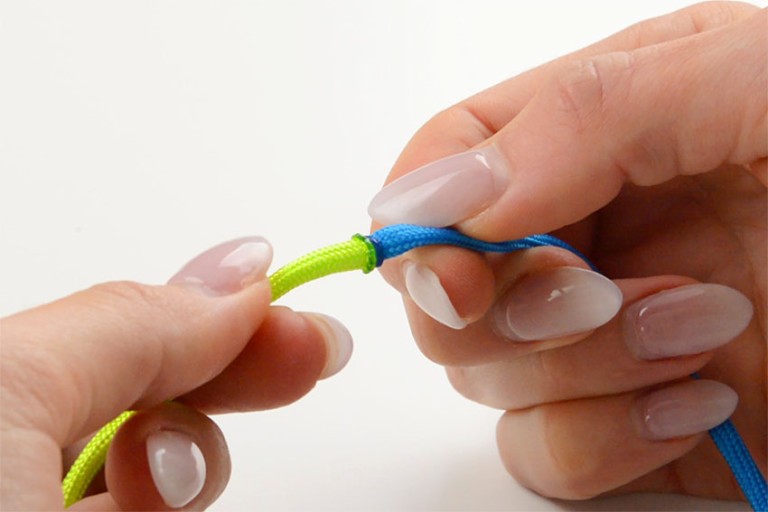
- Quickly and carefully stick the hot cord ends together until they cool off (keep your fingers at least an inch away from the melted ends). You should now have a 2 colour cord that’s 8 feet long.
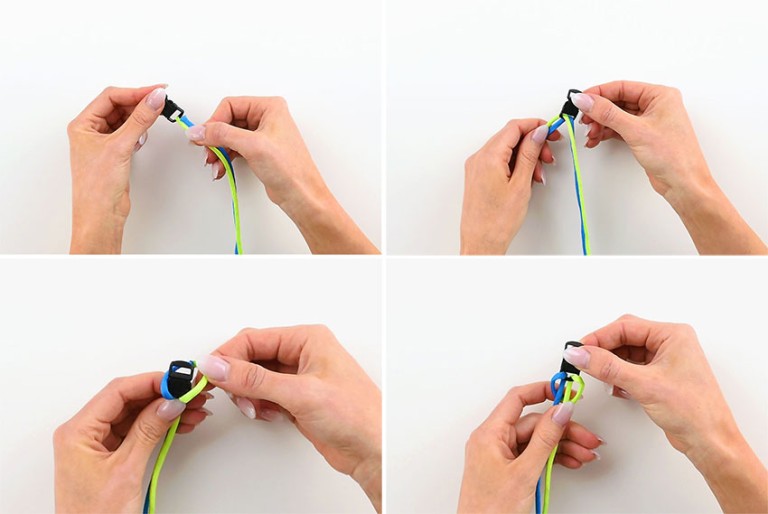
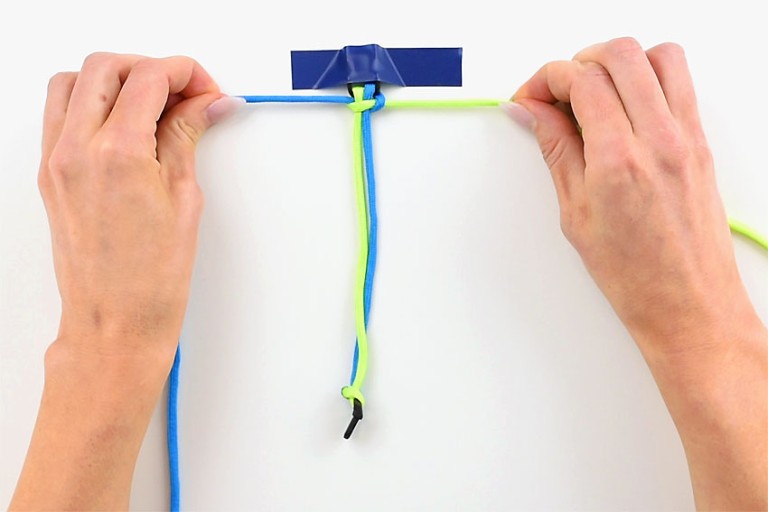
Step 2: Attach cord to buckle
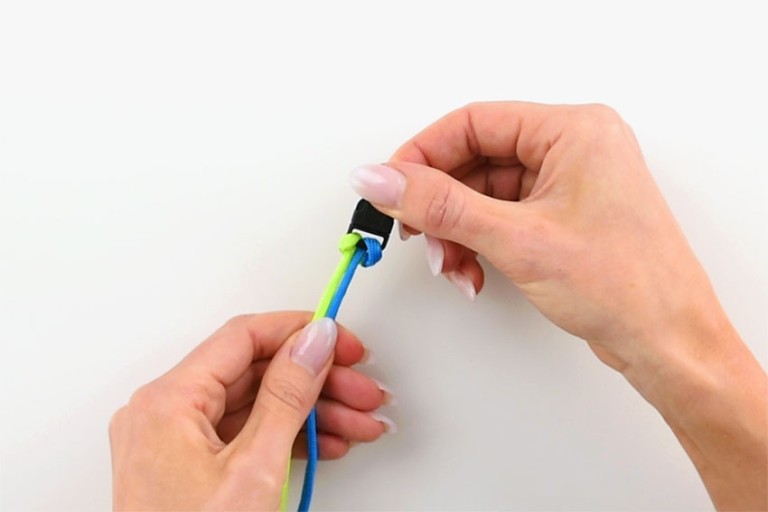
- Clip together the 2 pieces of the bracelet buckle. Push the loose ends of the cord through one side of the buckle. Keeping the ends together, pull them through the buckle until you have about an inch of the centre loop remaining.

- Open the loop and pull it over top of the buckle to the other side. Pull down on the loose ends to secure the cord into a cow hitch knot.
- Push the loose ends of cord through the other side of the buckle. Pull them through the buckle until it’s just large enough to fit over your wrist. Unbuckle the two sides of the bracelet buckle and set aside.

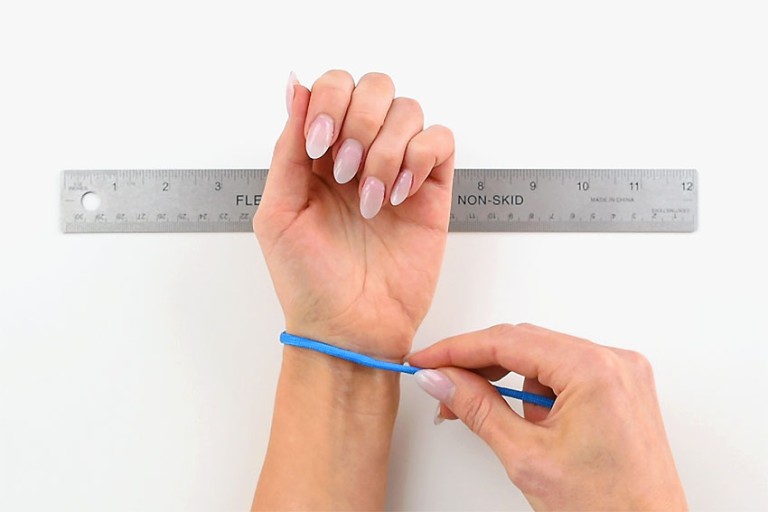
Step 3: Measure bracelet length
- Wrap a piece of paracord around your wrist. Measure this against a ruler to get your wrist measurement.
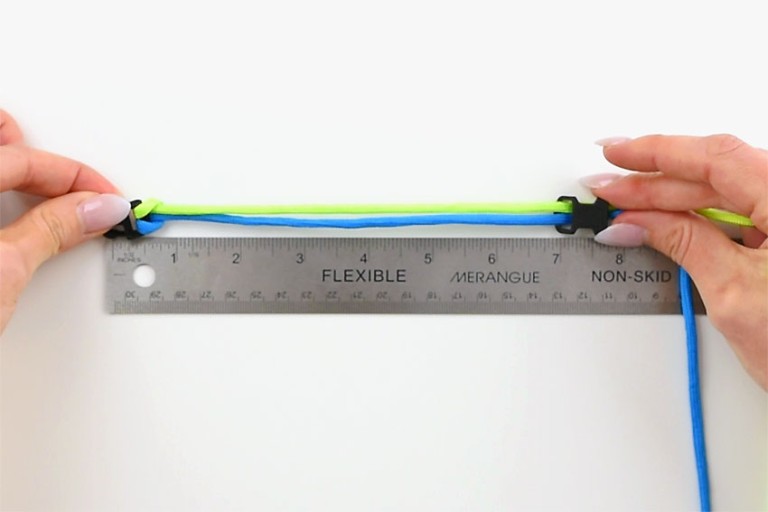
- Place the open bracelet against a ruler. Pull the loose side of the buckle until it measures your wrist measurement PLUS one inch (eg. for a 6 inch wrist you want a 7 inch bracelet length). Include the length of the buckle in your measurement, but not the length of the male prongs.
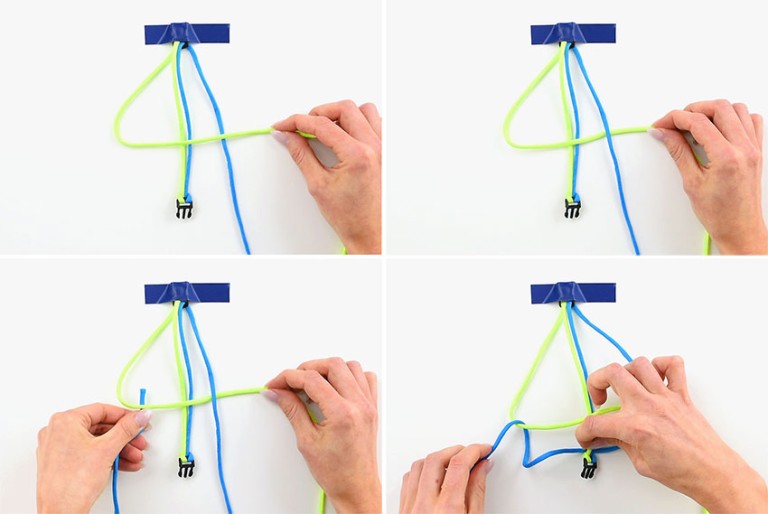
Step 4: Knotting Pattern
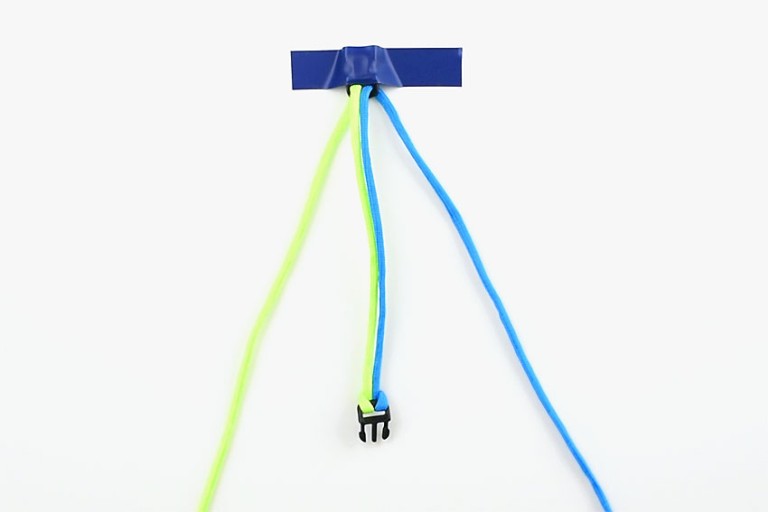
- To make knotting easier, secure the loose end of the buckle to your working surface with tape. The buckle with the cow hitch knot should be free at the bottom. Place 1 cord on the left and 1 cord on the right of the buckle.
- Take the left cord (green in this case) and bend it over top of the two centre strands. Lift the right (blue) strand over top so the green strand is under the blue strand.Take the end of the blue strand and push it through the loop made by the green strand. Pull the blue strand through, making sure you lift the buckle so it’s over the blue strand, but under the green strand.
- Pull both cords to tighten the knot.
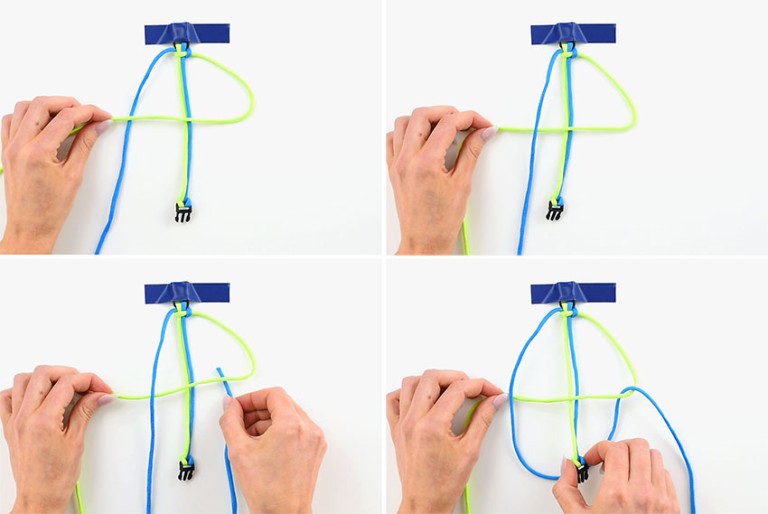
- Repeat these steps in a mirror image, starting from the right side this time.Take the right cord (green in this case) and bend it over top of the two centre strands. Lift the left (blue) strand over top so the green strand is under the blue strand.Take the end of the blue strand and push it through the loop made by the green strand. Pull the blue strand through, making sure you lift the buckle so it’s over the blue strand, but under the green strand.
- Pull both cords to tighten the knot.
- Continue this knotting technique, alternating sides until the knots reach the bottom bracelet buckle.

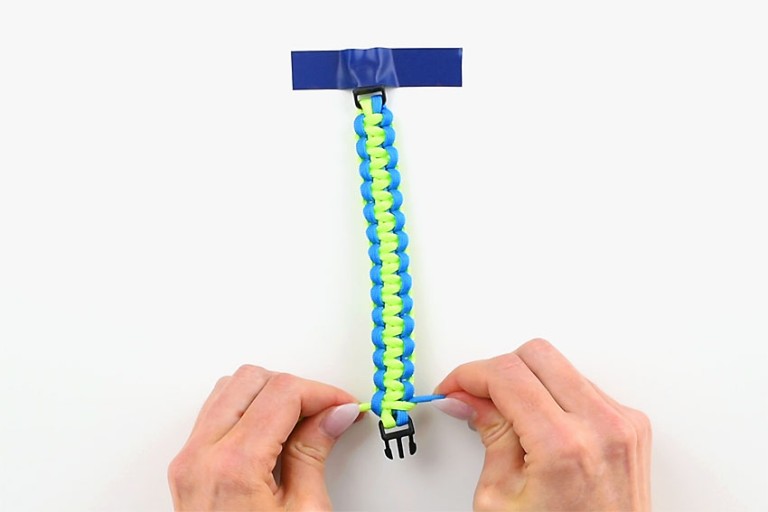
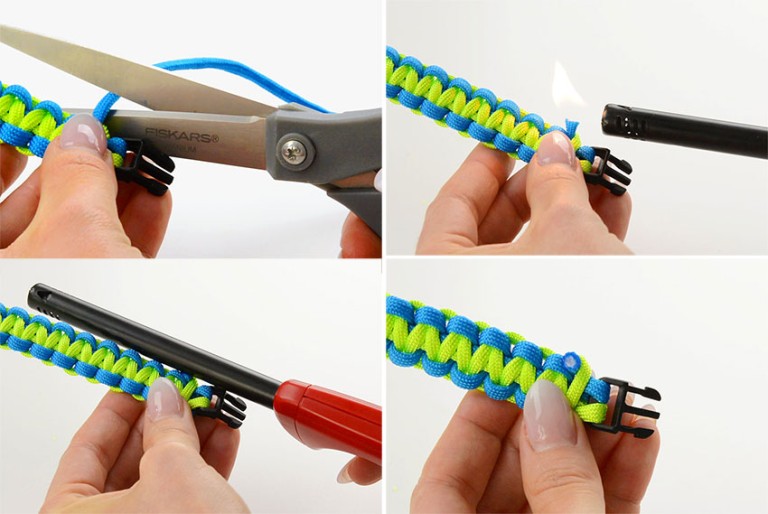
Step 5: Finish off bracelet
- Snip off any leftover, unknotted cord, close to the bracelet. Carefully melt the end of the cord with a BBQ lighter for about 3 seconds.Quickly and carefully push the rounded edge of the BBQ lighter against the melted end and the nearest knot until it cools. This will prevent your knots from coming undone.Repeat for the opposite side.
- Your paracord bracelet is complete!
Helpful Tip:

With so many colours of paracord available, you can create any colour combination you want! Or even single coloured bracelets.
These paracord bracelets are so satisfying to make! I love seeing them come together one knot at a time. Such a fun and easy craft for kids and adults!

Here’s even more knotted craft ideas:

How to Make a Paracord Keychain


Our book Low-Mess Crafts for Kids is loaded with 72 fun and simple craft ideas for kids! The projects are fun, easy and most importantly low-mess, so the clean up is simple!

Where to buy:
You can purchase Low-Mess Crafts for Kids from Amazon, or wherever books are sold:
Amazon | Barnes and Noble | Books- A- Million | Indiebound | Indigo | Amazon Canada


Leave a Reply