

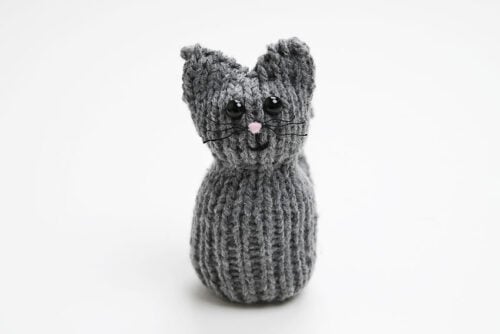
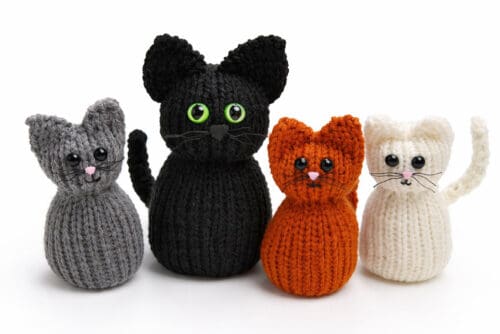
This loom knit cat is so cute! With its round little body, tiny ears, and sweet stitched face, this knit cat is so satisfying to make. You can customize it with different yarn colours and facial details, making each one totally unique. Whether you set them on display, give them as a homemade gift, or use them in pretend play, these cat plushies are sure to bring a smile to anyone who sees them.
If you’re a loom knitting beginner and ready to make something besides yet another hat, we think this loom knit cat is the perfect next project. You can use the same simple techniques you already know and transform a basic knit tube into an adorable stuffed animal. It’s an easy, low-stress, and fun way to practice simple sewing and shaping skills. So let’s get started!

This post contains affiliate links. If you use these links to buy something, we may earn a small commission at no extra cost to you. This helps support our website and allows us to keep creating fun, free content.
How to Make a Loom Knit Cat
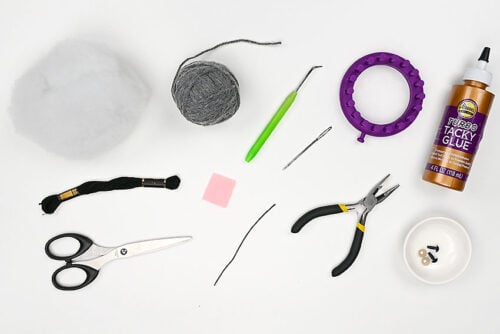
Materials:
- Worsted weight yarn (cat colour of choice)
- Safety eyes (8 mm)
- Felt (pink)
- Embroidery floss (black)
- Tacky glue
- Polyester fiber fill
- 20 gauge Wire
Equipment:
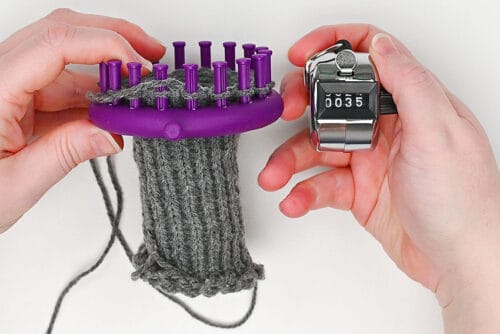
- Knitting loom (18 pegs)
- Row counter (optional)
See the craft in action:
Instructions:
Step 1: Find what you need
- Gather your supplies and materials.

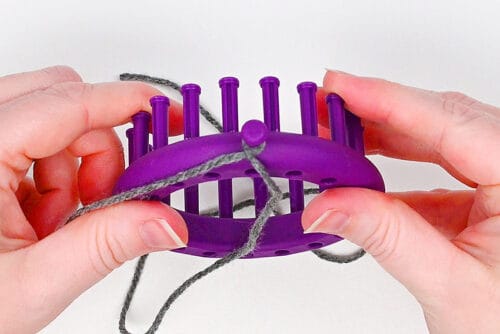
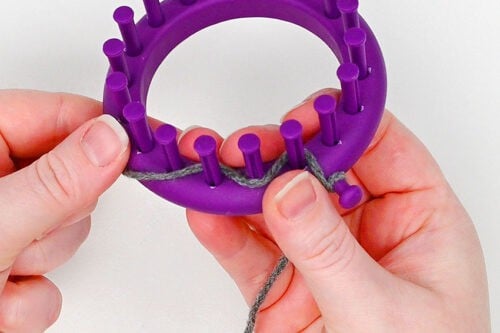
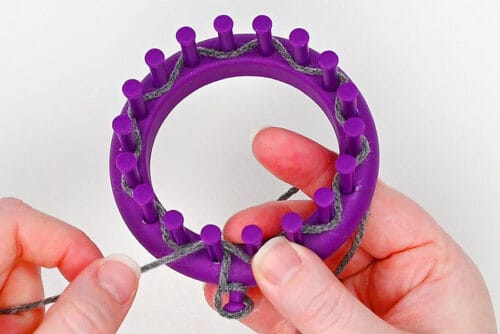
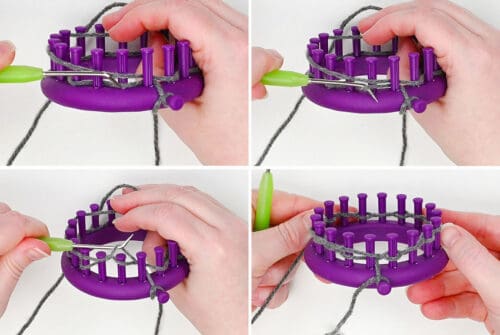
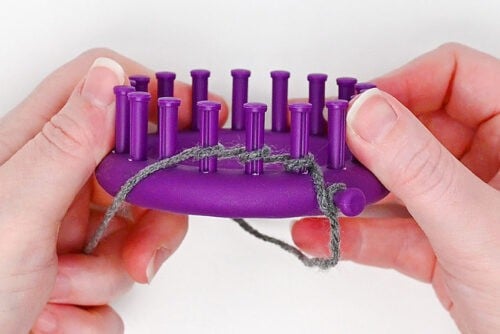
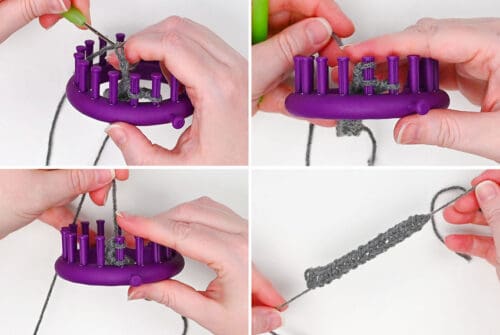
Step 2: Cast-on
- Make a slip knot and add it to the anchor peg on the side of the loom.
- Use a drawstring cast-on to attach the yarn. To do this, weave the yarn behind the first peg, in front of the second peg, behind the 3rd, etc.I’m left handed, so I’m going around the loom clockwise, starting with the peg to the left of the anchor peg. If you’re right handed you may prefer counter-clockwise — the pattern works either way.

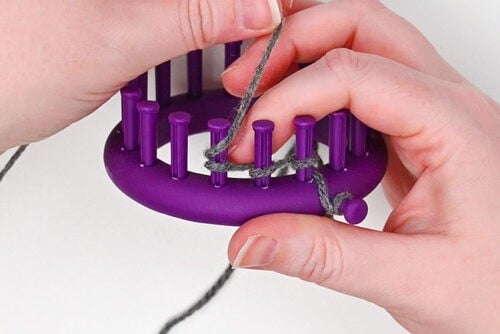
- Repeat around and finish by going behind the first peg.(If your loom has an even number of pegs.)
- Complete the cast-on by wrapping the working yarn around the loom.For every peg that has 2 loops in front, knit over (i.e. use your loom hook to lift the bottom loop up and over the top loop, and off the peg — to the back).

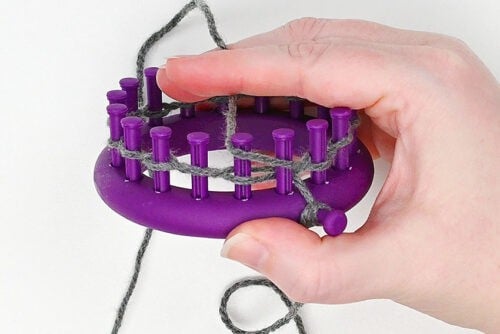
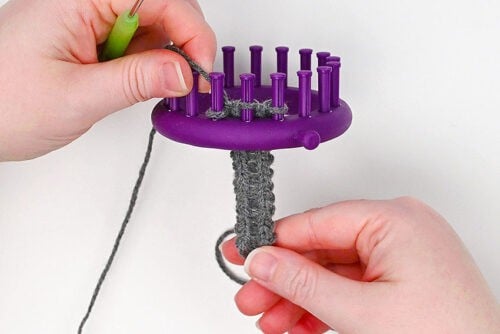
Step 3: Knit the cat
- The whole cat is made with u-knit stitches. You can choose to do a different knit stitch if you’d like — e-wrap knit is a looser stitch, while true knit is tighter.To begin the u-knit, bring the working yarn across the peg. Hold it loosely with your non-dominant hand.
- Use your loom hook to grab the bottom loop.
- Bring this loop over to the back of the peg.
- Repeat around. This creates 1 row of knitting.
- Repeat for a total of 35 rows. It’s that simple!

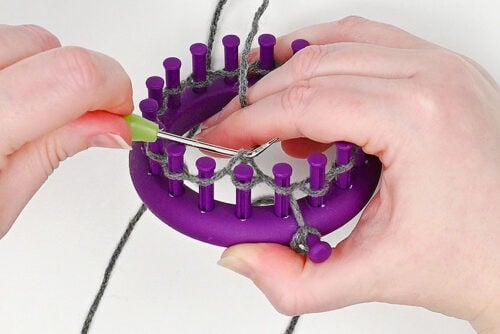
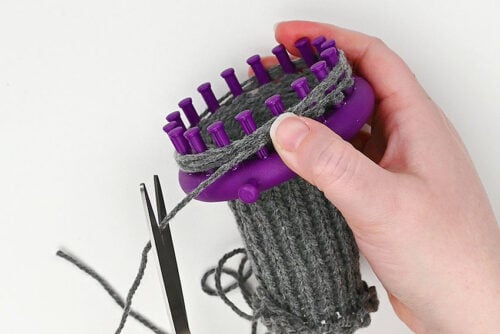
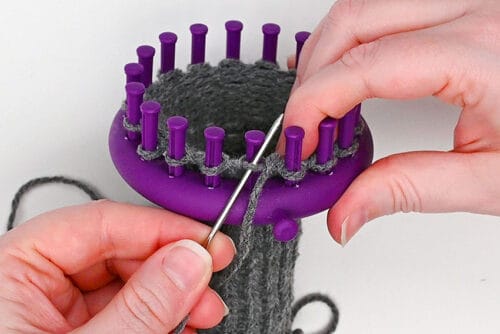
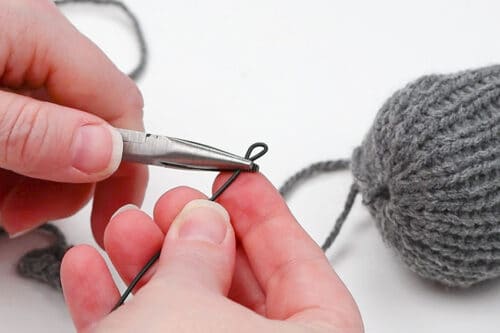
Step 4: Gather bind-off
- Wrap the working yarn around the loom 3 times and then cut it off.(You’ll need the long tail later on, so don’t cut it too short!)
- Attach the end of the yarn to a yarn needle. Bring the needle up through the loop on peg 1.
- Pull the tail all the way through the loop and then remove the loop from the peg.
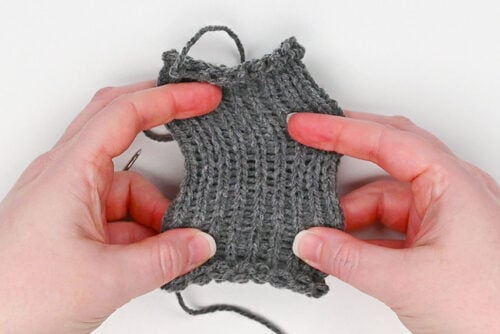
- Repeat around until you’ve removed every loop from the loom. Stretch out the stitches.
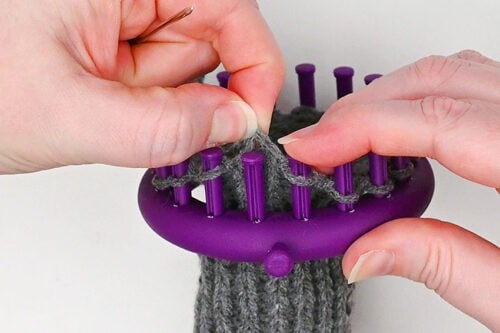
Step 5: Knit the tail
- E-wrap 3 pegs on the same loom to make the tail. Knit over each loop to finish the cast-on.
- Knit flat, going back and forth across the 3 pegs
- Repeat for 25 rows.
- Finish with a basic bind-off. To do this, take the first loop off the peg and place it on the next peg. Knit off. Then remove this loop and put it on the third peg. Knit off again.Cut the yarn, leaving a 10 inch tail. Slide the tail through the last loop and remove it from the peg.
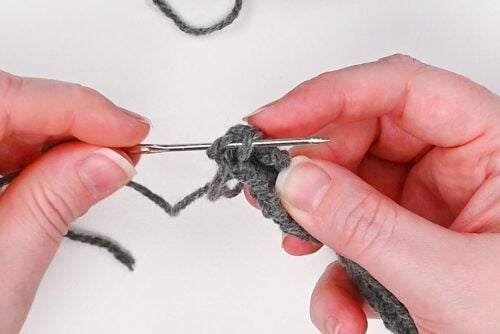
Step 6: Make the cat’s ears
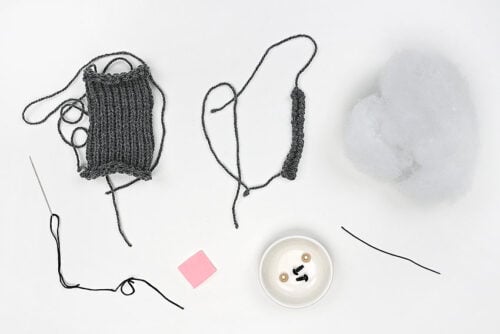
- Here’s all the pieces you’ll need to make the rest of the cat. We’ll discuss each one in turn, but this gives you a visual of what materials to gather if you haven’t already.
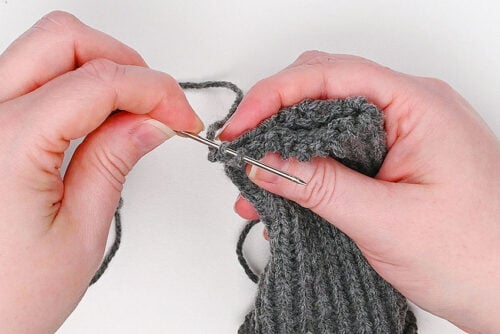
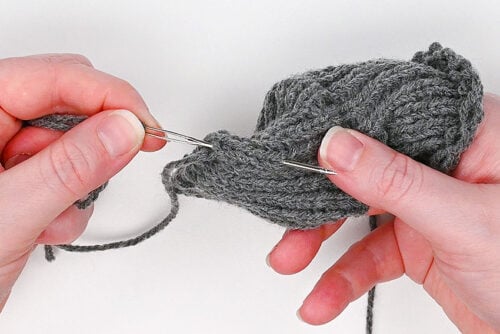
- Begin by sewing the top of the cat closed. This should be the side with the gather bind-off.To close it, fold the tube so the tail is at one side. Thread a yarn needle with the tail and bring it through 1 loop at the back and 1 loop at the front.
- Repeat, sewing from back to front, back to front, until you reach the other side.
- Bring the yarn down through the top corner and up through the side, going about 6 stitches down.
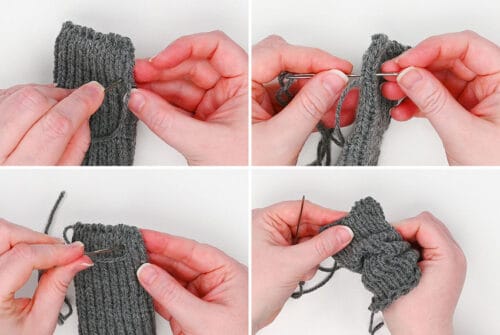
- To make the ears, bring the needle through the fabric half a stitch over and 1 stitch up. Sew through both layers.Repeat this, flipping the fabric back and forth, moving your way up and over until you get to the top center. You’ve made 1 ear!Then use the same process to go back down and out, creating the 2nd ear on the other side.Finish with the yarn on the inside and keep the tail long.
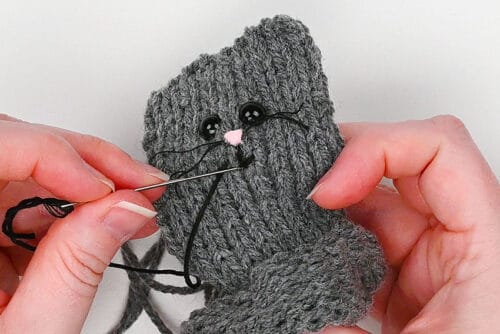
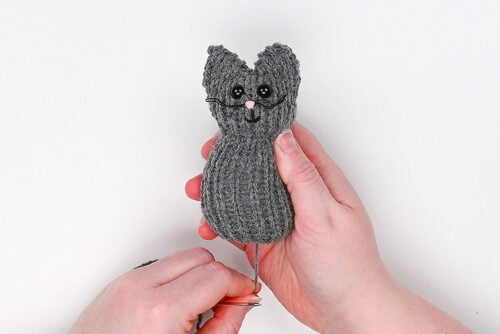
Step 7: Add the cat’s face
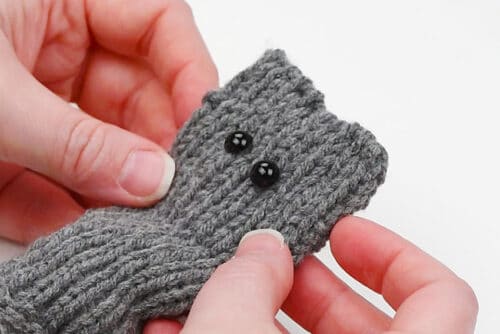
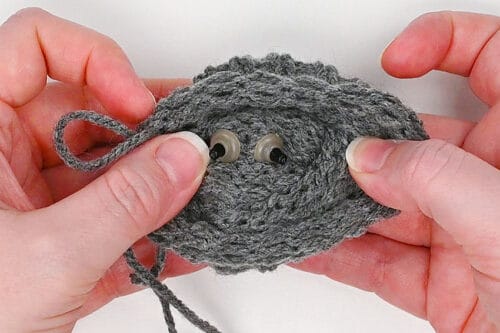
- Attach safety eyes about 5 or 6 stitches down from the top middle.
- Secure the eyes with the backings inside.
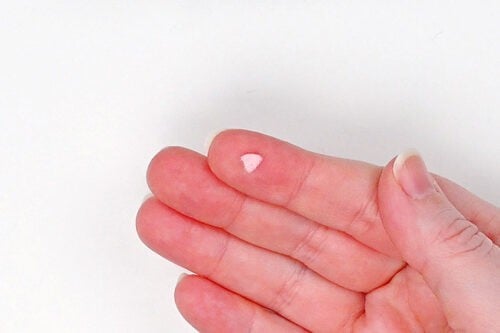
- Cut a teeny tiny rounded triangle nose from pink felt.(Ours is just less than 1/4 inch across.)
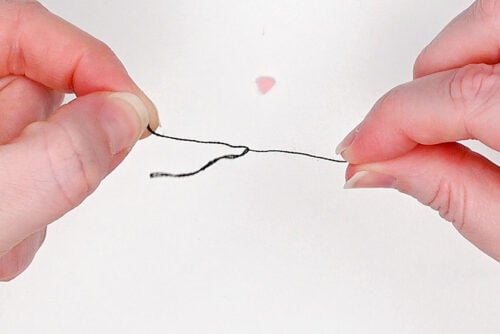
- Next, cut a 2 inch piece of black embroidery floss. Separate it into strands. (You’ll need 3 of them.)
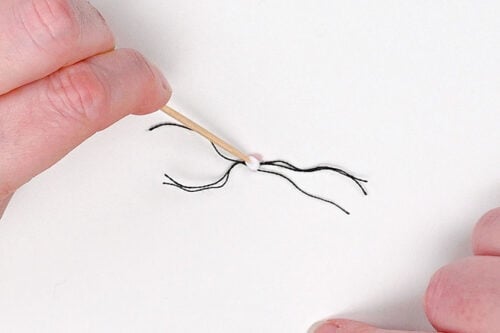
- Use a toothpick to attach tacky glue to the nose. Then attach 3 strands of embroidery floss at different angles, creating the whiskers.
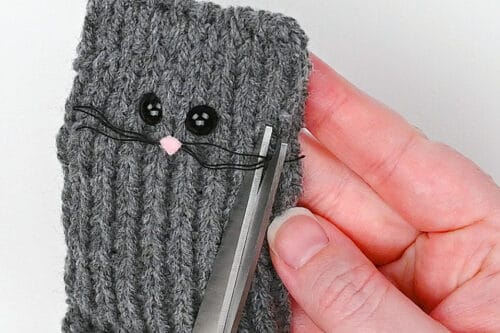
- Glue the nose to the cat’s face and cut the whiskers shorter, if needed.
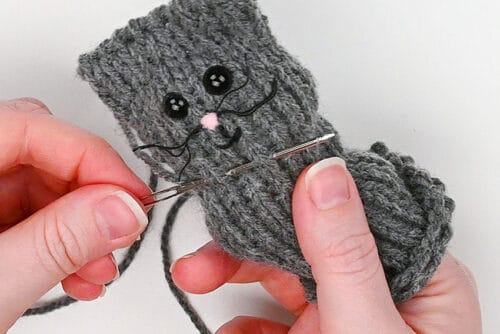
- Then use a full strand of black embroidery floss (all 6 threads) to stitch the mouth.
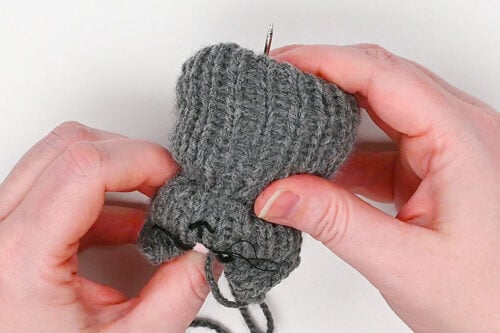
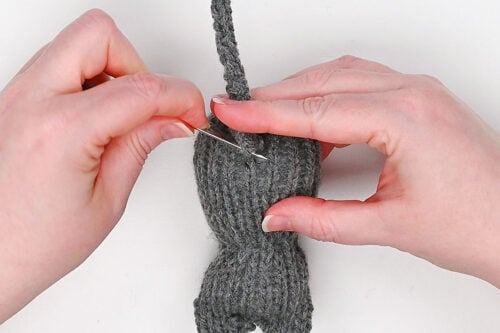
Step 8: Stuff the cat and form the head
- Add a bit of stuffing to the cat, just enough for it’s head.
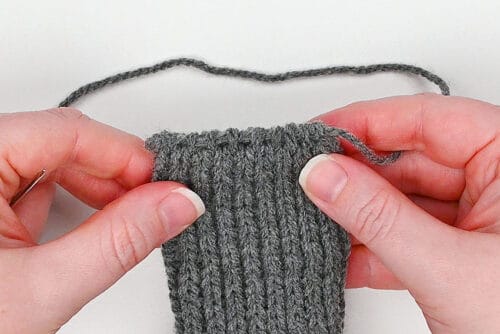
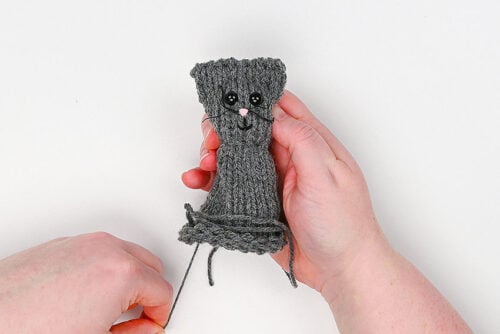
- Then bring the yarn tail down from the ears so it comes out at the side of the cat’s “neck”. Use a running stitch around the whole outside of the tube, working to keep the stitch straight across.
- Then pull the tail to tighten the running stitch. This will shape the cat’s head, making the head and body distinctive parts.Tie a knot inside to keep the gathering in place and cut off the excess yarn.
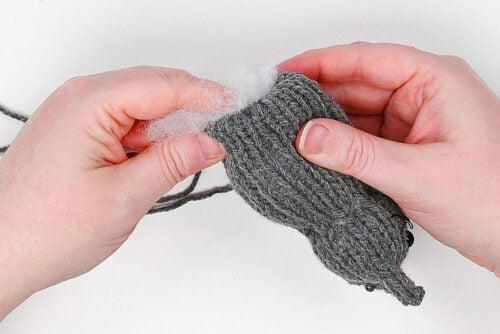
- Now stuff the rest of the body. Then pull the drawstring end to close off the cat.

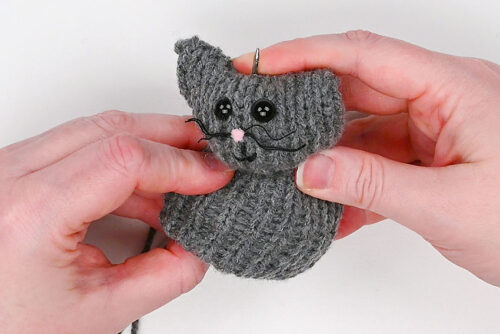
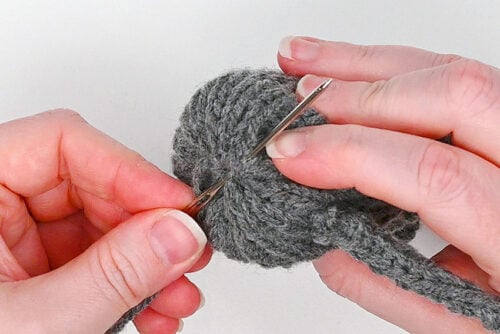
Step 9: Make the ears more pronounced
- Next we want to make the ears more pointed and create a bit of a gap between them at the top.To do this, thread a yarn needle with the drawstring tail and bring it up through the cat’s body so it comes out the top center of the head at the front. (Poor kitty… 😿)
- Bring the yarn over the top center of the head and down at the back (still near the top of the head). Push it back down through the body so it comes out the bottom.
- Pull the yarn down. You should see 2 distinctive ears form!
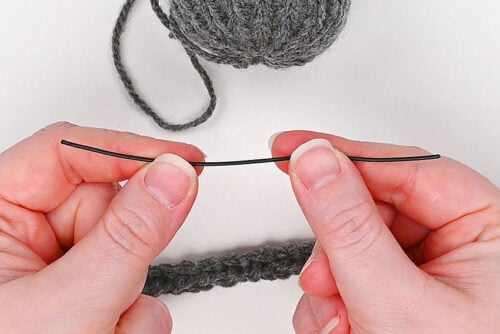
Step 10: Add the tail
- Cut a 4 inch piece of craft wire.
- Use pliers to make small loops or hooks on either end.
- String a yarn tail from the cat’s tail through one of these loops. Hold the wire in place as you sew across the loops, enveloping the wire inside the tail.
- Repeat until you get to the other side. Connect the yarn through this loop and weave in both ends, cutting off the excess.
- Use the rest of the drawstring tail to attach the cat’s tail. Sew the base of the tail to the back of the cat, sewing around until the tail feels secure.
- Then go back down through the bottom of the cat and sew around until the bottom is nicely closed off.
- Your loom knit cat is complete!
- Have fun making these adorable kitties in all your favourite coat colours, or use a different loom to create a larger cat! (Read more about this below.)

Helpful Tips:
- This pattern is very beginner-friendly and perfect if you’re new to loom knitting. All you need to do is knit a simple tube and shape it into your cat — no complicated stitches required.
- Be careful not to pull your yarn too tightly when doing a u-knit. Unlike an e-wrap knit, u-knits can easily become too tight, making it difficult to lift the loops off the pegs. Keeping your stitches a little looser will make the process much easier.

What size loom do I need to make a loom knit cat plushy?
We used an 18-peg small gauge loom (3/8-inch spacing) from Michaels to make our cat plushy.
But one of the best things about this pattern is how flexible it is. You can use whatever loom and yarn you have on hand. If you’re using a large gauge loom, try thicker yarn or double up your worsted weight yarn strands. Adjustable looms, like a Flexee loom, also work great.
If you use a different loom, you’ll just need to adjust the number of rows to get the right proportions for your cat. For example, our larger black cat was made on a 30-peg loom with 50 rounds for the body and 35 rows for the tail (worked over 5 pegs).

What size knit cat does this pattern make?
Our small cat, made with worsted weight yarn, measures about 4-1/2 inches tall. Keep in mind that the final size of your cat will vary depending on your exact yarn, loom, and tension.
We also made a larger cat on a 30-peg loom, which turned out about 6-1/2 inches tall.
How can I make a different size of loom knit cat?
Because this pattern is based on a simple knit tube, it’s easy to customize the size. Using a larger loom or thicker yarn (like bulky or super bulky) will create a bigger cat, while smaller looms and lighter yarn will make a smaller one.
You’ll also need to adjust the number of rows: more rows for a taller cat, fewer rows for a shorter one.

How can I decorate my loom knit cat?
There are lots of ways to customize your cat and make it your own. Here are a few fun ideas:
- Add cats eye safety eyes (though they may be too large for the smaller cats)
- Embroider the eyes and nose instead of using safety eyes and felt
- Glue or sew on small pieces of pink felt on the inner ears
- Add a ribbon collar with a tiny bell for extra personality (hint: Lindt bunny ribbons work perfectly!)
- Use thin wire or fishing line for the whiskers (you can use a paint marker to colour them white or black)
Each little detail you choose helps bring your cat to life and makes it completely unique!
Plus, if you’re feeling ambitious, you can even change colours while knitting to create a tuxedo cat, tortie, calico, or whatever coat pattern you’d like!

This loom knit cat is such a fun and rewarding project, especially if you’re ready to try something new beyond basic hats and scarves. It’s amazing how a simple knit tube can be shaped into such a cute and cuddly little plush, and the process is just as enjoyable as the finished result.
With so many ways to customize colours, sizes, and details, you’ll have fun creating your own unique cat — and you might just find yourself coming back to make another!
Here’s even more yarn craft ideas:


Now available
Low-Mess Crafts for Kids Book
72 cute and fun crafts that kids and parents alike can enjoy. All with as little mess as possible!
Where to buy:
You can purchase Low-Mess Crafts for Kids from Amazon, or wherever books are sold:
Amazon | Barnes and Noble | Books-A-Million | Indiebound | Amazon Canada


Leave a Reply