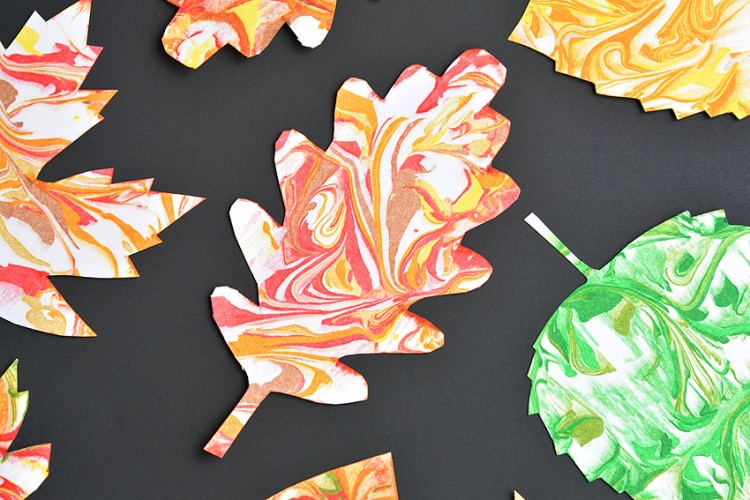
Celebrate all things fall with a leaf salt painting! Salt painted leaves are SO FUN to make and it’s such a creative autumn art project for kids.
Sprinkle table salt on white glue, then add watercolor paint to create these textured leaf paintings. Enjoy watching the paint spread across the raised salt, almost like magic — it’s so mesmerizing!

This post contains affiliate links. If you use these links to buy something we may earn a small commission which helps us run this website.
How to Make a Leaf Salt Painting
Equipment:
Watch the step-by-step video tutorial:
Instructions:
Step 1: Find what you need
- Gather your supplies and materials.


Step 2: Trace the leaf templates
- Print one of our free leaf templates (find the link in the materials list above) and then place it on a window or other light source.
- Set a piece of watercolor paper on top of the template. You should be able to see the leaf shape through the paper.
- Use a pencil to lightly trace the leaf shape onto the watercolor paper.We traced 2 leaves onto each of our half sheets of paper.


Step 3: Add glue and salt
- Trace the outline of the leaf with glue.
- Repeat, going over the second leaf with glue. You can also add veins to the center of one or both of the leaves.
- Pour a generous amount of salt on the glue, making sure it’s completely covered.
- Tilt the paper and let the extra salt fall off.You can put the paper upside-down briefly, but don’t tap or shake the paper — it can cause too much salt to fall off, and the glue may flatten.


Step 4: Add paint to the leaves
- Add drops of water onto the colours of your choice in the watercolor palette.

- Use a paintbrush to swirl around the water and add paint to your brush.
- Lightly touch the brush to the salt covered glue.Watch as the paint spreads, like magic, across the salt!
- Continue adding a little bit of paint at a time, and enjoy watching the paint spread across the salt.You can use a different colour for the veins of the leaf, if you’d like.
- Play around with blending colours or using 2 colours along the edge of the leaf.
- Your leaf salt painting is complete!


Helpful Tips:
- Pour the excess salt from your first artwork onto a plate or into a bowl and use it again for another painting!
- You can also use a light board for tracing your leaves onto the paper. An inexpensive light pad is a great drawing and crafting resource!

Free printable templates for leaf salt painting:
Use the text link below to find the leaf templates we used to make our salt painted fall leaves! There are 5 different varieties of leaves, and they’re all free to download and print.
>>> Leaf Templates <<<

What type of paper is best for a salt leaf painting?
We used watercolor paper to make our leaf salt paintings. It’s very thick and it’s meant to absorb liquid, making it the perfect choice to handle glue and paint without warping too much.
But cardstock will work as well, and it’s a lot less expensive. We used white paper as a background for our leaves, but you can easily use black or another matching fall shade.

What type of paint can you use for leaf salt painting?
Basically, you need a paint that’s liquid enough to spread across the salt and absorb into it. We used a watercolor pan set to make our salt painted leaves.
You can also use liquid watercolor paint or diluted food coloring. Try using a 3:1 water to paint ratio.

Bring out your inner artist with a leaf salt painting! Use our free printable leaf templates and a few simple supplies to create this simple fall craft. It’s super colourful and so satisfying to make!!

Here’s even more fall leaf craft ideas:


Our book Low-Mess Crafts for Kids is loaded with 72 fun and simple craft ideas for kids! The projects are fun, easy and most importantly low-mess, so the clean up is simple!

Where to buy:
You can purchase Low-Mess Crafts for Kids from Amazon, or wherever books are sold:
Amazon | Barnes and Noble | Books-A-Million | Indiebound | Amazon Canada


Leave a Reply