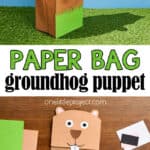
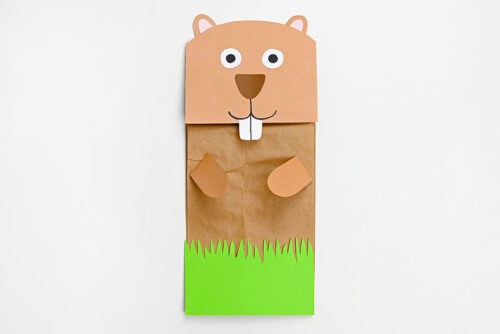
This groundhog paper bag puppet is SO CUTE! It’s a fun and simple craft that’s perfect for celebrating Groundhog Day with kids. Made with a paper lunch bag and our free printable template, it’s an easy project that comes together quickly and leaves plenty of room for creativity.
Whether you’re using it for a Groundhog Day classroom activity, a seasonal lesson, or just some hands-on crafting at home, this puppet is great for storytelling and pretend play. Kids will love putting on puppet shows and deciding whether their groundhog has seen its shadow, making it a playful way to bring this classic winter tradition to life.

This post contains affiliate links. If you use these links to buy something, we may earn a small commission at no extra cost to you. This helps support our website and allows us to keep creating fun, free content.
How to Make a Groundhog Paper Bag Puppet
Materials:
- FREE Groundhog Paper Bag Puppet Template
- Paper sandwich bag(s)
- Brown construction paper
- Cardstock (light pink, white, black, dark brown, green)
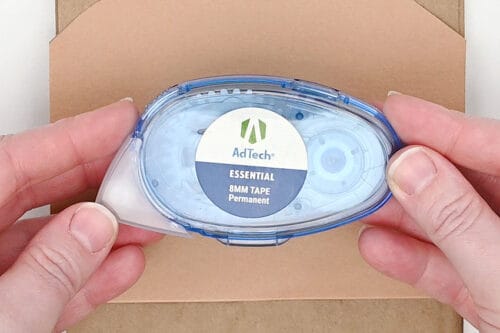
- Glue tape
- Fine tipped black marker
Equipment:
Instructions:
Step 1: Find what you need
- Gather your supplies and materials.


Step 2: Cut the template pieces
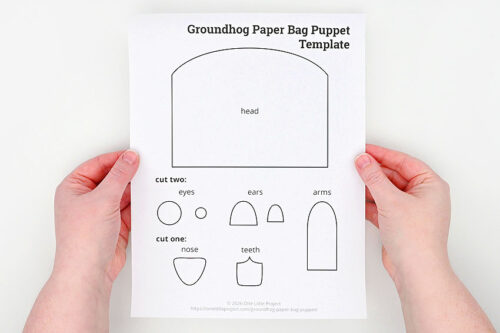
- Print our free groundhog puppet template and cut out the pieces.

- Trace the head, outer ears, and arms onto brown construction paper and cut them out.Cut the eyes and teeth from white cardstock, the pupils from black cardstock, and the inner ears from light pink cardstock.You’ll also need a green piece of cardstock 5-1/8 inches across and 3 inches tall.
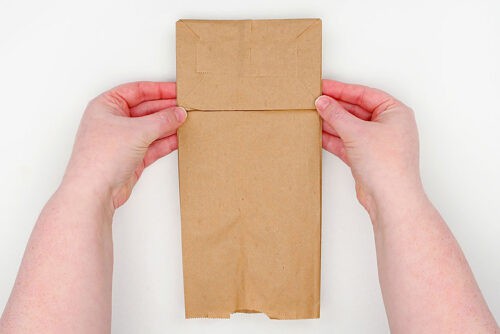
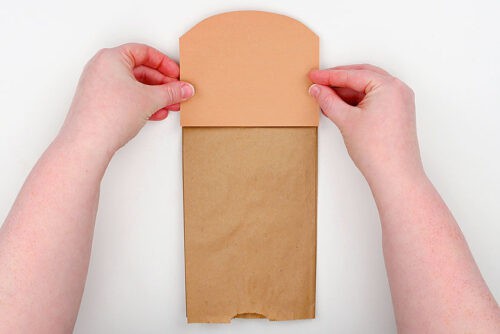
- To make your puppet you’ll need a brown paper bag. Our templates are made for a sandwich bag 5 inches across and 10 inches tall.
- We’ll be putting our puppet together with glue tape, but glue stick will also work.

Step 3: Build the groundhog
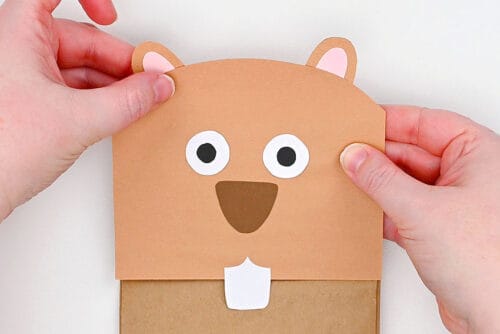
- Add glue tape to the back of the head piece (but not at the top, where it will stick out from the bag).Line up the bottom and edges, placing it on the bottom of the paper bag.
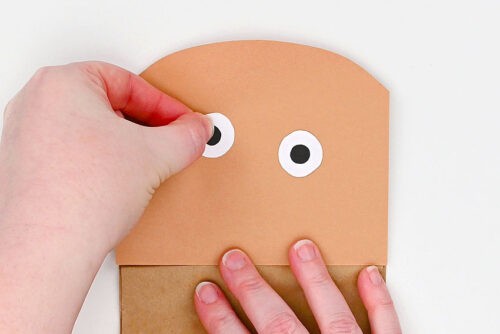
- Glue the eyes together and then glue them on the bag.
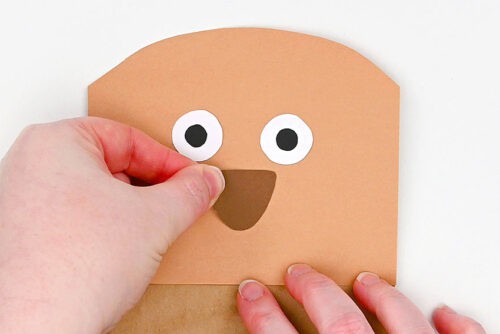
- Attach the nose in the middle of the bag, below the eyes.
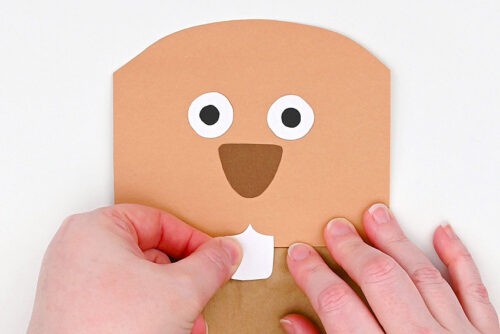
- Add glue tape to just the top of the teeth (the curved part).Attach them to the bag so they stick out below the face and so the center of the teeth lines up with the center of the nose.
- Then glue the ears together, lining up the bottom edges. Add glue tape to a small section on the front of the ears and add them to the bag of the head.
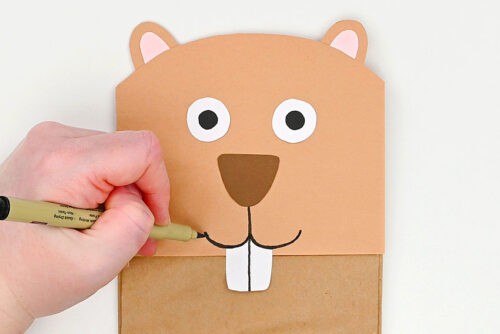
- Use a fine point black marker to draw a straight line down from the nose onto the center of the teeth.Then draw a smiling mouth that lines up with the curve of the teeth. (It’s best to draw from the center outward.)
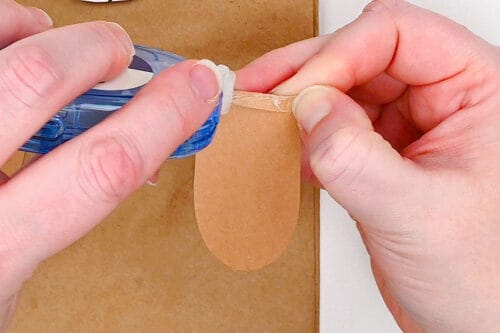
- Bend the flat part of the arms down about 1/4 inch or so. Add glue tape to these folds.
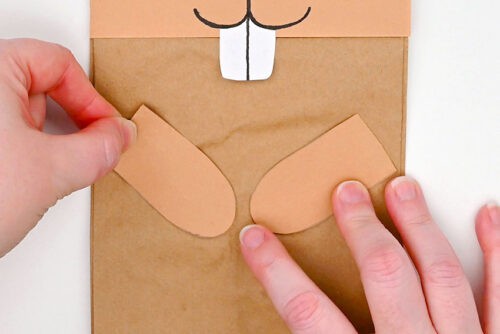
- Then attach the arms to the bag so they point down and in.
Step 3: Decorate the bag
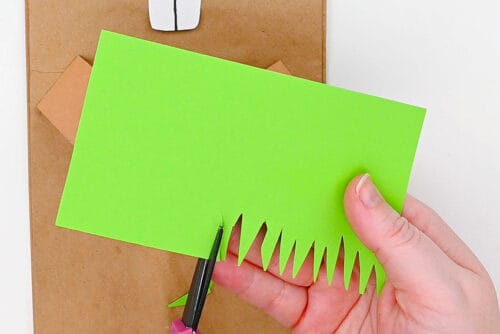
- Cut long points from a long side of the green cardstock. Vary the size and how far down they go.These will be the grass blades that the groundhog is popping up from.
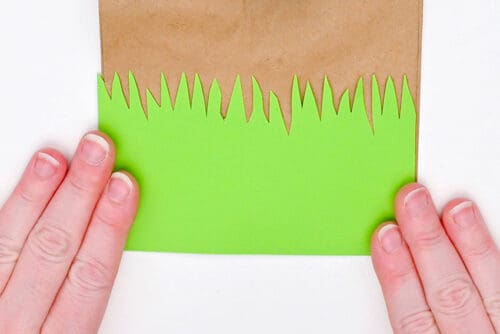
- Attach the grass to the bottom of the bag, lining up the bottom and side edges nicely.
- Your groundhog paper bag puppet is complete!
Helpful Tips:
- Careful with the glue: Don’t add glue tape on the very top of the groundhog’s head. If you have glue sticking out above the paper bag it can grab onto the table (and other surfaces) and make the puppet annoying to play with.
- Draw the mouth from the center out: Starting in the middle helps the mouth line up nicely with the teeth and keeps the face looking even.

Get our free printable groundhog puppet template:
The link below will take you to our free, printable groundhog paper bag puppet template! The PDF file will open in a new window. Then simply print the pattern on 8.5 x 11 (letter size) printer paper or cardstock.
>>> Groundhog Puppet Template <<<

What type of paper should I use for this groundhog paper bag puppet?
We used a mix of construction paper and cardstock. Cardstock is the best choice, because it holds its shape well, but brown construction paper is the perfect colour to match the paper bag.
You can also use scrapbook paper or even printer paper — just keep in mind that thinner paper can curl a bit more.
What’s the best glue for a paper bag puppet?
We love glue tape; it’s like a glue stick, but stronger and it grips paper really well. A glue stick works great too and keeps everything neat and low-mess.
You can use tacky glue, but apply it sparingly, as too much will wrinkle the paper.

Do I have to add the grass to my groundhog puppet?
No, there are lots of other fun ways to customize your groundhog! On the groundhog puppet we made last year we used cotton balls and snowflake confetti to represent snow. You can also use dark brown paper or felt to create a little mound of earth.
For extra personality, try gluing on a paper scarf, or cut out a tiny hat to turn your groundhog into a fun character. You could even give him glasses or a wristwatch!

This groundhog paper bag puppet is such a fun way to celebrate Groundhog Day with kids. Between the simple supplies and the free printable template, it’s an easy craft that turns into hours of creative play. This little groundhog is sure to bring smiles — and maybe a few shadow predictions too!
Here’s even more groundhog craft ideas:


Now available
Low-Mess Crafts for Kids Book
72 cute and fun crafts that kids and parents alike can enjoy. All with as little mess as possible!
Where to buy:
You can purchase Low-Mess Crafts for Kids from Amazon, or wherever books are sold:
Amazon | Barnes and Noble | Books-A-Million | Indiebound | Amazon Canada


Leave a Reply