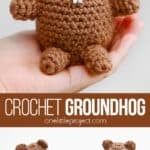
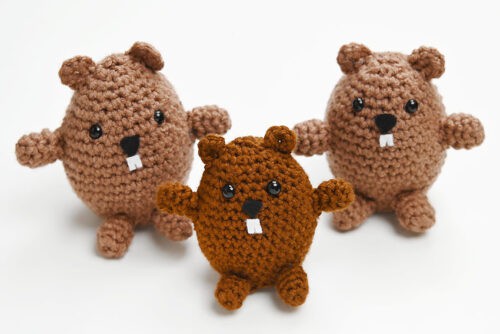
This crochet groundhog is SO CUTE! This chubby little groundhog amigurumi is quick to make, uses simple stitches, and is a fun project for both beginners and advanced crocheters. Plus it’s a great way to use up brown yarn from your stash!
Use the FREE crochet groundhog pattern below or grab the printable, ad-free pattern with BONUS Quick Guide from our Etsy shop. This whimsical groundhog crochet project is perfect for Groundhog Day, woodland-themed nurseries, or as a sweet handmade gift for kids and animal lovers. So grab your yarn and crochet hook, and let’s get started!

This post contains affiliate links. If you use these links to buy something, we may earn a small commission at no extra cost to you. This helps support our website and allows us to keep creating fun, free content.
How to Make a Crochet Groundhog
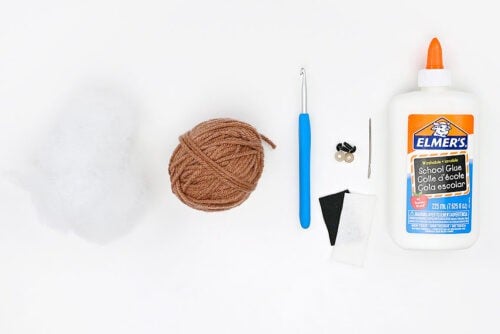
Materials:
- Worsted weight yarn (brown)
- Polyester fiber fill
- Safety eyes (7mm)
- Felt (black and white)
- White glue
- Crochet Groundhog Pattern (No Ads)
Equipment:
Instructions:
Find what you need:
- Gather your supplies and materials.

Body:
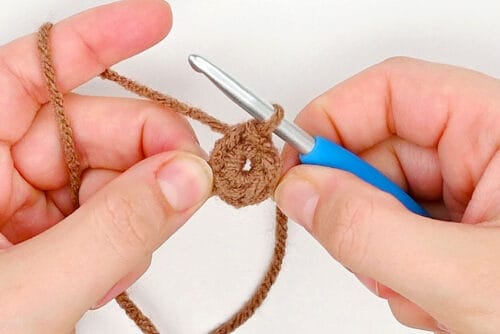
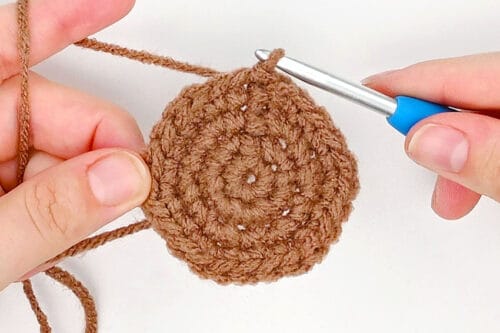
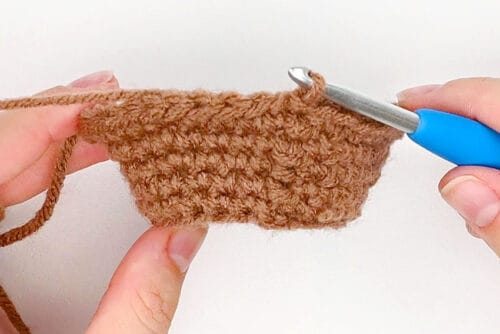
- Round 1: Insert 6 single crochet into a magic circle. Pull the tail to tighten and slip stitch into the first st to join the round. (6)
- Round 2: Chain 1 and insert 2 sc in each st around (an increase). Sl st into the first st to join the round. (12)
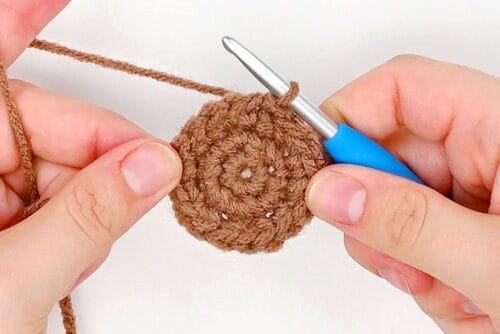
- Round 3: Ch 1 and *insert 1 sc into the first st. Inc in the next st*.Rep from * to * around. Sl st into the first st to join the round. (18)
- Round 4: Ch 1 and *insert 1 sc into each of the first 2 sts. Inc in the next st.*Rep from * to * around. Sl st into the first st to join the round. (24)

- Round 5: Ch 1 and insert 1 sc into the BLO of each st around.Sl st into the first st to join the round. (24)
- Round 6: Ch 1 and insert 1 sc into each st around.Sl st into the first st to join the round. (24)
- Round 7: Ch 1 and *insert 1 sc into each of the first 3 sts. Inc in the next st.*Rep from * to * around. Sl st into the first st to join the round. (30)
- Round 8: Ch 1 and insert 1 sc into each st around.Sl st into the first st to join the round. (30)
- Round 9: Ch 1 and *insert 1 sc into each of the first 4 sts. Inc in the next st.*Rep from * to * around. Sl st into the first st to join the round. (36)
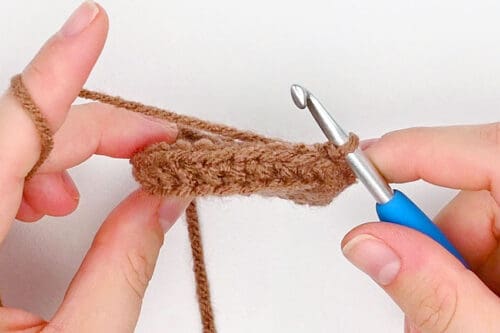
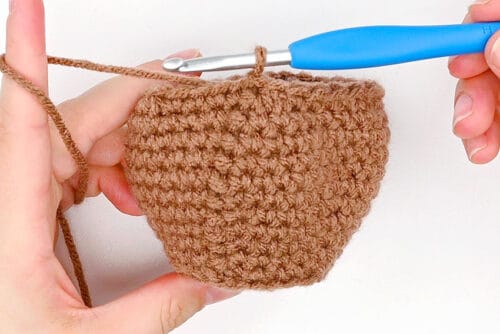
- Rounds 10–14: Ch 1 and insert 1 sc into each st around.Sl st into the first st to join the round. (36)
- Round 15: Ch 1 and *insert 1 sc into each of the first 4 sts. Sc the next 2 sts together (a decrease).*Rep from * to * around. Sl st into the first st to join the round. (30)
- Round 16: Ch 1 and insert 1 sc into each st around.Sl st into the first st to join the round. (30)
- Round 17: Ch 1 and *insert 1 sc into each of the first 3 sts. Dec across the next 2 sts.*Rep from * to * around. Sl st into the first st to join the round. (24)
- Round 18: Ch 1 and insert 1 sc into each st around.Sl st into the first st to join the round. (24)
- Round 19: Ch 1 and *insert 1 sc into each of the first 2 sts. Dec across the next 2 sts.*Rep from * to * around. Sl st into the first st to join the round. (18)
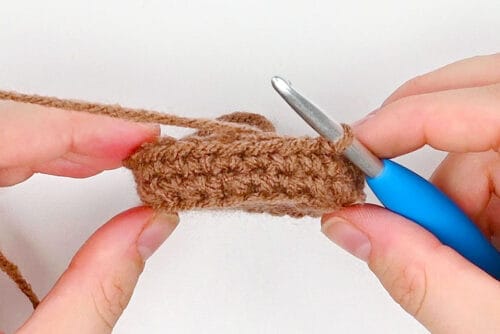
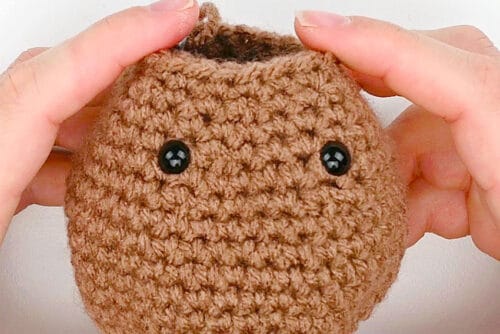
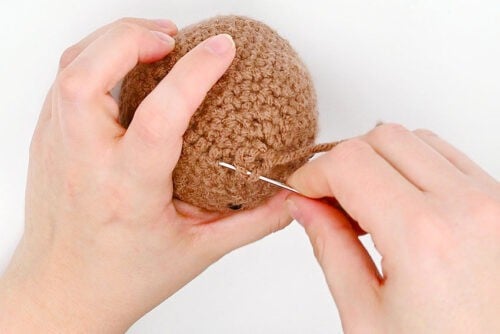
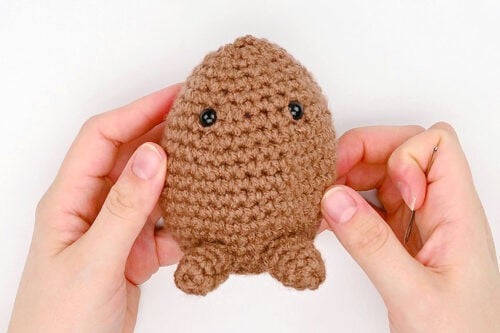
- Insert safety eyes between rounds 13 and 14, placing them 4 to 6 sts apart. Secure the eyes with the backings.
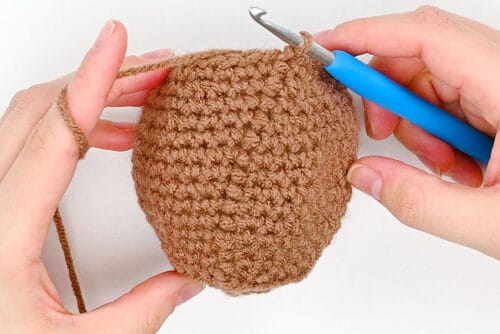
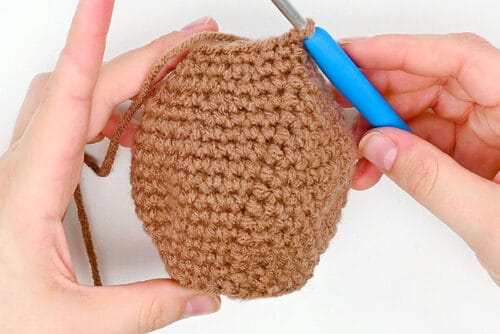
- Round 20: Ch 1 and insert 1 sc into each st around.Sl st into the first st to join the round. (18)
- Stuff the body with poly-fil until it’s firm and holds its shape.
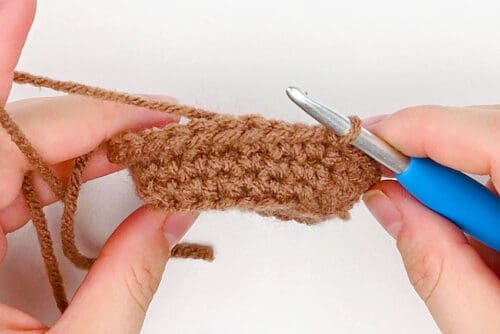
- Round 21: Ch 1 and *insert 1 sc into the first st. Dec across the next 2 sts.*Rep from * to * around. Sl st into the first st to join the round. (12)
- Round 22: Ch 1 and dec around.Sl st into the first st to join the round. (6)
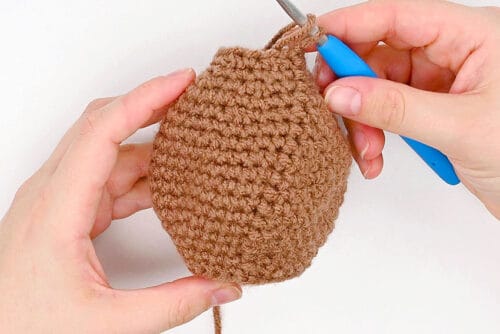
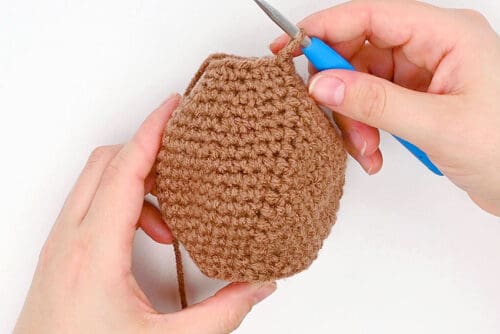
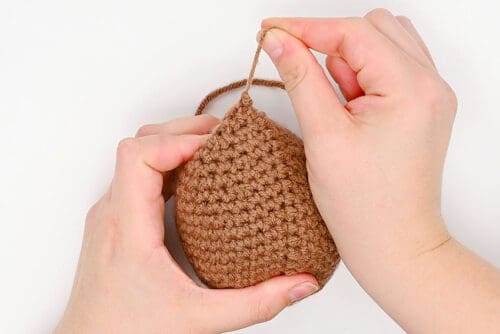
- Fasten off the yarn.
- Sew the tail through the sts in the last round and pull to close the gap. Then weave in the tail, tucking the end into the body.


Arms and Legs:
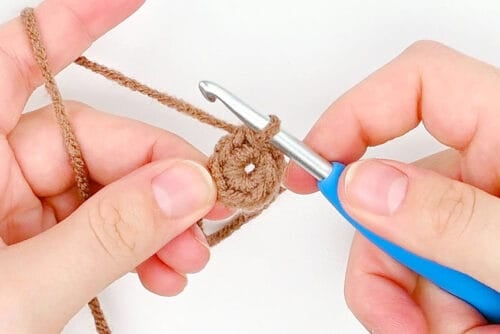
- Round 1: Insert 6 sc into a magic circle.Pull the tail to tighten and sl st into the first st to join the round. (6)
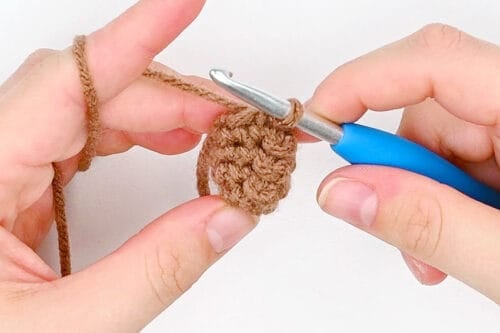
- Rounds 2–4: Ch 1 and insert 1 sc into each st around.Sl st into the first st to join the round. Fasten off the yarn, leaving a 6 inch tail. (6)
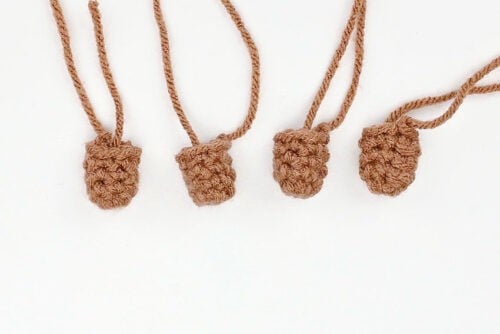
- Rep Rounds 1–4 three more times to make 4 pieces total (2 arms and 2 legs).
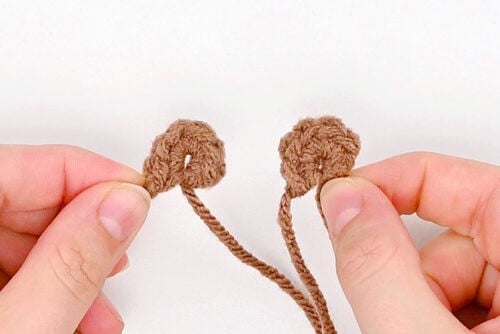
Ears:
- Insert 6 sc into a magic circle. Pull the tail to tighten, but DO NOT join the round — keep the circle open.Rep to make a second ear. (6)
Assembly:
- Add a small amount of stuffing into the legs. Attach them to the bottom front of the body, sewing along rounds 1 and 2 and placing the feet 2 to 3 sts apart.
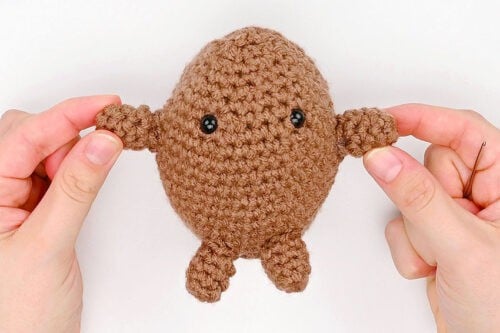
- Then stuff the arms and attach them to the sides of the body, sewing them between rounds 12 and 13.
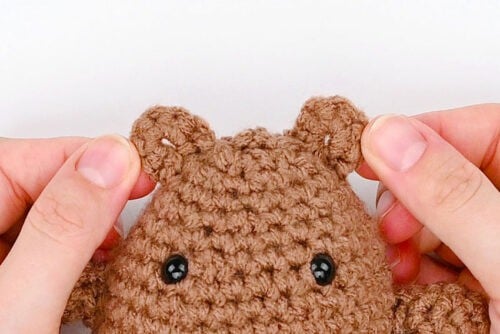
- Sew the ears on, placing them on either side just below the last round.
Face:
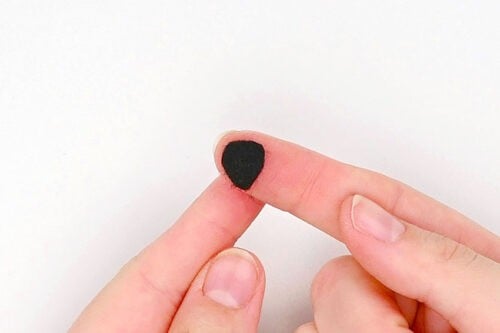
- Cut a small rounded triangle from black felt for the nose.
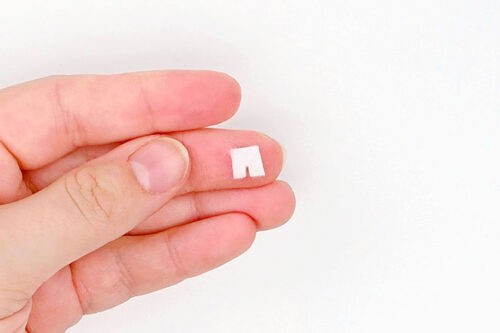
- Then cut a small square from white felt. Cut a slit in the felt, going up about half way, creating a gap in the teeth.
- Add a small amount of glue to the back of the nose.
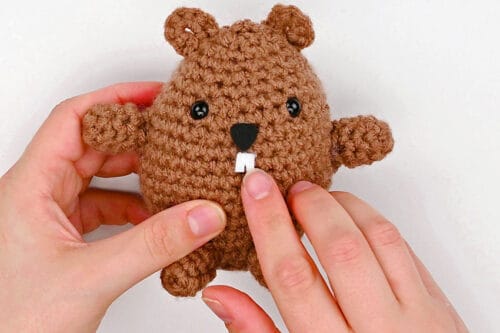
- Attach the nose in the center of the face and then glue the teeth directly below.
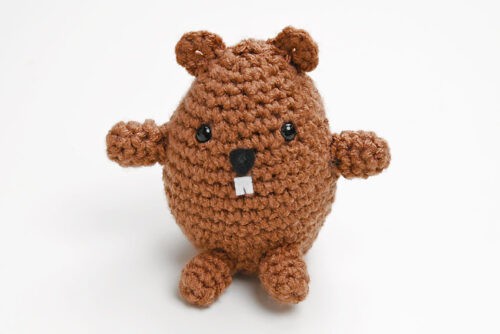
- Your crochet groundhog is complete!
- Have fun making these cute crochet animals in your favourite shade of brown.Or use different yarn weights to create different sizes of groundhogs! (Read more below.)

Helpful Tips:
- We write all our crochet patterns in English using US terminology.
- New to crochet? Master the stitches with our crochet basics posts! These step-by-step instructional guides are perfect for beginners, offering helpful tips and answering FAQs.
Crochet Abbreviations & Terms:
This pattern uses standard US crochet terms. Here’s what each abbreviation means:
BLO = back loop only
ch(s) = chain(s)
dec = decrease
inc = increase
rep = repeat
sc = single crochet
sl st = slip stitch
st(s) = stitch(es)

Download our crochet groundhog pattern:
You can follow the full crochet groundhog pattern with step-by-step instructions for free right here in this post (supported by ads). Or, if you’d like a printable amigurumi groundhog PDF pattern with BONUS Quick Guide, you can grab it in our Etsy shop. It’s perfect to keep by your side as you crochet!
Printable Crochet Groundhog Pattern
Get the printable Crochet Groundhog Pattern PDF with step-by-step photos + BONUS Quick Guide in our Etsy shop!

What size crochet groundhog does this pattern make?
This mini groundhog is about 4 inches tall (including ears) and 4-3/4 inches across (including arms).
You can easily size the groundhog plush up or down by using different yarn weights and adjusting your hook size accordingly. Even using a worsted weight yarn that’s thinner than usual will result in a much smaller groundhog.

Do I have to use safety eyes for this crochet groundhog amigurumi?
Nope, you can also keep the groundhog completely soft. You can cut small circles from black felt for the eyes as well and then glue them on.
Or, you can embroider the eyes with yarn or embroidery floss instead of using safety eyes. This is safer for kids under 3 years old, for whom safety eyes aren’t recommended.

This crochet groundhog is such a fun little project to make, and it’s one you’ll be tempted to work up more than once. Whether you gift it to an animal lover or add it to your amigurumi collection, this cuddly groundhog is sure to bring a smile. Have fun customizing the colours or details, and enjoy watching your groundhog come to life stitch by stitch!
Here’s even more crochet pattern ideas:


Now available
Low-Mess Crafts for Kids Book
72 cute and fun crafts that kids and parents alike can enjoy. All with as little mess as possible!
Where to buy:
You can purchase Low-Mess Crafts for Kids from Amazon, or wherever books are sold:
Amazon | Barnes and Noble | Books-A-Million | Indiebound | Amazon Canada


Leave a Reply