
These Easter gnomes are such a cute way to decorate for spring! With their tall striped hats, fluffy beards, and sweet bunny ears, they make a playful twist on classic gnome decor. Holding a tiny carrot or Easter egg, these little guys will look right at home as part of your seasonal decor.
Making your own Easter gnome craft is a fun way to add a cozy handmade touch to your spring decorating. Whether you display them as Easter decor, tuck them into a centerpiece, or give them as a thoughtful handmade gift, these adorable bunny gnomes are sure to bring a little extra charm to your home!

This post contains affiliate links. If you use these links to buy something, we may earn a small commission at no extra cost to you. This helps support our website and allows us to keep creating fun, free content.
DIY Easter Gnomes
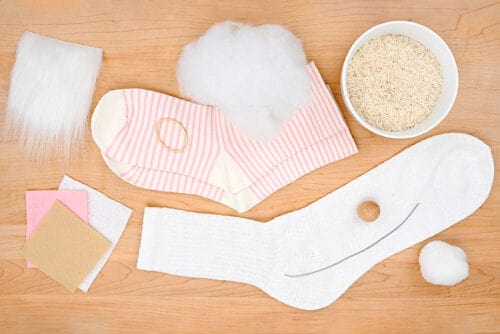
Materials:
- Striped socks
- White sock
- Polyester fiber fill
- 12 gauge Wire
- Felt (tan or other skin tone)
- Rice
- Rubber band
- Gnome beard
- Felt (white and pink)
- Wooden ball (1 inch)
- Faux carrot decoration
- Large white pom pom(s) (2 inch)
Instructions:
Step 1: Find what you need
- Gather your supplies and materials.

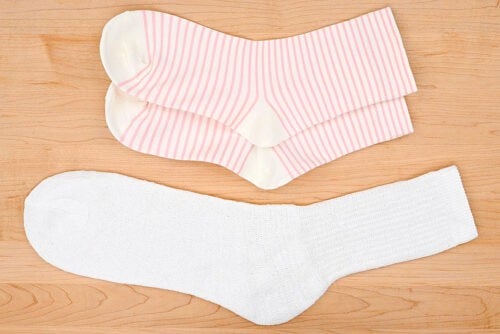
Step 2: Make the gnome’s hat
- To make this Easter gnome, you’ll need 3 socks: 1 solid white for the body and 2 in a pastel colour or striped pattern for the hat, arms, and feet.
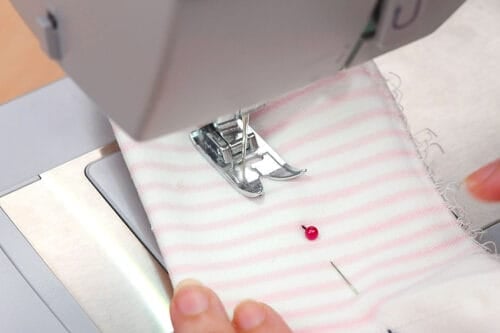
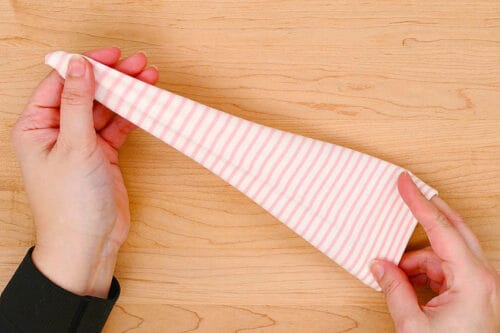
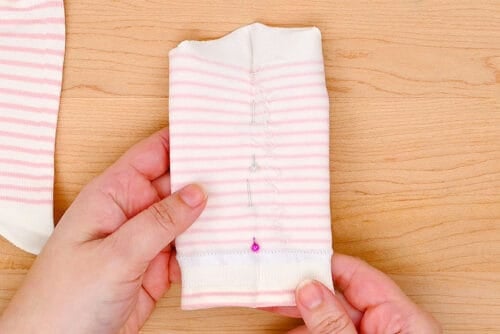
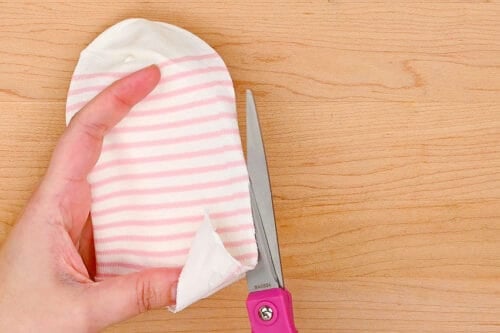
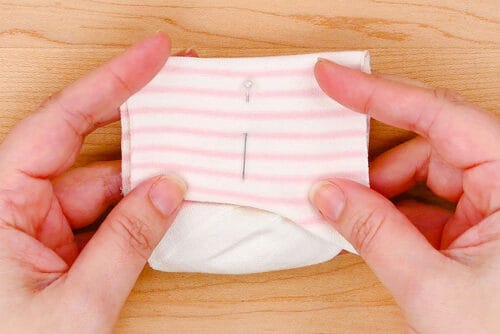
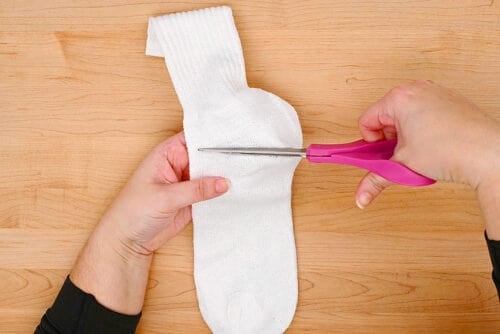
- Turn one of the striped socks inside out and use sewing pins to create a curved line across the sock from one side to the other, creating a hat shape about 10 inches long.Don’t include the toes or heel in the “hat” area.
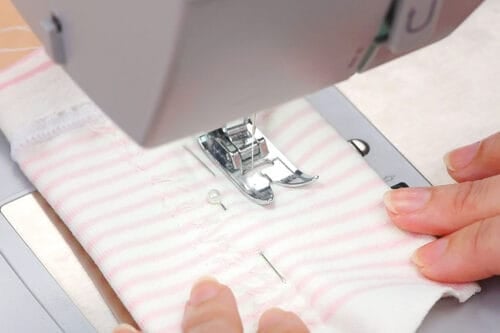
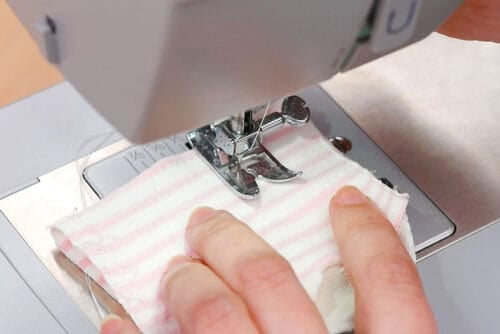
- Sew along the pin line to create a pointed hat. You can use a sewing machine or sew the hat by hand.

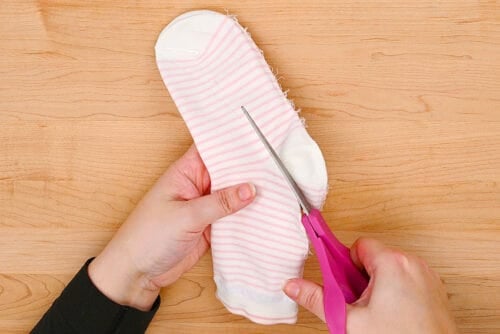
- Cut off the excess fabric, creating a 1/2 inch seam.
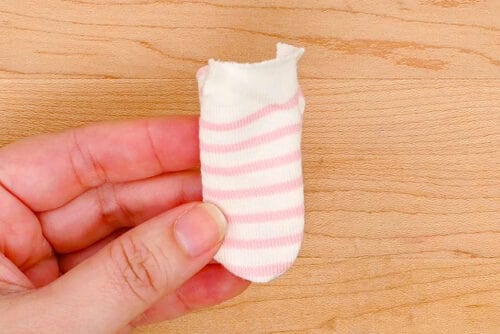
- Turn the hat right side out. Adjust it so the seam is at the back of the hat.
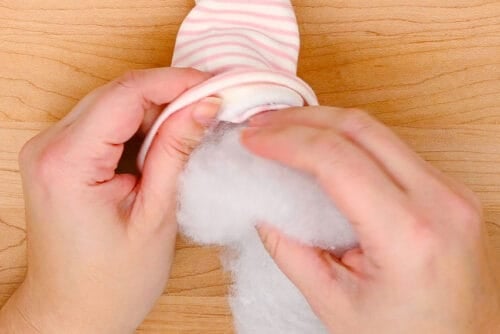
- Add poly-fil stuffing into the hat, so that about 3/4 of it is loosely stuffed.
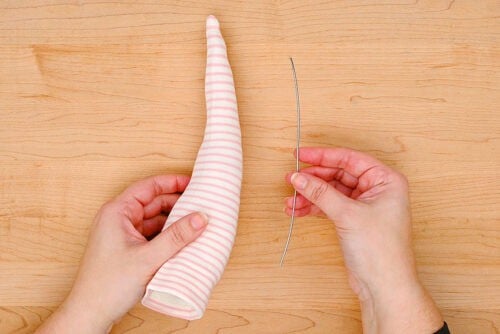
- Then cut an 8 inch piece of wire.
- Add the wire into the hat, pushing it into the stuffing so it goes to the top of the hat. Curve the top of the hat down to whatever jaunty angle you like.

Step 3: Make the gnome’s arms
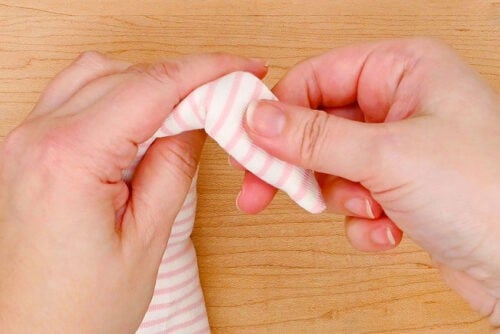
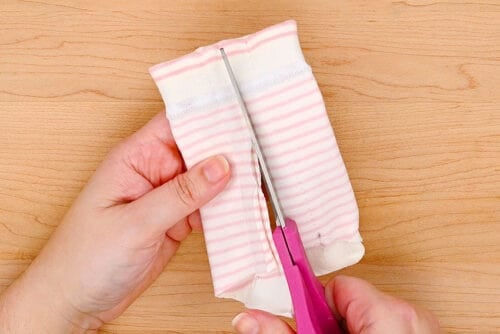
- Cut the 2nd striped sock in half horizontally, at around the heel mark. Put a line of pins going down the center of the ankle part of the sock.
- Sew a line on either side of the pins, creating tube sections about 7 inches long.
- Cut the sock in half.
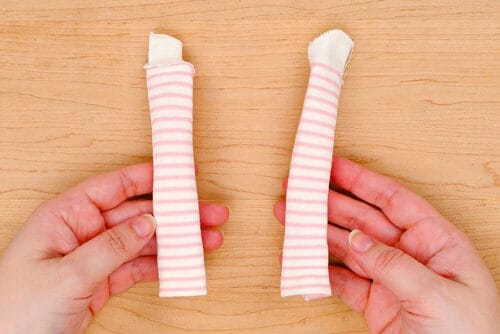
- Turn each piece right side out. These are the gnome’s arms!
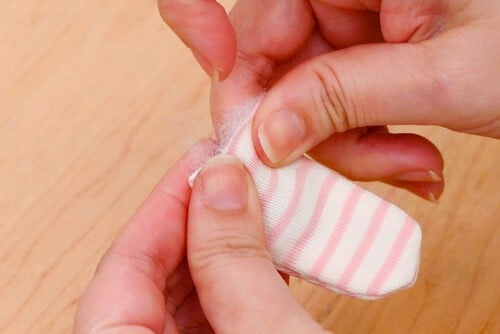
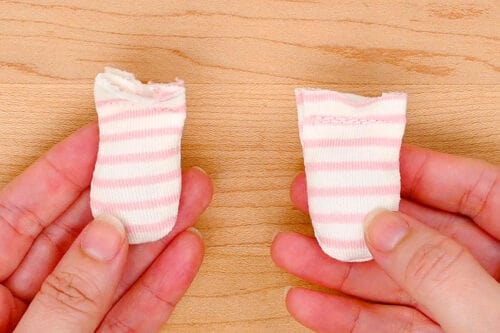
Step 4: Make the gnome’s feet
- Cut the heel section of the sock into 2 pieces, separating the front and back sides.
- Fold these pieces in half, putting the pattern on the inside. Add a pin to the middle of each of them.
- Sew a “U” shape into these sock pieces, with the top of the “U” being the open part of the fabric.
- Cut around the sewing to create a small seam allowance and then turn them right-side out.
- Add a small amount of stuffing into each “pocket”.
- Sew across the opening of the pieces, creating the gnome’s feet!
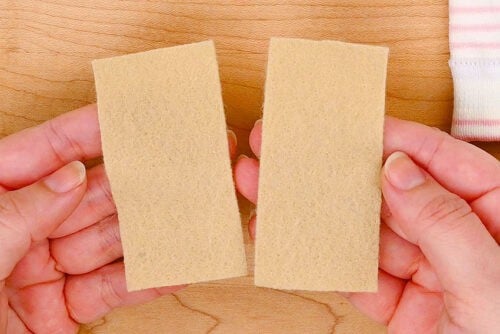
Step 5: Make the gnome’s hands
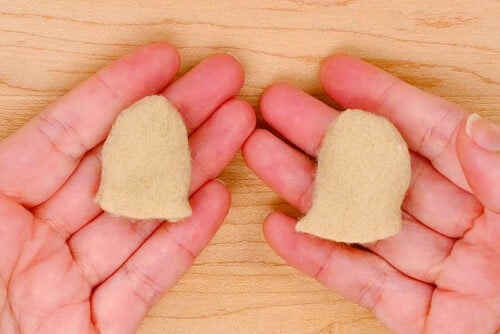
- To make the gnome’s hands, cut 2 rectangles of tan felt about 3 inches long by 1-1/2 inches wide.
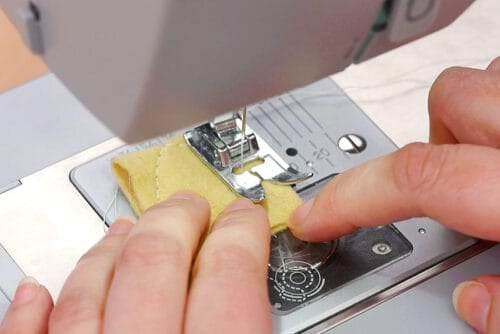
- Fold the felt pieces in half. Sew another “U” shape onto each of the pieces.
- Trim around the sewing, flip them right-side out, and then add a bit of stuffing inside the hands.
Step 6: Make the gnome’s body and attach the arms and feet
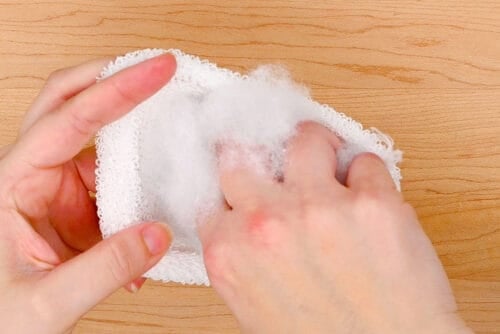
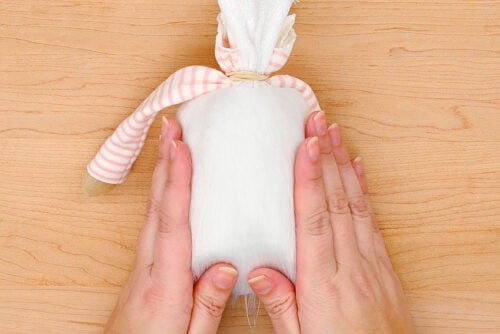
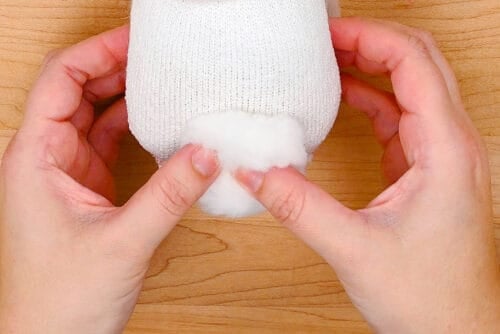
- Cut the toe portion off an adult sized white sock, just before the heel.
- Add 1 cup of dried rice into the bottom of the sock.
- Then add stuffing into the gnome body until you’re happy with the size and firmness.Leave a space at the top, at least 1 inch tall.
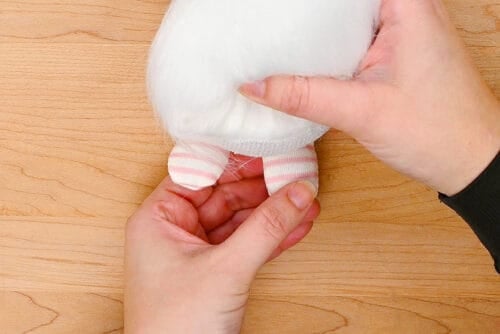
- Place the hands into the arms of the gnome. Secure them with a dot of hot glue on either side.
- Hold the arms on either side of gnome’s body and use a rubber band to close off the body, connecting the arms to it.
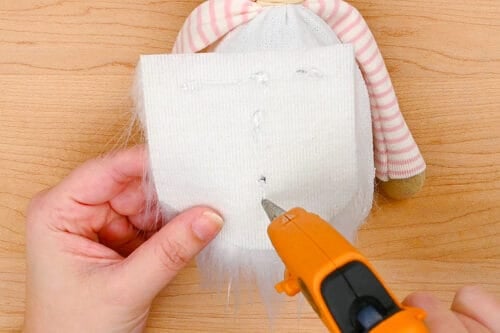
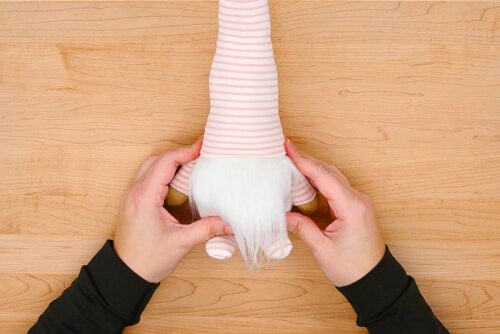
- Add a “T” shape of glue to the back of the beard.
- Attach the beard to the front of the gnome, just below the rubber band.
- Now glue the feet to the bottom of the gnome, so they’re sticking out the front.


Step 7: Add the hat and bunny ears
- Stretch the hat onto the sock body, pulling it down enough that it overlaps the beard by at least 1 inch.This will be easier if you’ve stretched out the body nicely so it’s tall rather than squat. Once you’ve added all the rest of the pieces you can glue the hat on the sides to keep it in place.
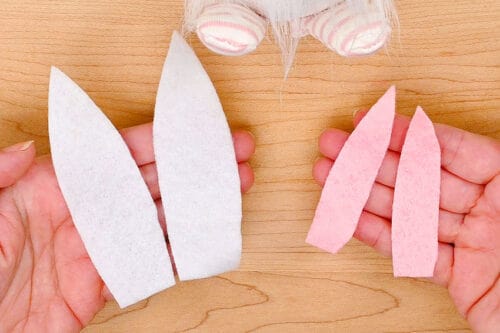
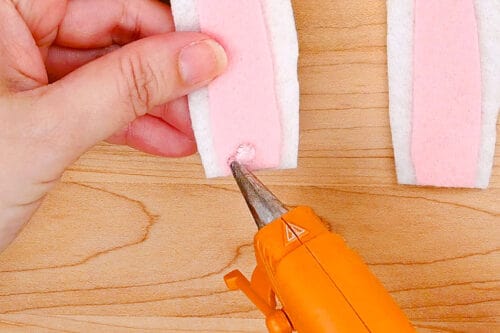
- Cut bunny ears from white felt and inner ears from pink felt.The white ears should be about 4 inches tall and 1-1/2 inches wide at the bottom. The inner ears are 3-1/4 inches tall and just under 3/4 inch wide.
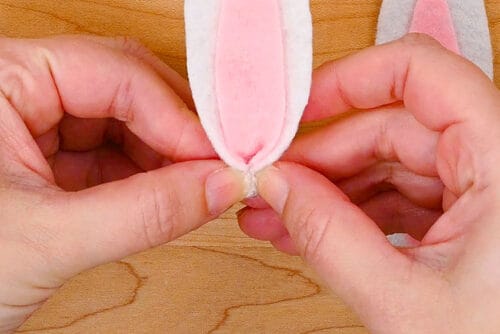
- Glue the inner ears onto the outer ears, lining up the bottoms. Then add a dot of hot glue to bottom center (on the front).
- Pinch the ear in at the bottom, creating a more 3D ear. Repeat with the second ear.
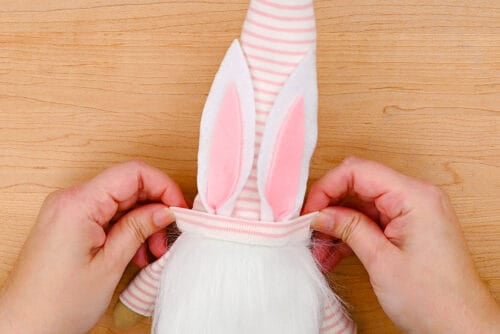
- Glue the ears to the front of the hat, about 1 inch up from the bottom. Then fold the hat up, creating a little cuff.
Step 8: Add the nose and finished touches
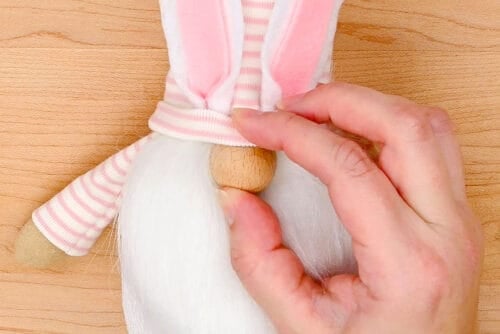
- Use hot glue to attach the wooden ball nose to the gnome. Pull the hat down over it a bit and glue this in place.
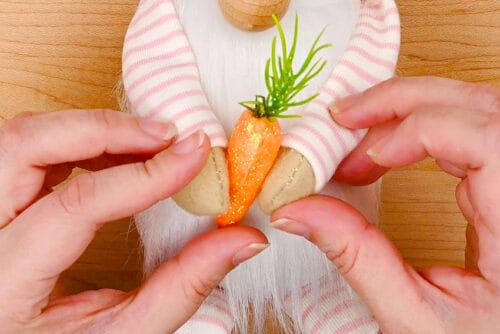
- These gnomes look really adorable holding a small Easter symbol. Here we’ve given the gnome a carrot to hold, gluing it to both of its hands so it stays in place.
- Finally, glue a large white pom pom to the back of the gnome, creating a bunny tail.
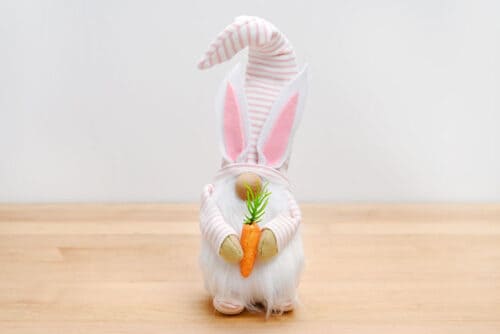
- Your Easter gnome is complete!
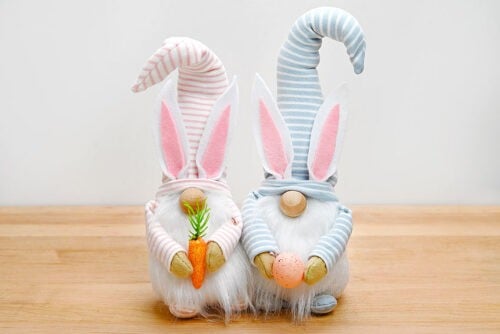
- Now make a friend for your gnome! These Easter gnomes look so cute with different colours or patterns of hats.
Helpful Tips:
- Use different socks for unique gnomes: Try different colours, patterns, or pastel stripes to give each Easter gnome its own personality.
- Customize the design: You can easily leave off the arms or feet if you prefer a simpler look, like we’ve done with some of our other gnome crafts. Feel free to adjust the design and make your Easter gnome however you like!

Where can I get beards for my Easter gnomes?
You can buy specific “gnome beards” online. They often come with the wood ball noses, too! If you want to add a whimsical touch you can even find pastel beards for your Easter gnome!
You can also use the template and instructions in our Valentine gnome post to make your own gnome beard from faux fur. When you cut the fur make sure the long fur is going the right way and gently use a craft knife on the back of the fur, instead of using scissors. This will preserve the look of the long pile fur.

What can I use to stuff my Easter gnome?
We filled our gnomes with rice and poly-fil stuffing. The rice adds weight to the bottom so the gnome stands up nicely, while the fiberfill keeps the body soft and plush.
You can also use dried beans, poly pellets, or aquarium gravel for the weighted base. For the soft stuffing, you can also use stuffing from an old pillow or even fabric and yarn scraps.

What can my Easter gnome hold?
There are lots of cute options! Your gnome can hold:
- a small carrot
- an Easter egg
- a tiny Easter basket
- faux spring flowers
- a miniature chocolate bunny decoration (you can even make one from brown felt!)
Feel free to get creative and customize your gnome with whatever spring or Easter items you like.

These Easter gnomes are such a fun way to add a little handmade charm to your spring decorating and they’re SO EASY to customize! Try different sock patterns and colours, and a variety of little props to give each gnome its own personality. Whether you make just one or a whole group, these cozy bunny gnomes are sure to bring a cheerful touch to your Easter decor!
Here’s even more Easter craft ideas:


Now available
Low-Mess Crafts for Kids Book
72 cute and fun crafts that kids and parents alike can enjoy. All with as little mess as possible!
Where to buy:
You can purchase Low-Mess Crafts for Kids from Amazon, or wherever books are sold:
Amazon | Barnes and Noble | Books-A-Million | Indiebound | Amazon Canada


Leave a Reply