These fall gnomes are too cute!! Every year we see the signs of autumn. A crisp fall breeze, leaves falling from the trees, and, of course, gnomes. Gnomes?! Yes, these adorable fall gnomes are the perfect way to add whimsy to your seasonal decor!
With their cute beards, cozy hats, and vibrant autumn colours, these DIY gnomes are the perfect fall craft. And they’re really easy to make using simple supplies! Follow along to create your own fall gnome friend that will make everyone smile.

This post contains affiliate links. If you use these links to buy something we may earn a small commission which helps us run this website.
How to Make Fall Gnomes
Materials:
- Free Printable Fall Gnomes Template
- Fall patterned tea towel (or fabric)
- Grey sock (or other colour)
- Rice
- Polyester fiber fill
- Felt (peach or cream colour)
- Rubber band
- Gnome beard
- Wooden ball (1 inch)
- Faux acorns (or fall leaves or flowers)
- Pinecone (or pumpkin, etc)
Equipment:
- Sewing machine (or needle and thread)
Watch the step-by-step video tutorial:
Instructions:
Step 1: Find what you need
- Gather your supplies and materials.


Step 2: Make the fall gnome hat
- Print our free fall gnome template (find the link in the materials list above!) and cut out the hat piece.
- Place the hat pattern on the back of the tea towel (or other hat material) and trace around it with chalk or a gel pen. Then cut out the hat.You can also pin the pattern in place and cut around it.
- Fold the hat in half, with the right side in, and sew the straight edges together.If you’re using burlap for the hat you can use a hot glue gun and overlap the two sides slightly.
- Turn the hat right side out, so that the pattern is facing out and the seam is on the inside.


Step 3: Stuff the gnome’s body
- Cut the toe portion off an adult sized grey sock, just before the heel.Set the top part aside for later.
- Add 1 cup of dried rice to the bottom of the sock. This will stop the gnome from falling over.
- Now add stuffing to the gnome body until you’re happy with the size and firmness of it. Leave a space at the top, at least 1 inch tall.


Step 4: Make the arms
- Cut the top of the sock into two long halves.

- Fold each piece in half, lengthwise, with the inside of the sock facing out. Pin the edges in place.
- Sew down the long edges of both sock pieces to create narrow tubes.
- Use your fingers or a loop turner hook to turn the tubes right side out, hiding the seams inside.These are the gnome’s arms.
- Compare the arms to the gnome body and see how long you want them to be. We cut ours to about 6 inches long.


Step 5: Make the hands
- Cut 2 pieces of peach/cream felt to be 2 by 4 inches in size.
- Fold one of the pieces in half and sew the two sides together in a “U” shape, with an opening at the top.Repeat with the second piece of felt.
- Flip the felt pieces right side out, creating little rounded hands for the gnome.Add a bit of stuffing to each hand to give them dimension.


Step 6: Connect the arms and hands
- Add a small line of glue to both sides of the hand near the opening.
- Place the hand inside one of the ends of the arms. Repeat, attaching the second hand to the other arm.


Step 7: Piece together the fall gnome
- Place one arm on either side of the gnome body, with the hand side facing down. Make the tops of the arms even with the top of the body.
- Gather the arms and the body together.
- Use a rubber band to close off the top of the sock and connect the arms to the body. If you don’t have an elastic you can also use a piece of string.To keep the arms in place more easily you can also glue them to the body first.
- Add a line of hot glue to the top back of the beard. Then add more glue going down the middle.Attach the beard to the body just below the rubber band.
- Add glue to one side of the wooden ball and attach it towards the top center of the beard, creating the gnome’s nose.


Step 8: Add the gnome’s hat and fall accessories
- Set the gnome hat on your gnome with the seam towards the back. Then roll up the front of the hat and add a bit of hot glue just above the nose.
- Roll the hat back down so the glue sticks to the top of the nose, connecting it in place.
- Turn the gnome around, roll up the hat at the back, and add a line of glue to the sock.Again, roll the hat back down and hold it in place until the glue is dry.
- Add glue to whatever embellishments you have for the hat. We decided to add acorns.
- Set the acorn in place towards the front side of the hat. Repeat with more acorns and any other embellishments, like faux berries.Hold them in place as the glue dries, or else they may slide down or fall off.
- Finally, add a bit of glue to the inside of one of the gnome hands.
- Place the pinecone (or other fall decor of choice) into the glue so it looks like the gnome is holding it.Connect the other hand to the opposite side of the pinecone with hot glue.Again, hold the hands and pinecone in place until the glue dries.
- Your fall gnome is complete!


Helpful Tips:
- Give your gnomes different colours of hats to ensure each gnome has a unique personality! We used burlap, red, and a fall leaf pattern.
- Making gnomes is a great way to use up lone socks! We used grey socks for our gnomes, but you could also use white, black, or any fall colour.
- If the gnome hat is too slouchy and wants to fall down you can add some stuffing inside the hat before gluing it into place.

Get our free printable fall gnomes pattern:
The link below will take you to our free, printable fall gnome hat template! The PDF file will open in a new window. Then simply print the pattern on 8.5 x 11 (letter size) printer paper.
>>> Fall Gnomes Pattern <<<

What can I use to make the fall gnome hat?
We used burlap and fall patterned (or coloured) tea towels to make hats for our fall gnomes. Any patterned cloth you can find, whether it’s a cloth napkin or actual material from the fabric store, will work nicely.
But you can also use a patterned sock to make the hat. Or, if you can crochet or knit, whip up a little pointed hat for your gnome!
How can I make a beard for the fall gnomes?
If you don’t have a specific “gnome beard” you can definitely cut your own beard from faux fur! Check out our Valentine gnomes post to find a template for the beard and specific instructions on how to cut it.
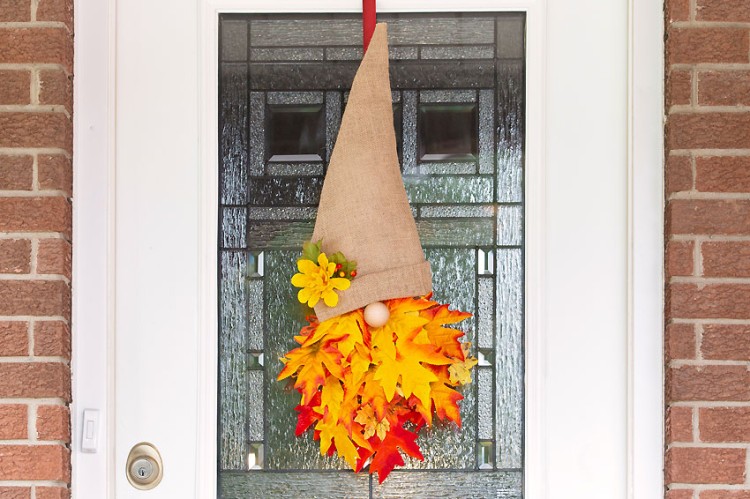
Or you can take inspiration from our fall gnome wreath and make a beard from fabric leaves!

What can I fill my fall gnome with?
We really like using poly-fil for our gnomes. It’s lightweight, inexpensive, and easy to find at the craft store. But you can also use stuffing from an old pillow, or scrap fabric and yarn ends.
And we highly recommend using something heavy at the bottom of the gnome to keep it standing upright. We used rice for these gnomes, but you can also add dried beans or buy special poly-pellets meant for stuffies.

These fall gnomes are the perfect use for a mismatched sock! Celebrate all things fall with these autumn gnome decorations. Whether you’re an experienced crafter or a beginner looking for a fun weekend project, you’ll be sure to enjoy making these adorable stuffed gnomes.

Here’s even more fall craft ideas:


Our book Low-Mess Crafts for Kids is loaded with 72 fun and simple craft ideas for kids! The projects are fun, easy and most importantly low-mess, so the clean up is simple!

Where to buy:
You can purchase Low-Mess Crafts for Kids from Amazon, or wherever books are sold:
Amazon | Barnes and Noble | Books-A-Million | Indiebound | Amazon Canada


Leave a Reply