
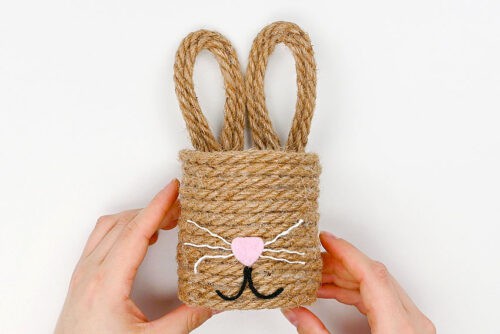
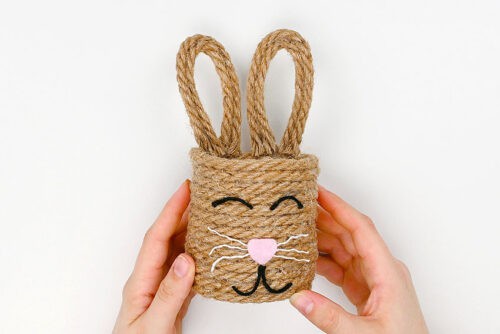
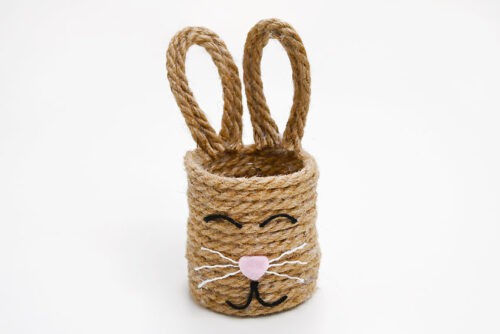
This twine bunny craft is a fun and creative project that’s perfect for spring and Easter! Made with simple wrapped twine, this adorable Easter bunny craft comes together with tall ears, a sweet little face, and a rustic texture that fits beautifully with spring decor.
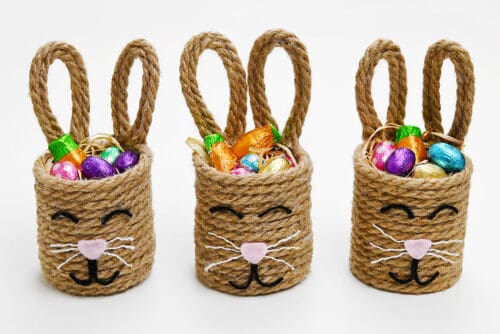
What makes this bunny craft extra fun is how versatile it is. You can fill it with Easter candy to make a cute DIY bunny basket, use it as a small bunny treat holder, or keep it on your desk as a playful bunny pencil holder. It’s an easy twine craft that’s simple to customize and makes a charming handmade decoration for the season!

This post contains affiliate links. If you use these links to buy something, we may earn a small commission at no extra cost to you. This helps support our website and allows us to keep creating fun, free content.
How to Make a Twine Bunny
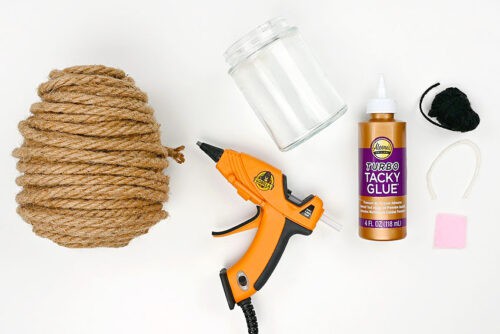
Materials:
Instructions:
Step 1: Find what you need
- Gather your supplies and materials.

Step 2: Make the base of the bunny
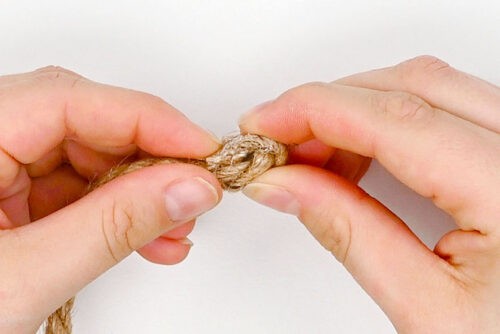
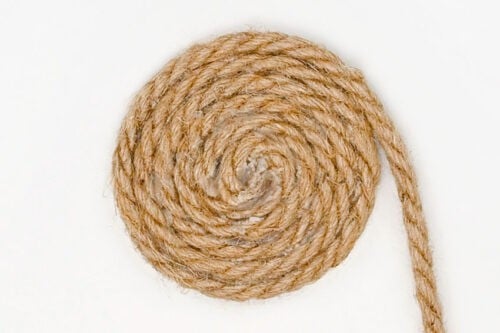
- Add a dot of hot glue to the end of the twine.
- Roll the twine into itself, doubling over the end with the glue.
- Add about an inch of hot glue to the twine and roll it into itself again.

- Continue gluing and rolling until you have a spiral that’s just bigger than the base of your mason jar.


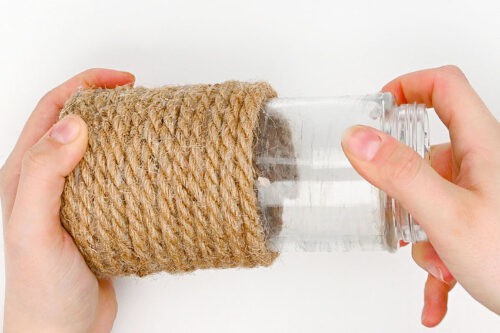
Step 3: Add the walls of the “basket”
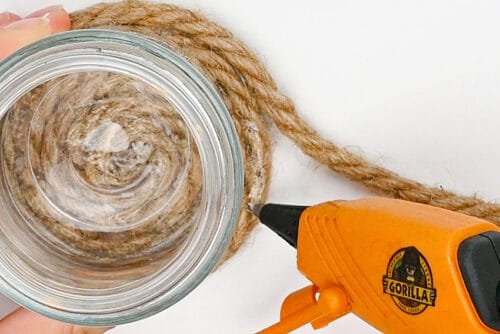
- Set the mason jar on top of the twine circle, centering it. Then add glue on top of the outside layer of twine.
- Add the twine into the glue, using the jar as a guide to keep it straight.You’ll wrap the twine around the jar, but not to the jar. The mason jar will be removed later.
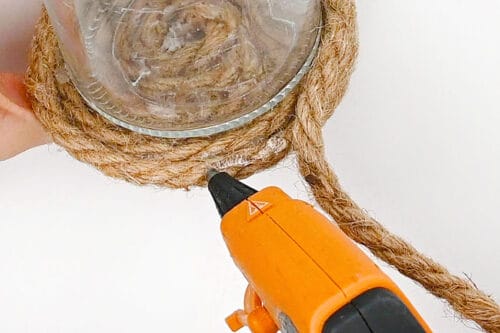
- Working in small 2 inch sections, wrap the twine upwards around the jar. Be careful not to get glue on the jar.
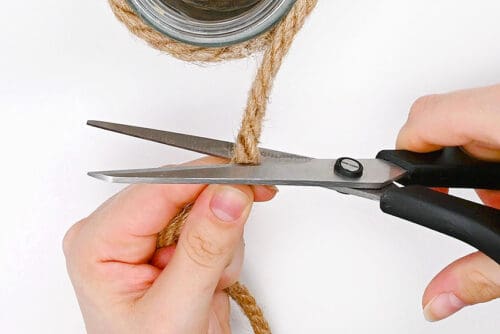
- Continue wrapping up and around the jar until you reach the top. Then cut the twine from the roll.
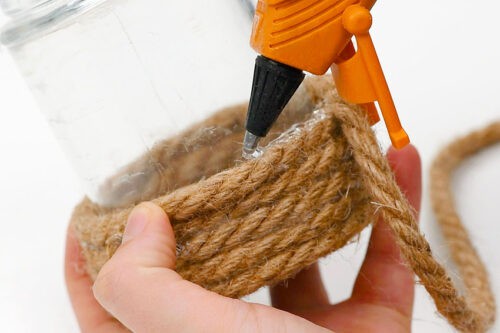
- Add more glue and press the twine end down into it. Hold it in place for a minute so it stays nice and secure.
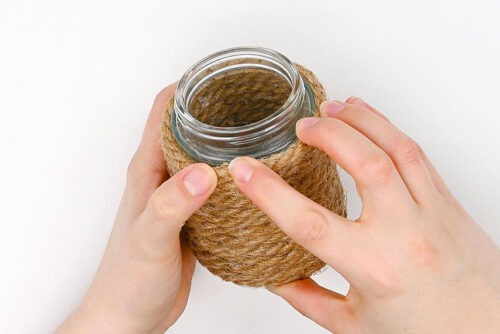
- Now remove the mason jar. You may need to twist it a bit to loosen it.
- Then trim down the twine end on an angle to make it blend in more with the top of the pencil holder.
Step 4: Add ears to the bunny
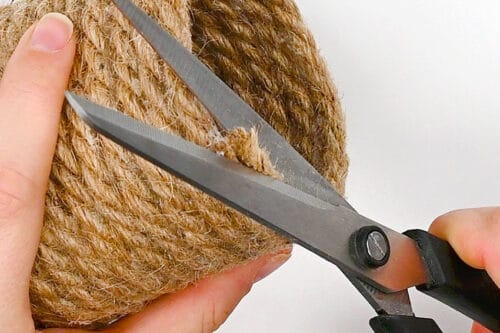
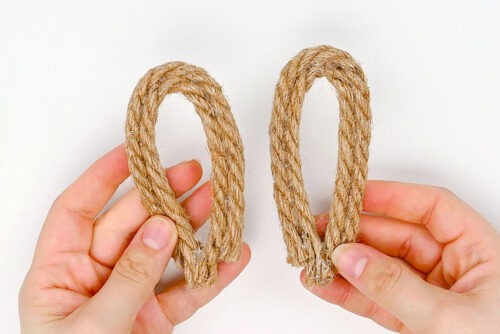
- Cut two pieces of twine about 6 inches long.
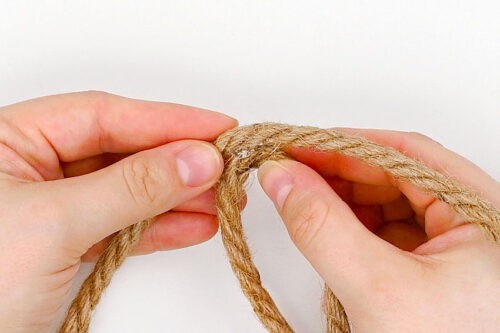
- Grab one piece and glue the ends together, creating a loop.
- Add hot glue to the middle of the second piece of twine. Attach this to the top center of the looped piece.
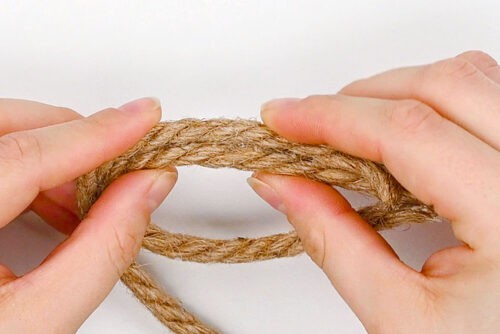
- Glue the second piece so it’s attached all along the outsides of the loop, creating the bunny’s ear.
- Repeat to make a second bunny ear.
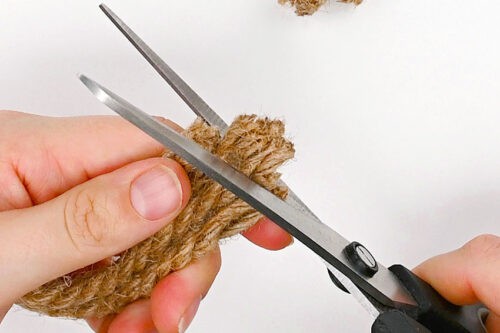
- Trim down the excess twine at the bottom middle of the ears, making them flat and even.
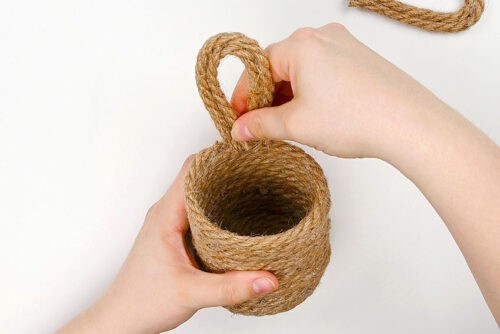
- Add a generous amount of hot glue to the flat bottom of an ear. Attach it to the rim of the pencil holder.
- Glue the second ear next to the first, spacing them about 1/2 inch apart.


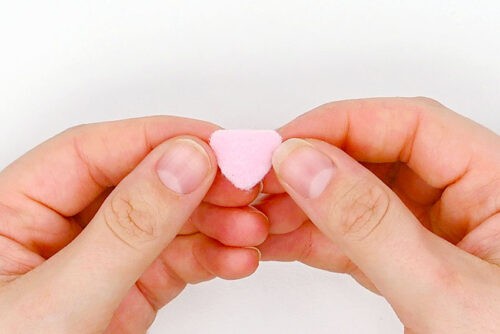
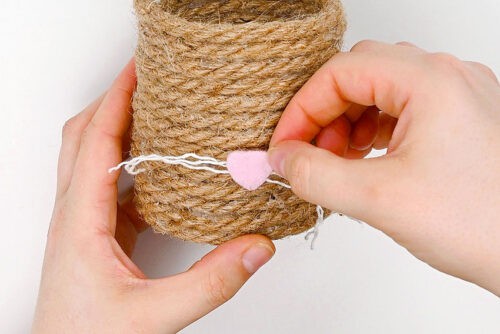
Step 5: Add a bunny face
- Cut a rounded triangle from pink felt about 3/4 inch across. This will be the bunny’s nose.
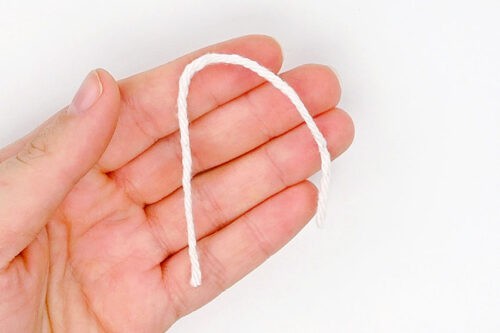
- From white cotton yarn (or macrame cord), cut a 4 inch piece.
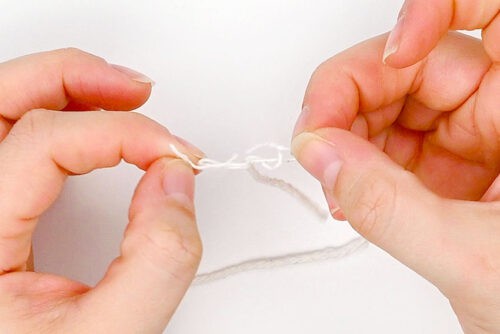
- Cut the yarn in half (creating two 2 inch pieces) and then separate the strands of yarn. This should give you 6 thin pieces.
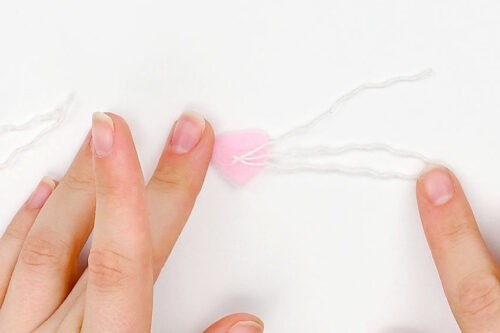
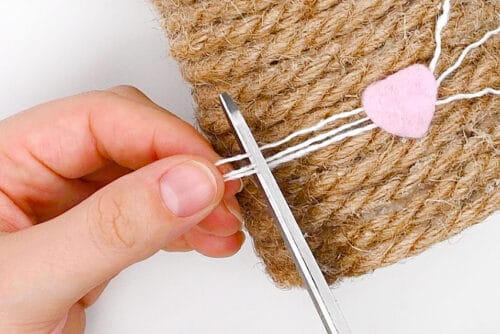
- Add hot glue to the middle of the nose and attach the yarn pieces as whiskers. There should be 3 on each side — 1 in the middle going straight out, and 2 on either side at about a 45 degree angle.
- Add glue to the back of the nose (the side where the whiskers are attached) and place it on the basket, on the side opposite the ears, about 1/3 of the way up.
- Once the nose is attached, trim the whiskers down so they’re even.
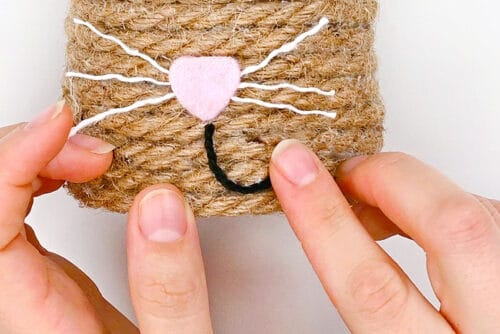
- Cut a 1 inch piece of black yarn. Add tacky glue to the yarn and attach it below the nose, shaping it into a curved line that slopes down and out from the center.
- Repeat on the other side, attaching another curved piece of yarn to mirror the first. This completes the bunny’s mouth.
- Cut 2 more 1 inch pieces of black yarn. Glue them above the nose in curved lines (an upside-down smile shape) to look like closed eyes .
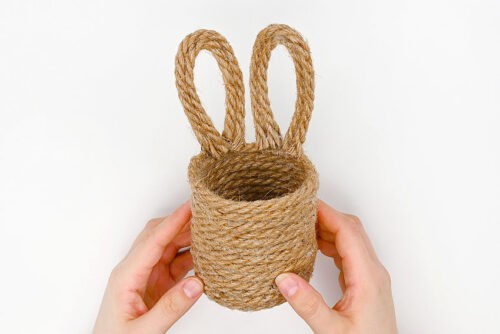
- Your twine bunny craft is complete!
- Have fun making more bunnies and using them as Easter baskets, spring decor, or even pencil holders!
Helpful Tips:
- Work in small sections of hot glue: Apply glue a little at a time instead of all the way around the container. This keeps the glue from drying before the twine is in place and allows you to keep the shape neat.
- Use a thicker twine or rope for best results: Medium (5mm) or thick jute (8mm) twine creates a sturdy structure and gives the bunny a nice rustic texture.

What can I use as the base of my twine bunny basket?
You can work around almost any container to create your bunny, depending on what size basket you want to make. We used an empty jar, but you can also use tin cans, yogurt cups, or even a drinking glass.
Just choose something sturdy enough to work around that will hold its shape while you work.
How strong is this twine bunny holder?
The jute rope creates a surprisingly strong basket! It’s flexible, but it stands up nicely on its own and holds a lot of stuff without changing shape.
If you want a really sturdy base you can glue the twine around the outside of a tin can instead of having it free standing. Just make sure the can is clean and the edges are smooth before you start wrapping the twine.

What glue works best for this twine bunny craft?
Hot glue is definitely the best choice for building the bunny basket. It dries quickly and holds the bunny together well. And, if you’re careful, the glue doesn’t show at all.
You can also use tacky glue to put the bunny together. It will give you a cleaner look (no glue strings showing at all), but the dry time makes it more difficult to create a smooth shape around the jar.

What can I use this bunny holder for?
This bunny craft is super versatile! You can fill it with Easter candy to make a small bunny treat holder, use it as a DIY Easter basket, or keep it on a desk as a cute bunny pencil holder! It also works as a small spring decoration.

This twine bunny craft is such a fun way to add a little handmade charm to your spring and Easter decor. With just a few simple supplies, you can create an adorable bunny that’s both cute and practical.
Use it as a bunny treat holder for Easter candy, a small DIY bunny basket, or even a playful pencil holder for your desk. However you use it, this sweet little bunny is sure to bring a smile and add a cozy, rustic touch to your spring decorating!
Here’s even more bunny craft ideas:


Now available
Low-Mess Crafts for Kids Book
72 cute and fun crafts that kids and parents alike can enjoy. All with as little mess as possible!
Where to buy:
You can purchase Low-Mess Crafts for Kids from Amazon, or wherever books are sold:
Amazon | Barnes and Noble | Books-A-Million | Indiebound | Amazon Canada


Leave a Reply