
How to Make Polymer Clay Beads
It's so easy to make these marbled polymer clay beads! Create your own clay beads for jewelry, crafts, and more.
Yield: 20 polymer clay beads
Cost: $1
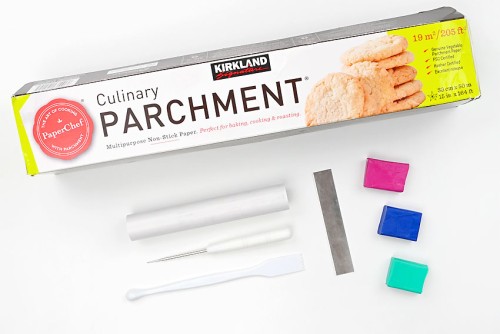
Equipment
- Clay cutting tool (or craft knife)
- Clay roller (or rolling pin)
Materials
Instructions
Step 1: Find what you need
- Gather your supplies and materials.
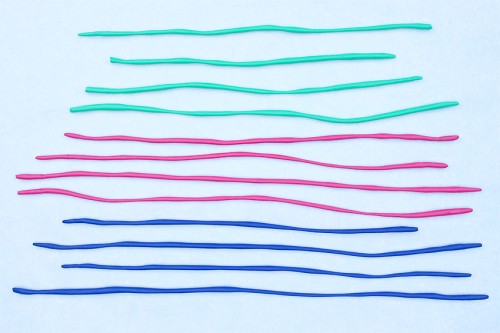
Step 2: Work the clay and roll into thin "snakes"
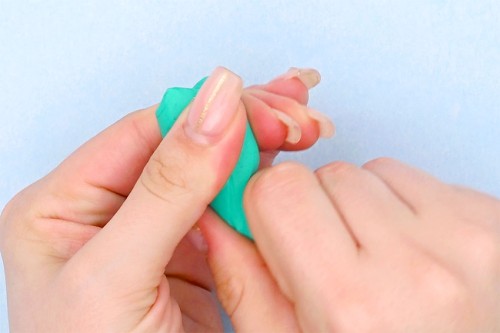
- Knead the clay until it feels soft and easy to work with.This is called "conditioning" your clay. Some people use a special clay rolling machine to do this, but you can just use your hands.
- Roll the clay with your hands on a silicone mat, creating thin strips.You can also roll the clay on the counter or on parchment paper if you don't have a silicone mat.
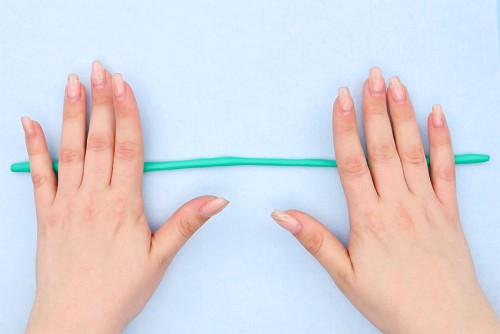
- As you roll the clay, cut it into shorter lengths as it gets longer. This will make it easier to work with.
- Roll the clay pieces into "snakes" with a diameter of about 2mm.
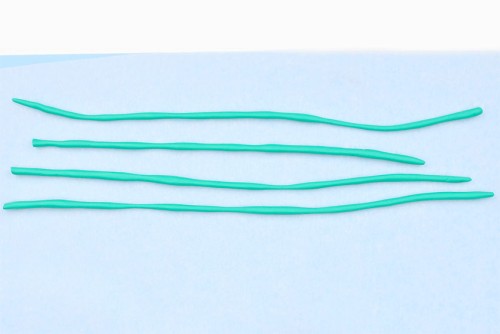
- Repeat this process for all the colours you'd like to use.
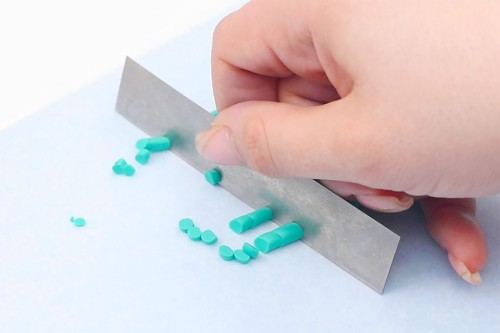
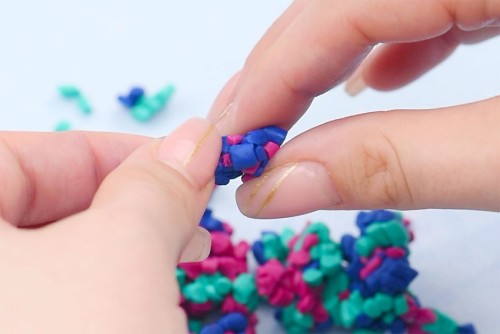
Step 3: Cut the clay and combine the pieces
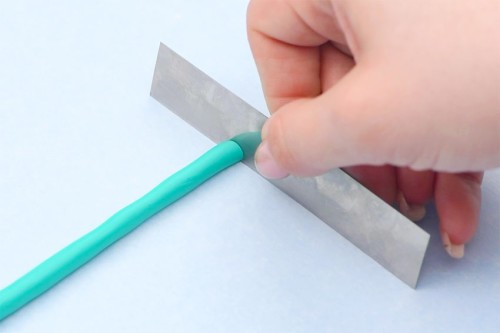
- Chop the clay snakes into tiny pieces, anywhere from 1/8 to 1/4 inch long, using a cutting tool or knife.You can line up the "snakes" and cut multiple rows at a time to make it go faster.
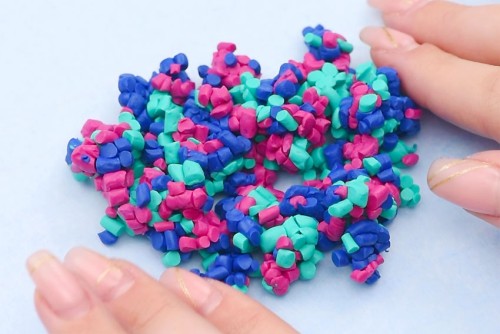
- Use your fingers to mix up all the small pieces, dispersing the colours evenly.
- Gather all the clay pieces together, laying them out in a relatively flat pile.
Step 4: Combine the clay bits and roll them flat
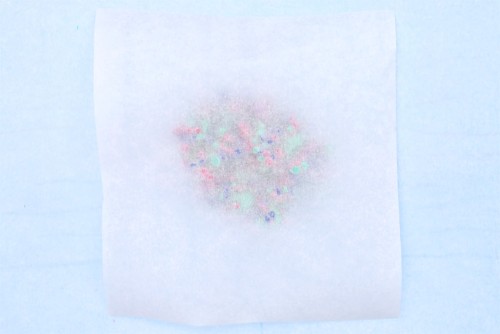
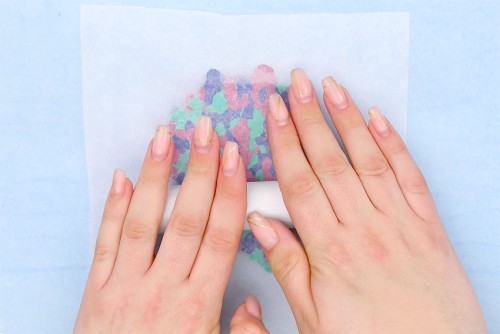
- Place a piece of parchment paper over top of the clay.This will stop imprints and texture from forming on the clay when you roll it out.
- Use the rolling tool over the parchment paper to flatten the clay, combining it into one marbled piece of clay.
Step 5: Shape your beads
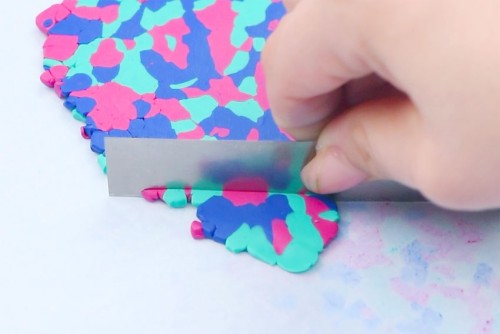
- Remove the parchment paper and use your cutting tool to break off small pieces of the clay.If you'd like to create identical beads use a ruler to measure out the size before cutting.
- Use your hands to roll the clay into a bead shape. You can also roll the clay on the mat for really smooth sides.
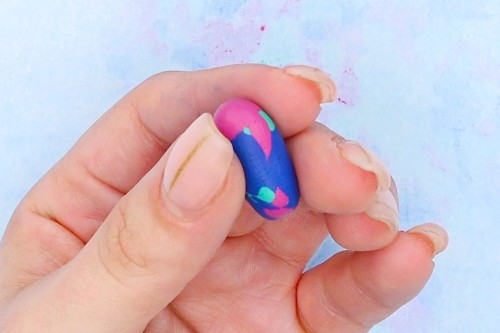
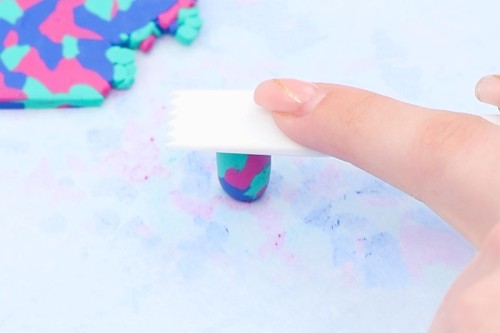
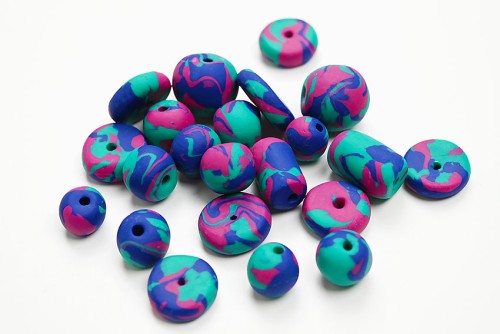
- Different tools will help to create different shapes of beads. We used the flat scraper tool on our long bead to flatten the ends and to squish down our flat beads.
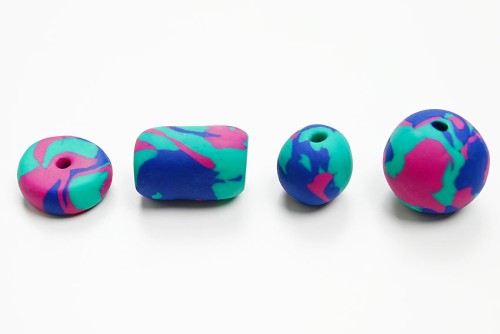
- We made flat beads, longer tube beads, and 2 sizes of round beads. You can even make square beads and other shapes, if you'd like.(The following picture shows the beads after baking so you can see the various shapes you can make. Don't make the holes in the beads without reading the instructions below.)
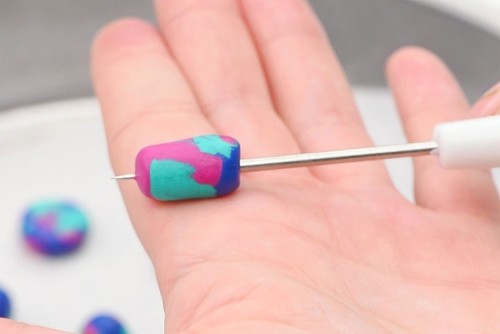
Step 6: Make the holes in the beads
- When you're happy with your beads, place them on a parchment lined baking tray and refrigerate them for at least 15 minutes.Putting the beads in the fridge will help them keep their shape and make it a lot easier to make the holes in the beads.
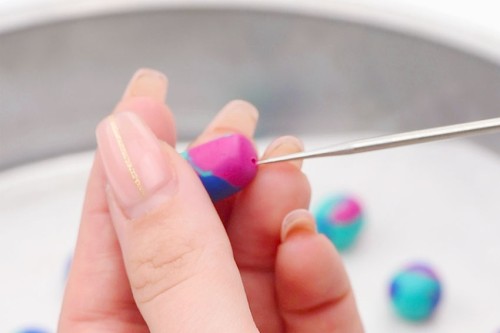
- Use a needle tool or toothpick to make the holes in your beads.Use a gentle twisting motion to push the tool into one end of the bead. This (along with chilling the clay) will help prevent warping.
- Push the tool/toothpick all the way through the bead, remove it, and then push back through the other end.This will even out and clean up the bead's hole.
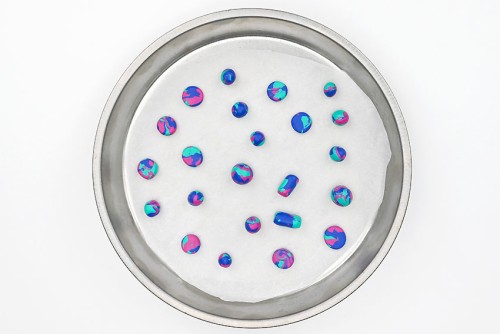
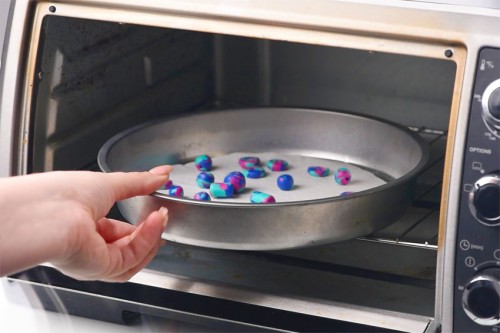
Step 7: Bake the beads
- Set the beads back onto the parchment lined tray and bake in the oven according to package instructions.We baked our beads at 275F for 15 minutes, but baking time will vary based on the type of clay you use and the thickness of the bead. You may want to test bake 1 bead to see what your beads require.Note: If you're using a toaster oven like we did, make sure it's set to heat from the bottom element only. If you heat from the top, they'll burn.
- Your polymer clay beads are complete!Have fun using your DIY clay beads for bracelets, necklaces, earrings, keychains, and more.
Video
Notes
Looking for more fun clay crafts? Here's a few of our favourites:
Dried Flower Ornaments
How to Make a Clay Turtle
Clay Bear