This clay bear is SO CUTE and so easy to make! Use air dry clay, your hands, and a toothpick to sculpt this adorable clay teddy bear. This is a fun craft for beginners to working with clay – No special tools are required!
This bear looks so cute displayed on a dresser or bedside table, and makes a thoughtful homemade gift for Valentine’s Day or birthdays. Follow the easy step by step tutorial below!

This post contains affiliate links. If you use these links to buy something we may earn a small commission which helps us run this website.
How to Make a Bear with Clay
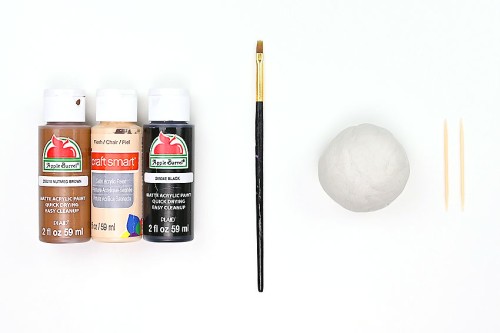
Materials:
Equipment:
- Water
Watch the step-by-step video tutorial:
Instructions:
Step 1: Find what you need
- Gather your supplies and materials.

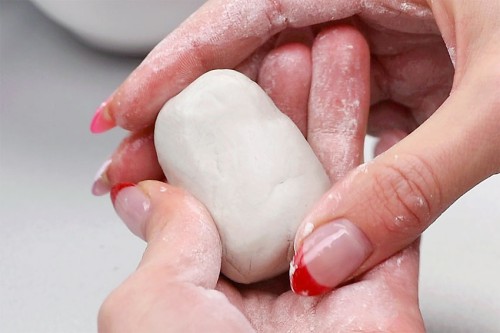
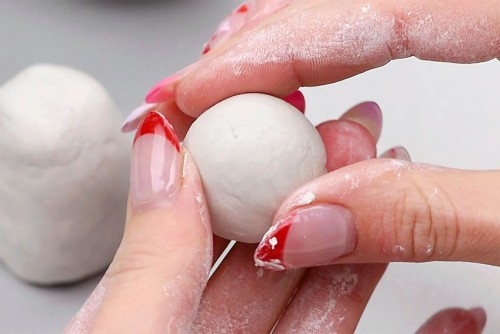
Step 2: Make the clay bear’s body and head
- Start by working with a large piece of clay. Break off a piece and form it into an oval shape, about 1-1/2 inches tall and 1-1/4 inches wide.Flatten the bottom, so that the bear will sit flat on the table. Dip your fingers in water to smooth the sides of the clay.
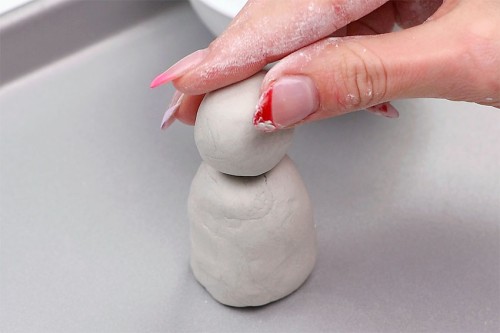
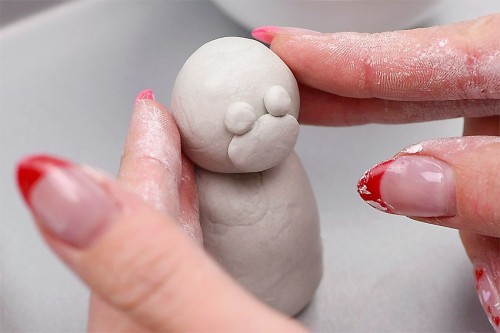
- Form a 1 inch ball for the bear’s head. Again, use your fingers and water to smooth out the clay.

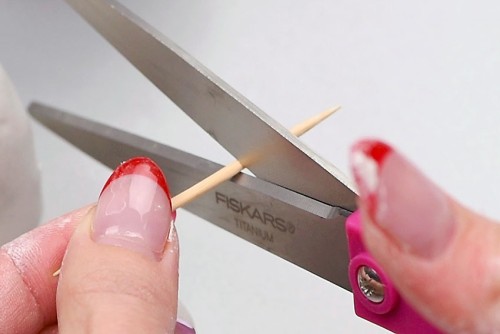
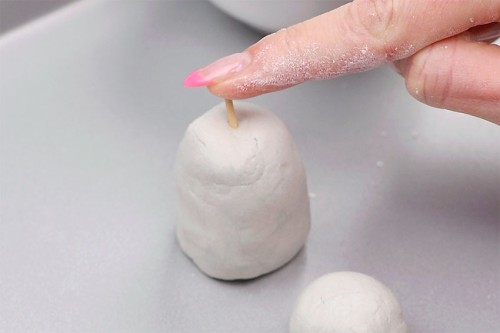
- Cut off about 1/3 of a toothpick to make a piece about 3/4 inch long.
- Stick the toothpick third in the top center of the bear’s body, pointy end down.
- Attach the bear’s head by pushing it, centered, onto the toothpick.
Step 3: Make and attach the bear’s facial features
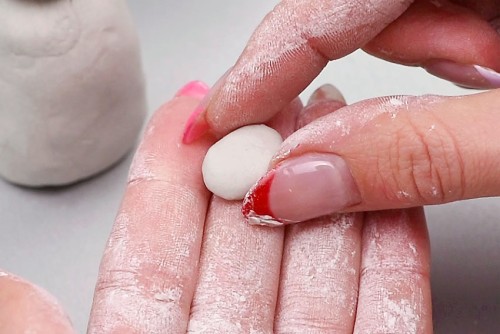
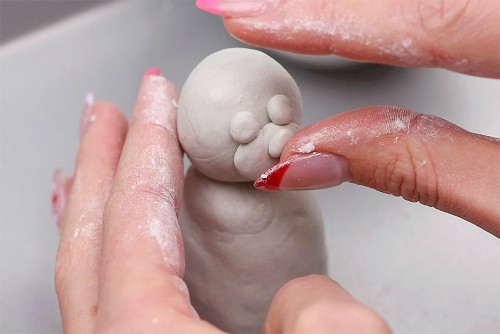
- Start with a small ball of clay to create the bear’s muzzle. Form it into a flat oval shape, about 3/4 inch wide and 5/8 inch tall.
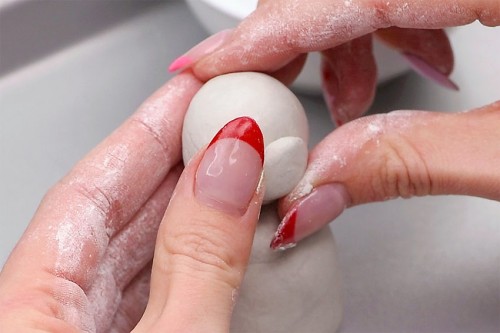
- Use water to attach the bear’s muzzle to the bottom center of the bear’s head.
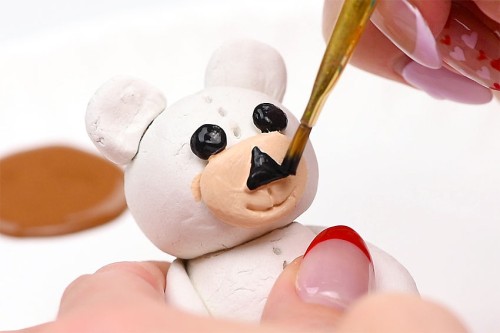
- Create 2 tiny balls, about 3/16 inch in size, for the bear’s eyes and attach them above the bear’s muzzle.
- Form a small triangle, 1/4 inch in size, for the bear’s nose and attach it, point up, to the top center of the bear’s muzzle.
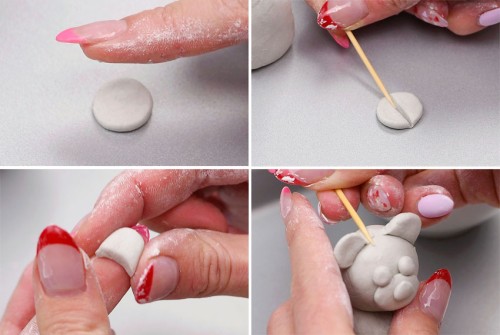
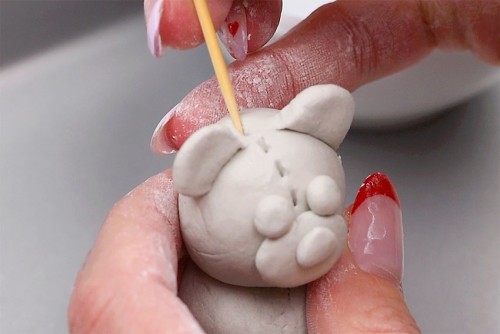
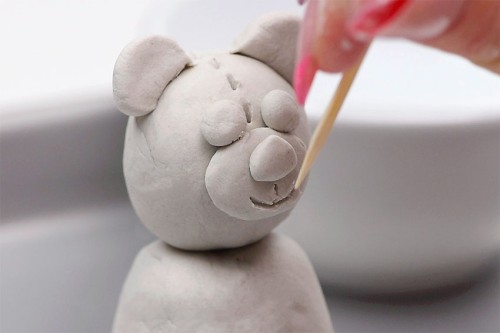
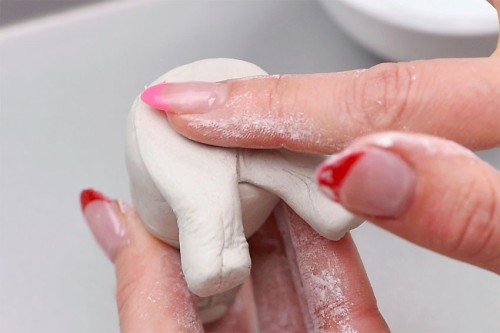
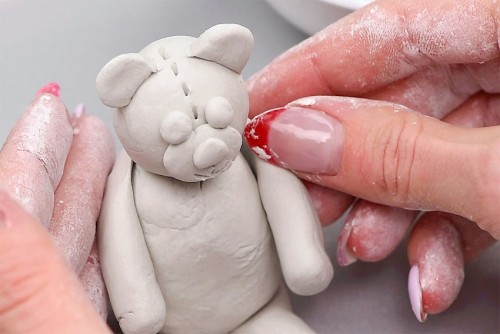
- Make and attach the bear’s ears. To do this, form a small ball and flatten it. You should have a circle that’s just over 1 inch in size.Use a toothpick to cut the circle in half, creating two ears. Push the ears in on the sides, creating a curved bottom for the ears to attach to the head.Then use water to attach the ears to the top of the bear’s head. Smooth down the edges of the ears with a toothpick to help them stick.

- Use a toothpick to add stitch marks to the middle of the bear’s face, from its muzzle to the top of its head.
- Carve a smile into the bear’s muzzle, below the nose, connected with a vertical line coming down from the nose.
Step 4: Make and attach the bear’s arms and legs
- Roll out a log of clay about 1/2 inch in diameter and about 3 inches long.
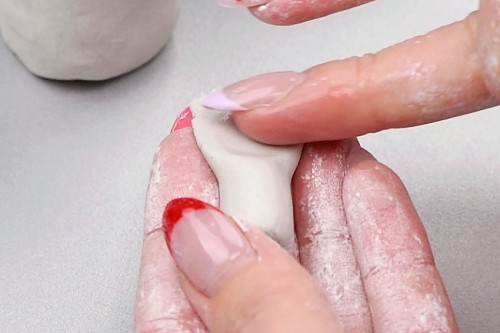
- Break the log into two pieces for the bear’s legs. Flatten and smooth down the end of each half so that the part connected under the bear is flat.
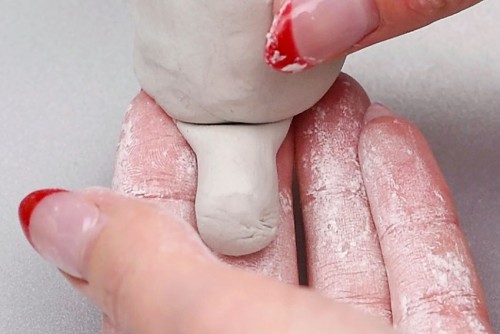
- Use water to attach the flat part of the bear’s leg to the bottom of its body. Make sure to point the leg so it’s facing towards the outside.
- Attach the second leg in the same way, again pointing outward. Then use your finger and a bit of water to smooth out and flatten the bottom of the bear.
- Make arms the same way as the legs, this time starting with with a log that’s just over 1/4 inch thick and about 4 inches long.Attach the flat parts of the arms at the back of the bear, up near where the head is attached. Use a toothpick or your fingers and water to make the arm connection seamless.
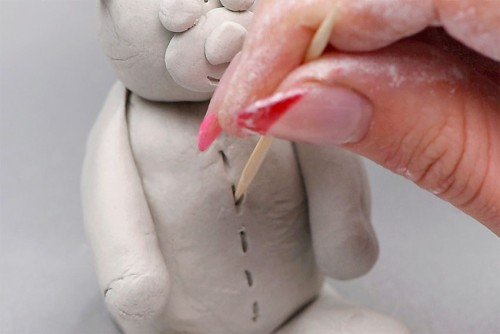
- Use a toothpick to carve more stitching marks down the front middle of the bear’s body.
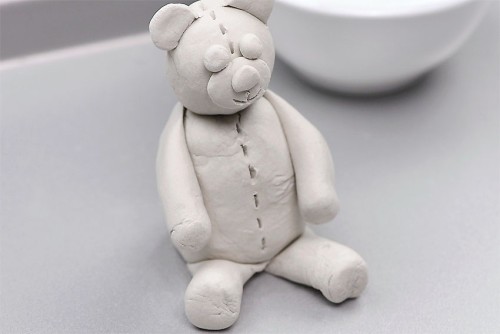
- Allow the clay teddy bear to dry for 48 hours.

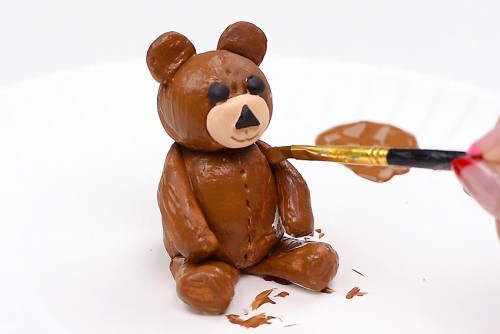
Step 5: Paint the clay bear
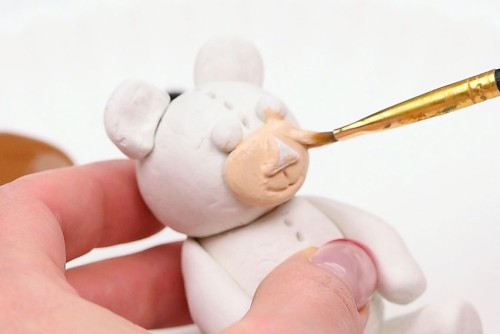
- Paint the bear’s muzzle light brown using acrylic paint.
- Use black paint to cover the bear’s eyes and nose.
- Paint the rest of the clay bear a medium brown colour. Allow 1 hour to dry.
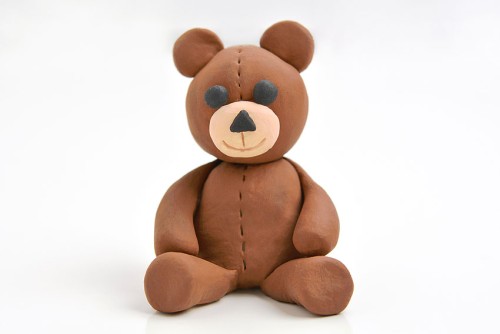
- Add a second coat of paint, if needed, and allow to dry.Your clay bear is complete!
Helpful Tips:
- Be sure to measure the parts of the bear as you go, against the parts you’ve already made. This will give the teddy bear the best proportions.
- If you’re having trouble with pieces sticking to one another, make sure you’ve used enough water. If it still doesn’t stick (we had one head that refused to stay on!), connect the pieces with super glue after they’ve dried.

What clay is best to make a clay bear?
We made our clay teddy bear using DAS air dry modeling clay, which you can find at craft stores, Walmart, or Amazon.
If you don’t want to take a trip to the store, you can also make clay at home. Our clay recipe uses only 3 ingredients and dries a beautiful crisp white!
What paint works best on this clay teddy bear?
Acrylic paint works very well for painting clay figurines. It’s inexpensive, durable, and the colours stay nice and bright. Paint pens are a great option if you’d like more control for painting finer details, such as the the bear’s face.
If you’re worried about the mess of acrylic paint, you can use tempera paint instead. The coverage isn’t as good, but it’s washable, which might make things easier if you’re working with kids.

How do you make easy clay animals?
Making clay animals is all about creating simple shapes and putting them together! You don’t need any special tools or any sculpting experience to make super cute animal figurines.
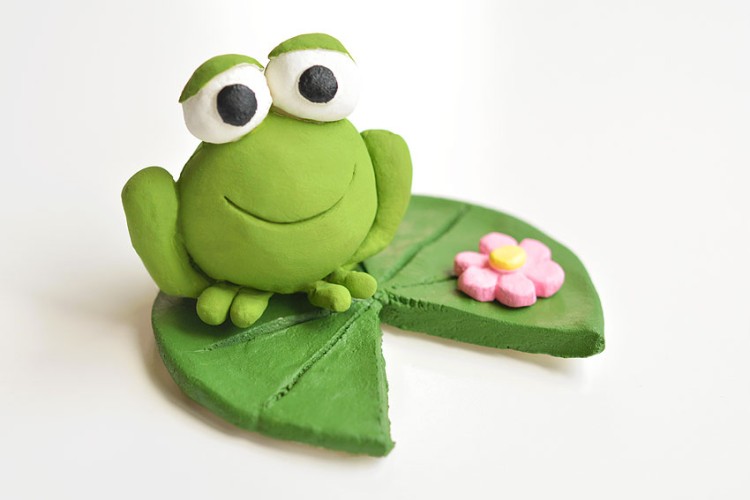
Start with one part of the animal (eg. the bear’s body) and build the rest of the pieces in proportion to that. Try making an easy clay frog, a clay turtle, or even clay monsters!

How else can I decorate my clay bear?
There are lots of ways to make this clay teddy bear your own! Bring the bear’s arms up so that it looks like it’s holding a little sculpted heart or flower. Or use the toothpick to create a fur texture all over the bear!

This handmade clay bear is such a cute clay sculpting project, and it’s SO EASY for beginners. Paint your teddy bear the traditional brown, or make a group of rainbow coloured bears!

Here’s even more clay craft ideas:


Our book Low-Mess Crafts for Kids is loaded with 72 fun and simple craft ideas for kids! The projects are fun, easy and most importantly low-mess, so the clean up is simple!

Where to buy:
You can purchase Low-Mess Crafts for Kids from Amazon, or wherever books are sold:
Amazon | Barnes and Noble | Books-A-Million | Indiebound | Amazon Canada


Leave a Reply