This post is sponsored by Universal Pictures Home Entertainment. As always, the opinions are entirely my own.
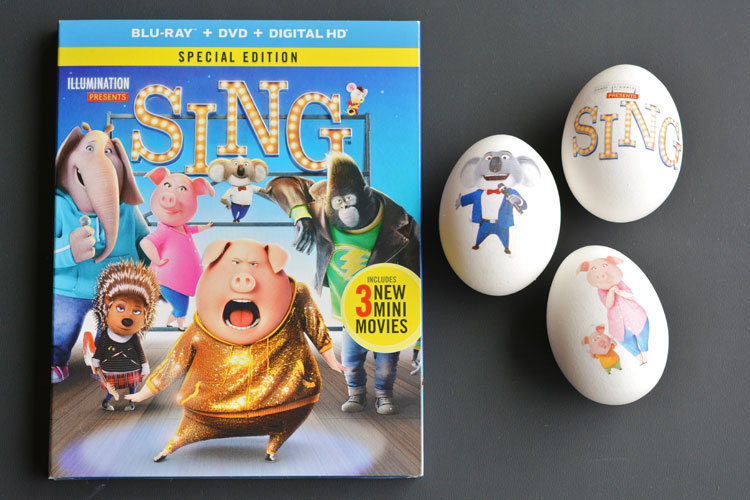
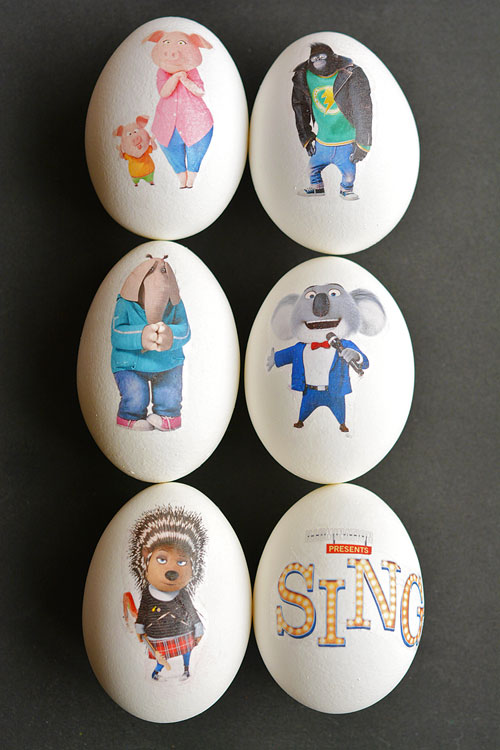
SING Special Edition is now available on Blu-ray & DVD! So I went on a mission to figure out how to transfer the movie characters onto Easter eggs. You can use this method to transfer ANY image onto an Easter egg!
Don’t they look adorable?! And they’re so easy to make!
We watched SING last night with the kids and it was such a cute movie! It’s an animated musical comedy about an optimistic koala who puts on the world’s greatest singing competition and all the different animals are the contestants. And let me just say, I love musicals! It’s such a funny and sweet movie with great singing voices and a great cast.
The music-filled comedy includes over 60-minutes of bonus content and incorporates three all-new entertaining mini movies featuring the cast from SING as well as an exclusive Tori Kelly music video and a variety of musical extras.
What was your biggest dream when you were a kid?
Like the ridiculous one? The impractical one? The one that everyone thought was a bad idea? For me, I wanted to sing on Broadway. It feels embarrassing admitting that to the world, but I loved to sing. I STILL love to sing.
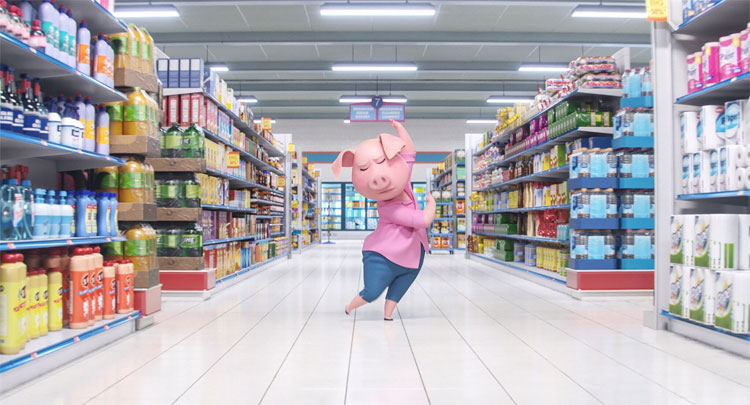
This image from SING is pretty much what I look like when I’m doing the photo shoots for my blog posts… (seriously…)
I put my music on full blast, and I sing at the top of my lungs while I make my projects and take the photographs. Or at least, that’s what I do when no one is home. I tone it down a bit when my husband is home, because, well… he doesn’t share my love for musicals, and it’s just a little embarrassing when he walks in and I’m in the middle of a soul haunting ballad. haha
I’m a bit of a sap, but I can totally relate to the characters in SING. Especially Rosita, the overworked and underappreciated mommy pig played by Reese Witherspoon. I picture myself up on stage singing my heart out, waiting for the chance for my big win. (Or does everyone do that?)
SING was nominated for two Golden Globes and has an awesome soundtrack. If you’re not familiar with the movie, you can watch the trailer here:
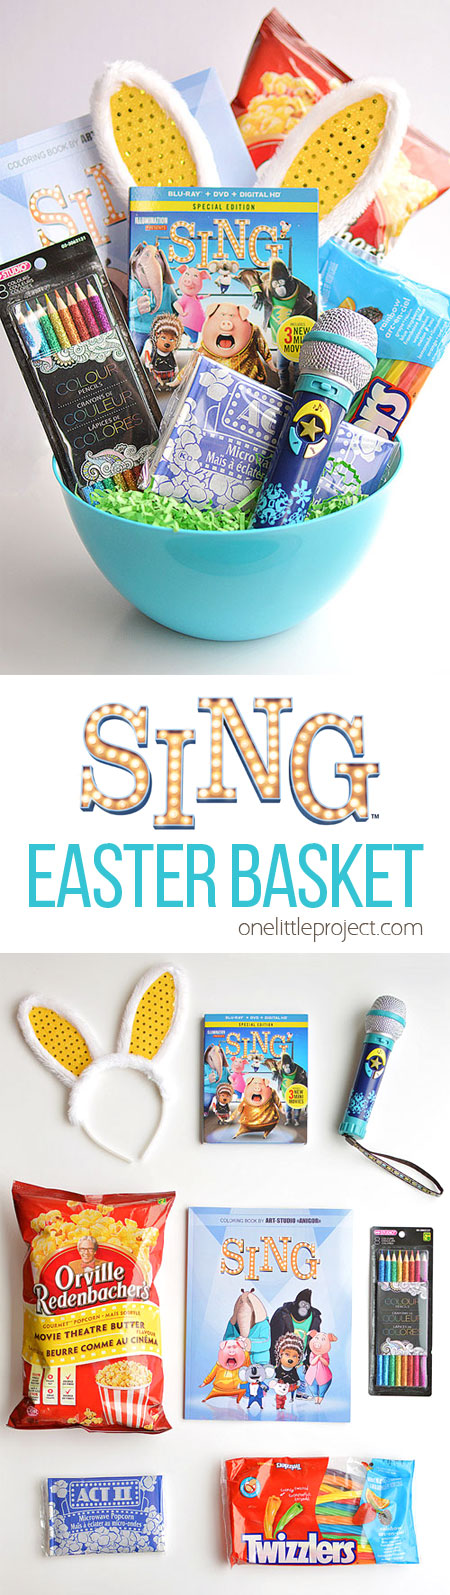
Make a SING Themed Movie Night Easter Basket
The SING DVD also makes an awesome Easter basket stuffer! Making a movie night Easter basket is so simple, so cute and so much more fun (and healthier…) than giving boat loads of candy!
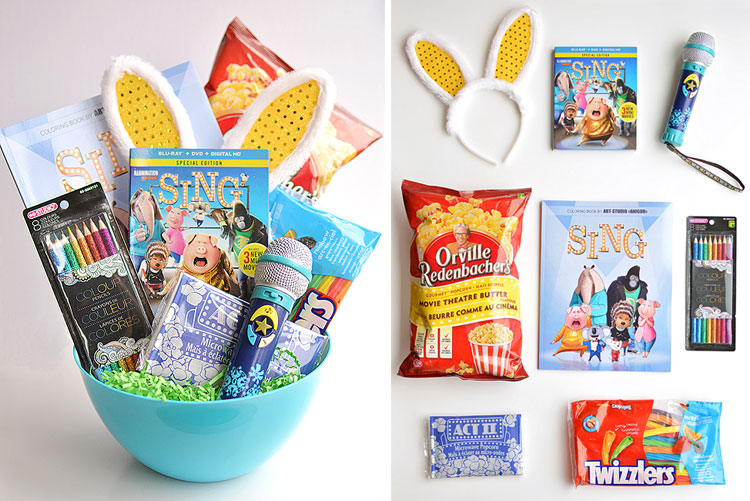
Here’s what you’ll need to make your own SING movie night Easter basket (this list includes affiliate links):
- SING Special Edition DVD
- Toy Microphone
- Bunny Ears Hairband
- SING Colouring Book
- Pencil Crayons
- Bag of Popcorn
- Twizzlers
- Microwave Popcorn
- Big Popcorn Bowl to put it all in
After we watched the movie, my girls were putting on their own singing competition. They were making up their own songs and everything! I wish I had gotten it on video!
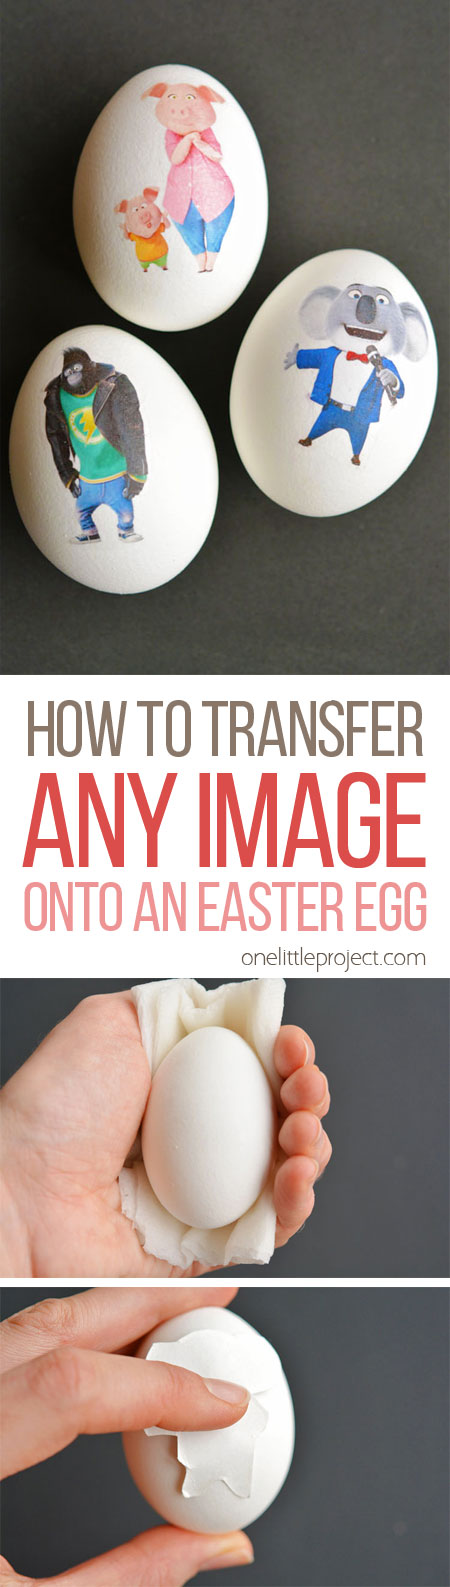
I’m going to show you how to transfer the movie characters, or ANY images onto Easter eggs. It’s way easier than you think, and you can customize them however you want!
How to Transfer Any Image onto an Easter Egg
Here’s what you’ll need:
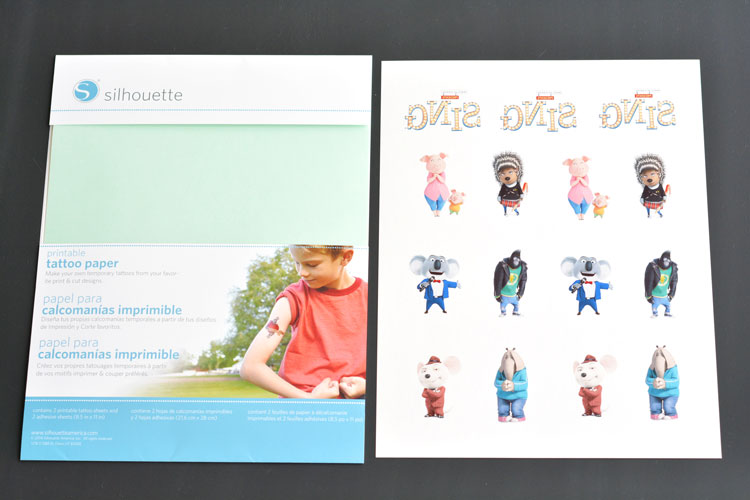
- Printable Tattoo Paper (Here’s an affiliate link to the Silhouette Tattoo Paper that I used in this post)
- Hard Boiled Eggs
- InkJet Printer
- Your Favourite Images (Get our Free Printable SING Characters Template)
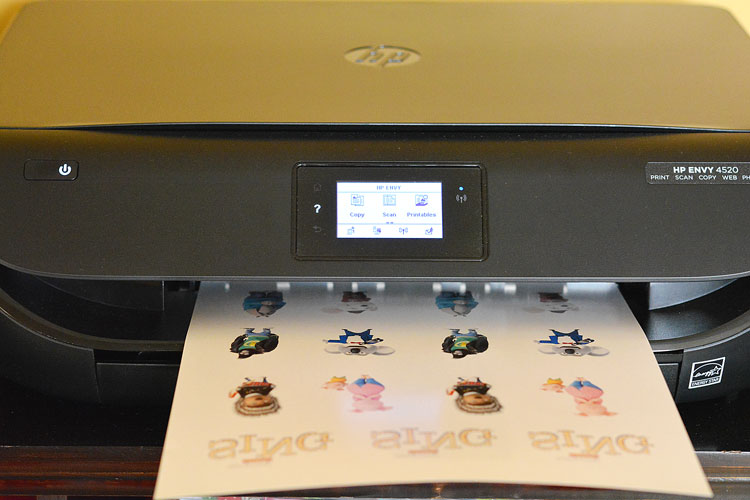
You can print out any images you want! We decided to use the characters from SING, and they ended up looking so cute! Just make sure if you’re printing something with words, that you reverse the image before you print it.
There are two pieces in the printable tattoo transfer paper:
- A heavy cardstock type sheet
- A green adhesive sheet
Start by printing your image on the glossy side of the cardstock sheet. Use an InkJet printer and set it to the photo paper setting. I’ve read that laser printers will work too, but I haven’t tested that for myself to confirm.
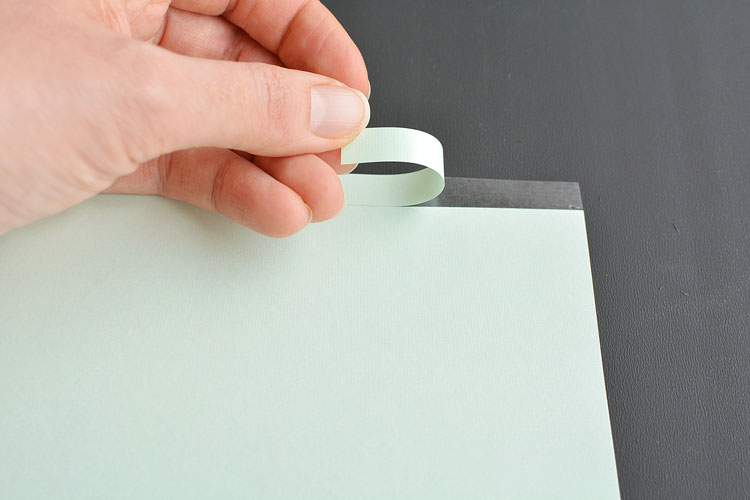
Peel off the small strip of the green backing on the adhesive sheet.
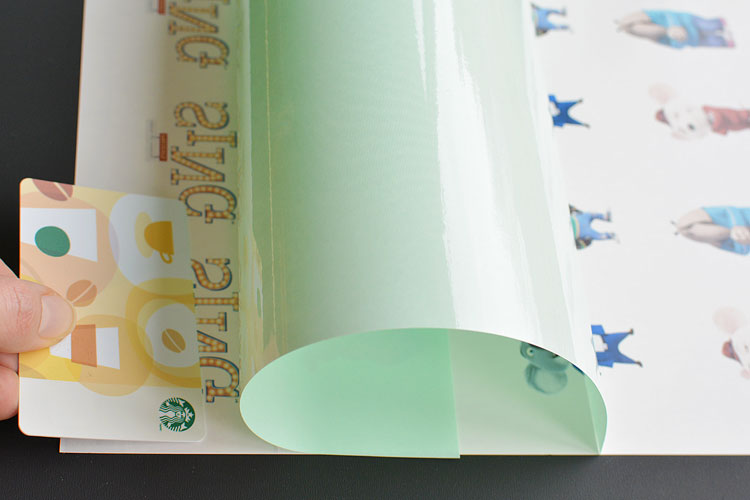
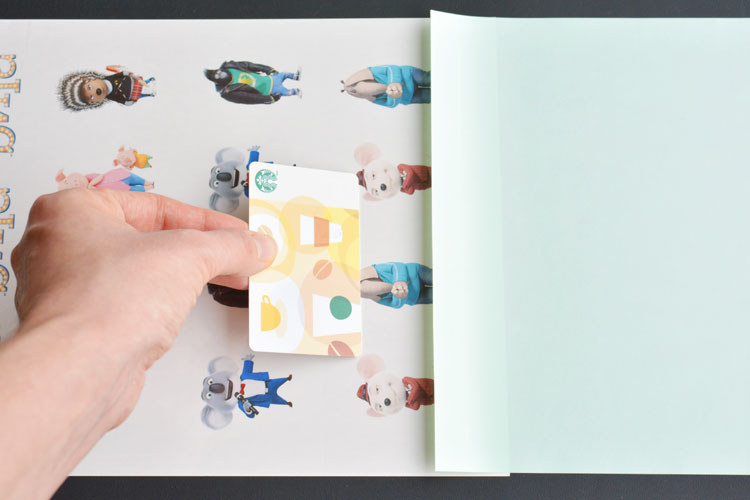
Then position the adhesive sheet directly over your cardstock with the images that you printed. Be careful to line up the corners and press it down to get it to stick.

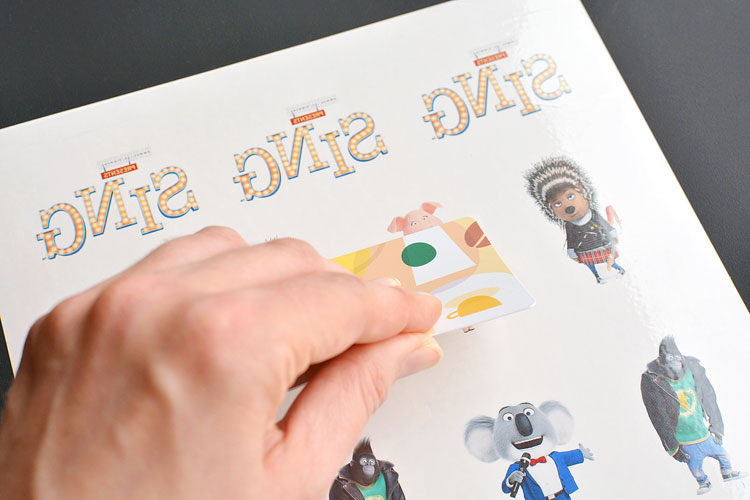
Slowly peel away the green backing, pressing the adhesive onto the images as you go. Make sure you go slowly or you’ll get bubbles in the adhesive. Use a credit card or a gift card to rub the adhesive sheet onto the printed image.
Keep pulling away the green backing until it’s completely removed.
Make sure you rub the gift card over the entire printed image to make sure the adhesive is well attached. Rub it over each individual image as well.
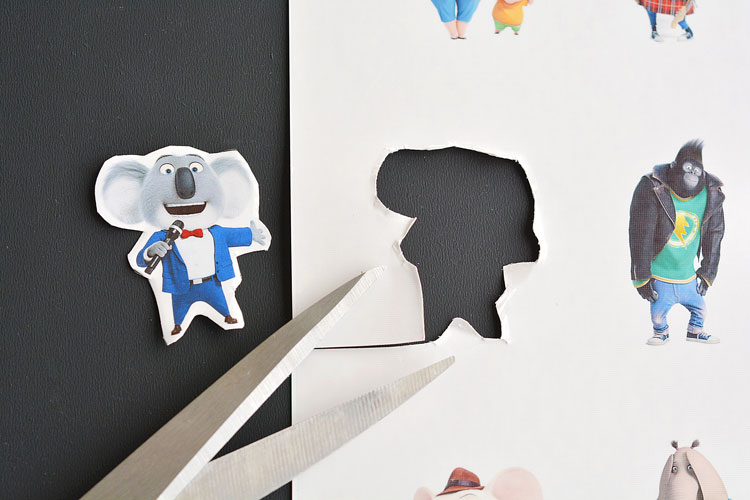
Then use scissors to cut out each of the shapes. Don’t worry about getting super close to the edges of the image – the adhesive won’t be visible after you transfer the image.
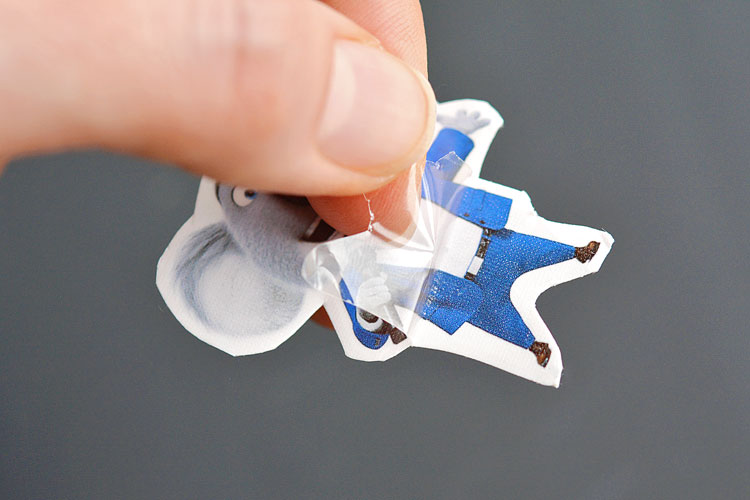
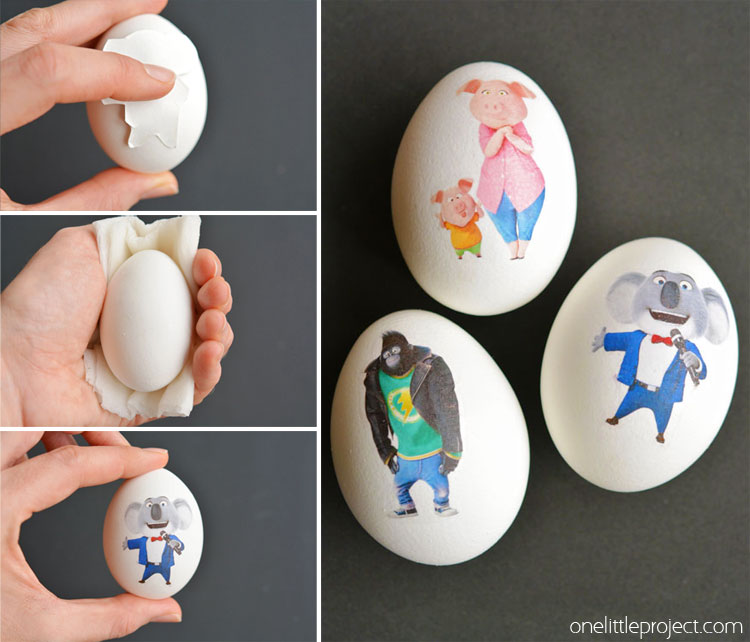
You’ve just made your very own temporary tattoos! Peel away the top plastic backing. If the adhesive pulls up with the plastic, push the plastic back down and rub the gift card over it before you try again.
Now apply the tattoo to the hard boiled egg with the sticky image side directly on the egg.
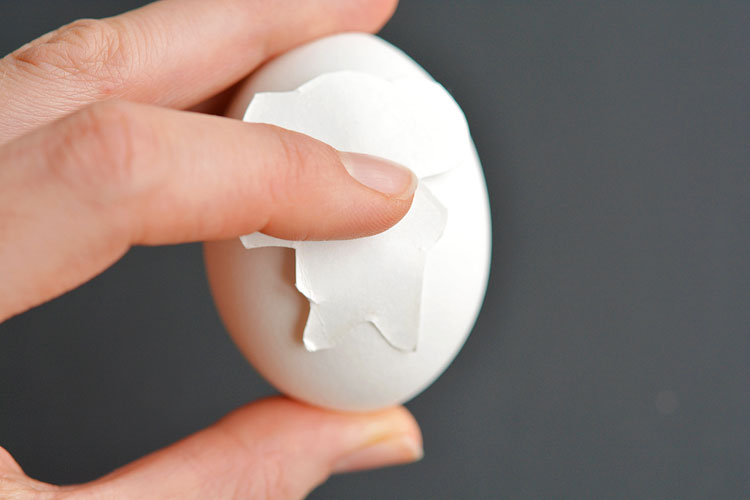
Press a wet paper towel onto the image and hold it for 15 seconds until the paper backing is loose. Before you remove the paper backing, slide it around a bit to make sure the edges of the image are smoothed out onto the egg.
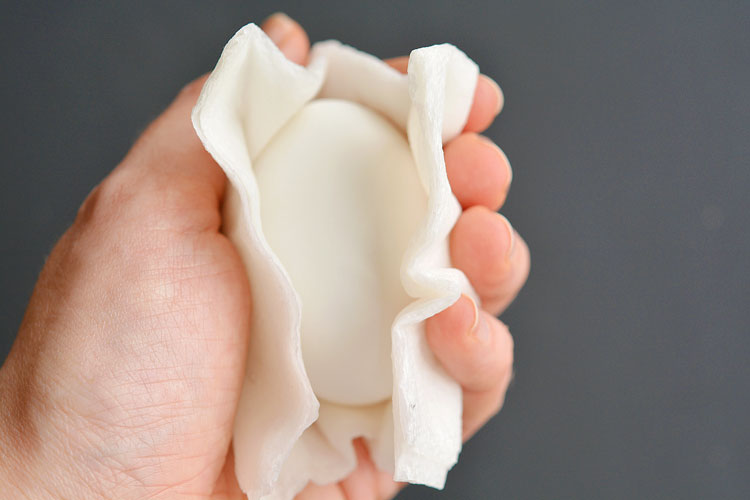
And when you remove the wet paper towel and the paper backing, you can see that the image transferred perfectly!
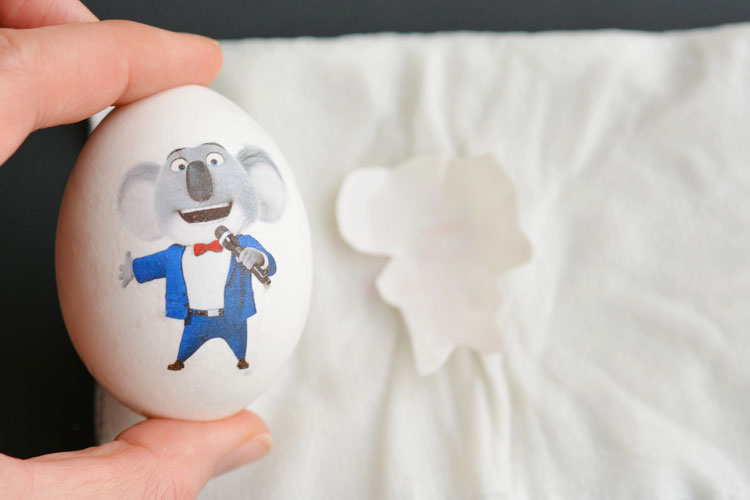
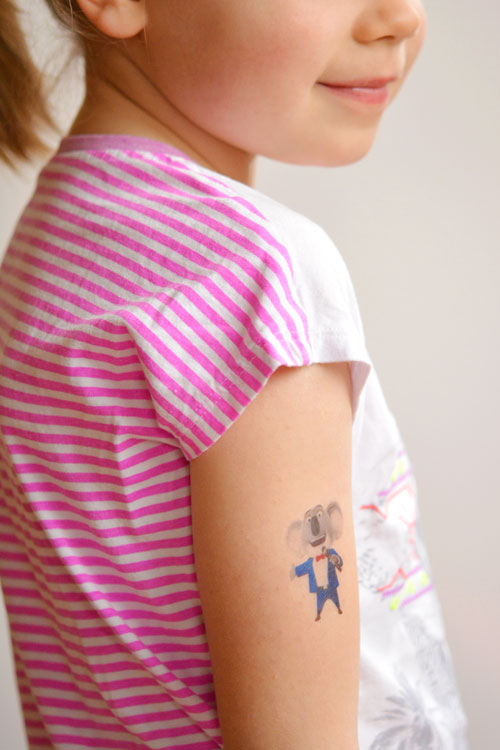
Aren’t they cute!? It’s so easy to make your own temporary tattoos and you can use any image that you like!
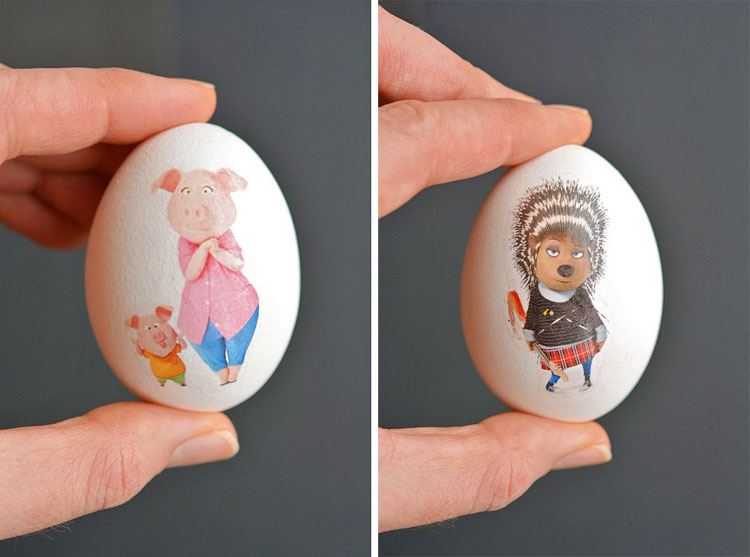
Since the eggs are white, the colours of the transferred images are nice and bright and they really pop.
They work as temporary tattoos as well, of course, but any of the white areas show the skin through them. If you use them just as temporary tattoos, you’ll want to choose images without very much white to get the best effect.
I love that you can customize these however you like! You can make them with flowers, or Easter characters, or even family photographs!
Follow @SINGMOVIE on Social Media: Facebook | Twitter | Instagram
It’s so easy to transfer any image onto an Easter egg! They end up looking bright and colourful and you can make them with any images you like! Such a fun project to try with your little ones this year!
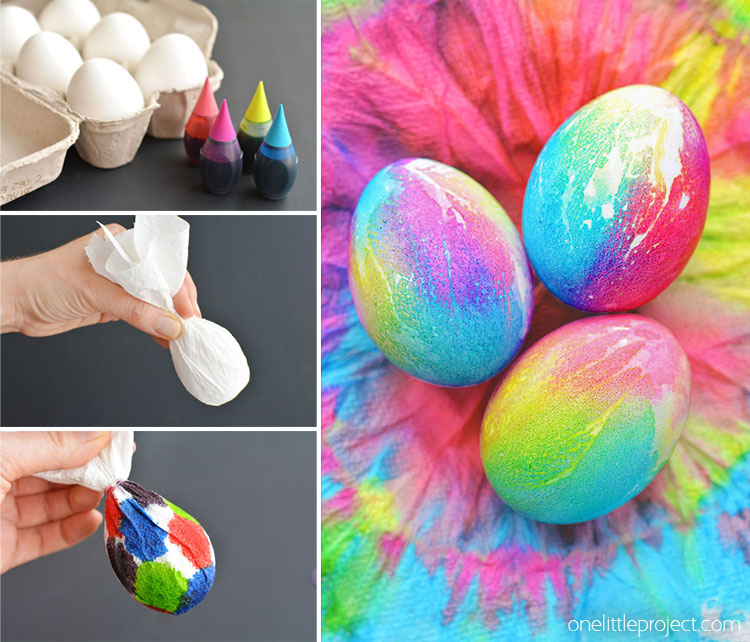
If you’re looking for more fun Easter egg ideas, be sure to check out our tie dye Easter eggs. These are so fun and ended up looking sooooooooo pretty!!


Leave a Reply