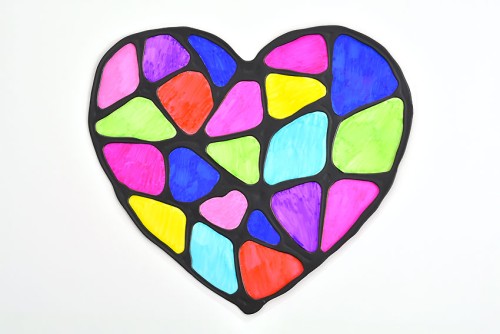
This DIY stained glass suncatcher craft is SO FUN to make, and it’s so bright and cheerful! Use one of our free, printable templates (see the links below!) to create the suncatcher’s shape, and then use markers to colour it all your favourite colours.
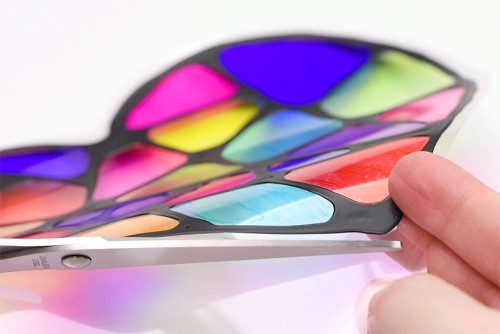
These suncatchers look awesome hanging in the window, but they’re also really fun to play with! Shine a flashlight over the suncatchers to experiment with the colourful shadows. So cool!

This post contains affiliate links. If you use these links to buy something we may earn a small commission which helps us run this website.
DIY Stained Glass Suncatcher Craft
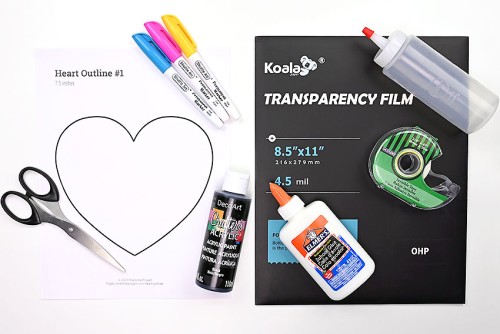
Materials:
Equipment:
- Empty squeeze bottle (or half full bottle of glue)
- Free Printable Heart template (or any other shape!)
Watch the step-by-step video tutorial:
Instructions:
Step 1: Find what you need
- Gather your supplies and materials.

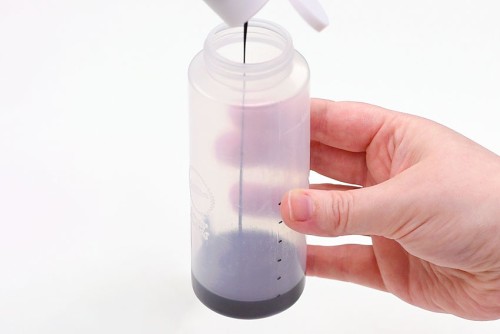
Step 2: Mix black glue and prepare the template
- Add 1 part black paint to an empty squeeze bottle. (We marked 1 cm on the side of the bottle and filled the paint to that mark.)
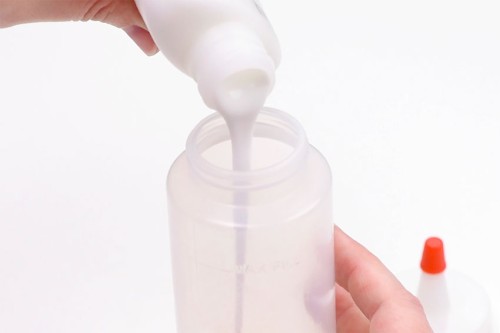
- Pour in another part of white glue, making a 1:1 ratio of paint and glue. (We marked 2cm on the side and filled the glue to that mark.)

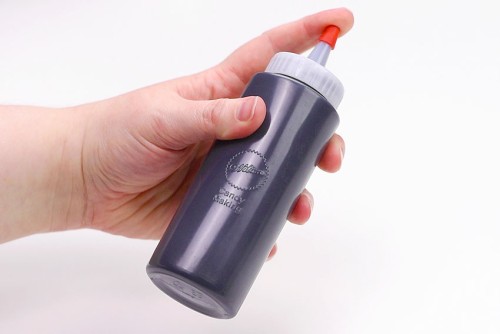
- Place the cap on the bottle and shake well for a few minutes, to fully combine the glue and the paint.
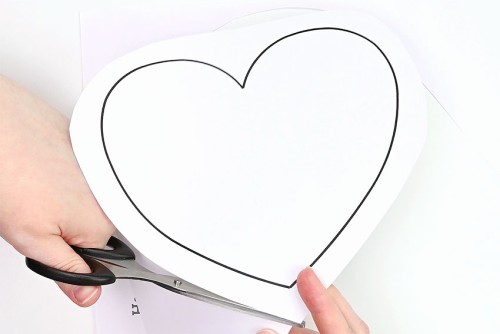
- Print out a heart template (or a shape of your choice!) and roughly cut it out, leaving between 1/2 – 1 inch around the outside.
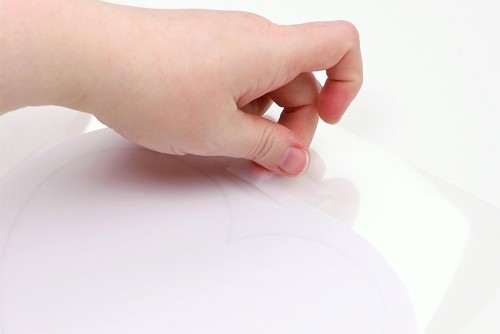
- Tape the template to the transparency film, printed side down, so that you can see the shape from the other side of the film.
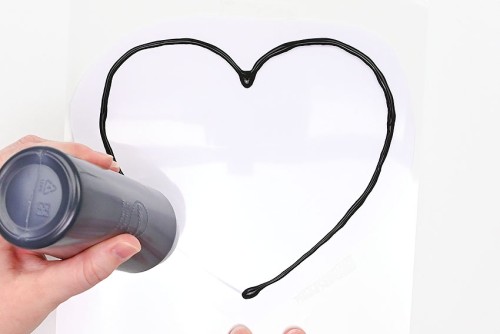
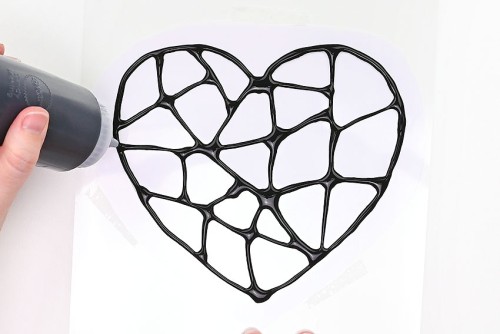
Step 3: Make the suncatcher outlines
- Trace around the outline of the shape with the black glue.
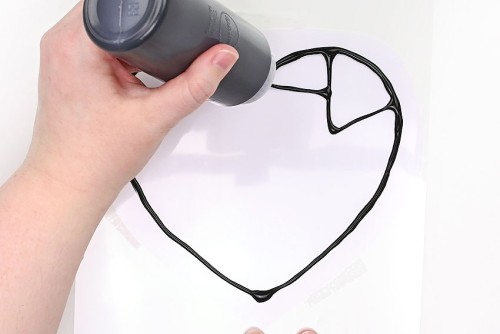
- Begin adding lines inside the shape to create a stained glass look.
- Continue adding lines and shapes until you’re happy with the design. Don’t add the lines too close together, because the glue will spread a bit.Allow the black glue to dry overnight.
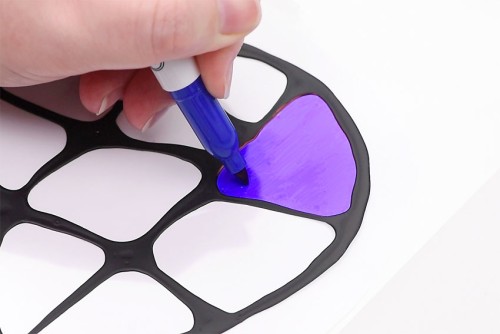
Step 4: Colour the suncatcher and cut it out
- Use permanent marker to colour in a section of the heart.Use the fine tip of the marker to go along the edge of the black glue, and the thicker side of the marker to fill in the rest.
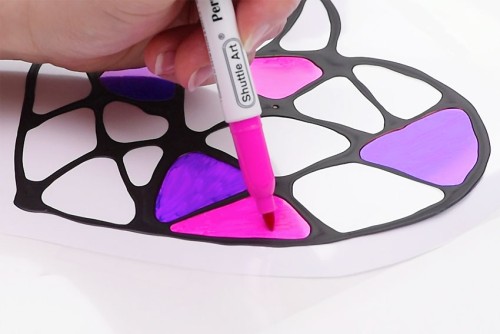
- Add the same colour in different areas of the suncatcher if you’d like, and then choose a second colour.
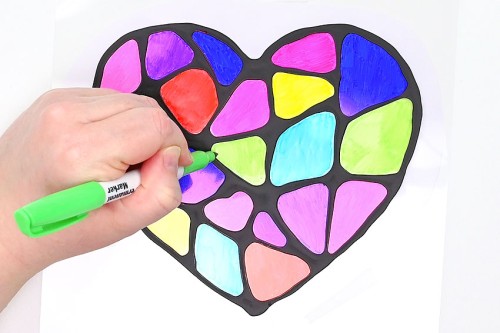
- Continue colouring in sections of the suncatcher until they’re all filled.
- Remove the paper template and cut out the heart suncatcher. Cut about 1/4 inch away from the black line – no need to be super precise, because the part outside the heart is clear and won’t be seen.
- Your DIY stained glass suncatcher is complete!
Helpful Tips:
- Make sure your black glue is very well mixed and make it a day ahead of time if you can. The glue seems to have a nicer consistency when it’s had a chance to sit for a while before using it.
- Test your black glue on scrap paper to get an idea of how fast it flows out. Our bottle required little to no squeezing for the mixture to come out.

What is black glue?
Black glue is a combination of white glue and black acrylic paint. The black glue flows smoothly out of the bottle and it’s often used in art to create a contrast between the black lines and another medium, like watercolour paint, pastels, or markers.
Black glue flattens a bit and turns matte as it dries, but it still provides nice, raised lines that are easy to colour in.
What kind of squeeze bottle works the best?
You can use an empty glue bottle (or a half full bottle that you can add paint to). You can buy a condiment squeeze bottle from the dollar store, or even needle tip glue bottles from the craft store or Amazon.
The squeeze bottle we used is actually meant for candy making. Basically you want to use a bottle with a small nozzle that allows you to create fine lines with the black glue.

Download our free printable templates to make these DIY suncatchers:
Click the links below to find many great options for tracing! The templates are free to download and print. See each page for PDF links that will open in a new window. Then print them on regular 8.5 x 11 (letter sized) printer paper.
>>> Heart Outline <<<
We used both the large and medium sizes of heart outline #1.
>>> Butterfly Template <<<
We used large butterflies #1 & #5 and drew our own butterfly patterns inside.
>>> Star Template <<<
We used the large star template #1. We also used the largest size on the ‘many sizes’ option of star #1.

What can I use as a base for my stained glass suncatcher?
We used transparency film, the kind used for overhead projectors. It’s a flexible, clear plastic that provides a sturdy enough base to make these suncatchers.
You can also put a blank laminating pouch through a laminator and use that. Plastic folders would also work well, or you can cut out a flat part from a plastic clamshell (the kind that fruit and pastries come in).

What type of markers are the best for making DIY suncatchers?
We found permanent markers to be the best choice for colouring on the transparency film. We used Shuttle Art markers, but coloured Sharpies also worked very well. Be sure to use darker colours, because lighter colours don’t show up very well on the plastic.
Glass markers would probably be another good choice. We tried washable Crayola markers, but the colours beaded up on the plastic. It’s definitely an option if that’s all you have, but you won’t get the smooth consistent colours you see in our photos.
How can I hang this suncatcher craft in the window?
We used removable double sided tape to hang these suncatchers, but sticky tack works as well. It looks best if you can hide whatever you use to stick it with behind the black glue sections.
You can also make a small hole at the top with a one hole punch and hang the DIY suncatcher on a suction cup hook. This will allow the suncatcher to move in the breeze, as well!

Add a little colour to your life with this pretty DIY suncatcher craft. These suncatchers look gorgeous reflected in the sun, and they’re also really fun and inexpensive to make!

Here’s even more summer craft ideas:


Our book Low-Mess Crafts for Kids is loaded with 72 fun and simple craft ideas for kids! The projects are fun, easy and most importantly low-mess, so the clean up is simple!

Where to buy:
You can purchase Low-Mess Crafts for Kids from Amazon, or wherever books are sold:
Amazon | Barnes and Noble | Books-A-Million | Indiebound | Amazon Canada


Leave a Reply