This “stained glass” snowflake suncatcher craft is SO PRETTY and really easy to make! These DIY suncatchers look great hanging in the window, and they’re so much fun to colour.
Simply cut out a paper snowflake and then create a colourful pattern with markers — it’s such a fun celebration of winter! Plus, these snowflake suncatchers make beautiful reflections on tables and walls when the sun hits them. Or you can simply shine a flashlight over them to see the colourful shadows; it’s so much fun!

This post contains affiliate links. If you use these links to buy something we may earn a small commission which helps us run this website.
How to Make a “Stained Glass” Snowflake Suncatcher
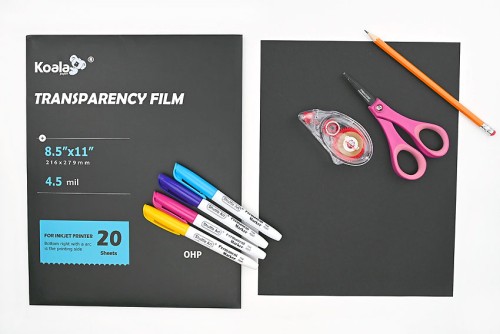
Materials:
- Black paper (or colour of choice; 24 lb or less)
- Glue tape
- Transparency film
- Permanent markers (many colours)
Equipment:
Watch the step-by-step video tutorial:
Instructions:
Step 1: Find what you need
- Gather your supplies and materials.

Step 2: Fold the paper snowflake
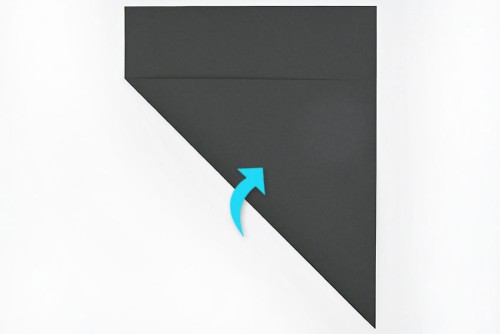
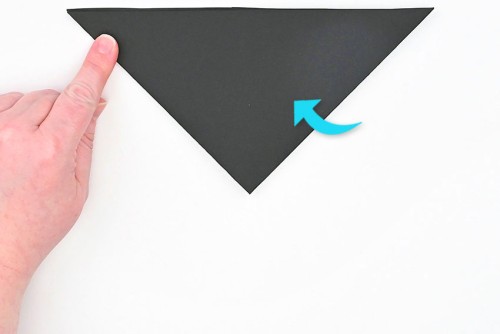
- Fold the bottom left corner of the paper up so that the bottom edge of the paper meets the right side.
- Cut off the extra paper (the rectangular strip).

- Place the paper back in the same position, with the fold going up diagonally on the left.
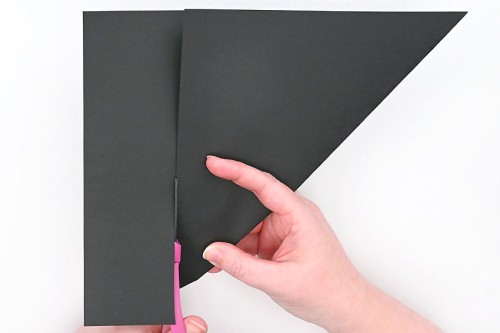
- Fold the bottom right corner up to meet the top left corner. You should have a triangle with the longest edge along the top.
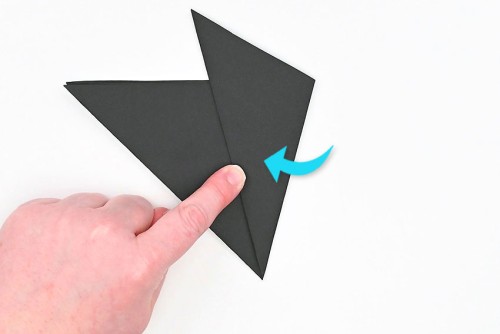
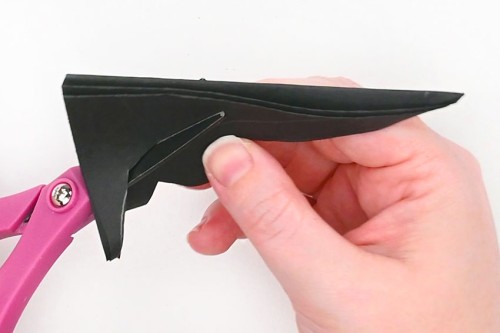
- Now fold the right third of the paper over to the left as shown in the photo below.Don’t push the fold down completely, as you may need to adjust it to make perfect thirds that line up.
- Fold the left third over so that the left edge meets the right fold, again as shown in the photo below.At this point you may need to adjust the folds so that the edges line up nicely.
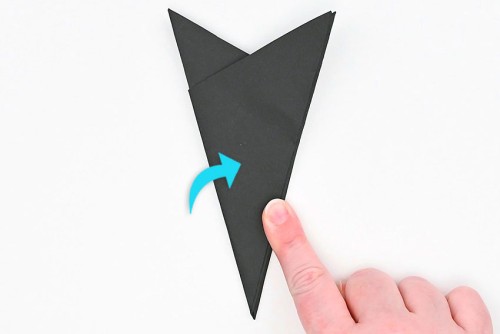
- Cut off the top points of the paper. You can flip the paper over and cut along the edge of the paper on the back.
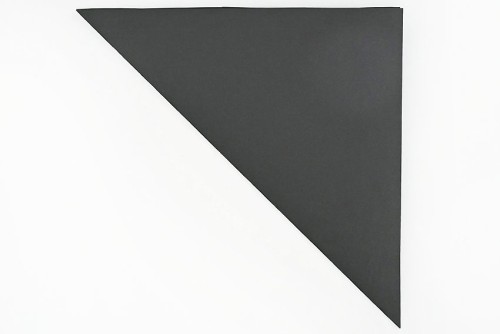

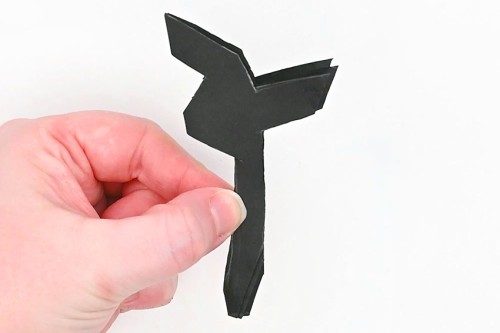
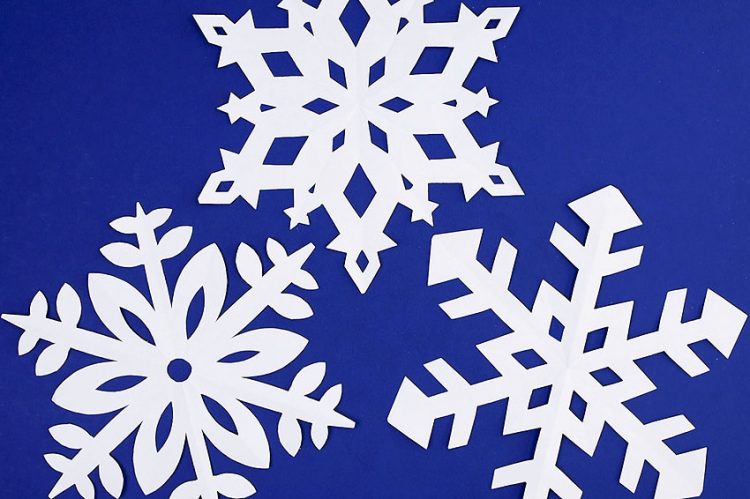
Step 3: Draw and cut the snowflake design
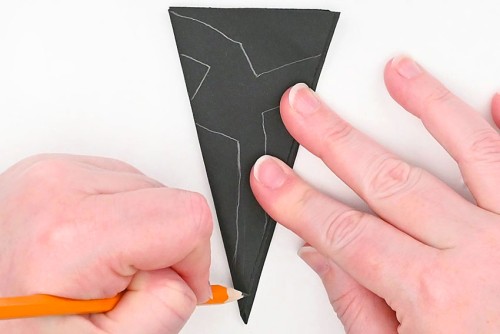
- Set the paper back down so that the top folded edge is on the left.Use your pencil to draw a snowflake pattern. Follow the pattern in the picture to make the same snowflake we did, or design your own snowflake.Visit our full guide on how to make paper snowflakes which includes tips on how to make them, design ideas and even folding templates.
- Begin cutting out the snowflake along the pencil lines.Regular adult scissors will work but children’s safety scissors are not sharp enough. We like using sharp detail scissors (link in the materials list above) if you have them.
- Continue until the snowflake pattern is completely cut out.
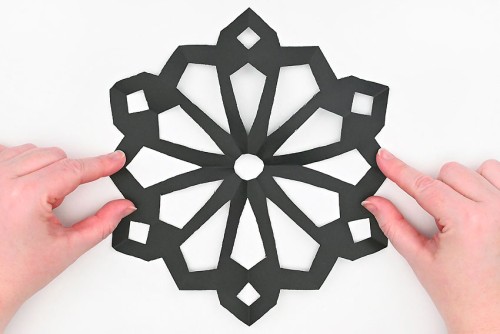
- Unfold the paper to reveal your beautiful snowflake!
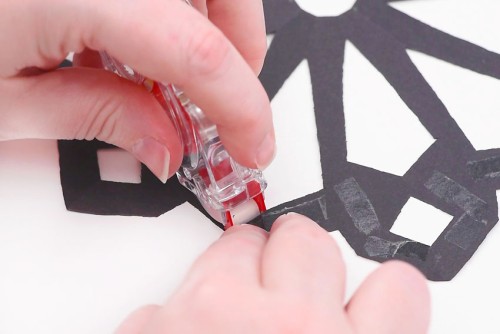
Step 4: Add a plastic backing to the suncatcher
- Flip the snowflake over to hide any leftover pencil marks. Then add glue tape along the edges and center of the paper.
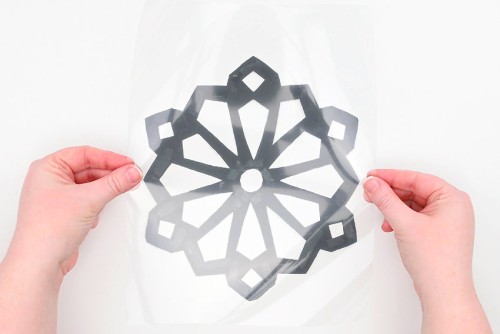
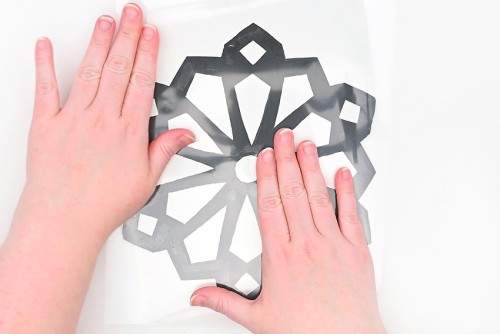
- Place a piece of transparency film on top of the snowflake, with the shiny side down.
- Press and smooth the plastic sheet into place.
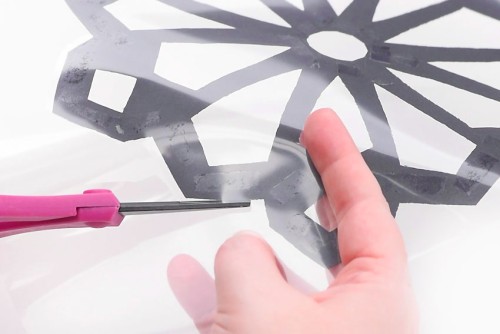
- Cut off the extra plastic around the outside of the snowflake.No need to be super precise — you can leave a little border around the outside of the snowflake, because it’s clear and won’t show up once the suncatcher is hung in the window.
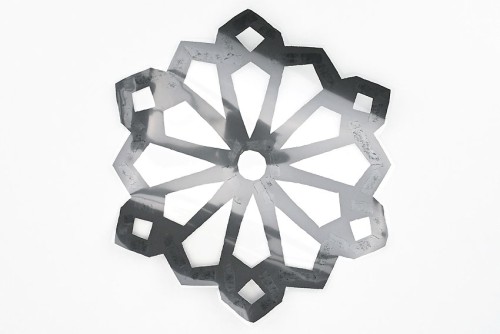
- Set down the snowflake with the paper side down. The top facing you should be only plastic.
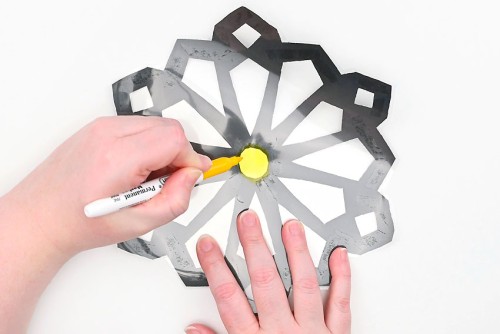
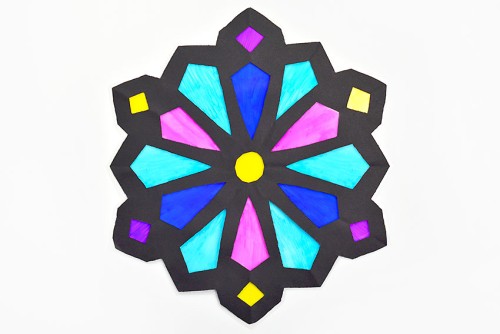
Step 5: Colour your snowflake suncatcher
- Choose a colour of marker and fill in a section of the snowflake.Make sure the whole area is filled in. You can even go over the edge a bit, since when you flip the snowflake over it will be hidden behind the paper.
- Continue, filling in the rest of the sections with colour. You can make a pattern with the colours, like we did, or fill them in randomly.
- Your “stained glass” snowflake suncatcher is complete!

Helpful Tips:
- To flatten your paper snowflake once you’ve unfolded it, cover it with parchment paper and iron on a medium-low temperature, no steam. This will remove the worst of the creases in the paper. Note: Don’t iron it after you’ve added the transparency film.
- Check out our how to make paper snowflakes post for more tips and tricks, as well as printable templates and snowflake ideas.

What type of markers are best for this snowflake suncatcher?
We recommend using permanent markers to colour on the transparency film. Sharpies or any other brand of permanent markers should work well. Use darker colours for the best results, since lighter colours don’t show up well on the plastic.
You can use washable Crayola markers if that’s all you have, but the colour will bead up on the plastic and won’t give you the consistent colour you can see in our photos.
What type of plastic is used?
We used transparency film, the kind meant for use with overhead projectors. It’s a flexible, clear plastic that gives the paper snowflake a sturdy base.
You can also put a blank laminating pouch through the laminator and use that. Or try using a plastic folder, or even the flat part of a clamshell package (the kind that pastries and fruit come in).

How can I hang up my stained glass snowflake suncatcher?
We put removable double sided tape on the back side of the suncatchers to hang them up in the window, but sticky tack also works. Place the tape or sticky tack behind the black parts of the suncatcher so they’re hidden from view.
You can also punch a hole in the top of the suncatcher and string some ribbon or twine through to hang them on a suction cup. This will also give a bit of movement to the suncatcher.
What black paper did you use? Can I use a different colour?
We bought a pack of 24 lb paper from Michael’s to make our snowflake suncatchers, but you can also use black construction paper. We like the look of the black paper since it makes the suncatchers look like real stained glass.
If you don’t have any black paper you can definitely use another colour. We made a couple suncatchers with blue paper and they look really nice too!

What scissors are best for a paper snowflake craft?
We recommend using detail scissors if you have them. These scissors have short, sharp blades that make it easy to cut precisely through layers of paper.
If you don’t have detail scissors, any sharp adult scissors should also work. Just avoid using children’s safety scissors since they won’t be sharp enough to cut through all the layers of paper.
How else can I make a snowflake suncatcher?
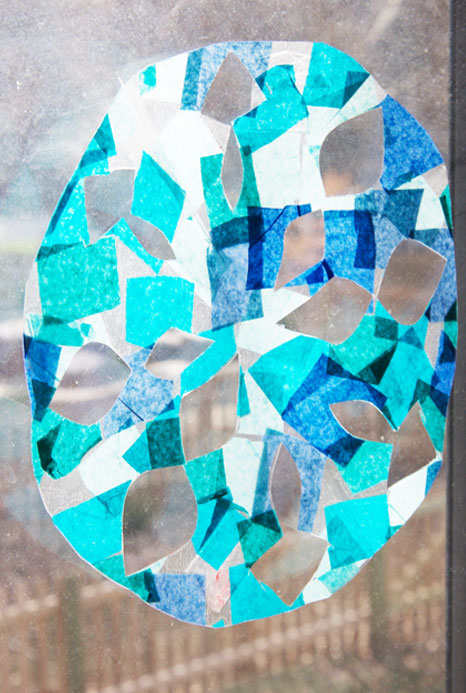
Tissue paper also creates a really beautiful and colourful snowflake suncatcher! Attach pieces of tissue paper to the sticky side of a piece of contact paper. Then seal it in with another piece of contact paper on top.
Then follow the step by step tutorial above to fold and cut it into a paper snowflake. It’s another fun and easy way to make a winter suncatcher!
You can also make beautiful coffee filter snowflakes to hang in the window.

Use these snowflake suncatchers to add a bit of colour in your house after all the Christmas decor is taken down! These DIY suncatchers are easy, quick, and inexpensive to make, and they create a beautiful glow when the sun shines through them.

Here’s even more DIY suncatcher ideas:


Our book Low-Mess Crafts for Kids is loaded with 72 fun and simple craft ideas for kids! The projects are fun, easy and most importantly low-mess, so the clean up is simple!

Where to buy:
You can purchase Low-Mess Crafts for Kids from Amazon, or wherever books are sold:
Amazon | Barnes and Noble | Books-A-Million | Indiebound | Amazon Canada


Leave a Reply