Did you know that you can make a beautiful paper flower in the same way that you make a paper snowflake?! It’s so much fun! Learn how to make paper flowers by following our easy photo and video tutorials below.
These kirigami flowers are SO PRETTY! And all it takes is a few simple folds and cuts to transform a single piece of paper into a beautiful flower. Design your own flower shapes or use our free PDF templates. (We have 9 different shapes to choose from!)

This post contains affiliate links. If you use these links to buy something we may earn a small commission which helps us run this website.
How to Make Paper Flowers
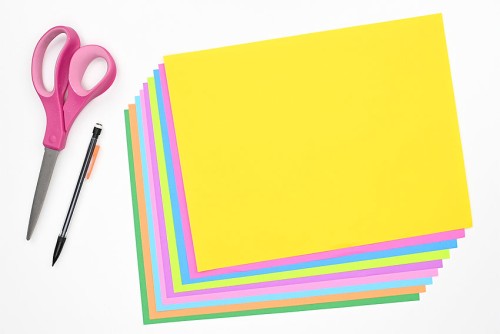
Materials:
- 1 piece Colored printer paper (per flower)
Watch the step-by-step video tutorial:
Instructions:
Step 1: Find what you need
- Gather your supplies and materials. You’ll need 1 sheet of paper per flower.

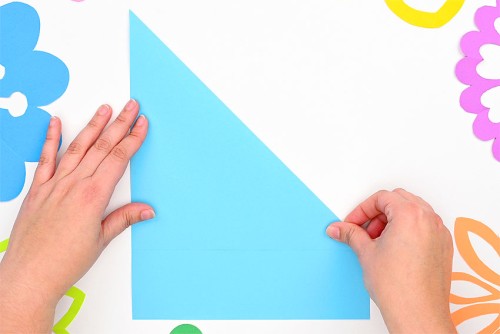
Step 2: Fold the flower base
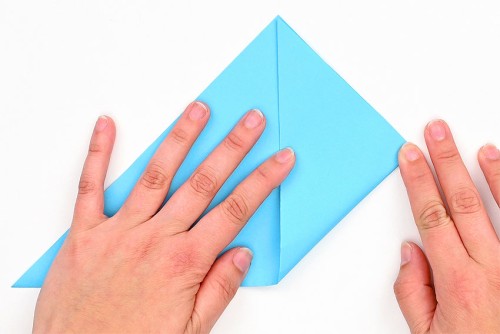
- Fold the top right corner of the paper down so that the top edge meets the left side of the paper.
- Cut off the bottom rectangle part of the paper. This gives you a square piece of paper.
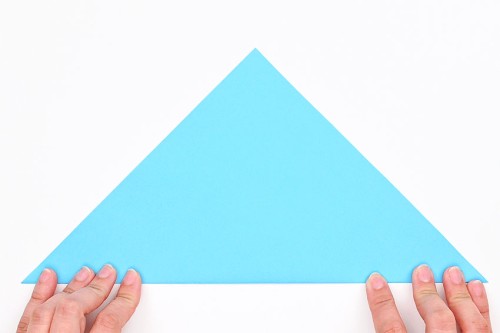
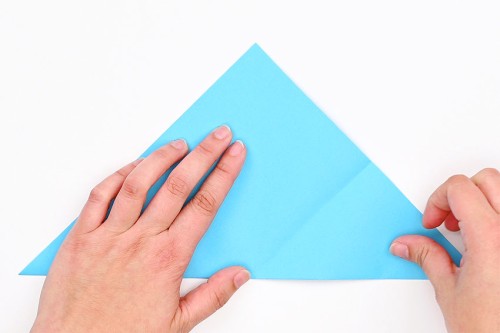
- Keeping the paper folded in half, turn the triangle so the long, folded edge is at the bottom.

- Bring the right bottom corner over to meet the left.Mark the middle of the paper by making a small crease at the bottom, but don’t fold the paper completely.
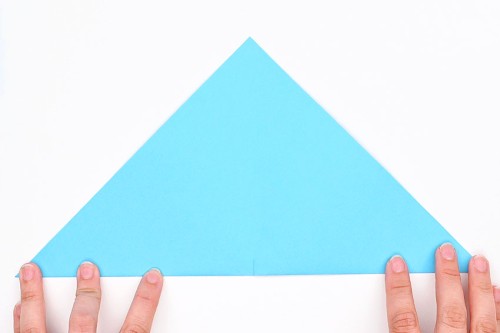
- Open the paper back up.
- Bring the right point of the triangle up to the top point. Again, make a crease mark at the top right, but don’t make a full fold.
- Open the paper back up to a triangle shape again.
- Bring the top point of the triangle down to the mark you just made. Make a crease mark at the top point, but again, don’t make a full fold.
- Unfold the paper again. You should have a crease mark at the bottom middle, and two crease marks on the right edge.
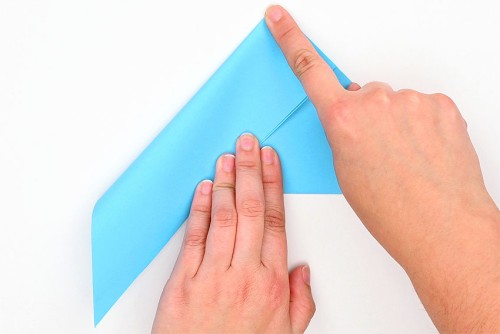
- Fold the bottom right corner up as shown in the photo below. Make the fold starting at the bottom center crease mark, so that the bottom right edge meets the top right crease mark.Press this fold down completely.
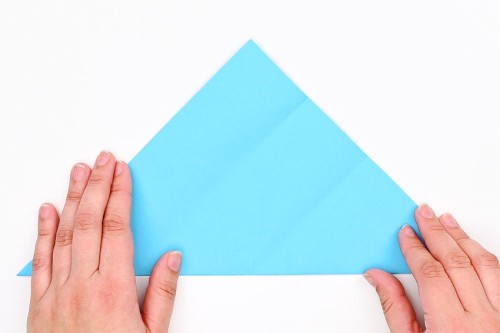
- Now fold the bottom left corner up and right so that the bottom edge lines up with the other bottom fold.
- Then bring the bottom right edge over so it lines up with the left edge. Press down the fold. You should have a tall triangle shape with 3 pointed edges at the top.


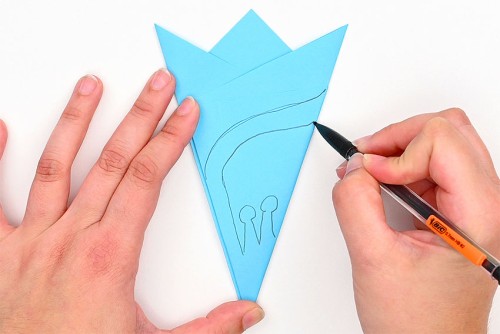
Step 3: Draw your flower design
- Draw your flower design on the triangle.Follow the pattern in this tutorial, or see the templates below for 8 other flower designs!
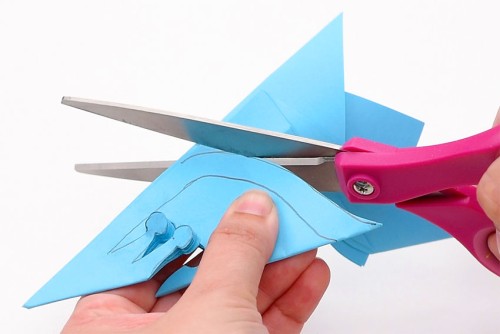
Step 4: Cut out the flower and unfold
- Cut around the outside of the flower design.
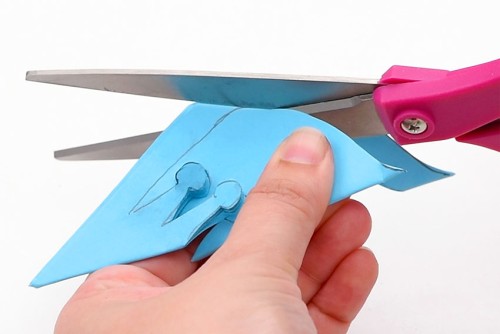
- Then carefully cut along the inside lines.
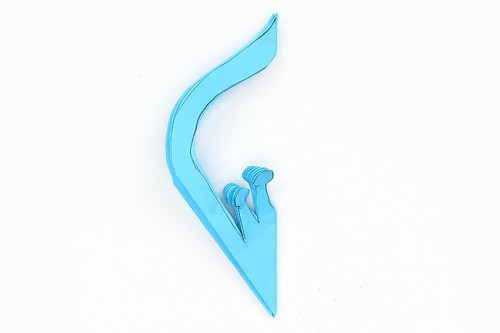
- This is what your paper should look like after you finish your cutting. It’s very similar to making a paper snowflake.
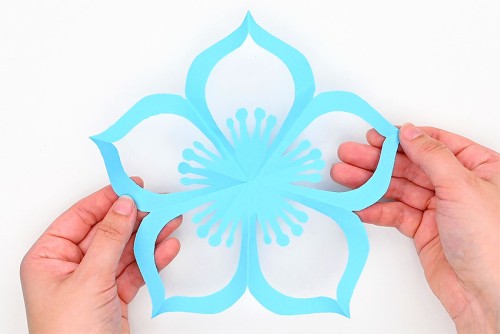
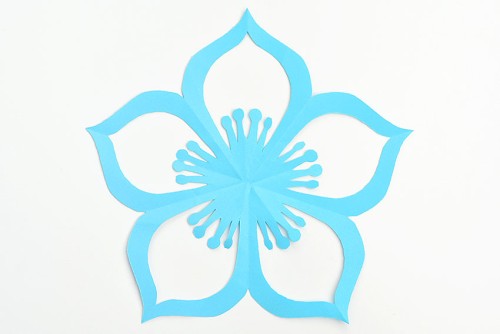
- Unfold the paper to reveal a beautiful kirigami flower!
- Smooth out the folds and your paper flower is complete!
Helpful Tip:
Want to remove the creases from your folded paper flower? Simply iron the paper on a low temperature. Place the flower between two pieces of parchment paper to prevent the iron from tearing the smaller details of your flower.
 Download our free paper flower templates:
 Download our free paper flower templates:
Click on the links below to download our free, printable paper flower templates! The PDF files will open in a new window. Then simply print the templates on 8.5 x 11 (letter size) printer paper and follow the instructions on the page.
The templates are numbered according to the following image:

Find the pattern you like in the image above, and click the link below to get the corresponding printable template:
>> Paper Flower Template #1 <<
>> Paper Flower Template #2 <<
>> Paper Flower Template #3 <<
>> Paper Flower Template #4 <<
>> Paper Flower Template #5 <<
>> Paper Flower Template #6 <<
>> Paper Flower Template #7 <<
>> Paper Flower Template #8 <<
>> Paper Flower Template #9 <<
When you’re using the templates, the process is exactly the same as the tutorial above, but we’ve marked out the lines and patterns where you need to fold and cut.
Just make sure that the printed lines stay on the outside as you fold. Don’t fold towards the lines, or you won’t be able to see them when it comes time to cut out the pattern.

What paper is best for making paper flowers?
We used regular 24 lb colourful printer paper to make these paper flowers. You need to use paper that’s thin enough to fold over several times, so something like cardstock won’t work.
Try using wrapping paper, newsprint, or magazine pages to create different designs for your kirigami flowers.
What scissors do you recommend for cutting paper flowers?
You need to use scissors that are sharp enough to cut through lots of layers of paper, so children’s scissors probably won’t be sharp enough.
You can use regular scissors as long as they’re fairly sharp. We like to use detail scissors for paper crafts like this one. Detail scissors have shorter scissor blades which makes it easier to cut the small details on the flowers.

What can I do with these folded paper flowers?
Arrange and glue your flowers on a larger piece of paper, like a poster board, or pin them on a bulletin board. You can even hang the paper flowers from string, ribbon, or fishing line.
You can also tape these paper flowers to your wall for a photo backdrop, or use them as general party decorations.

Practice your paper folding skills and make a pretty paper flower in only 5 minutes! Decorate your space with these bright and colourful kirigami flowers. They’re SO FUN and easy to make!

Here’s even more paper craft ideas:


Our book Low-Mess Crafts for Kids is loaded with 72 fun and simple craft ideas for kids! The projects are fun, easy and most importantly low-mess, so the clean up is simple!

Where to buy:
You can purchase Low-Mess Crafts for Kids from Amazon, or wherever books are sold:
Amazon | Barnes and Noble | Books-A-Million | Indiebound | Amazon Canada


Leave a Reply