


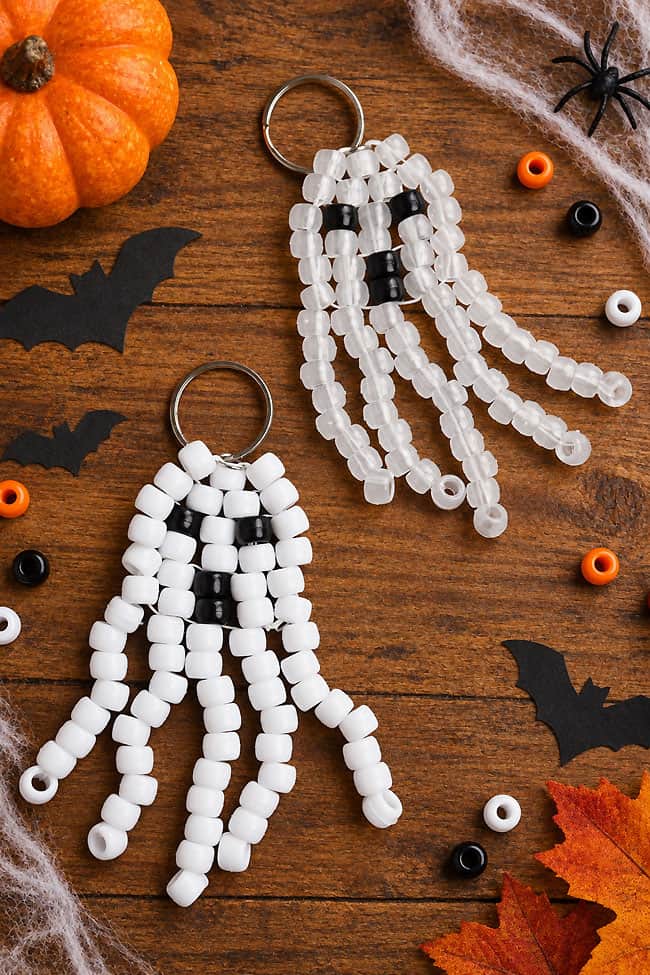
Looking for a cute pony bead ghost to make for Halloween? This easy beaded ghost keychain is made with simple white and black pony beads, with long dangling fringe that gives it a fun, floaty shape. The little face is worked right into the pattern, so you can create a sweet Halloween ghost with just a few basic supplies.
This pony bead ghost is a fun project for kids, tweens, and adults who enjoy bead crafts. Make one for a backpack or key ring, or create a whole group using white, clear, glow-in-the-dark, or even pastel beads. They’re perfect for Halloween party favours, classroom crafts, or a relaxing seasonal project at home.
This post contains affiliate links. If you use these links to buy something, we may earn a small commission at no extra cost to you. This helps support our website and allows us to keep creating fun, free content.
How to Make a Pony Bead Ghost
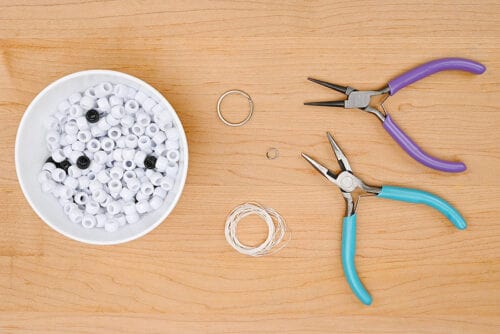
Materials:
- Clear elastic cord
- Pony beads (white and black)
- Jump rings
- Split ring keyring
Equipment:
- Needle nose pliers (2 pairs)
See the craft in action:
Instructions:
Step 1: Find what you need
- Gather your supplies and materials.

Step 2: Connect the first beads
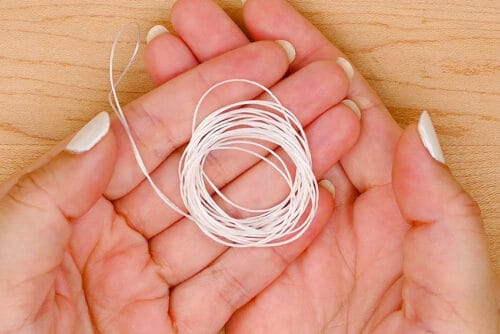
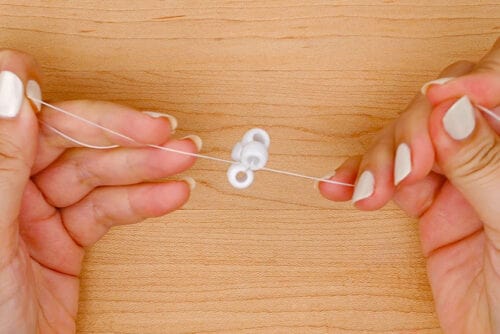
- Cut an 8 foot (96 inch) piece of white or clear elastic cord.
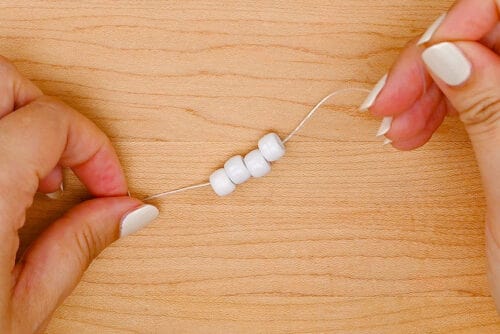
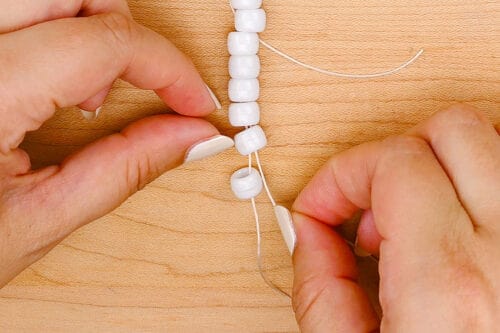
- Add 4 white beads to one end.
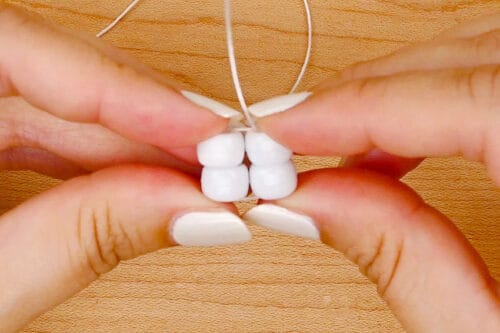
- Tie the end of the cord to the cord on the other side of the beads.
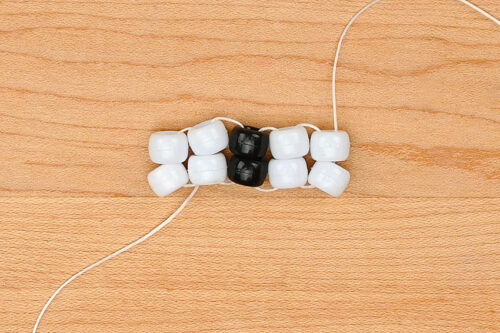
- This should create 2 rough columns of 2 beads each. Set the beads down so the long cord is at the bottom right.

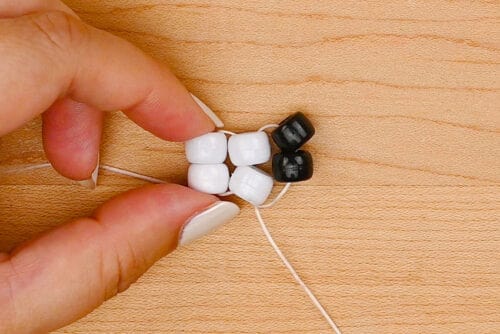
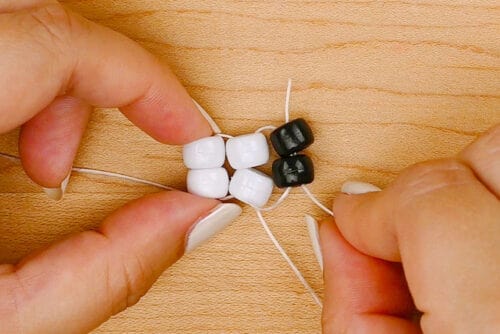
- Add 2 black beads to the long cord. Bring the cord down through the 2 white beads on the right, so it pulls the new beads next to them.
- Then bring the cord up through the last beads added (the 2 black ones).This is a process you’ll need to repeat, threading the elastic back through the previous beads and into the new beads to grow the shape. This is why you need to use a thin elastic or thread.
- Add 2 more white beads in the same way.Repeat, so that you have 5 columns (2 white, 2 white, 2 black, 2 white, 2 white).
Step 3: Build up the ghost face
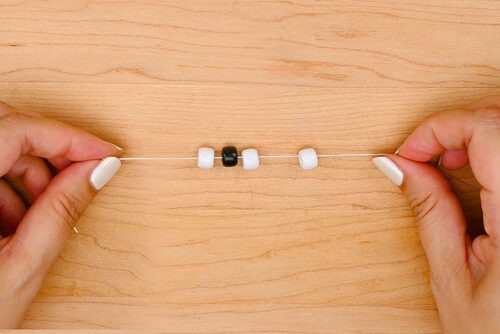
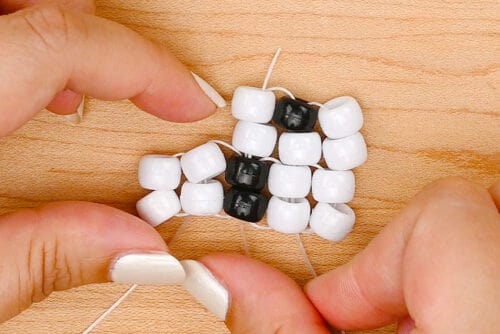
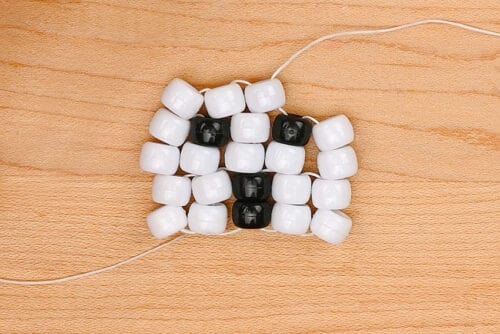
- Add 4 more beads to the cord: 2 white, 1 black, 1 white.
- Bring the cord down through column 4 (the 2 white beads to the right of the black ones).
- Adjust the cord so that you have 4 beads on top of the right 2 columns. Then bring the cord end up through column 3 (the black beads).
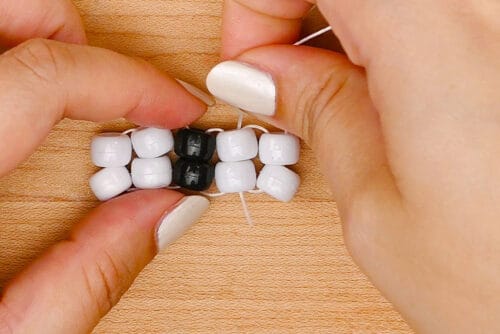
- Now you can add beads in the same way you did the first ones.Add 2 white beads and go down through the column to the right (4 beads now), and back up through 4 beads (the 2 black, and the 2 white ones just added).
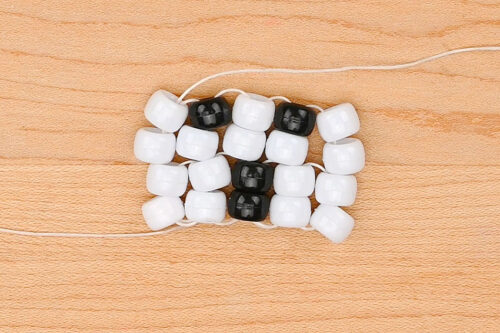
- Repeat, adding 1 black bead and 1 white. Then add 2 more white beads to the left column.Finish with the cord coming out the top left bead.
Step 4: Finish the ghost head
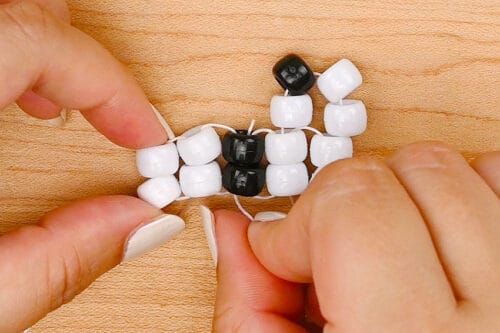
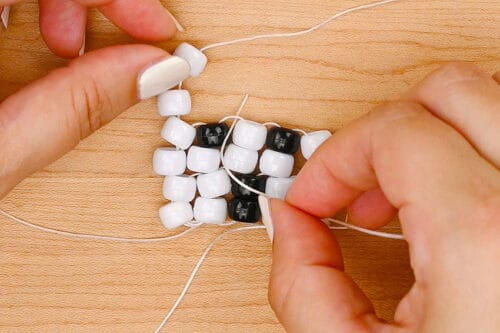
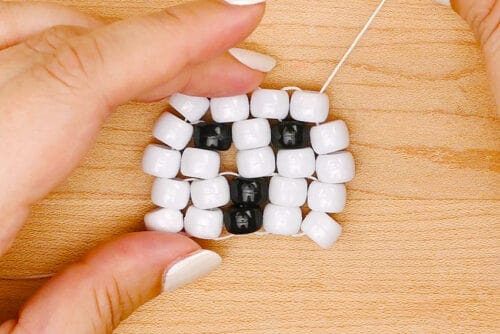
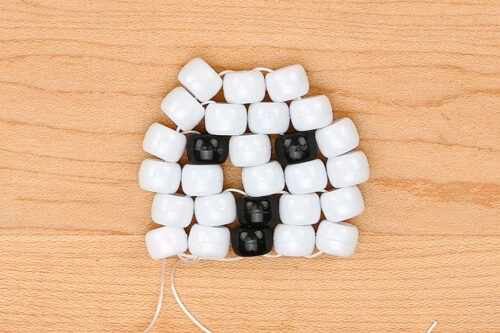
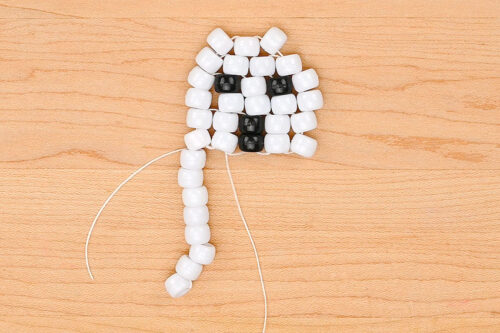
- Add 2 white beads to the cord. Bring the cord under the elastic between the left eye (black bead) and the bead to the right.
- Then bring the cord end through the right side of the last bead added. Arrange the beads so they sit in the same direction as the previous ones.
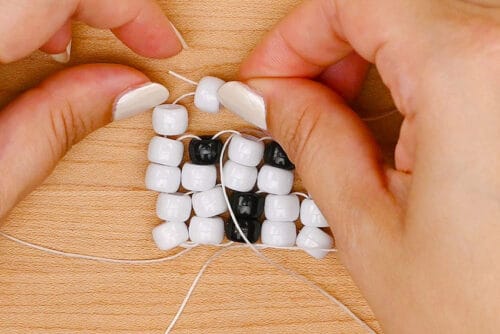
- Add 1 more white bead before bringing the cord up through the elastic between the right eye and the bead to its left.Then go through the right side of the bead you just added. This will pull the bead into place.
- Add 1 white bead to the cord. Go under the elastic to the right of the eye this time before going through the right of the bead just added.
- Add 3 more white beads in the same way, forming the top of the ghost’s head. Finish by bringing the cord down through the left column of beads.
Step 5: Form the ghost’s body
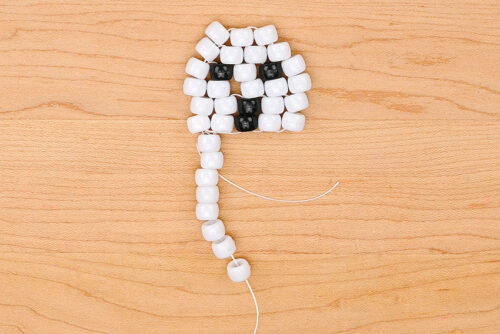
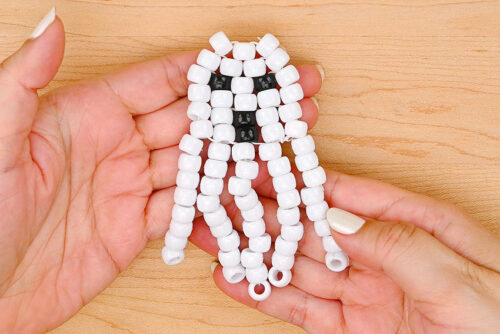
- Add 8 white beads and let them fall down the cord so they sit against the ghost head.
- Looping around the 8th bead, bring the cord up through the other 7 white beads.
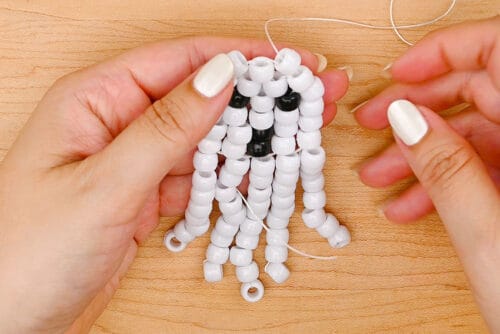
- Then bring the elastic all the way up the left column and back down the 2nd column so it sits below the head again and to the right of the fringe column you just made.Going up and down through the columns like this helps shape the ghost.
- Repeat Step 5 to make 4 more fringe sections of white beads, working up and down through the columns in the same way, gradually working towards the right.Use 9 beads for fringe #2, 10 beads for fringe #3, 9 beads for fringe #4, and 8 beads for fringe #5.
Step 6: Finish the pony bead ghost
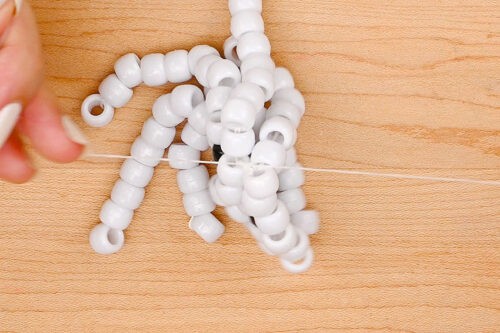
- Find where the short tail of elastic is, where you tied the first knot.Bring the long cord through the beads until it’s in the same place. Tie the 2 ends in a double knot.
- Thread each cord through a few beads before cutting off the excess.
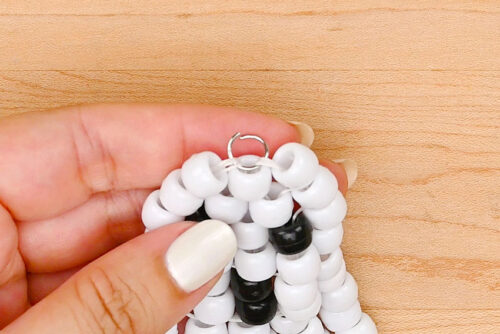
- Add a jump ring to the elastic at the top center of the ghost. Keep the jump ring open.
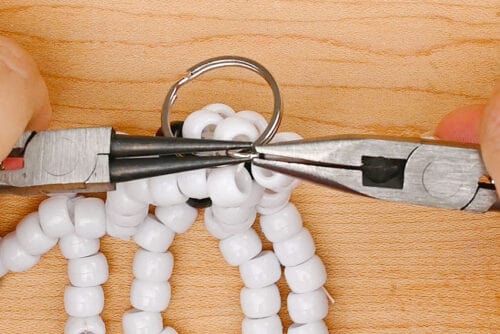
- Add a split ring keyring onto the jump ring before using 2 pairs of pliers to close the jump ring.
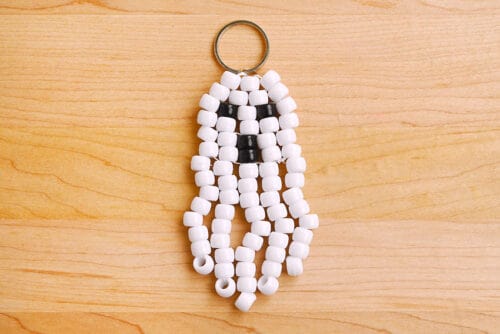
- Your pony bead ghost is complete!
Helpful Tips:
- Try different bead colours: Use glow-in-the-dark pony beads for a spooktacular surprise, or try pastel or pearlescent beads for a softer looking, extra-cute ghost.
- Keep the cord snug as you work: Pull the cord firmly enough that the beads hold the shape you’re looking for, but not so tightly that the ghost starts to curl or bunch up.
- Use a tapestry needle to make threading easier: A blunt tapestry needle can help guide the elastic cord easily through the pony beads, especially when you need to pass through a row of beads. Choose a needle with a head that’s thin enough to fit easily through the bead holes.
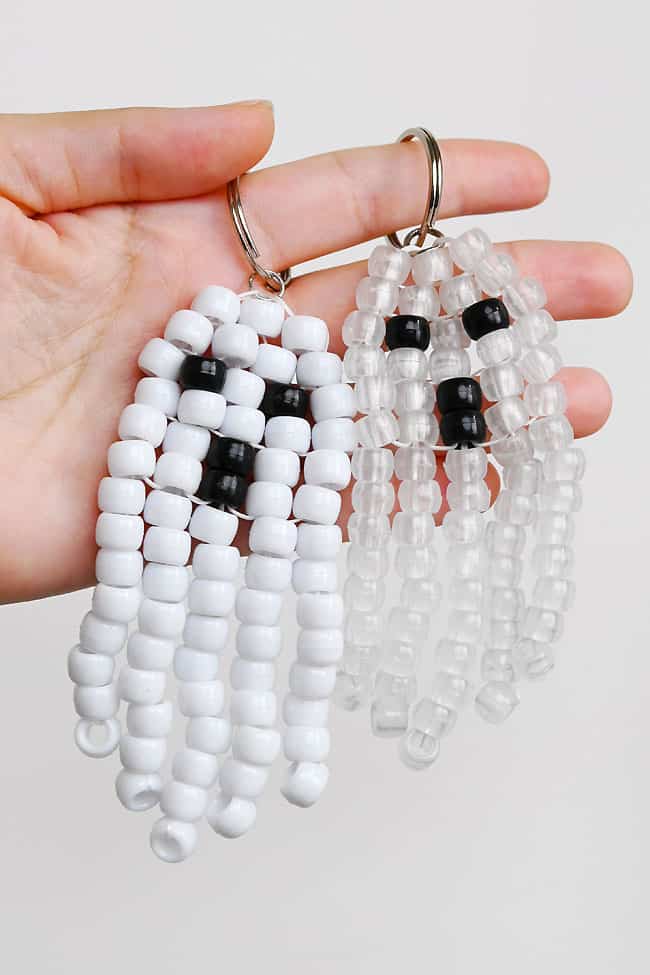
What type of beads do I need to make a pony bead ghost?
We used regular pony beads to make our ghost keychains, but mini pony beads will also work if you’d like to make a smaller version.
You’ll need black beads for the ghost’s eyes and mouth, plus white, clear, or another colour of your choice for the ghost’s body.
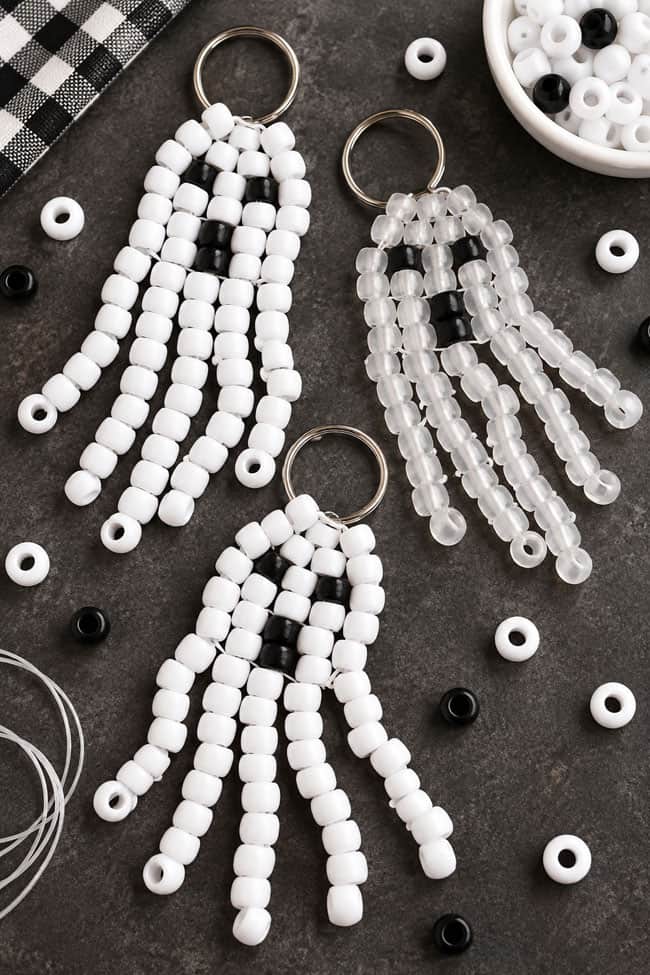
What cord is best for a pony bead ghost?
We highly recommend using a thin elastic cord for this ghost keychain. It’s thin enough to thread through the pony beads several times, and the slight stretch helps the top of the ghost hold its shape nicely without sagging.
Can I make the pony bead ghost fringe longer or shorter?
Yes! Simply add or remove beads from the hanging sections to adjust the length. Keeping the center fringe slightly longer than the outside pieces gives the bottom of the ghost a nice rounded shape.
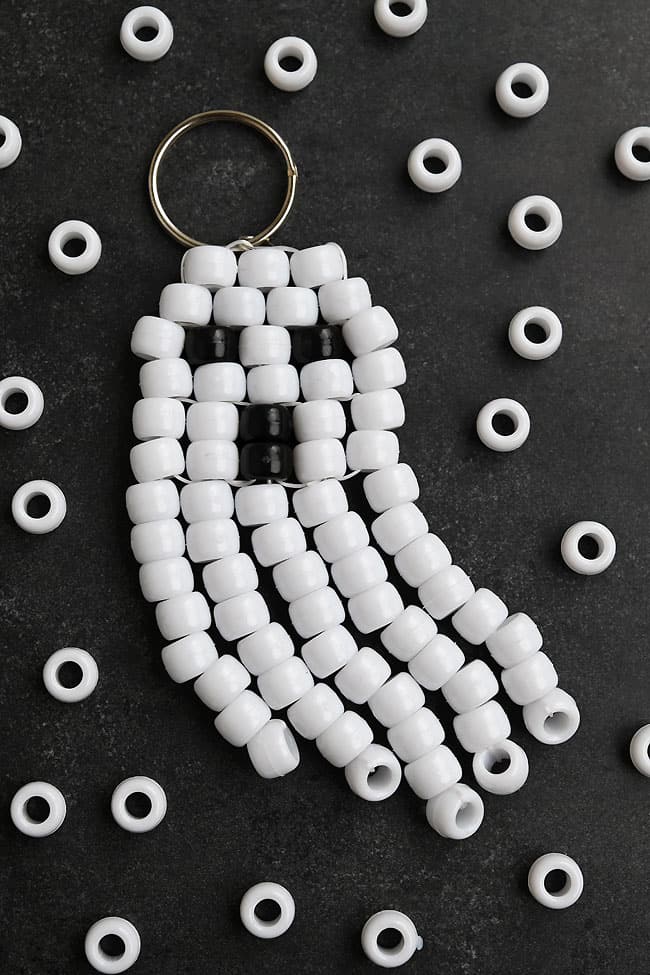
Why is my pony bead ghost curling?
The cord is probably being pulled a little too tightly. Loosen the tension slightly and flatten the ghost with your fingers as you work.
You want the beads to sit snugly together without pulling the sides inward or causing the finished ghost to curl.
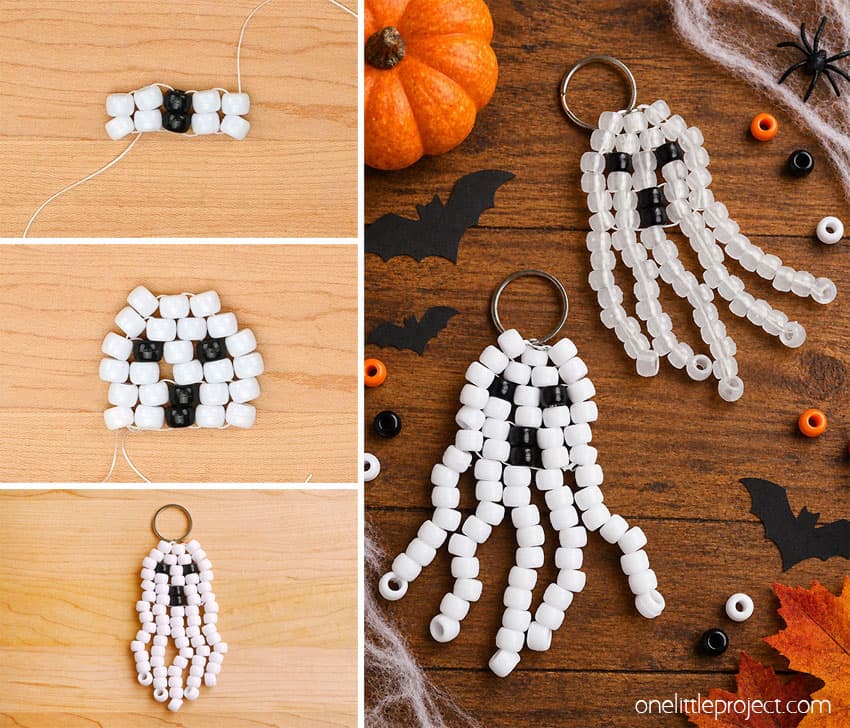
This pony bead ghost is such a fun little Halloween craft to add to your collection. The dangling fringe gives it lots of movement, and changing up the bead colours makes it easy to give each ghost its own personality.
Clip your finished ghost onto a backpack, key ring, or zipper, or make a few to hand out as Halloween party favours. They’re quick to customize and cute enough to keep out all spooky season long.
Here’s even more ghost craft ideas:

Now available
Low-Mess Crafts for Kids Book
72 cute and fun crafts that kids and parents alike can enjoy. All with as little mess as possible!
Where to buy:
You can purchase Low-Mess Crafts for Kids from Amazon, or wherever books are sold:
Amazon | Barnes and Noble | Books-A-Million | Indiebound | Amazon Canada








Leave a Reply