
This pony bead bunny is such a fun little craft to make for spring and Easter! With just a handful of pony beads and some cord, you can weave together the cutest bunny with long ears and a sweet little face. It’s one of those crafts that’s relaxing to work on and so satisfying to see come together bead by bead.
This pony bead bunny pattern makes an adorable DIY keychain, or you can use it for a backpack charm or Easter tree ornament. Kids will love picking their own bead colours, and it’s a great beginner project. Whether you’re crafting for Easter baskets, classroom activities, or just a cute handmade accessory, this little bunny is sure to make you smile.

This post contains affiliate links. If you use these links to buy something, we may earn a small commission at no extra cost to you. This helps support our website and allows us to keep creating fun, free content.
How to Make a Pony Bead Bunny
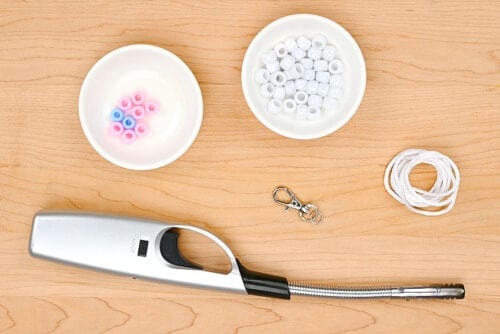
Materials:
- Rattail cord
- Swivel keychain clasp
- Jump rings
- Pony beads (white, pink, blue)
Equipment:
See the craft in action:
Instructions:
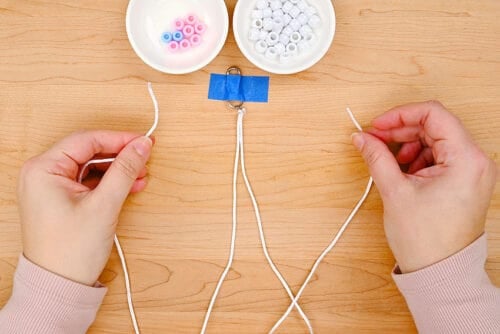
Step 1: Find what you need
- Gather your supplies and materials.

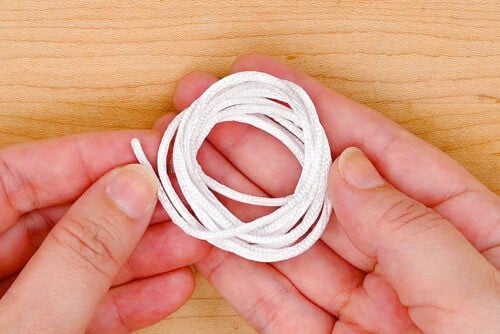
Step 2: Set up your cord
- Cut a piece of rattail cord about 4 feet (48 inches) long.
- Fold the cord together so that 1 end is about 6 inches longer than the other.
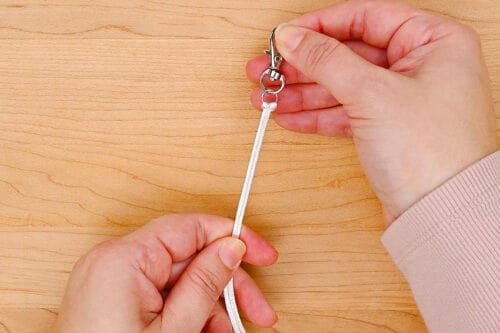
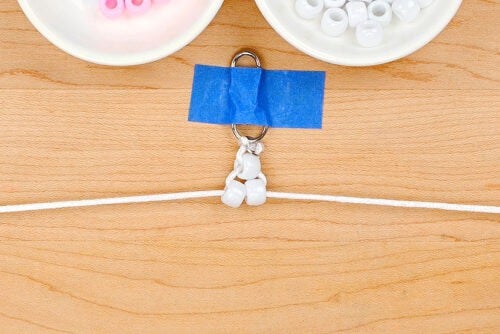
- Attach the loop end of the cord to the jump ring on the keychain hardware using a lark’s head knot.To do this, slide the loop up through the jump ring and bring it over the swivel keychain. Then pull down on the cords to tighten the knot.

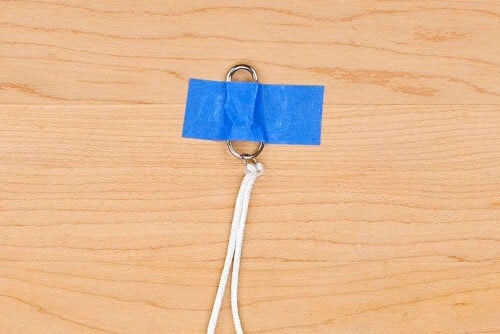
- Tape the keychain piece to your working surface. This makes it a lot easier to make knots and work with the beads.

Step 3: Make the first bunny ear
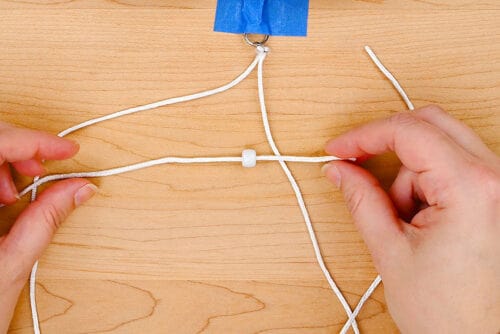
- To make the pony bead bunny you’ll be working with the ends of the cords, first attaching bead(s) to one strand, and then the other.
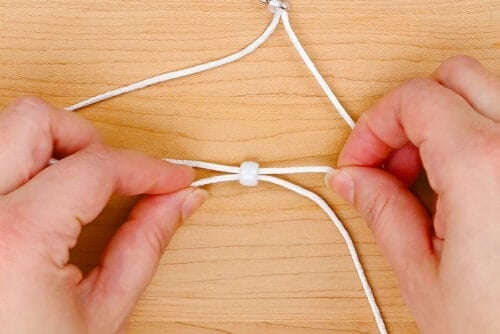
- Begin by adding 1 white bead to the left cord. (You can also do the right cord if it’s more comfortable to you.)
- Now take the end of the right cord and push it through the right side of the bead, so it’s attached to both cord ends.
- Pull the cord ends so that the tip of the ear ends up right against the knot.
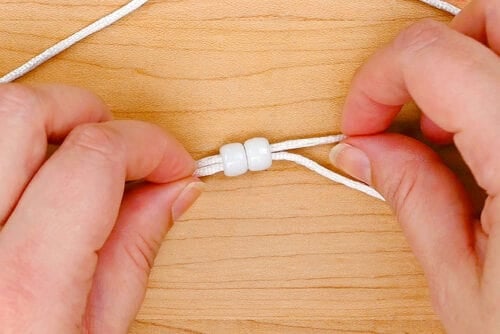
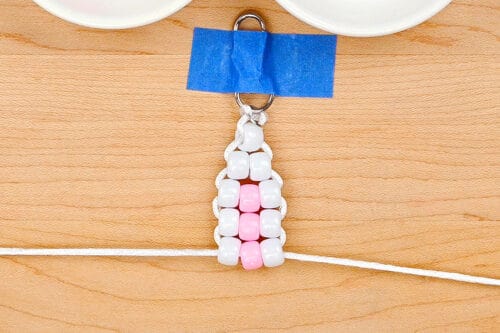
- For the next row add 2 white beads to the left cord. Again, bring the right cord through the beads.
- Pull the cord ends again, so this row of beads is snug against the first. You want the cords to be tight enough that they don’t sag, but not too tight that the beads end up buckling.
- Add the next few rows (3, 4, 5) of the ear following the same steps and adding beads in the following order: white, pink, white.
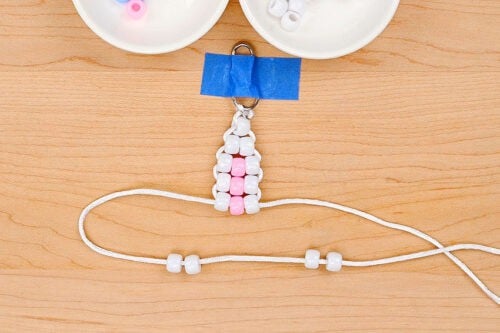
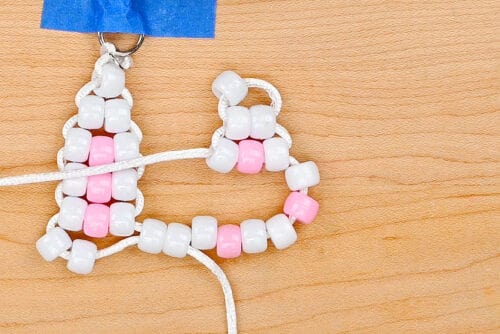
- Now add 4 white beads to the left cord. Separate the beads into 2 parts of 2 beads each.
- Bring the right cord over in-between the 2 sets. String the right 2 beads onto the right cord, sliding the cord in from the left this time.
- Pull the cords so you have the first ear finished and 2 beads that will be the center of the bunny’s head.Now you’ll have a top and bottom cord. Make sure the longer cord is on the top.

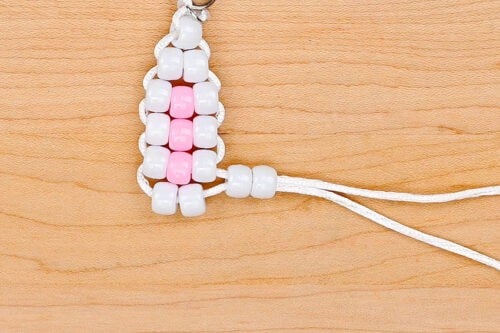
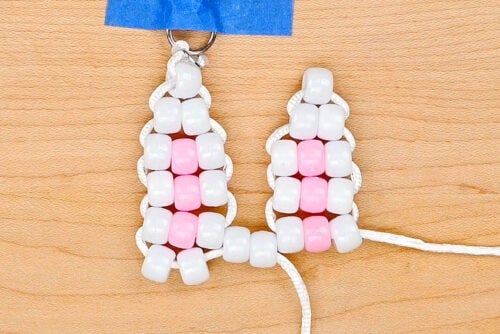
Step 4: Make the second ear
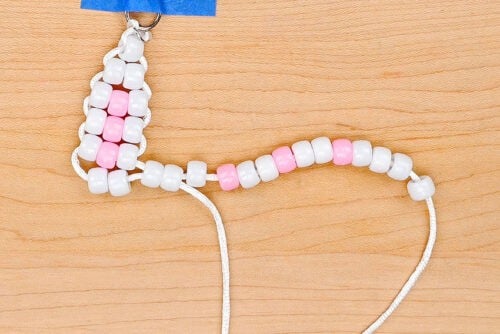
- Add the following beads to the longer cord: 1 white, 1 pink, 2 white, 1 pink, 2 white, 1 pink, 4 white.
- Loop the same long cord up. You’ll be using it to form the second ear shape.
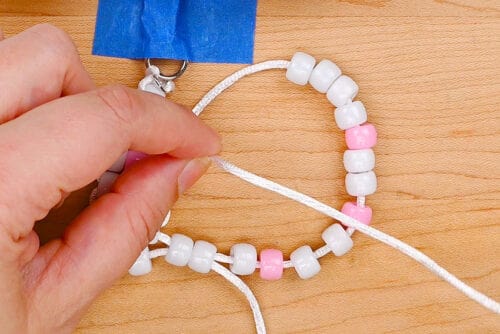
- Bring the cord end back through the second and third white beads from the end, going in the same direction. As you pull the cord, center the last white bead added so it becomes the tip of the ear.
- Bring the same cord back through the next 3 beads: white, pink, white.
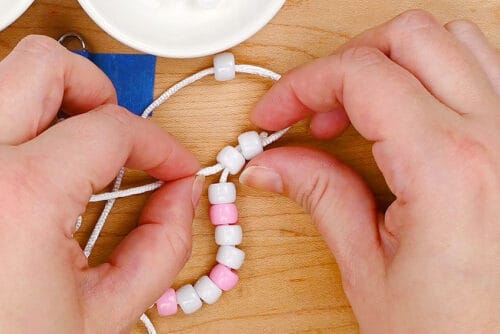
- Repeat another 2 times so there are 2 rows formed of white, pink, white. Pull on the cords if necessary to tighten up the rows on the ear.
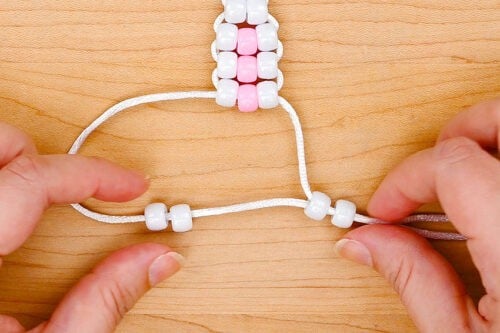
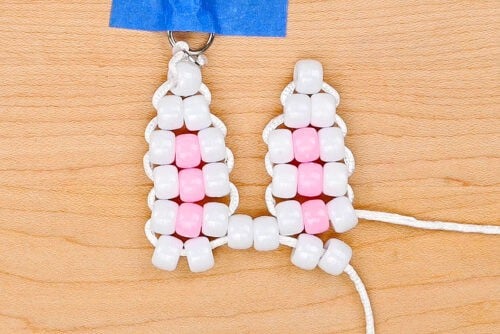
- Now we’re going to work with the 2 cord ends again. Add 2 white beads to the left (bottom) cord.
- Bring the right cord through not only these 2 white beads, but also the 2 white beads between the ears and the 2 at the bottom of the left ear.

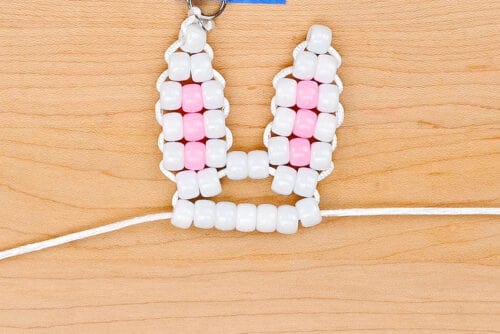
Step 5: Form the bunny’s face
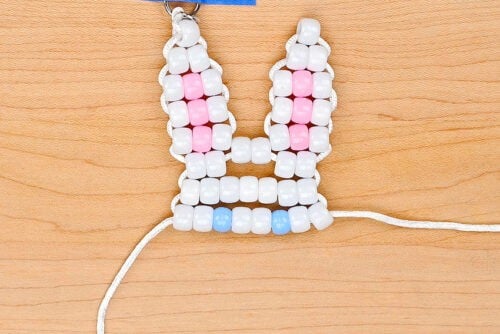
- The next row (the forehead) will be made with 7 white beads. Follow the standard adding the beads to the left cord and bringing the right cord back through them.
- Add the next row with the eyes in the same way: 2 white, 1 blue, 2 white, 1 blue, 2 white.
- Now make a row with the nose: 3 white, 1 pink, 3 white.
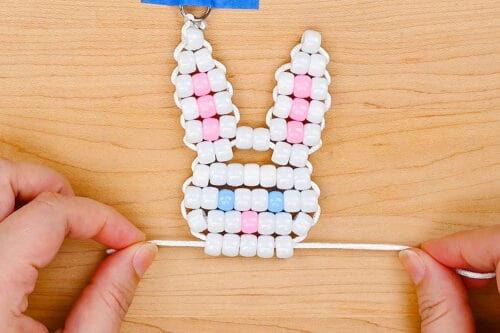
- Finish off with a row of 5 white beads for the chin.

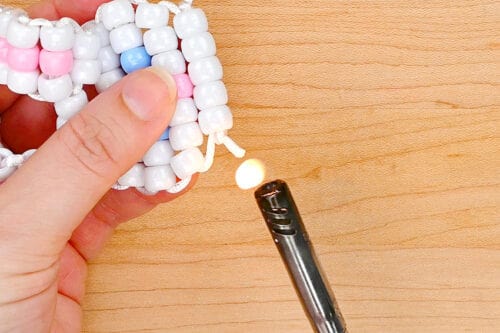
Step 6: Finish off the keychain
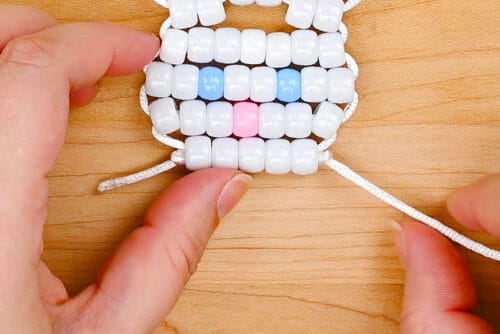
- Tie knots on both cords, placing them as close to the beads as possible. Make a double knot, if necessary.
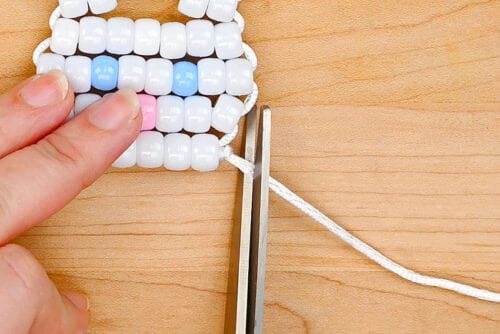
- Cut the cord ends close to the knots, leaving about 1/4 inch extra.
- Hold a BBQ lighter next to the cord end and light it. This will melt the end of the cord, keeping it from unraveling. Repeat on the other cord end.
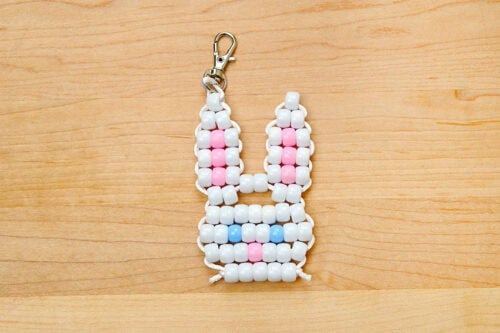
- Your pony bead bunny is complete!
Helpful Tips:
- Only melt the cord ends if you’re using a synthetic cord such as rattail, nylon, or paracord. Natural fibers like cotton or hemp cannot be melted — they will simply burn instead.
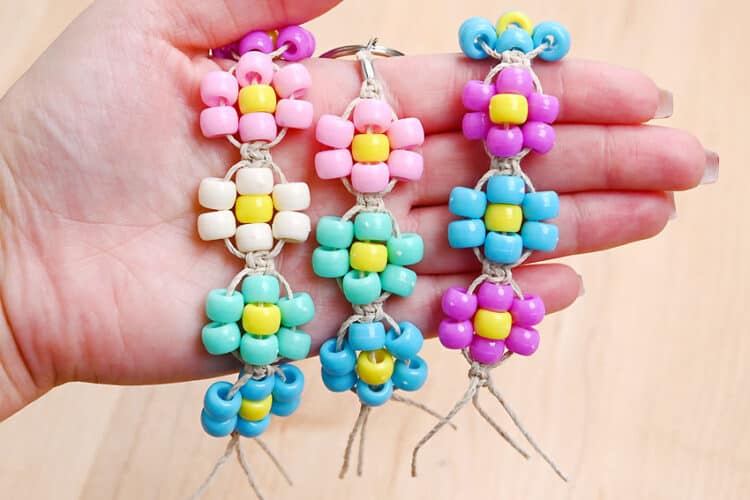
- Customize your bunny with different bead colours: Try changing the inner ear colour, using different beads for the eyes, or even making a grey bunny instead of white. You could also create pastel, rainbow, or seasonal colour combinations to make each bunny unique!

How can I make it easier to slide the cord through the beads?
If you’re using a synthetic cord, you can carefully melt the cut ends of the cord before you start beading. This creates a smooth, sealed tip that slides through the pony beads much more easily and prevents the cord from fraying.
If you’re using cotton cord, or another natural fiber, wrap a small piece of tape tightly around each end of the cord to create a firm tip that will pass through the beads more easily.

How many beads do I need to make a pony bead bunny?
Each pony bead bunny uses 57 pony beads in total:
- 48 white beads (bunny head)
- 7 pink beads (inner ears and nose)
- 2 blue beads (eyes)
You can easily change the colours if you’d like to create different bunny styles.
What else can I use this pony bead bunny keychain for?
These little bunnies are super versatile and can be used in lots of fun ways. You can attach one to a backpack or purse as a bag charm, clip it onto an Easter basket, hang it in a window as Easter decor, or even turn it into a cute ornament for an Easter tree!

What is the pattern to make this pony bead bunny?
Below is the simplified bead pattern. In the pattern, w = white, p = pink, and b = blue.
Left Ear
- Row 1: w
- Row 2: 2w
- Row 3: w p w
- Row 4: w p w
- Row 5: w p w
- Row 6: 2w (space) 2w
Right Ear
- Row 1: w p w
- Row 2: w p w
- Row 3: w p w
- Row 4: 2w
- Row 5: w
Face
- Row 6a: 2w (join to the previous 4 white beads in Row 6)
- Row 7: 7w
- Row 8: 2w b 2w b 2w
- Row 9: 3w p 3w
- Row 10: 5w

This pony bead bunny is such a fun little project to make, and it’s a great way to practice basic pony bead patterns while creating something cute at the same time. With just a few beads and some cord, you can turn this simple pattern into an adorable DIY keychain that’s perfect for spring and Easter.
Whether you make one bunny or a whole collection in different colours, these beaded bunnies are a cheerful craft that’s easy to personalize. Clip one onto a backpack, add it to an Easter basket, or give it as a handmade gift — however you use it, this sweet little bunny is sure to bring a smile.
Here’s even more bunny craft ideas:


Now available
Low-Mess Crafts for Kids Book
72 cute and fun crafts that kids and parents alike can enjoy. All with as little mess as possible!
Where to buy:
You can purchase Low-Mess Crafts for Kids from Amazon, or wherever books are sold:
Amazon | Barnes and Noble | Books-A-Million | Indiebound | Amazon Canada


Leave a Reply