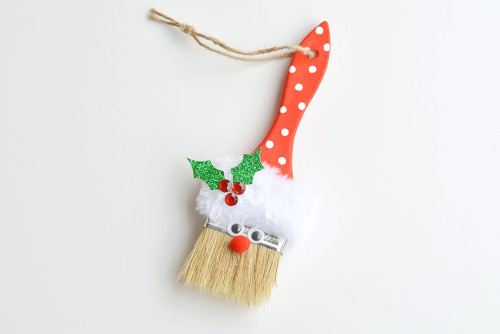
This paint brush Santa is such a fun and creative Santa craft idea! Transform a simple wooden paint brush and other dollar store supplies into a jolly Santa Claus ornament!
Paint brush Santa ornaments are such a unique decoration for the Christmas tree. It’s an easy and inexpensive holiday craft, with no special skills required!

This post contains affiliate links. If you use these links to buy something we may earn a small commission which helps us run this website.
DIY Paint Brush Santa Ornaments
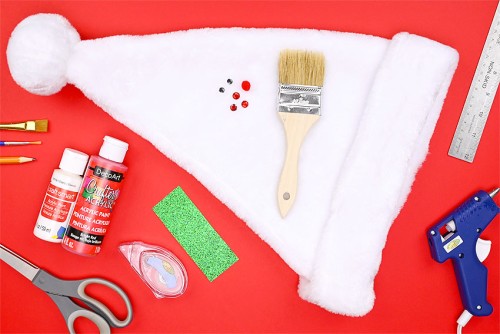
Materials:
- 2 inch Chip brush (with plain wooden handle)
- Acrylic paint (red and white)
- Green glitter paper
- White faux fur
- 2 Googly eyes (10 mm)
- 1 Pom pom (red, 10 mm)
- 3 Rhinestone stickers (red, 7 mm)
- Twine
Check Out The Video Tutorial:
Instructions:
Step 1: Find what you need
- Gather your supplies and materials.

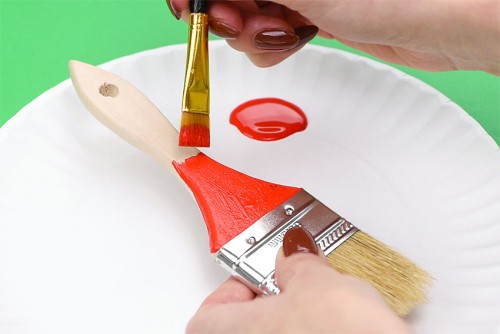
Step 2: Paint the paint brush handle
- Paint the wooden part of the chip brush red (both front and back). Allow to dry about 30 minutes. Add another coat of paint if needed.
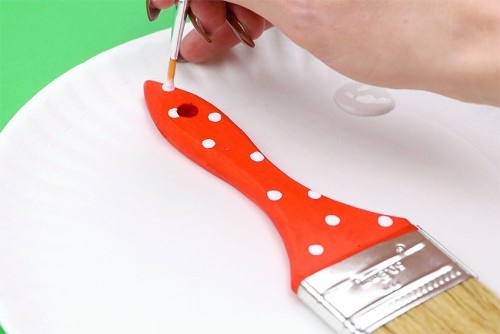
- Use a small paintbrush or the flat end of a wooden skewer to add white polka dots to the front of the handle using white paint.
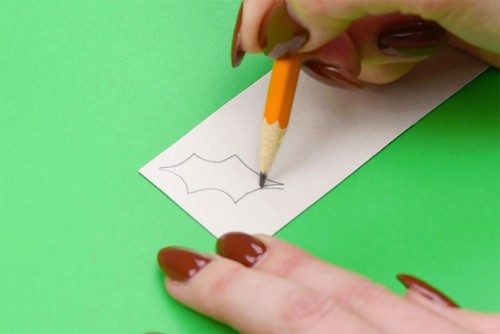
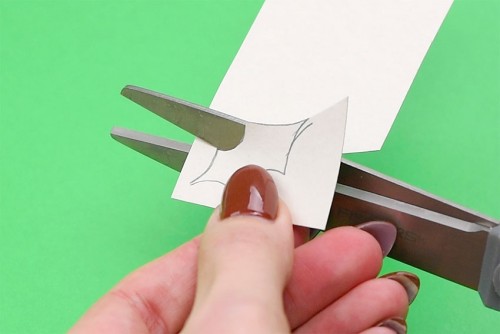
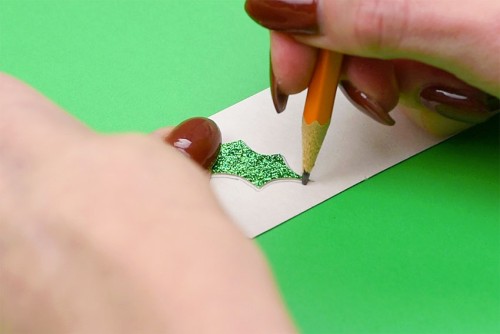
Step 3: Draw and cut out holly leaves
- Draw a holly leaf shape on the back of green glitter paper. Our holly leaves were 1-1/4 inch long by about 1/2 inch wide.
- Cut out the holly leaf.
- Trace the first holly leaf onto the glitter paper and cut it out so you have two leaves.
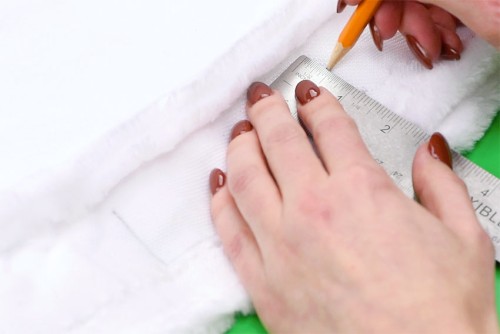
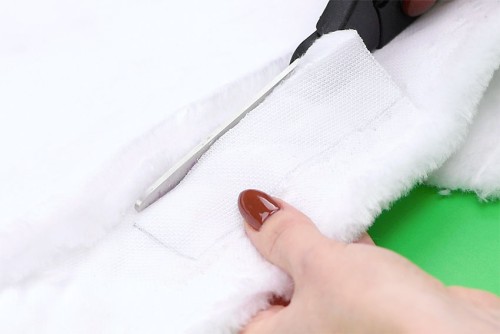
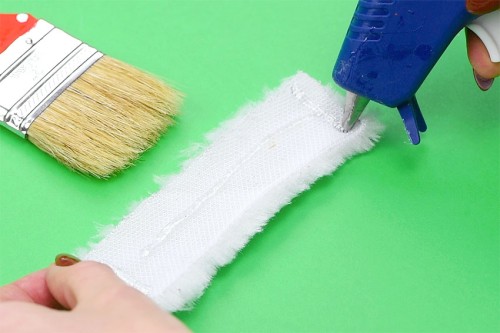
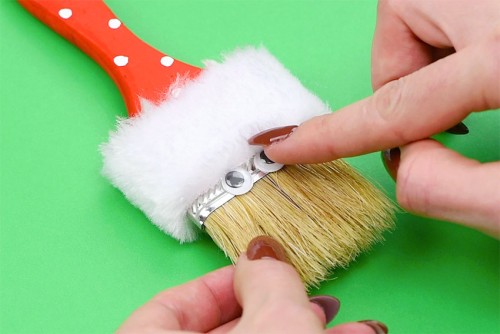
Step 4: Cut out and attach the faux fur
- Use a pencil or gel pen to draw a rectangle on the back of the faux fur, long enough to wrap around the metal band on the paintbrush and tall enough to cover most of it.We cut our fur to 1-1/4 inches high by 4-1/2 inches long.
- Cut out the strip of fur.
- Add a horizontal line of hot glue down the middle of the fur on the back side. Add vertical lines of glue on the left and right ends.

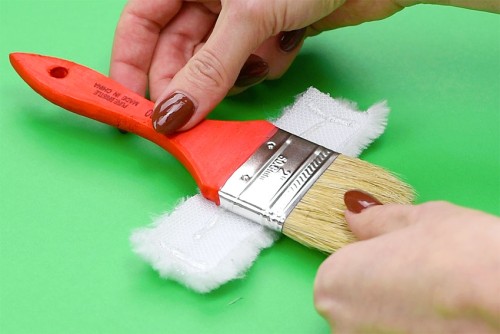
- Place the chip brush in the center of the fur, letting a little bit of the metal part show at the bottom.
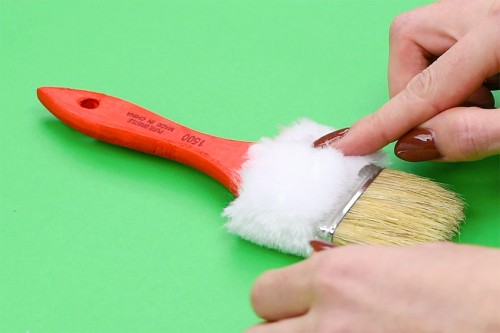
- Wrap the fur around the paintbrush, pressing down to secure the glued parts. Add more hot glue if needed.
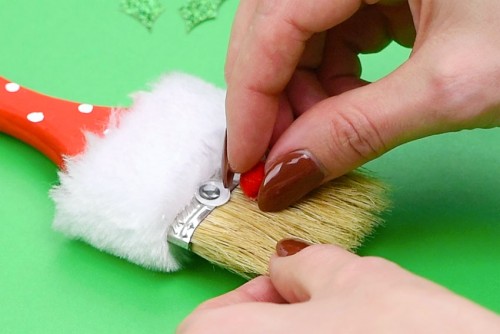
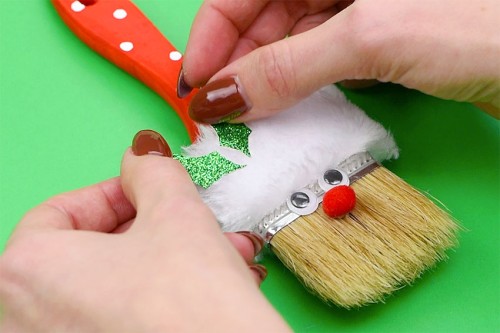
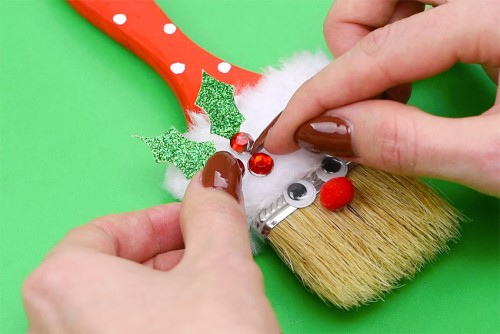
Step 5: Add a face and hat decorations
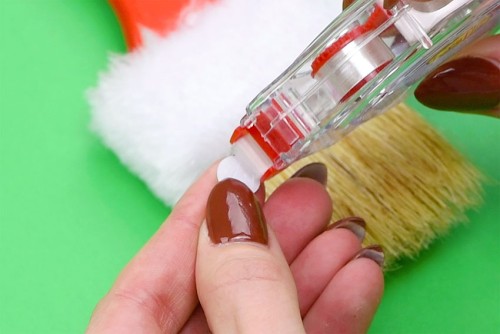
- Add glue tape or hot glue to the back of two googly eyes.
- Attach the googly eyes to the front center of the metal strip, right under the fur.
- Use glue tape or hot glue to attach the pom pom nose to the paintbrush bristles, below the eyes.
- Attach the holly leaves to the top left of the fur with glue tape or hot glue.
- Place the red rhinestone stickers at the bottom of the holly leaves in a triangle shaped grouping.
- To turn your Santa Claus paintbrush craft into an ornament, cut an 8 - 10 inch piece of twine and tie it through the hole in the handle.Your paint brush Santa is complete!
TIP:
- If your paintbrush doesn't have a hole for the ornament hanger you can hot glue the twine to the back of the brush handle.

What size paint brush works best for a Santa paintbrush ornament?
We used a 2 inch chip brush to make this paintbrush Santa craft. Our brushes were 2 inches across and 7 inches tall.
If you want to hang your paint brush Santa Claus on the Christmas tree I wouldn’t recommend a larger brush (unless your tree is very large!). But this craft will definitely work with any size chip brush.

What type of paint should I use on this paint brush Santa Claus?
We used inexpensive crafter’s acrylic paint to paint the chip brush and it worked really well with only one coat!
The stamped black writing on the back of the paint brush still showed through the paint, even after a few coats of red paint. Thankfully you can’t see the back anyway! Just make sure you don’t buy brushes that have black writing on both the front and the back.

How else can I decorate my paint brush Santa?
There are so many ways you can customize this paint brush Santa and make it you own! Here are some ideas:
- Add different fake berries or greenery to the hat, or even substitute miniature wooden or plastic decorations, like a candy cane
- Use red beads instead of rhinestones for the holly berries
- Glue mini pom poms to the handle instead of painting the dots
- Use a rhinestone or a sequin for the nose
- Wrap chunky chenille yarn around the brush instead of using faux fur, or cut out a rectangle from a fuzzy chenille sock
- Dip the brush bristles in white paint to tint Santa’s beard

This Christmas craft is fun for both the young and the young at heart. I love when an everyday object can be upcycled into something whimsical and creative!

Here’s even more DIY Christmas ornament ideas:


Our book Low-Mess Crafts for Kids is loaded with 72 fun and simple craft ideas for kids! The projects are fun, easy and most importantly low-mess, so the clean up is simple!

Where to buy:
You can purchase Low-Mess Crafts for Kids from Amazon, or wherever books are sold:
Amazon | Barnes and Noble | Books- A- Million | Indiebound | Indigo | Amazon Canada
Let us know what you think: