Learn how to make lotion at home with this simple tutorial! This homemade lotion, made with shea butter and coconut oil, is ultra nourishing and made with natural ingredients. And you can make it in just a few minutes (really!).
Making this DIY hand and body lotion is a surprisingly easy process, perfect for beginners. This recipe makes a thick, creamy lotion that will moisturize your skin, keeping it healthy and glowing. Make a batch for yourself, or increase the recipe and give it as a homemade gift!

This post contains affiliate links. If you use these links to buy something we may earn a small commission which helps us run this website.
How to Make Lotion
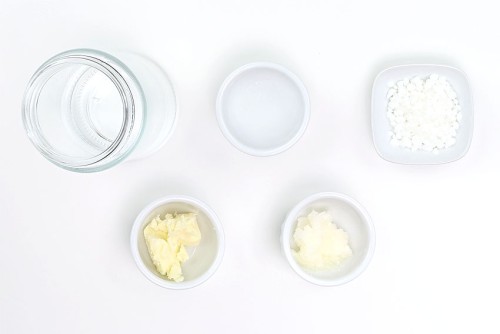
Materials:
- 10 grams Shea butter
- 9 grams Coconut oil
- 10 grams Emulsifying wax
- 70 grams Hot water (distilled water preferred)
- 1 gram Optiphen Plus (or other preservative)
Watch the step-by-step video tutorial:
Instructions:
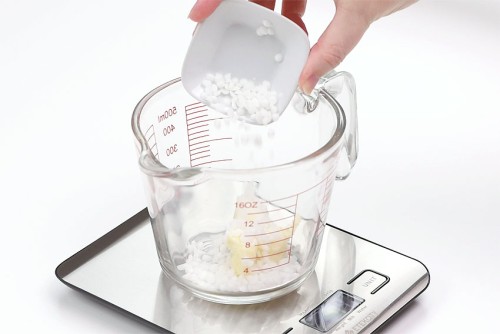
Step 1: Find what you need
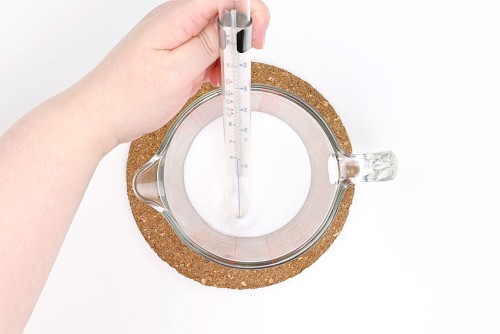
- Measure all of your ingredients using a digital scale.We prefer to measure the ingredients separately — it makes it easier to be precise and allows you to remove some if you accidentally add too much of one ingredient.We’d recommend using an eye dropper to measure out the preservative amount. You can also use an eye dropper to top off or remove from the water amount (pouring can get messy!).

Step 2: Combine and melt the oils
- Add the shea butter, coconut oil, and emulsifying wax to a glass measuring cup or bowl.Microwave the oils for around 1 minute, or until completely melted. If the oil is not fully melted, put it back in the microwave in 10 second increments until it’s completely melted.(You can also use a double boiler, but we found it takes a lot longer and doesn’t heat the oils as well as the microwave does.)
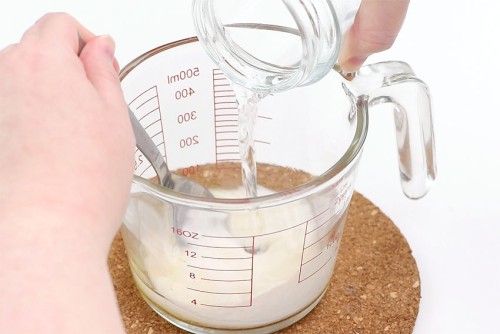
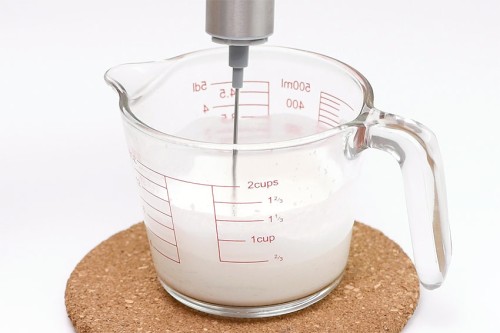
Step 3: Mix in the water
- Microwave the water for around 40 seconds. You want the water hot, but not boiling.Pour the water into the oil while stirring them together.
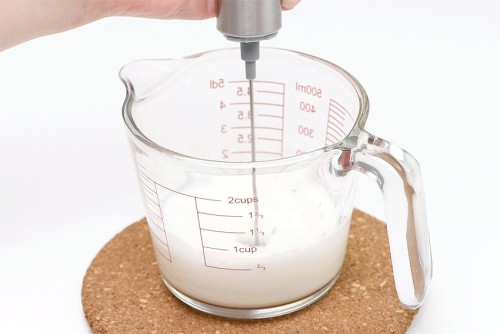
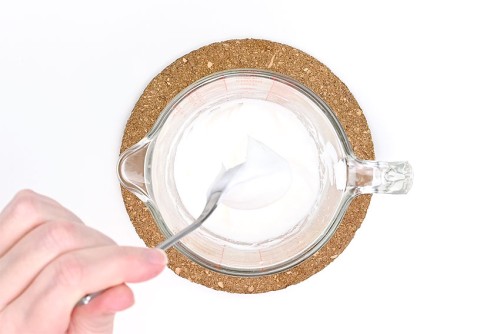
- Use a milk frother to fully combine the water and oil. Make sure to keep the frother towards the bottom of the cup, introducing the least amount of air possible.Blend the lotion for 20 – 30 seconds. Wait a minute and then blend the lotion for another 20 – 30 seconds. You can then use a spoon to stir out any bubbles from the top.(I’ve read that you’re supposed to keep doing this until you can see the mixture become “lotion-y” — but for me, personally, it looked combined but definitely still like liquid. It wasn’t until the mixture cooled down some that I could see it come together, like lotion. I’d recommend blending a couple times at the beginning, and a couple more times as it cools down.)
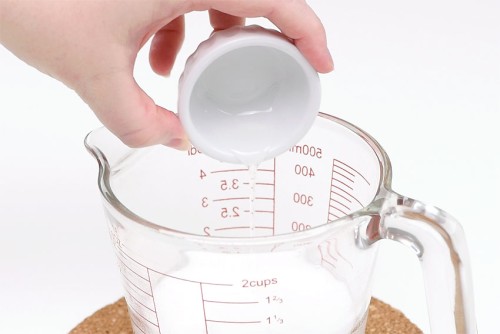
Step 4: Add preservative
- Cool your lotion to at least 176F before adding your preservative.Different preservatives have different temperature maximums (and amounts to add!), so be sure to check the label of your preservative for the specifics.
- Pour in the Optiphen Plus preservative.
- Blend in the preservative with the milk frother.

- Allow the lotion to cool for 30 minutes – 1 hour. As it cools it will thicken up to a lotion consistency.
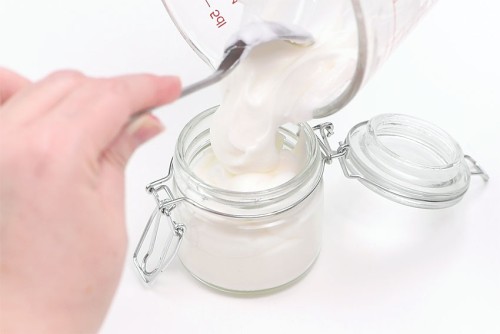
- Once the lotion has cooled you can spoon it into a jar.
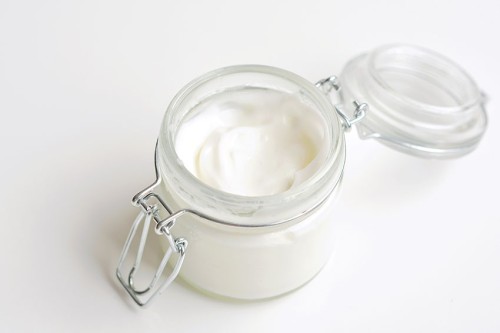
- Leave your lotion jar open for at least a few hours to make sure it’s completely reached room temperature. This way you won’t get condensation on the lid.
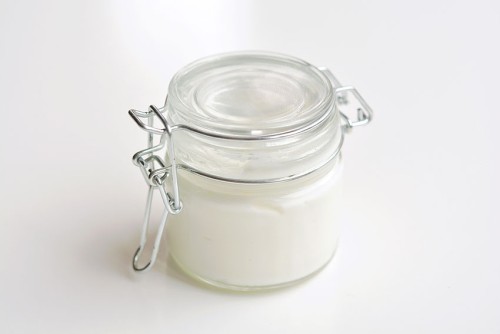
- Your homemade lotion is complete!
TIP #1:
- If you don’t have a milk frother you can also use a regular blender on a low speed. Immersion blenders are also popular for making lotion, but we found it added too much air to this small recipe.We don’t recommend just whisking it by hand. It doesn’t have enough power to create a proper emulsion.
TIP #2:
- If you’re storing your lotion in a tube or a smaller mouthed bottle, pour it in while it’s still liquid to make it easier.

Where can I buy lotion ingredients?
We bought our lotion ingredients at a local soap supply company. Most cosmetic or soap supply companies will have all the supplies you need!
Amazon is another great online resource for the ingredients and packaging required for lotion making.
Do homemade lotions need a preservative?
We recommend using a preservative when making a homemade lotion. Bacteria grows very quickly where water is present, and it will grow long before you can smell or see it.
We used Optiphen Plus to preserve our lotion, which is a highly effective broad spectrum antimicrobial preservative.
If you don’t want to use a preservative, you must keep your lotion in the fridge, where it will only last for 1 – 2 weeks before having questionable bacteria growth. Your other preservative free option is to make a body butter, which only contains oils.
If you’d like to read more about using preservatives in lotion, The Nerdy Farm Wife has a great article about natural preservatives for skin care.

Can I add a scent to this lotion?
Yes, if you like a scented lotion I definitely recommend adding in some essential oil or fragrance oil! Generally you’ll want to add fragrance at 1% (so 1 g for this recipe — though we found that even 10 – 15 drops add a nice subtle scent). You can add the scent at the same time you add your preservative.
How should I store this DIY lotion?
You can put it in a glass jar, like we did. You can also put this lotion in a pump bottle, add a pump lid to a mason jar, or pour it into a lotion tube. These are actually the safest options, because you won’t be introducing any bacteria into the lotion by sticking your fingers into it.

How long does homemade lotion last with preservative?
Generally homemade lotion will last around 6 months. It’s impossible to say exactly, because it depends on the preservative used, the shelf life and age of the oils, how the lotion is stored, etc.
To get the most out of your lotion:
- Use distilled water in the recipe.
- Store your lotion in a room without fluctuating humidity (i.e. keep it out of the bathroom).
- Use sanitized equipment. The Nova Studio has good basic article about hygiene when making lotion.

Can I switch up the oils in this recipe?
Yes, you can absolutely use different oils in this recipe. There are so many great oils that you can use, like sweet almond, avocado, sunflower, or jojoba. You can also replace the shea butter with cocoa butter or mango butter.
Just keep in mind that every butter and oil has a different consistency (eg. cocoa butter is harder than shea butter; coconut oil is solid at room temperature, while sweet almond oil is not, etc), so you may need play around with the percentages. Not every mixture will result in the same creamy texture that this recipe has.
How much lotion does this recipe make?
This is a 100 gram recipe, which fits in a 4 ounce (1/2 cup) jar. If you’d like to make a larger batch, simply increase the recipe amounts. Our recipe uses:
- 70% water
- 10% shea butter
- 10% emulsifying wax
- 9% coconut oil
- 1% preservative

Learning how make lotion is SO EASY, and I really like the idea of controlling what I’m putting on my skin. Pamper yourself with this velvety and luxurious DIY lotion that will keep your skin soft and refreshed!

Here’s even more ways to pamper yourself:


Our book Low-Mess Crafts for Kids is loaded with 72 fun and simple craft ideas for kids! The projects are fun, easy and most importantly low-mess, so the clean up is simple!

Where to buy:
You can purchase Low-Mess Crafts for Kids from Amazon, or wherever books are sold:
Amazon | Barnes and Noble | Books- A- Million | Indiebound | Indigo | Amazon Canada


Leave a Reply