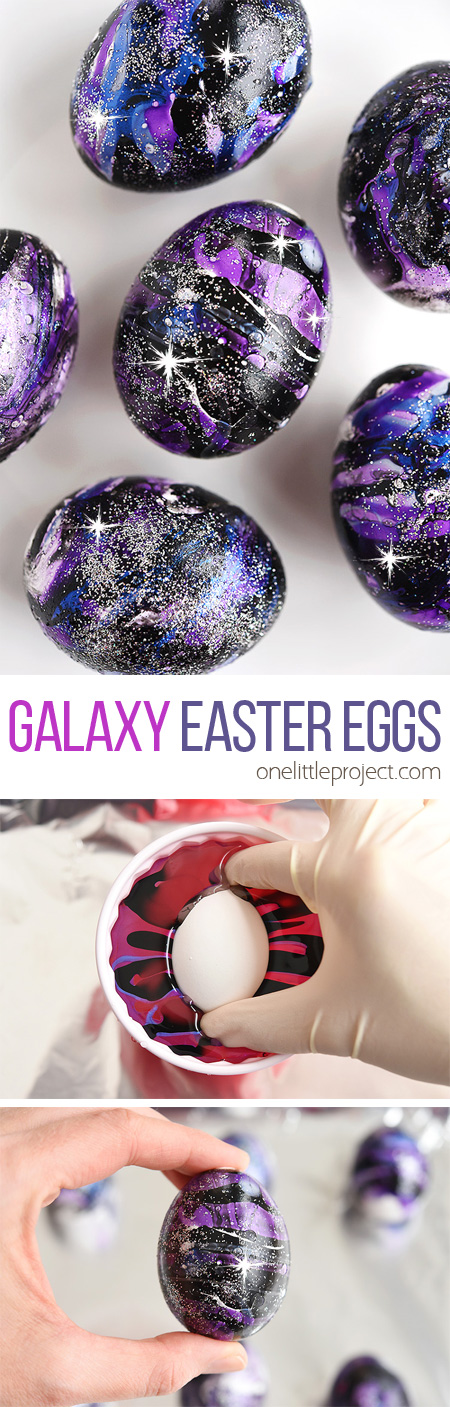
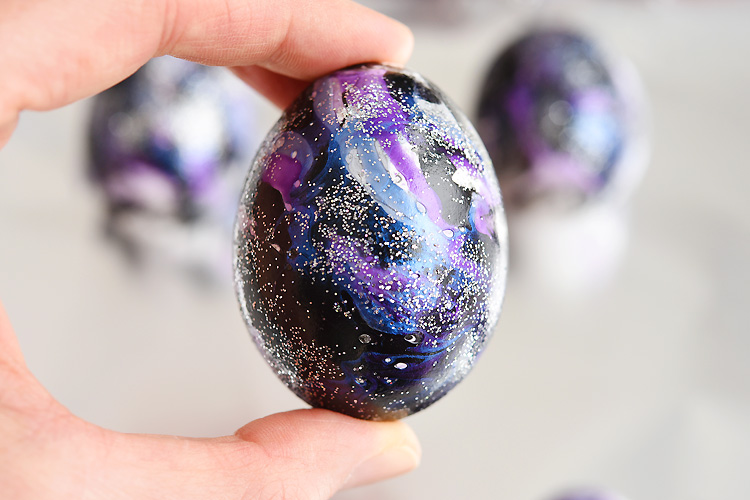
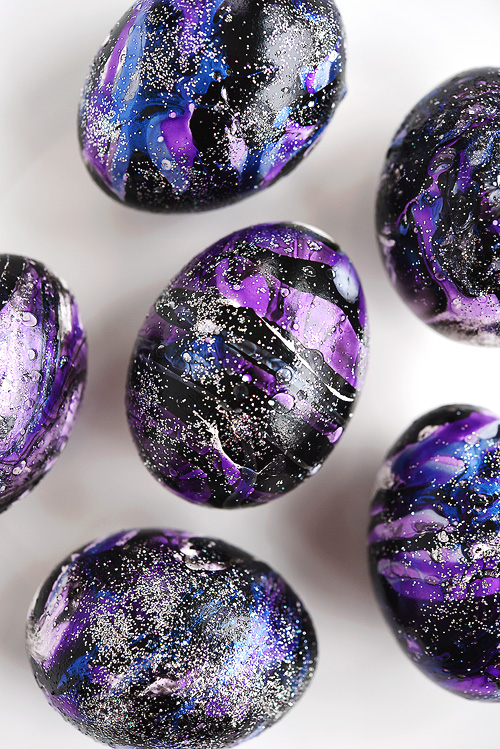
These galaxy Easter eggs are crazy fun! They ended up looking so amazing! Each egg is completely unique, and so beautiful when you look at the little details! And best of all, they’re surprisingly easy to make!
These eggs can be a little messy to make, so you probably don’t want to be trying this craft with young children. But in all honesty, it’s not THAT bad. For the other galaxy Easter egg tutorials I’ve seen online, you have to paint the eggs, and then you have to splatter paint on them for the stars. Which I actually think is messier? So I think if you’re planning to make galaxy Easter eggs, whatever method you decide on, you pretty much just have to accept the fact that things might get a little messy.
But, seriously, it’s not too bad. There were no drips, no stains, and no difficult clean up when I made mine. I didn’t even have to wipe down the counter afterwards. If you wear latex gloves and make everything on top of an aluminum foil lined baking sheet (including where you dip the eggs), the clean up is really easy!
My kids thought these eggs were so cool! I was inspired by the galaxy Easter eggs over at Dream a Little Bigger. She made hers with paint, so feel free to click on over to check out the difference.
How to Make Galaxy Easter Eggs
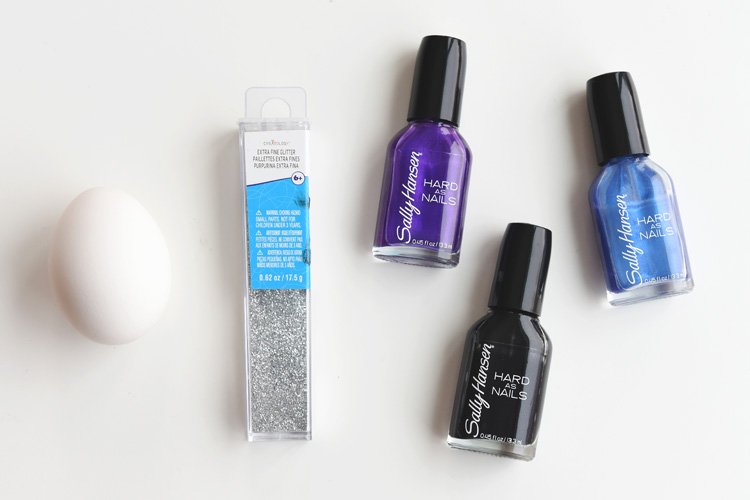
The full printable instructions are at the end of this post, but here’s what you’ll need:
- Eggs
- Nail polish (black, blue and purple)
- Fine silver glitter
- Lukewarm water
- Plastic cup (disposable)
- Latex gloves
Since we’re going to be using nail polish to make these eggs, there’s no way you can eat them. So I recommend cleaning out the eggs before you turn them into galaxy eggs.
It’s completely optional of course. But if you clean them out, you can save them for next year! If you decide not to clean them out, just remember that these eggs are decorative only. Don’t eat them.

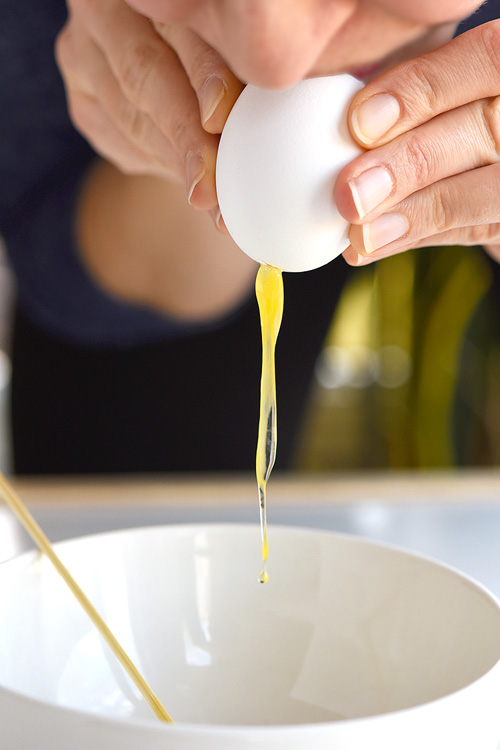
Poke a hole in the top and bottom of the egg with a thumb tack. Then use a wooden skewer to make the hole at the bottom a little bigger. You’ll want to get the skewer all the way into the egg so you can break the egg yolk inside.

Then, over top of a bowl, blow through the hole at the top of the egg to push out the insides of the egg. I was thinking it was going to be really difficult, but it really wasn’t that bad.
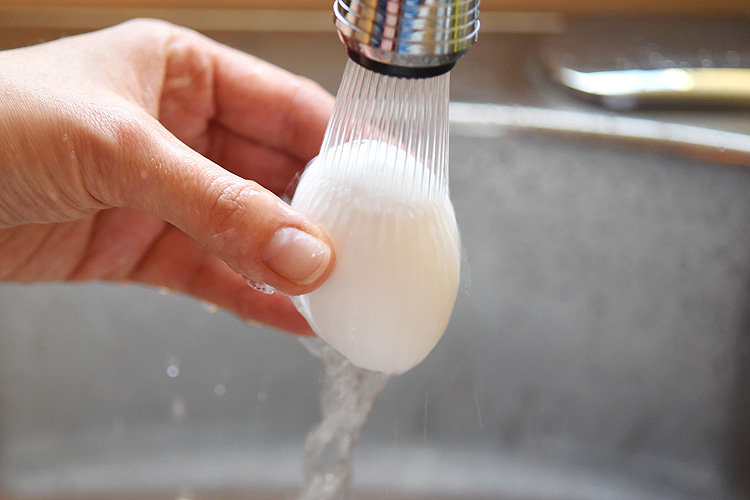
Then wash the egg under water. Try to get water inside the egg, shake it up, and empty out the water to clean out the inside of the egg. Let the eggs dry before you colour them.
Fill a large plastic drinking cup with luke warm water. If the water is too cold, the nail polish will sink to the bottom.
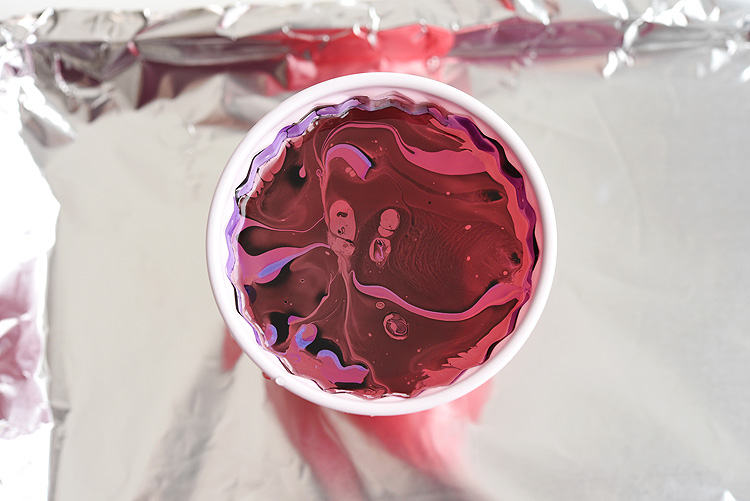
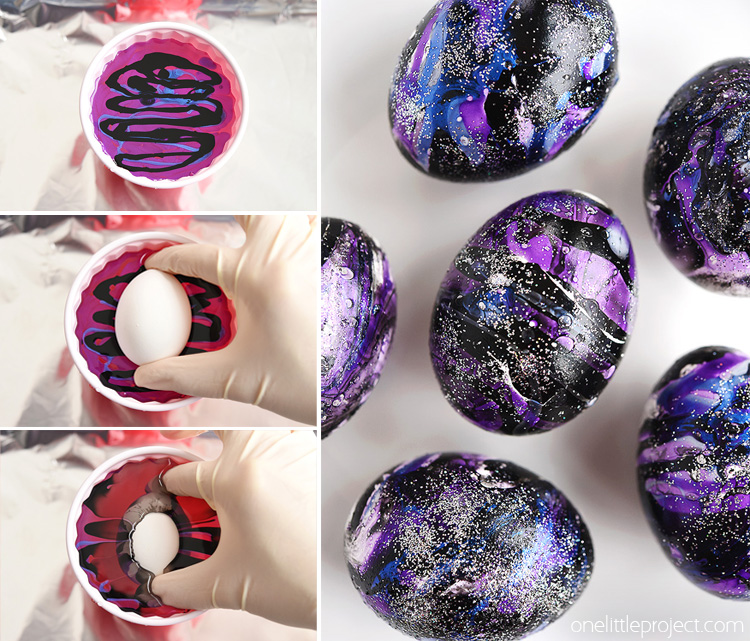
Start by pouring the purple and blue nail polish directly over the water in the cup. Then add the black nail polish last. (I found if I added the black first, you could barely see any purple or blue when it was done.)
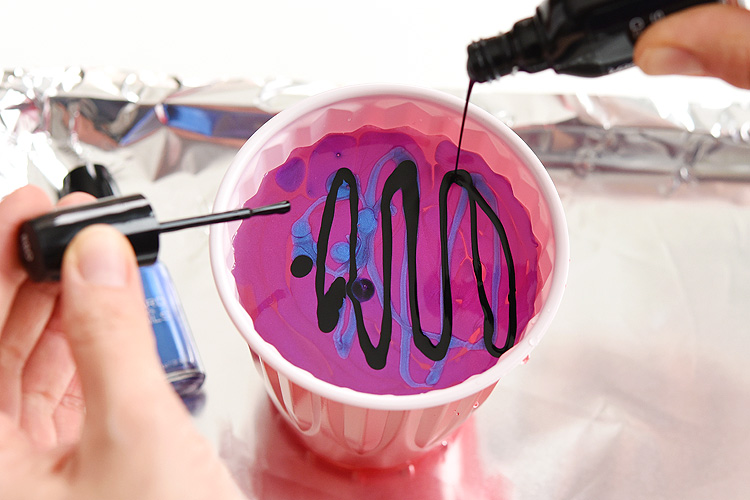
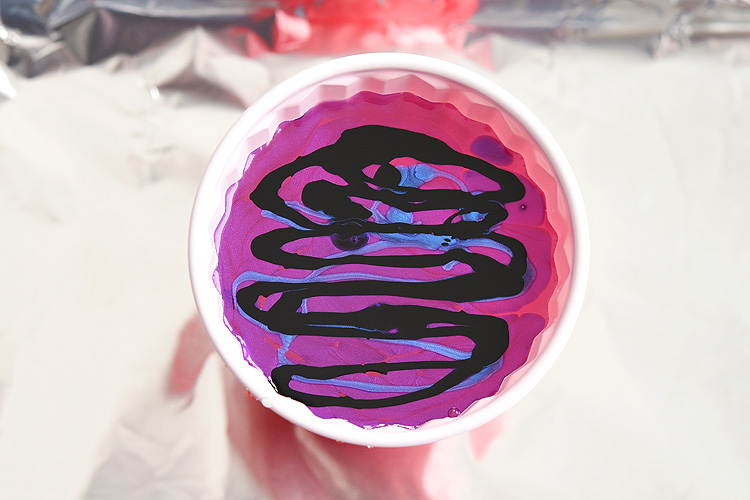
Rotate the cup so that the paint lines are going left to right, instead of up and down.
I HIGHLY recommend wearing latex gloves for this next part. Otherwise your fingers will be an absolute pain to clean up! I got my latex gloves at the dollar store next to the rubber kitchen gloves.
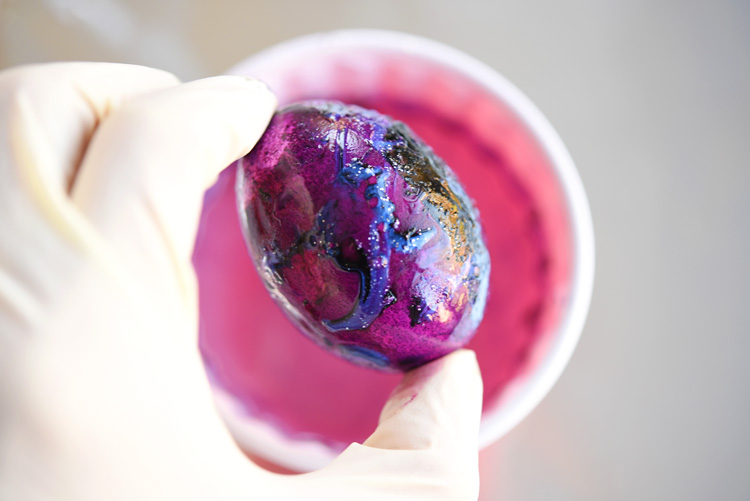
Hold the egg at the top and the bottom. (Cover the holes in the egg with your fingers if you blew out the eggs). Then lower it into the water until it’s fully submersed. Lower it fairly quickly – Don’t go slow or you’ll end up with a giant nail polish blob on the bottom of the egg.
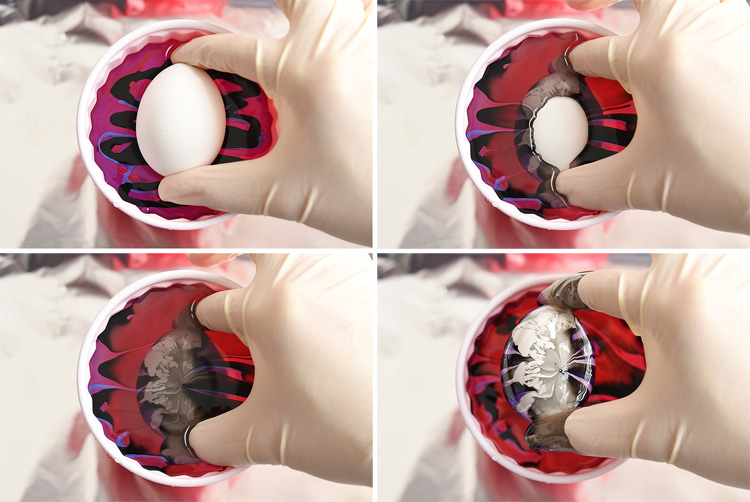
Your fingers are going to be messy. So definitely wear the latex gloves!
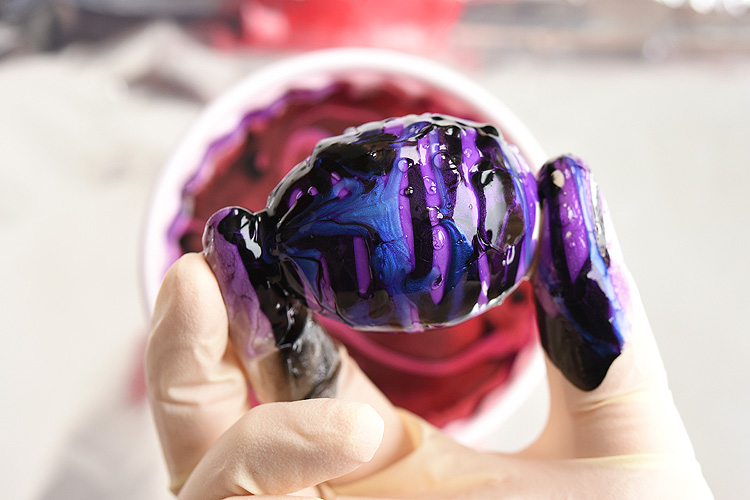
This egg was by far the messiest egg I made. I don’t know if I did something different because I was taking the photograph?? But they weren’t ALL this messy.
Just to show you that they aren’t all THAT bad, here’s another egg I made. This particular egg was the first one I tried, so it didn’t turn out, but you can see that my fingers aren’t NEARLY as messy. So I don’t want the photo above to scare you off. If you wear the latex gloves, you’ll be fine.
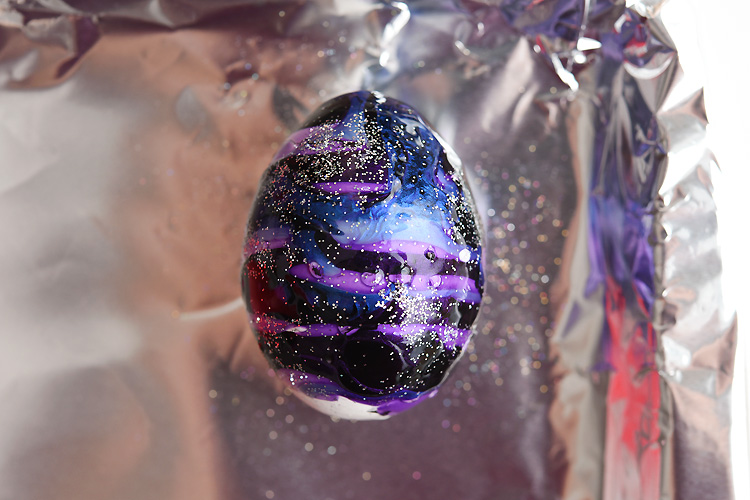
Set the nail polish covered egg onto an aluminum foil lined baking sheet.
Carefully sprinkle fine silver glitter onto the wet nail polish.
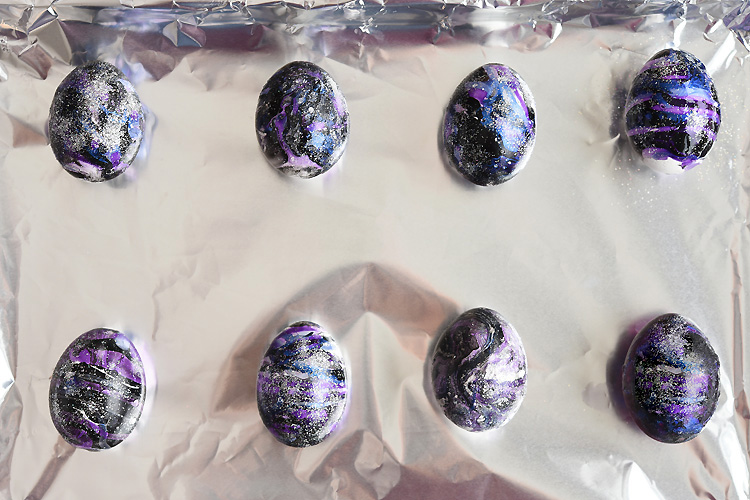
Then repeat the process for the rest of your eggs and let them dry for 6 to 8 hours.
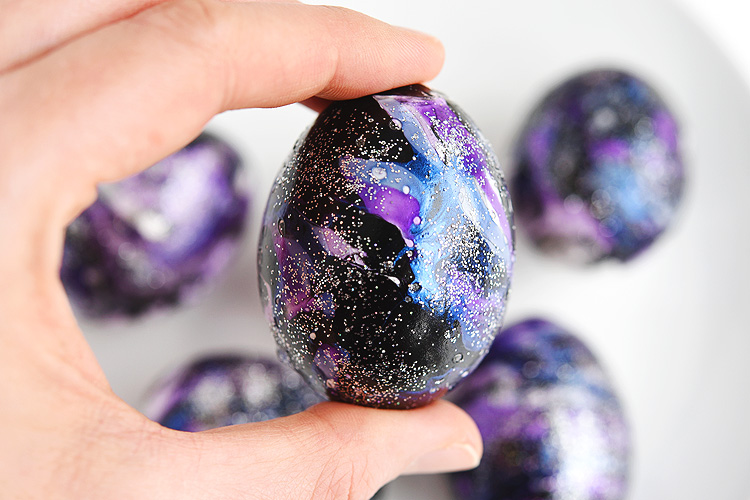
So pretty, right!? Just like a tiny little galaxy on the egg!
I got my nail polish at the dollar store. It really doesn’t matter if you can’t find the exact shades I’m using. As long as you have black nail polish, along with some blue, purple, pink or even red, then your galaxy Easter eggs will look beautiful!
When I was reading through the nail polish egg tutorials online, all of them seemed to skip the part about cleaning up when you’re done – and to be honest, that’s the part I was the most worried about! Don’t worry though, it’s really not that bad.
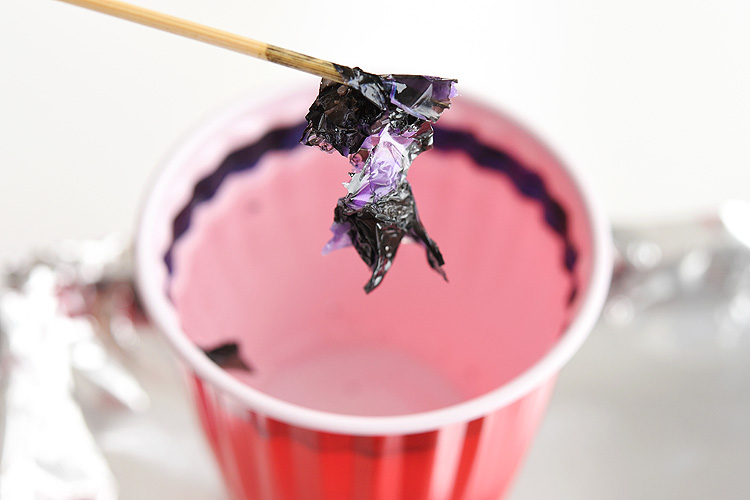
While your eggs are drying, leave the cup with the nail polish in it to dry as well.
After a few hours, the nail polish will harden on top of the water and you can scoop it out with a skewer. Scoop out all of the nail polish pieces and then pour the water down the drain.
Do NOT pour nail polish down your drain – especially wet nail polish. Make sure you remove all of the nail polish bits before you pour out the water.
I love how the galaxy Easter eggs turned out! Each egg is completely different! They look so pretty when they sparkle in the sunlight!

DIY Galaxy Easter Eggs
Materials:
- Eggs
- Nail polish black, blue and purple
- Fine silver glitter
- Lukewarm water
- Plastic cup disposable
- Latex gloves
Instructions:
- Blow out the eggs as shown in the tutorial above. Wash them out and let them dry.
- Fill a disposable plastic cup with lukewarm water.
- Pour nail polish on the water, going back and forth to create lines. Start with the blue and purple, and end with the black nail polish.
- Wearing a latex glove, hold the egg at the top and bottom and quickly dip it into the water until it’s fully submersed. Pull the egg out and set it on an aluminum foil lined baking sheet.
- Sprinkle fine silver glitter onto the wet nail polish.
- Allow the egg to dry for 6 to 8 hours.
These galaxy Easter eggs are SO COOL and crazy fun to make! This is such a fun Easter craft to try and a totally different way to decorate your Easter eggs! They end up making stunning Easter decorations that are out of this world!
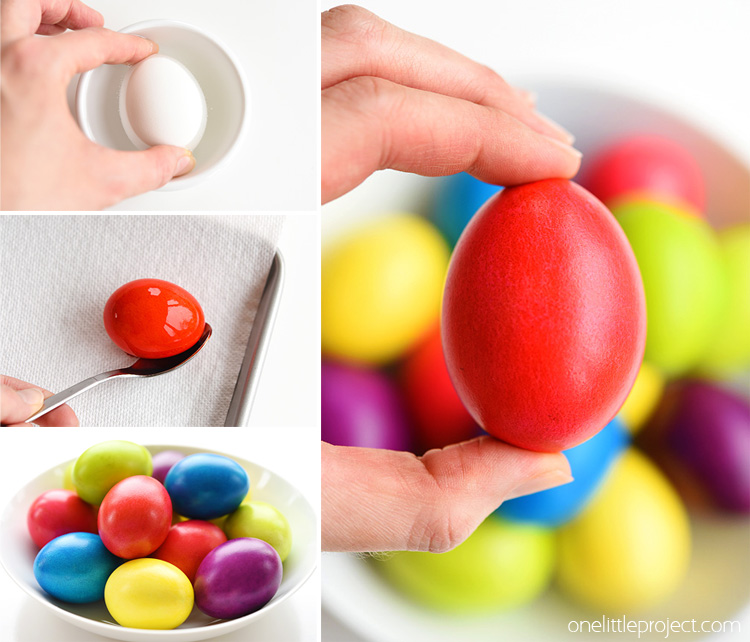
If you’re looking for more fun way to dye your Easter eggs, check out our tutorial for how to dye super bright Easter eggs. I had never thought of using this method, but it worked SO WELL!
Check out our book Low-Mess Crafts for Kids for 72 fun and simple craft ideas for kids! The projects are fun, easy and most importantly low-mess, so the clean up is simple!

Where to buy:
You can purchase Low-Mess Crafts for Kids from Amazon, or wherever books are sold:
Amazon | Barnes and Noble | Books- A- Million | Indiebound | Indigo | Amazon Canada


Leave a Reply