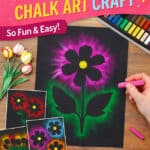
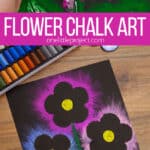
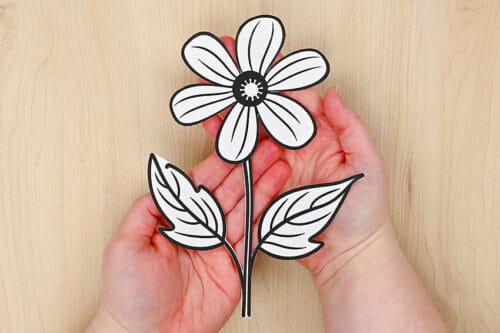
Flower chalk art is such a fun and colourful way to create bold, eye-catching designs using simple supplies. This chalk silhouette technique uses flower outlines to create a striking contrast between dark shapes and soft, blended chalk colours — giving your artwork a glowing, almost magical look. It’s an easy project that looks impressive every time, even for beginners!
This is a great craft for kids and adults alike, whether you’re making spring art, classroom projects, or just exploring creative techniques at home. With just a few materials and your favourite flower shapes (find printable templates below!), you can create beautiful chalk art that’s full of colour, texture, and personality.

This post contains affiliate links. If you use these links to buy something, we may earn a small commission at no extra cost to you. This helps support our website and allows us to keep creating fun, free content.
How to Make Flower Chalk Art
Equipment:
See the craft in action:
Instructions:
Step 1: Find what you need
- Gather your supplies and materials

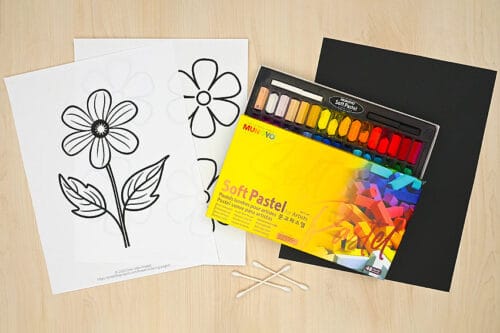
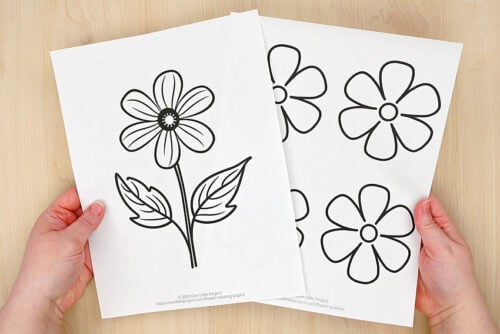
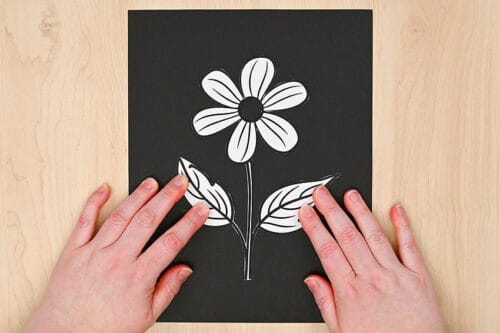
Step 2: Add the flower template to paper
- Print one or more of our flower templates! There’s a link in the materials list above with more links and details below the tutorial.

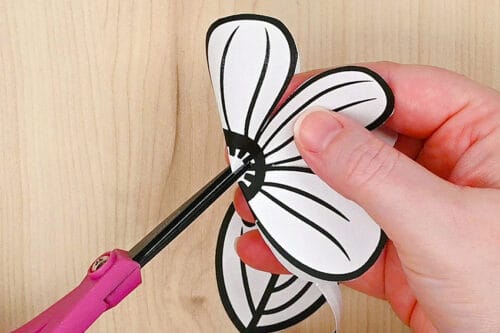
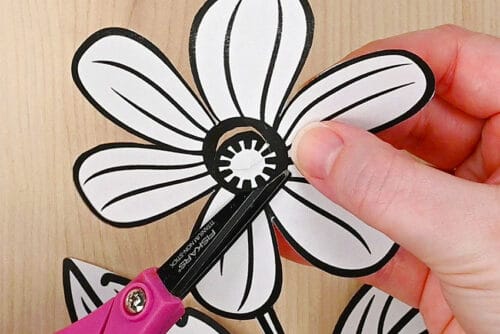
- Cut out the flower shape.
- Then fold the flower gently and make a snip at the center of the flower.
- Cut out the flower’s center.
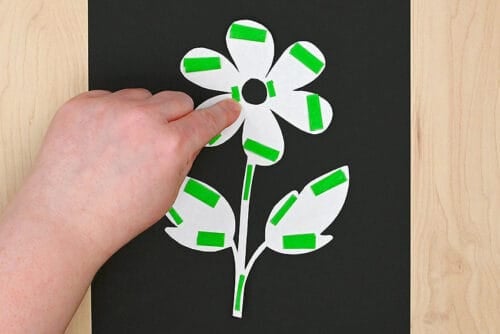
- Add loops of painter’s tape to the back of the flower.You’ll need to add quite a few and make some pretty thin ones for the stem and tips of the leaves. Otherwise the flower is likely to move when you add the chalk.
- Place the flower on a piece of black paper or cardstock. Press it down and smooth it out so the flower sticks nicely in place.
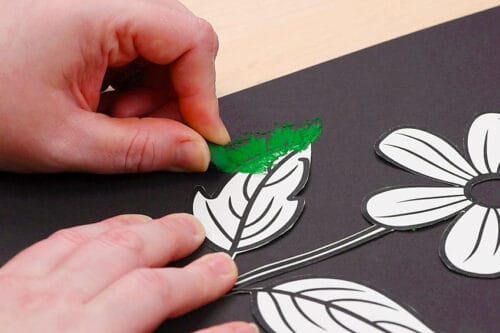
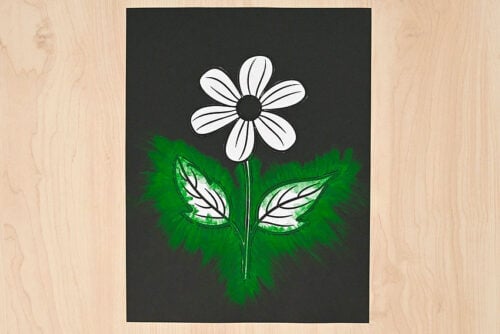
Step 3: Colour around the greenery
- Use green soft pastel to colour from the edge of the leaf onto the black paper, pressing firmly and extending the colour out about 1/2 inch.
- Continue adding green around the stem and leaves.
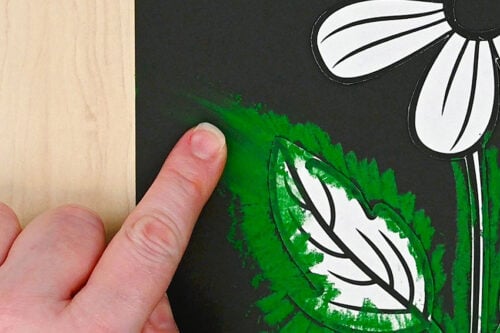
- Blow off the excess chalk dust and then use your finger to smudge the chalk outwards, away from the template.
- Again, continue around the stem and leaves. Try not to get the green too close to the flower, since you’ll be layering another colour on top.
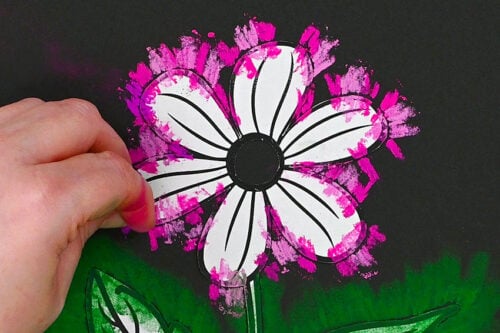
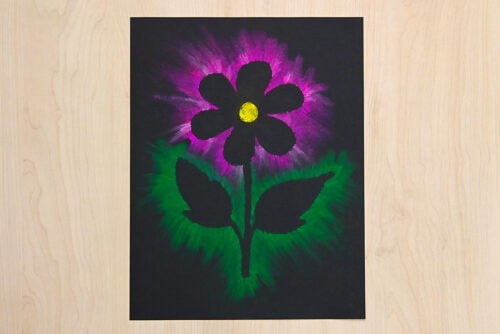
Step 4: Add colour to the flower
- Add pastel around the outside of the flower. This time we’ve used different shades of pink, spacing out the bands of colour.
- Remove excess dust and swipe the chalk outwards, away from the flower. When you get to the bottom of the flower be aware of the green chalk and wipe your finger off before continuing if you get green on it.
- Then add yellow soft pastel to the center of the flower.
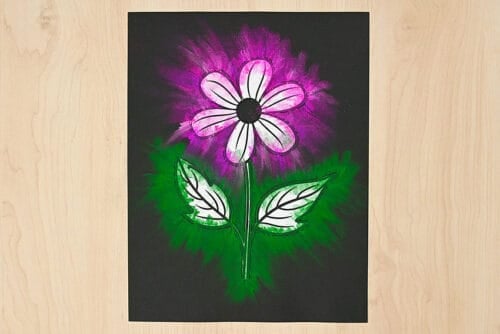
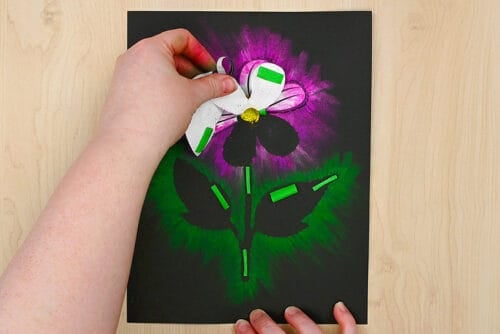
Step 5: Remove the template
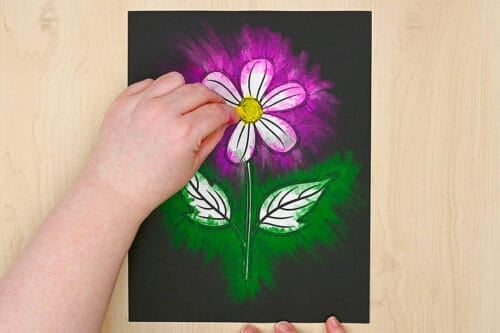
- Blow off any chalk dust again and then remove the template.Since the flower shape is quite delicate, the template may rip. It’s easier to do in little sections to stop the excess chalk dust from spreading around the silhouette area.
- Remove any tape that may have stayed behind and then use a Q-tip to clean up any smudges that got inside the flower.
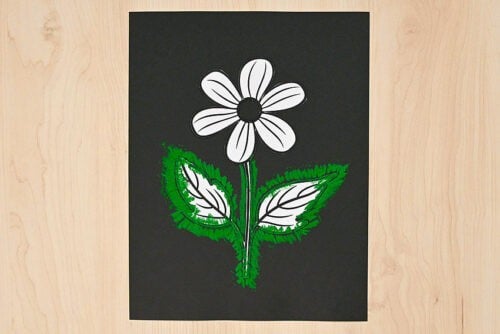
- Your flower chalk art is complete!
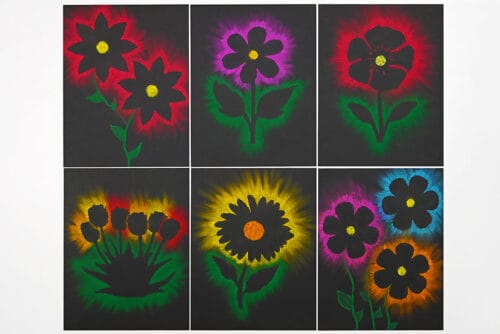
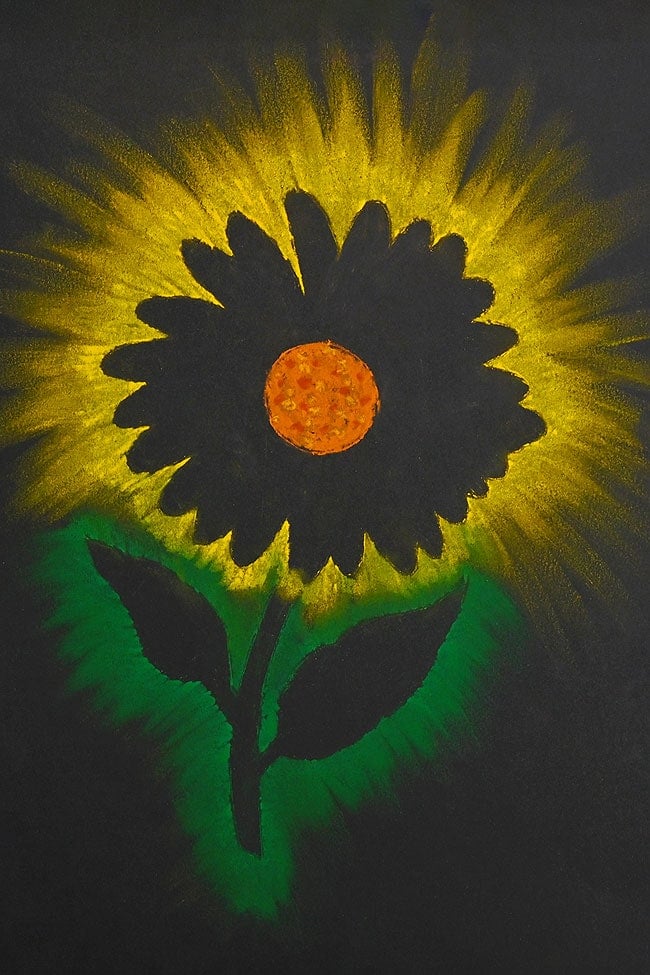
- Have fun making different flower outlines using a variety of colours!If you use our flower outlines (find links and information below!) you can draw your own stems and leaves.

Helpful Tips:
- Keep a damp paper towel nearby: Chalk pastel dust loves to move around and stick where you don’t want it. You should also wipe your fingers between colours so the shades don’t mix (especially after using green!).
- Have fun with colour: Use just one colour to make your flower, combine and blend 2 shades of the same colour, or even use more than 1 around the flower!
- Remove smudges easily: If some of the chalk gets inside the flower, no worries! You can remove them by using a Q-tip or gently rubbing with an eraser.

Where can I find templates to make this flower chalk art?
We have both flower coloring pages and flower outlines available for you to use!
There are about 5 coloring pages that make great templates for the chalk art, and there are 6 different flower outlines to choose from, in a variety of sizes.

What type of chalk should I use to make my flower chalk art?
We recommend using soft pastels (also called chalk pastels) for this art project. They’re very pigmented and add rich colour to the page.
You can use regular school chalk or sidewalk chalk, but we don’t fully recommend it. They’ll still work, but they don’t give as deep a colour.
Do I have to use my finger to spread the chalk across the page?
Nope, you definitely don’t! We understand that touching chalk can be a sensory issue for some people, so you can also use a Q-tip, cotton ball, or foam paintbrush to spread the chalk too.
Just keep in mind that these techniques tend to remove more colour, so use a gentle touch. But you can always add more colour after if you remove too much the first time!

This flower chalk art project is such a simple way to create colourful, high-contrast artwork. No two designs turn out exactly the same, and this easy, low-prep craft is perfect for kids, classrooms, or a relaxing creative activity at home.
Whether you try one flower or fill the whole page with different blooms, this easy technique is a fun way to experiment with colour and create something truly eye-catching!
Here’s even more flower craft ideas:


Now available
Low-Mess Crafts for Kids Book
72 cute and fun crafts that kids and parents alike can enjoy. All with as little mess as possible!
Where to buy:
You can purchase Low-Mess Crafts for Kids from Amazon, or wherever books are sold:
Amazon | Barnes and Noble | Books-A-Million | Indiebound | Amazon Canada


Leave a Reply