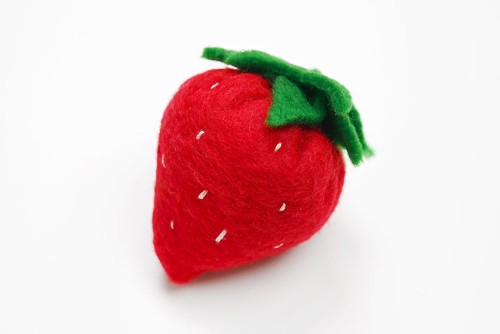
This adorable felt strawberry almost looks real! Strawberry season is one of the best (and yummiest!) times of the year, and to celebrate we’ve made these super cute felt strawberries.
You can use our FREE felt strawberry pattern to make this adorable felt fruit craft, perfect for sewing beginners. This summer craft is so much fun and great for DIY home decor, storytime, or pretend play. They also look soooo cute as an ornament, keychain, or backpack charm!

This post contains affiliate links. If you use these links to buy something we may earn a small commission which helps us run this website.
DIY Felt Strawberry
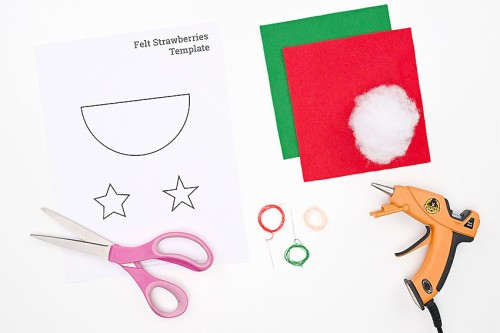
Materials:
- FREE Printable Felt Strawberry Pattern
- Felt (red and green)
- Sewing thread (red and green)
- Fiber fill stuffing
- Embroidery floss (peach or light pink)
Equipment:
Check Out The Video Tutorial:
Instructions:
Step 1: Find what you need
- Gather your supplies and materials.

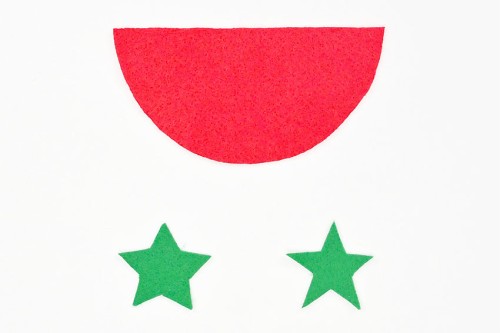
Step 2: Cut out the felt pieces
- Print our free felt strawberry pattern (find the link in the materials list above!) and cut out the shapes.
- Hold the pattern pieces on top of the felt to cut them out.Use green felt for the 2 star shaped leaves, and red for the strawberry (half circle) itself.You can also pin the pattern to the felt to make it easier to cut, or trace around the template with chalk or a gel pen.

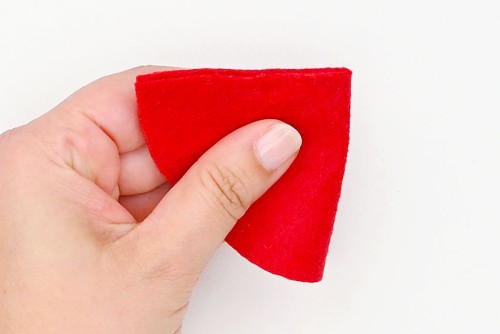
Step 3: Sew together the felt strawberry
- Fold the red half circle in half, matching up the straight edges.

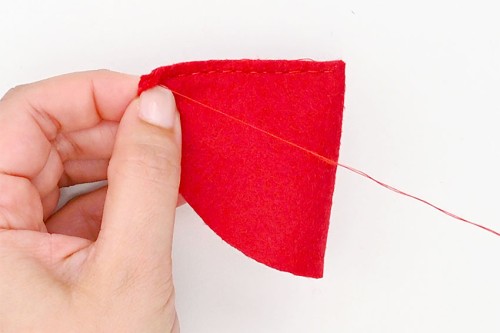
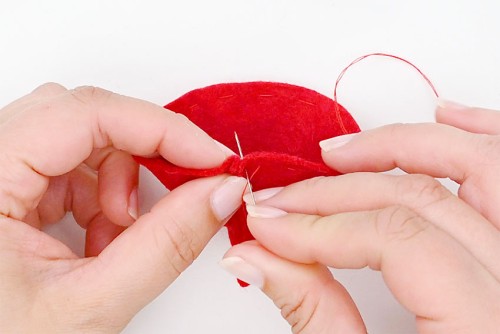
- Sew the straight edges together with a backstitch. Keep the needle and thread attached.
- Open the curved edges of the felt and sew a loose running stitch through one layer of felt. Continue all the way around and, again, keep the needle and thread attached.
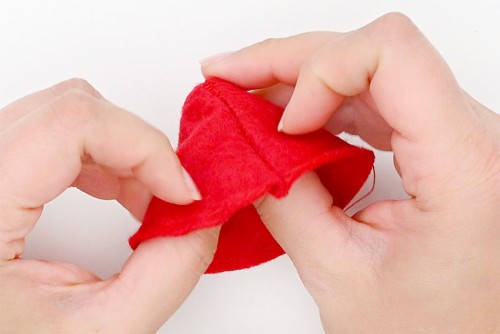
- Turn your strawberry right side out so that the seam is hidden inside.
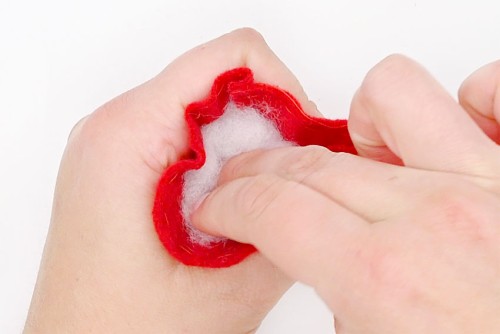
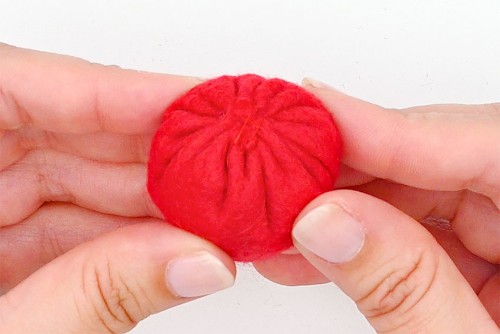
Step 4: Stuff the strawberry and sew it closed
- Add poly-fill stuffing to the strawberry until it's as soft or as firm as you'd like.
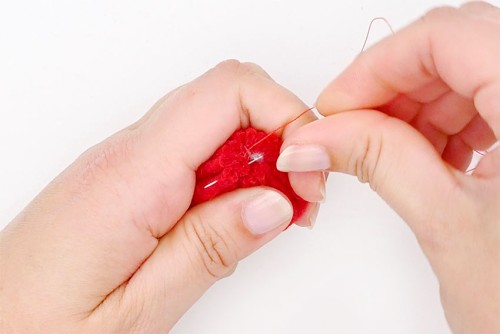
- Pull the attached thread, gathering the top of the strawberry closed around the stuffing.
- Sew across the opening multiple times until the top of the strawberry is securely closed.
- Finish this thread by pushing it down at the top and out through the middle of the strawberry. Cut the thread close to the felt and then pinch the felt to hide the thread inside.

Step 5: Attach the greenery
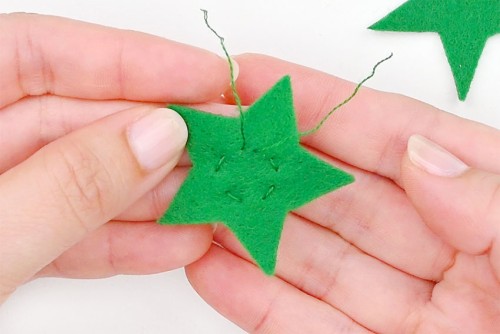
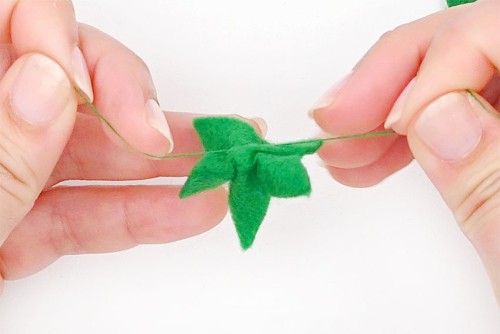
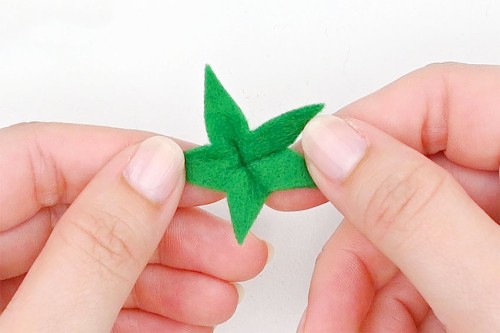
- Use green thread to sew a running stitch in a circle around the center of one of the star shapes. Leave a 2 inch tail on either side.
- Carefully pull the threads to gather the center of the star. Tie the threads together into a double knot, and then cut off the excess.
- This will give you cute leaves for the top of the strawberry. Repeat with the second green star.You can also just make 1 layer of leaves for your felt strawberry - it's up to you!
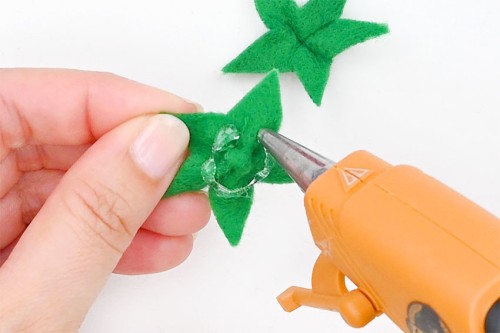
- Add a generous amount of hot glue to the bottom center of the larger leaves.
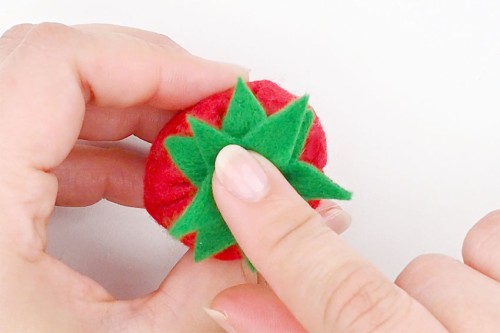
- Press the leaves onto the top center of the strawberry, covering the stitches.Repeat with the second set of leaves, attaching it on top of the first. Align this one so the points stick out between the points of the bottom layer.
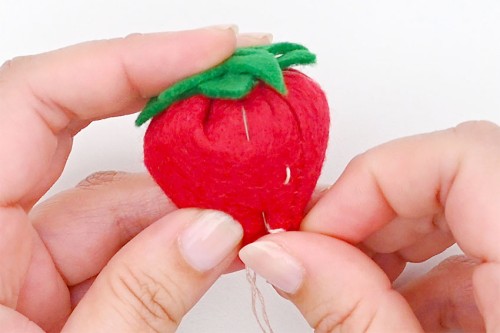
Step 6: Embroider seeds onto the strawberry
- Use a double strand of embroidery floss in light pink or peach to make seeds for the strawberry.Push your needle in near the top of the strawberry and bring it out where you'd like the first seed to be. Pull the thread until it just disappears inside the strawberry.Push your needle back down about 1/8 inch away and bring it back up where you'd like the next seed to start.Repeat about 20 times, or until you're happy with the number of seeds.
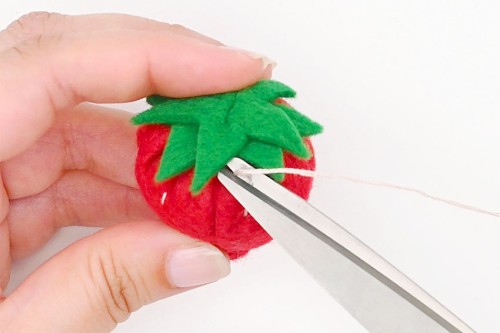
- Finish by cutting your thread close to the felt. Pinch the felt so that the thread disappears inside.
- Your felt strawberry is complete!
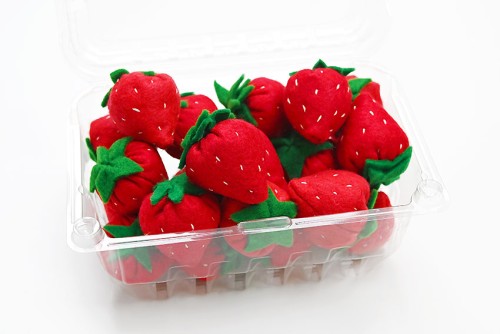
- Now have fun making a whole pint full for display or pretend play.
Helpful Tips:
- To make different sizes of felt strawberries, scale the pattern up or down before printing.
- You can make strawberries in the classic red, or you can also use different shades of pink or white to make these felt fruit.

Get our free printable felt strawberry pattern:
The link and picture below will take you to our free, printable felt strawberry pattern! The PDF file will open in a new window. Then simply print the template on 8.5 x 11 (letter size) printer paper.
>>> Felt Strawberry Pattern <<<

How else can I make seeds for this felt strawberry?
If you don’t like the look of the straight lines of embroidery floss you could also make French knots on your felt strawberry.
Or you can attach little seed beads, similar to how we added bugle beads to our felt donuts! This would add a sparkly touch and some texture to your felt food.
Or use puffy paint to add little dots across the strawberry. This paint is meant for fabric, and it has a small tip, making it really easy to use.

What type of felt is best for making a felt strawberry?
We used soft craft felt to make our felt strawberries, mostly because it’s what we have in our craft stash. This type of felt is inexpensive and easy to find at the craft store. It’s a good choice for simple kids crafts, but it’s quite thin and pills easily.
Craft felt is a good choice if your felt strawberry is going to be set in a bowl and not handled. But if you want to use it as felt play food or as a keychain, you’ll want to use wool felt.
Wool felt is perfect for projects that will have repeated handling. It’s very soft and durable, which means it’s also more expensive than craft felt. But it’s worth the expense, and will give your DIY felt strawberries a quality look with a nice texture.

Do I have to use hot glue to attach the felt strawberry leaves?
No, you can also attach the leaves to the top of the strawberry with a few simple stitches. We like the neat look of using hot glue, though (no extra stitch marks on top).
Or you can also use tacky glue. Make sure you hold or pin the leaves in place until the glue is dry.

These felt strawberries are soft, squishy, and so much fun to make! Set the strawberries in a decorative bowl on the counter, but don’t be surprised if guests try to eat this realistic looking felt food!

Here’s even more felt craft ideas:


Our book Low-Mess Crafts for Kids is loaded with 72 fun and simple craft ideas for kids! The projects are fun, easy and most importantly low-mess, so the clean up is simple!

Where to buy:
You can purchase Low-Mess Crafts for Kids from Amazon, or wherever books are sold:
Amazon | Barnes and Noble | Books-A-Million | Indiebound | Amazon Canada
Let us know what you think: