
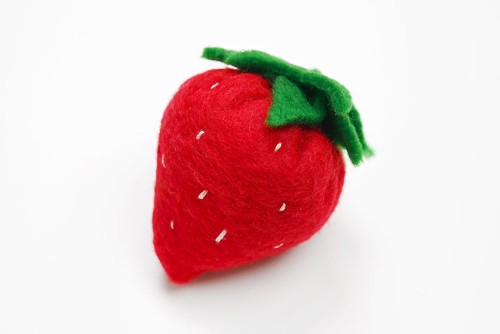
DIY Felt Strawberry
Felt or food? This super cute felt strawberry craft looks good enough to eat, and it's SO EASY to make!
Yield: 1 felt strawberry
Cost: $1
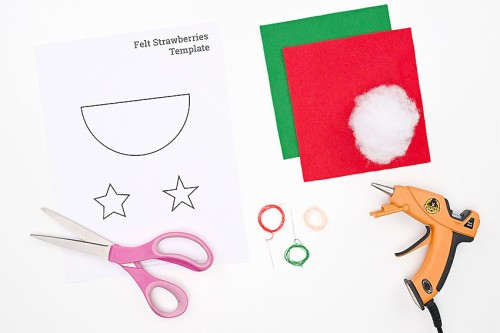
Equipment
Materials
- FREE Printable Felt Strawberry Pattern
- Felt (red and green)
- Sewing thread (red and green)
- Polyester fiber fill
- Embroidery floss (peach or light pink)
Instructions
Step 1: Find what you need
- Gather your supplies and materials.
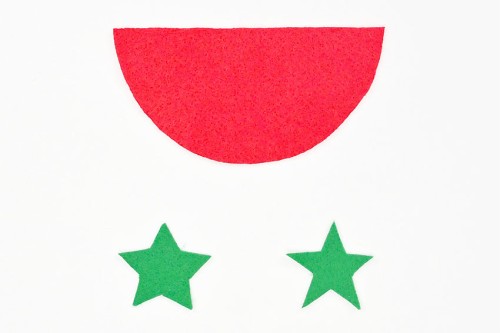
Step 2: Cut out the felt pieces
- Print our free felt strawberry pattern (find the link in the materials list above!) and cut out the shapes.

- Hold the pattern pieces on top of the felt to cut them out.Use green felt for the 2 star shaped leaves, and red for the strawberry (half circle) itself.You can also pin the pattern to the felt to make it easier to cut, or trace around the template with chalk or a gel pen.
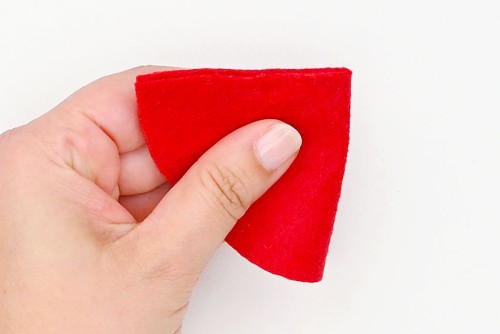
Step 3: Sew together the felt strawberry
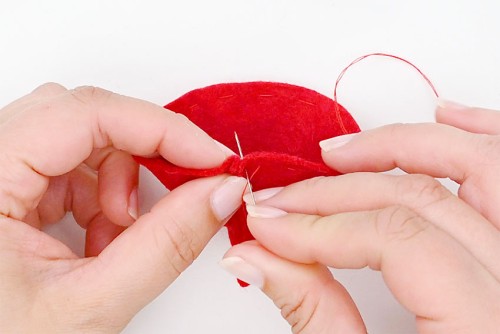
- Fold the red half circle in half, matching up the straight edges.
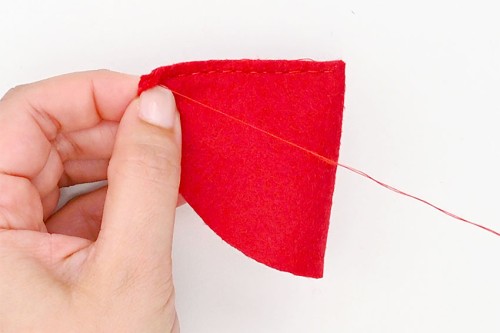
- Sew the straight edges together with a backstitch. Keep the needle and thread attached.
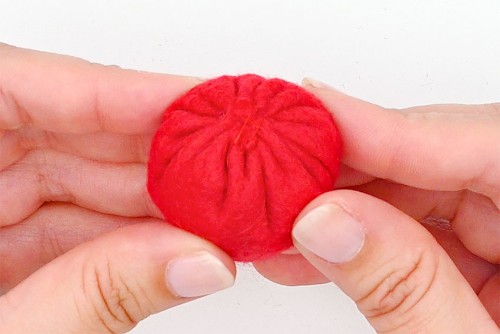
- Open the curved edges of the felt and sew a loose running stitch through one layer of felt. Continue all the way around and, again, keep the needle and thread attached.
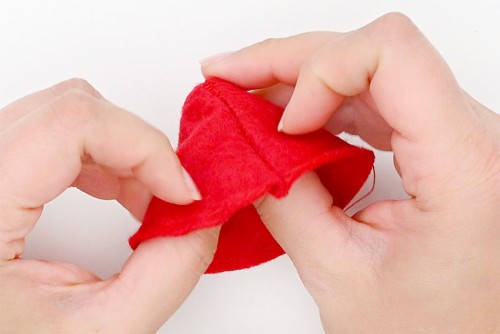
- Turn your strawberry right side out so that the seam is hidden inside.
Step 4: Stuff the strawberry and sew it closed
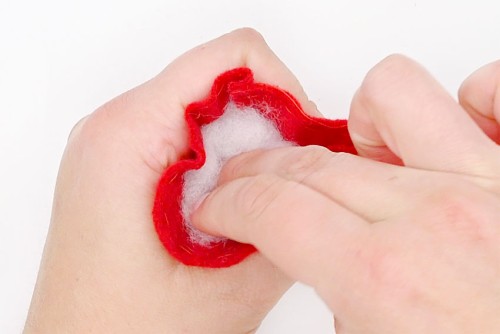
- Add poly-fill stuffing to the strawberry until it's as soft or as firm as you'd like.
- Pull the attached thread, gathering the top of the strawberry closed around the stuffing.

- Sew across the opening multiple times until the top of the strawberry is securely closed.
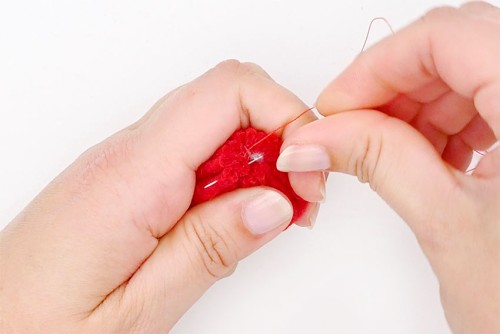
- Finish this thread by pushing it down at the top and out through the middle of the strawberry. Cut the thread close to the felt and then pinch the felt to hide the thread inside.
Step 5: Attach the greenery
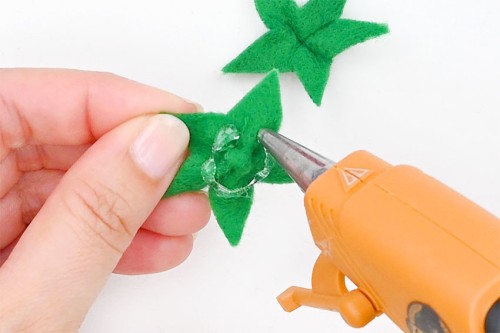
- Use green thread to sew a running stitch in a circle around the center of one of the star shapes. Leave a 2 inch tail on either side.
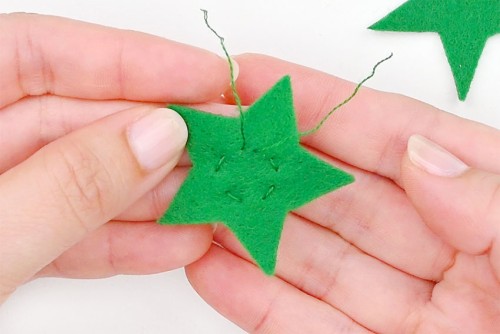
- Carefully pull the threads to gather the center of the star. Tie the threads together into a double knot, and then cut off the excess.
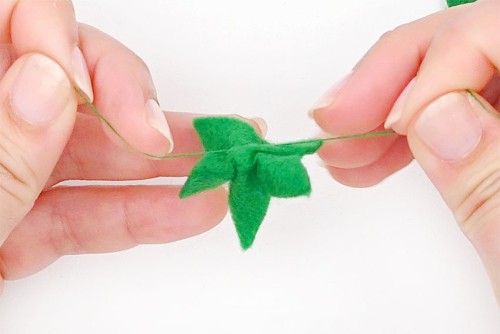
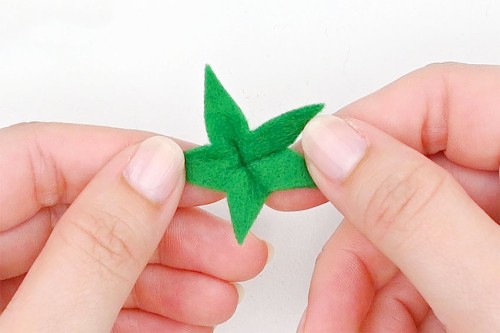
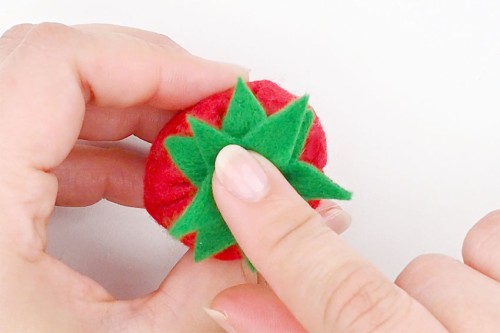
- This will give you cute leaves for the top of the strawberry. Repeat with the second green star.You can also just make 1 layer of leaves for your felt strawberry - it's up to you!
- Add a generous amount of hot glue to the bottom center of the larger leaves.
- Press the leaves onto the top center of the strawberry, covering the stitches.Repeat with the second set of leaves, attaching it on top of the first. Align this one so the points stick out between the points of the bottom layer.
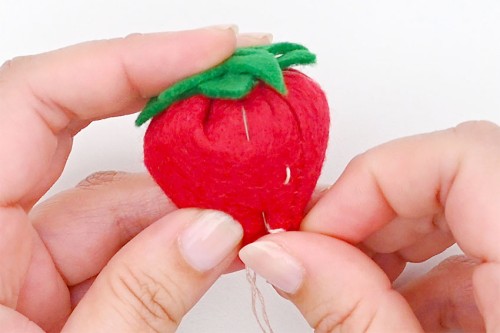
Step 6: Embroider seeds onto the strawberry
- Use a double strand of embroidery floss in light pink or peach to make seeds for the strawberry.Push your needle in near the top of the strawberry and bring it out where you'd like the first seed to be. Pull the thread until it just disappears inside the strawberry.Push your needle back down about 1/8 inch away and bring it back up where you'd like the next seed to start.Repeat about 20 times, or until you're happy with the number of seeds.
- Finish by cutting your thread close to the felt. Pinch the felt so that the thread disappears inside.
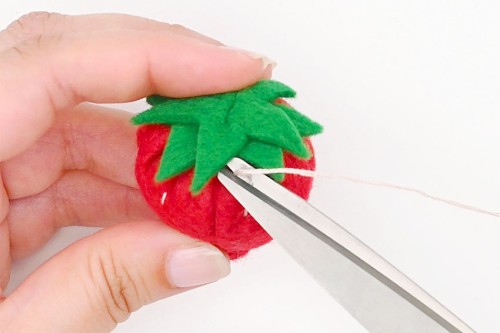
- Your felt strawberry is complete!
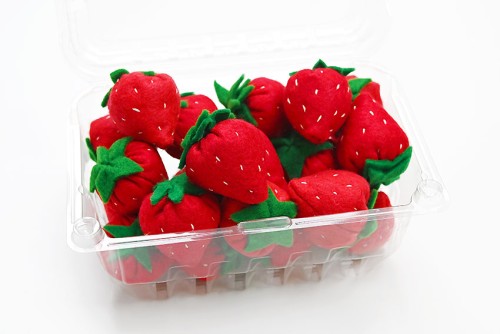
- Now have fun making a whole pint full for display or pretend play.
Video
Notes
Looking for more felt crafts? Here's a few of our favourites:
Felt Alphabet Letters
DIY Felt Donuts
Felt Monster Pattern