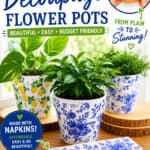
These decoupage flower pots are such a pretty way to dress up plain clay pots! With paper napkins and Mod Podge, you can add colourful lemons, delicate florals, vintage blue patterns, or any design that matches your style. They look like hand-painted ceramic pots, but they’re much easier to make — no painting skills required.
This is a simple and satisfying craft for turning basic plant pots into custom planters for your favourite houseplants. Give one as a handmade gift or use them as home decor, giving a bright little update to your windowsill, shelf, or patio table. Just choose a napkin pattern you love, brush on the Mod Podge, and watch your plain flower pot bloom into something beautiful!

This post contains affiliate links. If you use these links to buy something, we may earn a small commission at no extra cost to you. This helps support our website and allows us to keep creating fun, free content.
How to Make Decoupage Flower Pots
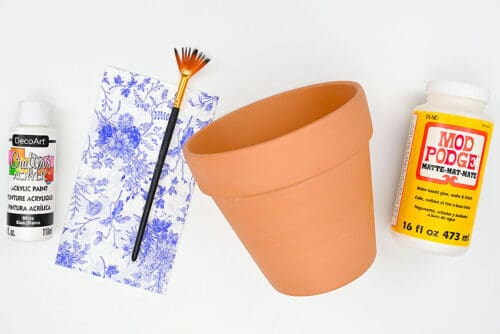
Materials:
- Large clay pots (6 inch)
- White acrylic paint
- Decorative paper napkin (colour/pattern of choice)
- Matte Mod Podge
Equipment:
See the craft in action:
Instructions:
Step 1: Find what you need
- Gather your supplies and materials.

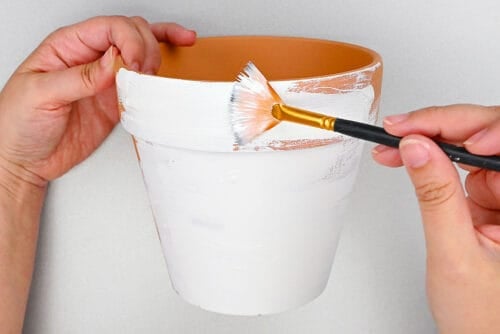
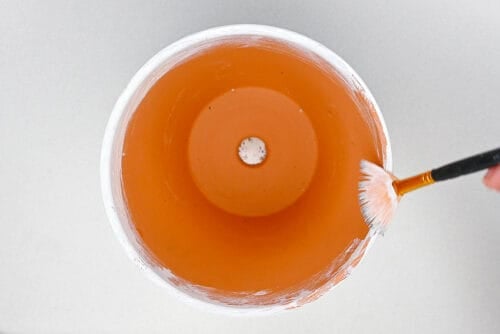
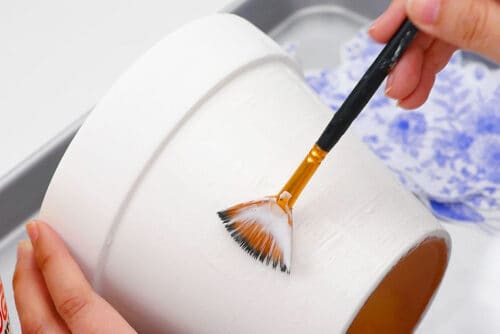
Step 2: Paint the pot
- Paint a white base coat on your terracotta pot using a fan brush or foam brush (to minimize brush marks).You can also use another colour depending on the background colour of your napkin.
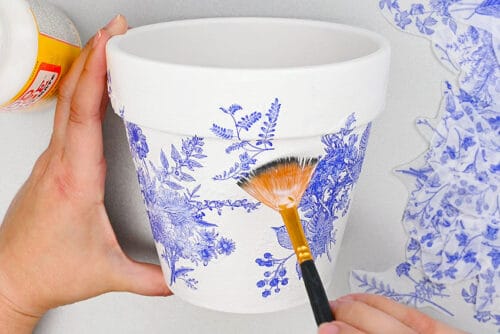
- Paint on, and just inside, the pot’s rim as well.Allow to dry and add a second coat, if necessary.
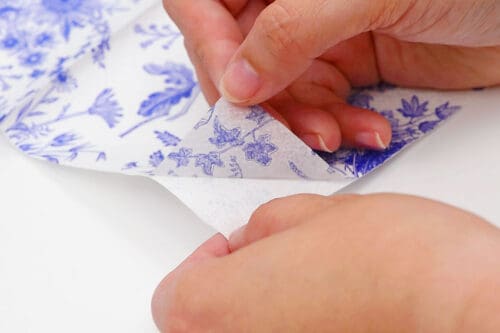
Step 3: Cut out napkin shapes
- Peel off the top (patterned) layer of the napkin.Depending on the quality of your napkins, you may need to do this in stages (removing one ply and then removing the second). Go slowly and work carefully, so you don’t rip the patterned layer.

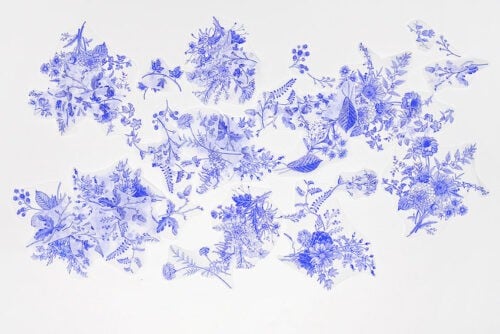
- Cut around shapes or objects on the napkin print. Make sure you cut a good variety and number of pieces.You’ll want big sections that cover most of the side, as well as smaller pieces that fill in the gaps.
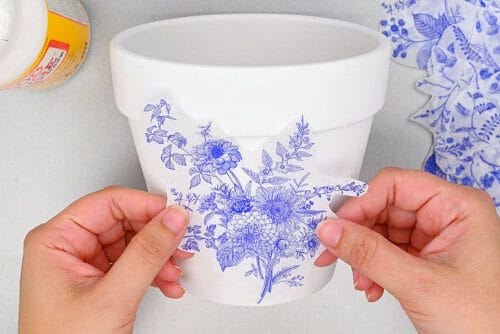
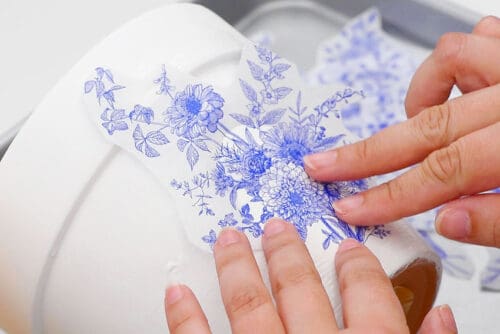
Step 4: Add the napkin to the pot
- Begin by choosing your first napkin piece and seeing how it will fit on the pot.
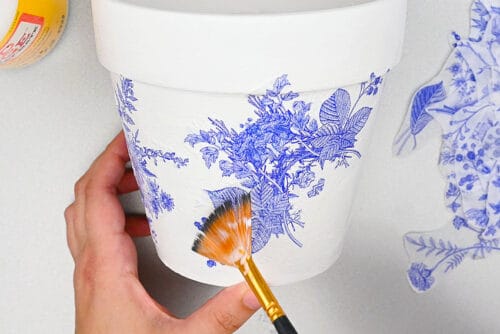
- Add Mod Podge to the side of the pot where the napkin piece will go. You should work in smaller sections at a time, so the Mod Podge doesn’t dry while you’re working.
- Place the napkin down carefully. You want it to be as flat as possible, without any wrinkles.
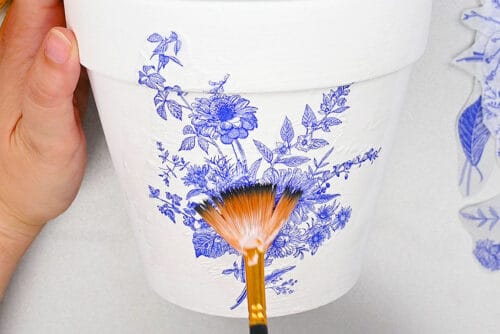
- Use the brush to press the napkin onto the pot. Then add a bit more Mod Podge on top to seal it in.
- Choose another big section of napkin to go beside the first piece. It’s okay to leave gaps between the two — we’ll fill those sections in later.
- Mod Podge this piece of napkin to the pot in the same way you did the first one.
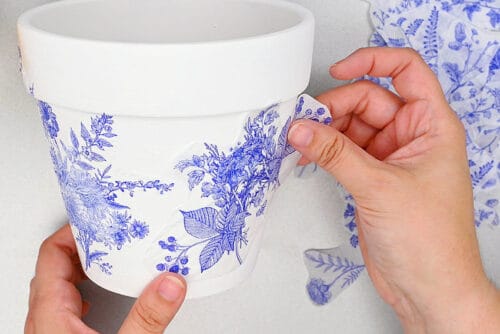
- Now it’s all about puzzling and planning. Choose a small piece of napkin to place between the 2 pieces.At this point you can choose whether you want the whole pot covered with napkin, with the pieces overlapping each other, or if you want to leave white space.For our pots we chose to leave some white space so the pattern was visible.
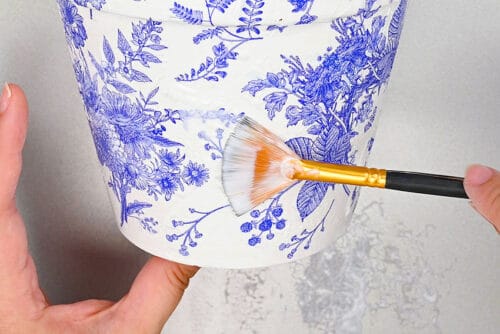
- Continue adding napkin to the pot, planning out what pieces go where. Like before, add Mod Podge first, place the napkin, and then brush on more Mod Podge.Repeat until the pot is full.
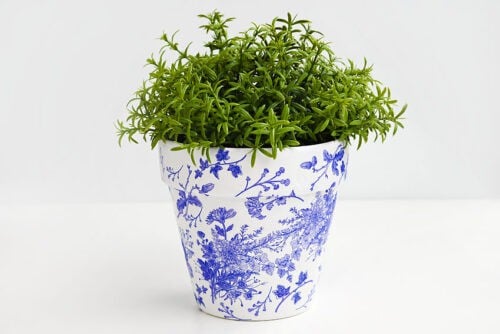
- Your decoupage flower pot is complete!
Helpful Tips:
- Cut several sizes of napkin pieces before you start. It helps to have a mix of larger pieces, smaller pieces, and tiny filler pieces so you can cover the curved flower pot smoothly and fill in any little gaps as you go.
- Work in small sections. Brush Mod Podge onto one small area of the pot, add the napkin piece, smooth it down, and then move on to the next section. If you try to cover too much of the pot at once, the Mod Podge can dry before you have time to position the napkin properly.
- Use a light hand when smoothing the napkin. Paper napkins are very delicate once they touch the Mod Podge, and they can tear easily if you press too hard. Gently smooth the napkin with your brush, working slowly and carefully to help it stick to the pot without ripping.

Where can I get patterned napkins to make decoupage flower pots?
The dollar store is a great place to start looking for patterned napkins. You can often find seasonal designs, florals, fruit prints, and other colourful patterns for a low price.
You can also check home goods stores, home decorating stores, party supply stores, and online shops. Party napkins work really well for decoupage because they come in so many colours, themes, and patterns.
Can I decoupage a flower pot without napkins?
Yes, you can make decoupage flower pots without napkins. Tissue paper, thin cotton fabric, and specialty decoupage paper can also work well.
The key is to use something thin enough to smooth around the curved surface of the flower pot. Paper napkins are especially easy to use because they’re lightweight and flexible, but other thin materials can give you a similar look.

Can I make decoupage flower pots without Mod Podge?
We do recommend using Mod Podge. It’s the easiest and most reliable option for this project. It works as both a glue and a sealer, and it’s easy to find at craft stores, big box stores, and the dollar store.
Other brands, such as DecoArt, also make decoupage medium, but Mod Podge is definitely a more accessible choice. You can also thin regular school glue or Elmer’s Glue-All with a little water as a homemade substitute, but it usually isn’t as easy to work with and won’t give quite the same polished finish as Mod Podge.

Can I use decoupage pots for real plants?
Yes, you can use decoupage pots for real plants, but it’s best to seal the pot first if you’re planting directly inside it. Terra cotta is porous, so moisture from the soil can soak through the pot and damage the decoupage design on the outside.
Before decorating, seal the inside of the pot with a non-toxic, waterproof acrylic spray sealer or Minwax Polycrylic. You can also seal the outside of the pot before decoupaging for extra protection. Once your napkin design is finished, add a final coat of sealer to help protect the surface.
If you’re planting an herb or another edible plant, we recommend using the decorated pot as a cover pot instead. Keep the plant in a plastic nursery pot and place it inside the decorated pot, so nothing from the sealed or decorated surface comes into contact with the soil or plant.

One of the best things about this project is how easy it is to make each pot feel completely different! Choosing prints in different colours and patterns can give the same basic pot a totally unique look, making it a lot of fun to personalize them in your style.
Let the finished pots dry well, add your favourite plants, and place them somewhere you’ll see them often. They’re a cheerful little reminder that even the simplest supplies can turn into something beautiful with a bit of creativity and care.
Here’s even more napkin craft ideas:


Now available
Low-Mess Crafts for Kids Book
72 cute and fun crafts that kids and parents alike can enjoy. All with as little mess as possible!
Where to buy:
You can purchase Low-Mess Crafts for Kids from Amazon, or wherever books are sold:
Amazon | Barnes and Noble | Books-A-Million | Indiebound | Amazon Canada


Leave a Reply