Learn how to decoupage Easter eggs with napkins! It’s SO EASY to do and you only need a few simple supplies to make these beautiful decoupage eggs.
Glue colourful napkins onto plastic or wooden eggs and then display them in an Easter basket or decorative bowl! This colourful Easter craft is both relaxing and fun for adults, and easy enough for kids to make.

This post contains affiliate links. If you use these links to buy something we may earn a small commission which helps us run this website.
How to Make Decoupage Easter Eggs
Equipment:
Watch the step-by-step video tutorial:
Instructions:
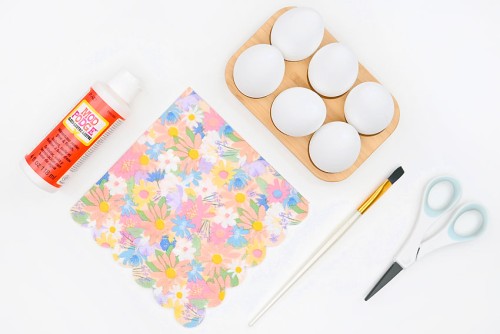
Step 1: Find what you need
- Gather your supplies and materials.

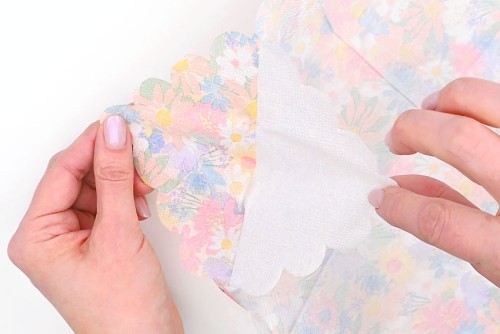
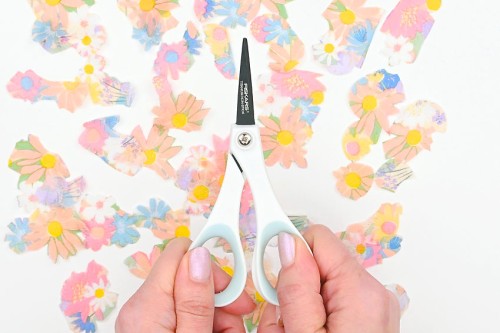
Step 2: Split the napkin and cut out the designs
- Unfold your napkin and carefully peel off the top printed layer.Napkins are usually 2 or 3 ply — make sure you’ve separated the print from all other layers.
- Cut around shapes or objects on the napkin print. Make sure you cut a good variety and number of pieces.We used detail scissors, which work really well for cutting precisely, but any scissors will work.

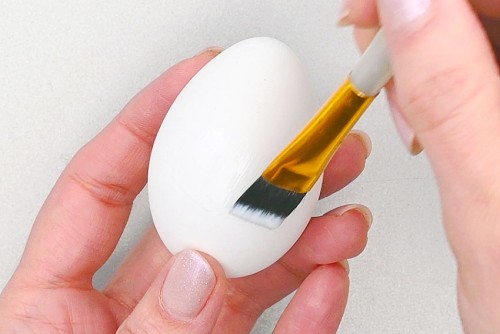
Step 3: Attach the first design
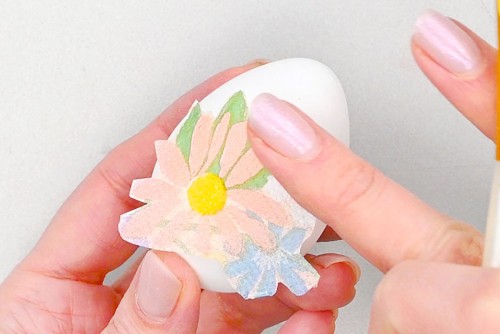
- Add a thin layer of Mod Podge to the front of a faux Easter egg.Our eggs are dyable plastic, but you could also use paper mache, wooden eggs, or even a blown out egg shell.
- Place your first piece of napkin onto the egg where the Mod Podge is. Smooth it down with your fingertips.
- Use the paintbrush to push the edges of the napkin piece down flat onto the egg.Brush more Mod Podge on top of the napkin, especially at the edges, to secure it in place.
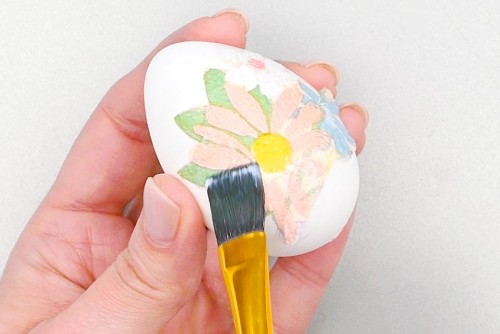
Step 4: Continue gluing the napkin pieces to the egg
- Add more Mod Podge beside the first image and place your second piece of napkin onto the egg.Again, use the paintbrush and your fingertips to smooth out the napkin as much as you can — but don’t push too hard or the paper will tear.
- Continue adding pieces of napkin to the egg with thin layers of Mod Podge.Hold pieces of napkin next to the egg to see how they’ll fit with your design before gluing them down.
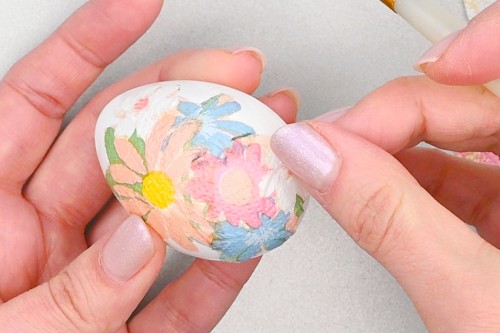
- Repeat, filling in the rest of the Easter egg.Make sure there aren’t any white areas showing between pieces. It’s okay, and even necessary, to overlap them a bit.
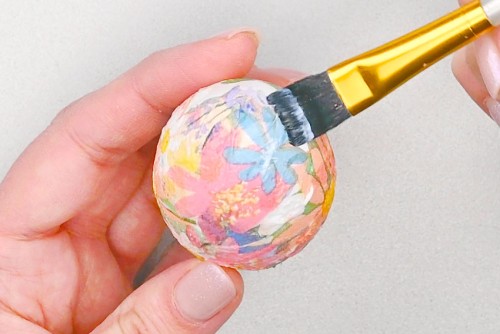
- When you’re finished adding napkin pieces, add a thin coating of Mod Podge over the whole egg.Allow to dry.
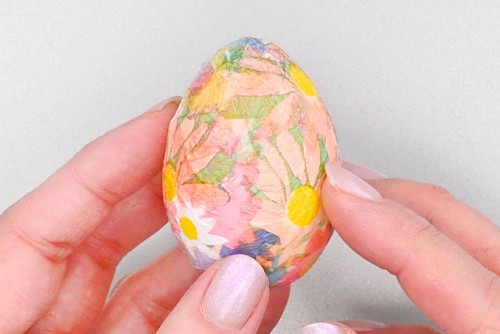
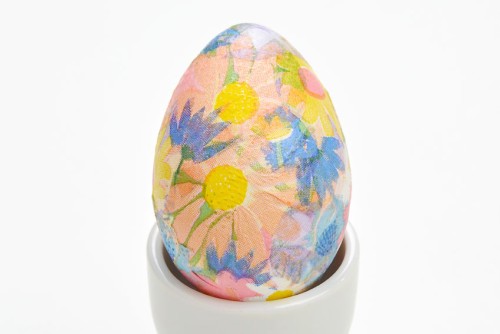
- Your decoupage Easter egg is complete!
Helpful Tips:
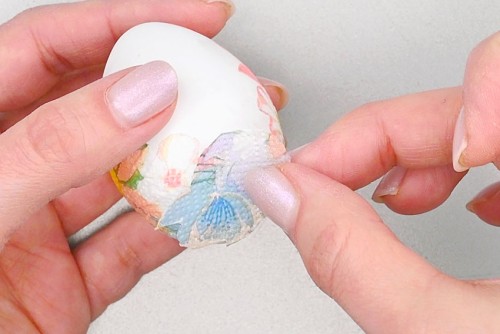
- Be sure to keep a damp paper towel or a wet wipe handy while you’re decoupaging your egg. It’s much easier to apply the napkin with clean hands, so your fingers won’t stick to the paper napkin and rip the pieces.
- Use matte Mod Podge to give your eggs a flat finish, instead of the glossy finish on our Easter eggs.

What is decoupage?
Decoupage is the act of decorating an object by gluing on cutout pieces of paper. It’s considered an art form, and is often combined with paint, gold leaf, or other decorative elements.
The word decoupage is both a noun (works produced by the art of decoupage) and a verb (the act of decoupaging).
Do I have to use a napkin to make decoupage Easter eggs?
Napkins work great for decoupage because they come in so many different patterns, and the coloured layer is so thin and flexible.
But if you don’t have napkins you like, you can also use thin wrapping paper, magazine pages, fabric, printed tissue paper, or rice paper. Any thin, paper-like material should work.

Where can I buy napkins for decoupage Easter eggs?
We bought our napkins at a home decor store, but you can also look at the dollar store, the supermarket, a party supply store, craft stores, or on Amazon.
What style of napkin is best for making decoupage Easter eggs?
The type of napkin you buy will depend on the look you’re going for. Look for napkins in the colour palette you want, with lots of small details that are distinct and easy to cut around.
You can also paint your Easter egg and simply add 1 large focal point design to the egg.
We like our floral napkins, but you can also use napkins with polka dots, stripes, stars, fruit, text, or any design you’d like.

Do I have to use Mod Podge to make decoupage Easter eggs?
Mod Podge works great, and it’s pretty inexpensive to buy if you don’t have any at home. But if you really don’t want to buy a special glue, you can water down regular white glue with 3 parts glue to 1 part water.
However we still recommend using Mod Podge. It’s a glue and a sealer in one, and it will prevent your Easter eggs from yellowing or peeling (which might happen with school glue).
Can I add other elements to my decoupage Easter eggs?
We like our decoupage Easter eggs as is, but depending on the design of your napkin you can definitely add some other details. Tie a ribbon around the egg, glue on a bow, add a faux flower to the egg, or add a touch of sparkle with some rhinestones.

Decoupage Easter eggs are so pretty, and it’s a lot of fun piecing the napkin designs together. Choose a napkin colour that matches your decor or make your decoupage eggs in fun Easter colours. Either way, these DIY Easter decorations will last for years to come!

Here’s even more Easter egg craft ideas:


Our book Low-Mess Crafts for Kids is loaded with 72 fun and simple craft ideas for kids! The projects are fun, easy and most importantly low-mess, so the clean up is simple!

Where to buy:
You can purchase Low-Mess Crafts for Kids from Amazon, or wherever books are sold:
Amazon | Barnes and Noble | Books-A-Million | Indiebound | Amazon Canada


Leave a Reply