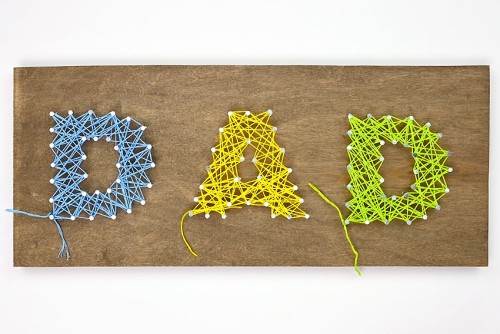
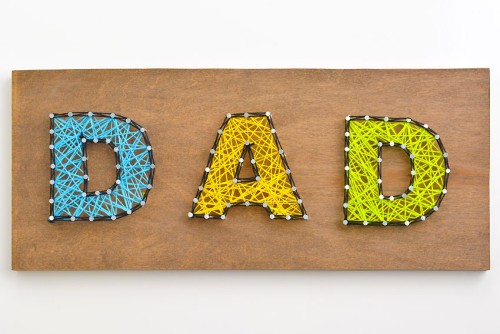
Make something special for Dad on Father’s Day with this Dad string art! It’s such a fun homemade gift, and a great project to display in his office, man cave, or on the mantle!
Choose his favourite colours for the string and then use our free printable template for the letters (see below). This string art sign is colourful, fun, and super easy to make!

This post contains affiliate links. If you use these links to buy something we may earn a small commission which helps us run this website.
DIY Dad String Art
Materials:
- 3/4 inch thick wood (about 16 x 7 inches)
- Common nails (7/8 inch long)
- Embroidery floss (3 colours, plus black)
Watch the step-by-step video tutorial:
Instructions:
Step 1: Find what you need
- Gather your supplies and materials.


Step 2: Add the template to the wood
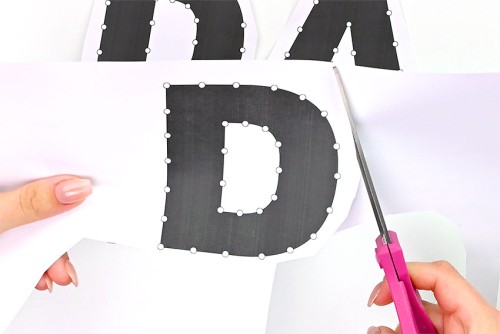
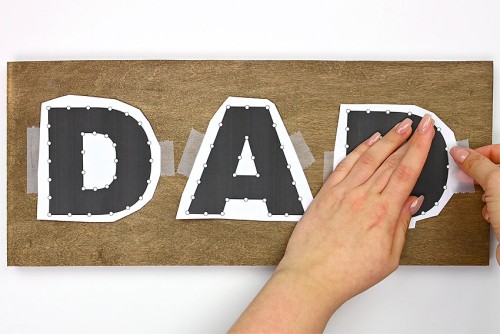
- Print out the free “DAD” template (find the link in the list above!) and roughly cut out the letters.
- Tape the template pieces onto your wood to keep the letters in place.You can measure so that the letters are placed completely evenly, or just eyeball what will look best.
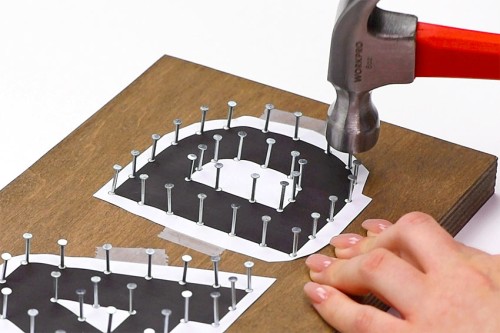
Step 3: Hammer in the nails
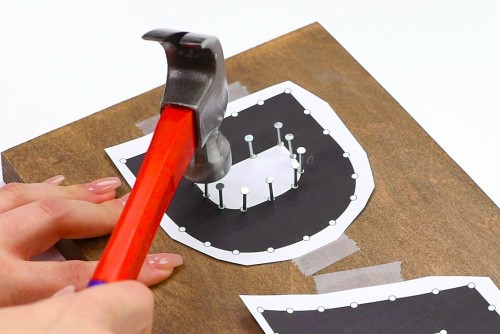
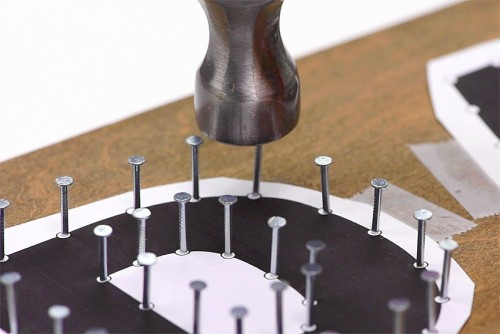
- Hammer in the nails on the inside of the first letter so that they’re sticking out about 1/2 inch above the wood. Starting on the inside of the letters makes it easier to maneuver.If you’re using the template, add the nails on the marked spots. Otherwise, add nails every 1/2 to 3/4 inch, keeping them a fairly even distance apart.
- Now hammer in the nails around the outside of the “D” to complete the first letter.
- Repeat the previous steps, filling in all three letters with nails.Make any final adjustments, checking that the nails are fairly straight and evenly hammered into the wood.

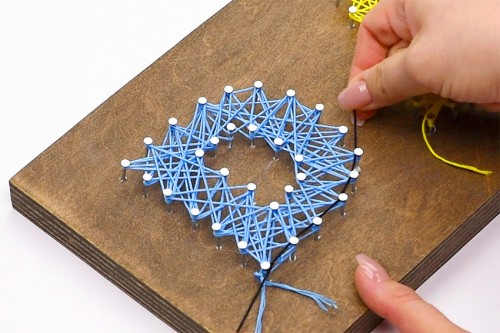
Step 4: Remove the template and start adding string
- Rip off the template letters from the board. Try to remove as much of the paper as possible.If you can’t reach some of the tiny pieces on the inside of the letters, use tweezers to help pull it out.
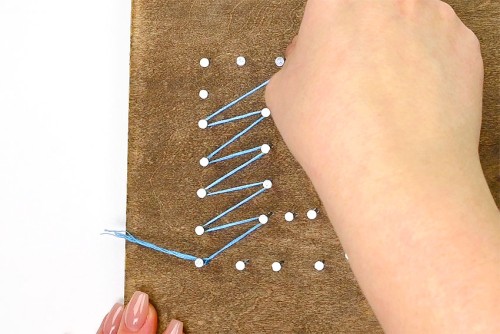
- Choose your first colour of embroidery floss and tie it in a double knot around one of the outside nails, leaving 1 to 2 inches of string on the end.
- Begin weaving the string across the letter, going from nail to nail in a zig zag pattern.
- Continue, making your way across the whole letter. Be careful not to go into the gap in the letter (the center hole of the “D”).
- Repeat the same movements, but this time move the thread across the nails at different angles to create a layered pattern.
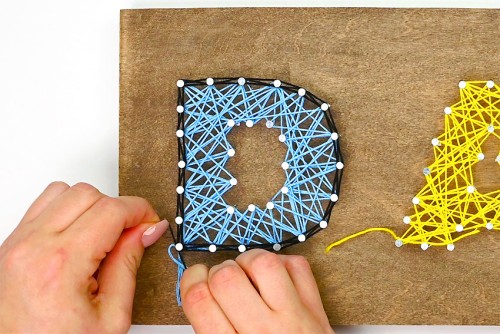
- Continue until you’re happy with how full the letter is. Return to where you started with the thread and cut it off, again leaving 1 to 2 inches extra.
- Tie the end of the string to the beginning thread, securing the two ends in a double knot.
- Repeat the same process for the next two letters, choosing a different colour string for each.


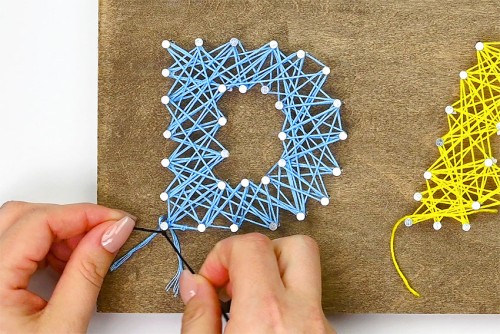
Step 5: Add a border and finish off the string art
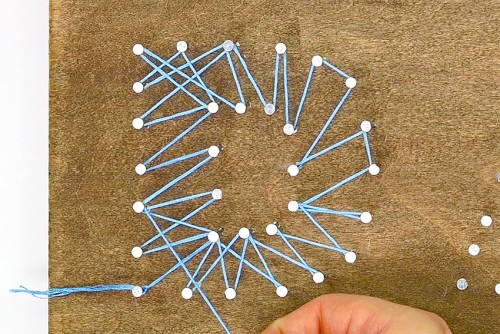
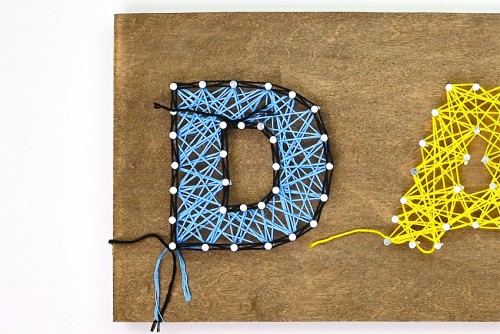
- To make room for the black border you may need to push the coloured string down on the nails.Tie black embroidery thread around the same outside starting point of the first letter.
- Working along the outside of the letter, wrap the string around each nail so that it makes a straight line across the inside of the nails.To do this, bring the thread from nail to nail and make a clockwise loop around each nail to keep the string in place.
- Once you’ve made your way around the whole letter, repeat the same process, this time going in the opposite direction.Wrap the string around the nails in a clockwise motion so that the border is straight across the outside edge.
- Loop the black thread one more time around, filling the center of the border by going on an angle between the nails. This time, loop the thread in an opposite direction each time.Cut the thread and tie it off.
- Repeat this process on the inside of the letter.
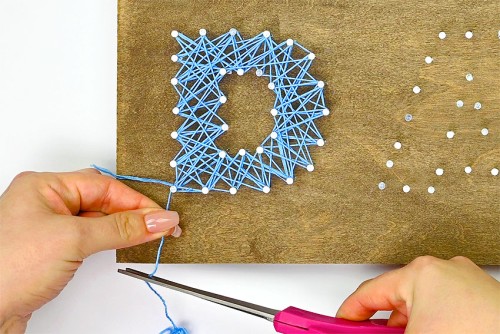
- Now add a black border on the next two letters.
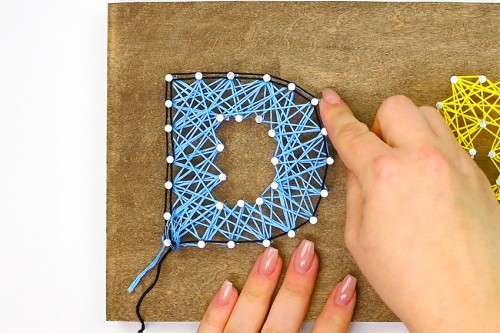
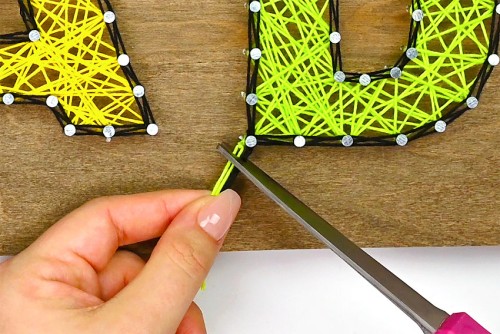
- Cut off the excess string lengths, close to all the knots you’ve tied.
- Your Dad string art sign is complete!

Helpful Tips:
- Use pliers to hold the nail in place while you’re hammering if you’re worried about hitting your fingers, or if you need to add a nail in a small spot where your fingers don’t reach.
- Paint or stain the wood before adding the nails for a nicely finished board.
- Try to do your hammering on the floor or on a very stable surface. Your table will shake, and possibly move around, as you’re hammering.

Download our free Dad string art template:
Click on the link or image below to download our free, printable Dad string art template! The PDF file will open in a new window. Then simply print the template onto regular 8.5 x 11 (letter size) paper.
>>> Dad String Art Template <<<

What kind of string do you use for string art?
We used embroidery floss because we liked the look of it and because it offered a great selection of colours.
However, you can really use any type of string that’s thin enough to be wound around the nails, like crochet cotton, baker’s twine, 2mm macrame cord, or thin jute twine.
You could even use regular yarn, but you might want to space your nails a bit further apart and use longer nails if you do – the thicker the string, the more height it will take up as it’s wound around the nails.

What thickness and size of wood do you recommend for this Dad string art?
You should use wood that’s at least 1/2 inch thick or, ideally, the same thickness as your nails are long. This will ensure that the nails don’t come through the other side of the board.
We used 3/4 inch thick maple plywood that was leftover from a shelving project. You can find plain wood boards at craft stores like Michaels, sometimes at the dollar store, or you can find smaller sheets at Home Depot and ask them to cut it down to size for you.
Try to use a piece of wood that gives you a 1 to 1-1/2 inch border around your string art design. One of our pieces of wood was 13-1/2 inches long and 6-1/2 inches tall, while the other was 16 inches long and 6-3/4 inches tall.

What type and length of nails is used to make this Dad string art pattern?
We used common nails that are 7/8 inch long (22 mm) and are 16 gauge thickness with a 3 mm wide flat head. Ideally we would have used 3/4 inch nails (to match the thickness of our board), but our hardware store was sold out of that length.
How many nails do you need for this Dad string art?
If you use our Dad string art template you’ll need 89 nails, exactly. But make sure you have at least 100 nails on hand, just in case any nails get bent or broken.

How can I make this DIY string art kid-friendly?
As long as an adult hammers in the nails, it’s easy for kids to attach the string. You can make it even more kid-friendly by poking straight pins into a thick foam board and using coloured thread – no hammer and nails required!
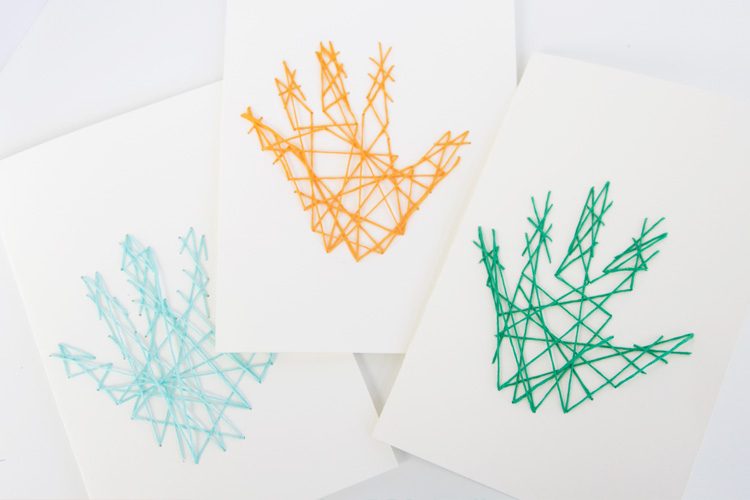
Or, weave the string in and out of cardstock or cardboard, like we did with our Halloween string art cards.
How else can I personalize this Dad string art?
Add a picture hanger on the back of the wood so that Dad can proudly display his string art sign on the wall. Or turn the string art gift into a key holder by attaching hook(s) to the wood below — or to the sides of — the letters.
Finally, use wood glue or tacky glue to attach clothespins to the bottom part of the wood. Then clip on your favourite pictures of you and Dad!
If you want to try one of these options, make sure your wood board is large enough and that your letters are high enough on the board to leave enough room for these extras!

This Dad string art makes a great gift for Father’s Day, birthdays, or just because! Making string art can be a long process, but it’s definitely a very fun one!
Practice your hammering skills and then relax as you weave the string around the nails. Your Dad will definitely appreciate your efforts!

Here’s even more Father’s Day craft ideas:
I Love You to Pieces Picture Frame


Our book Low-Mess Crafts for Kids is loaded with 72 fun and simple craft ideas for kids! The projects are fun, easy and most importantly low-mess, so the clean up is simple!

Where to buy:
You can purchase Low-Mess Crafts for Kids from Amazon, or wherever books are sold:
Amazon | Barnes and Noble | Books-A-Million | Indiebound | Amazon Canada


Leave a Reply