Celebrate Canada Day with this maple leaf string art! This red and white string art design is super cute, and it’s SO EASY to make.
Download our free, printable maple leaf template (find the link below) and display this patriotic craft with pride. Making string art is such a fun process, and these string art maple leaves also make great homemade gifts!

This post contains affiliate links. If you use these links to buy something we may earn a small commission which helps us run this website.
DIY Maple Leaf String Art
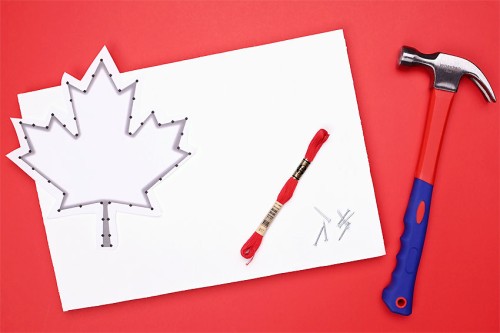
Materials:
- 3/4 inch thick wood (painted, roughly 12 x 12 inch size)
- Common nails (7/8 inch long)
- Red embroidery floss (3 – 4 skeins)
Watch the step-by-step video tutorial:
Instructions:
Step 1: Find what you need
- Gather your supplies and materials.

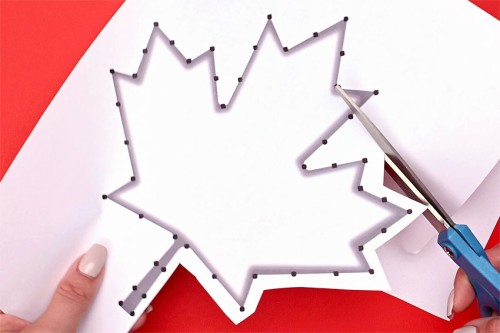
Step 2: Add the template to the wood
- Print off the free maple leaf string art template (the link is in the list of supplies above!) and cut out the shape roughly. Leave about 1/2 inch of paper outside the shape so you have room for the nails.
- Tape the maple leaf to the center of your wood board to keep it in place.You can use plain wood, or paint your wood white like we did.

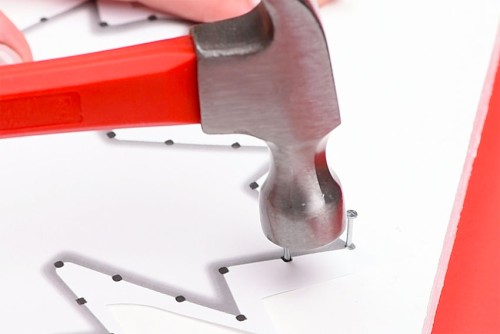
Step 3: Hammer in the nails and remove the template
- Hammer in the nails around the outside of the maple leaf so that they’re sticking out about 1/2 inch above the wood.If you’re using the template, add the nails on the marked spots. Otherwise, add nails every 1/2 to 3/4 inch, keeping them a fairly even distance apart.
- Continue, adding nails all around the outside of the leaf.Make any final adjustments, checking that the nails are fairly straight and evenly hammered into the wood.
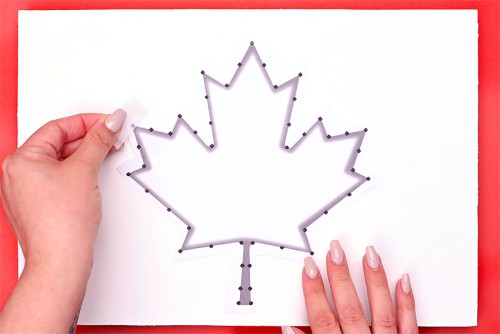
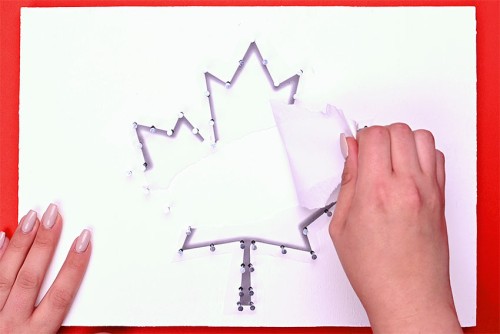
- Rip off the maple leaf template from the board. Try to remove as much of the paper as possible.If you can’t get some of the tiny pieces, use tweezers to help pull it out.

Step 4: Add string to the nails
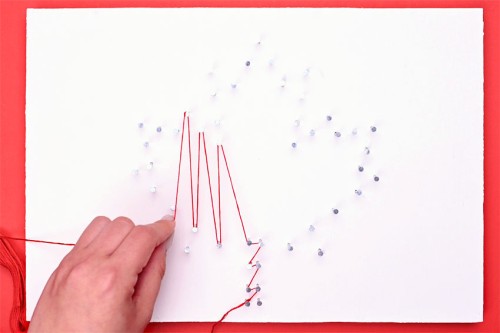
- Start by tying the red embroidery floss to one of the nails in a double knot.Leave 1 to 2 inches of string on the end.
- Begin weaving the string across the leaf, going from nail to nail in a zig zag pattern.
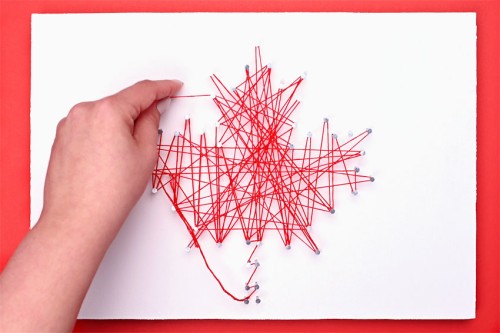
- As you make your way across the leaf, go from side to side at different angles, overlapping the previous threads.
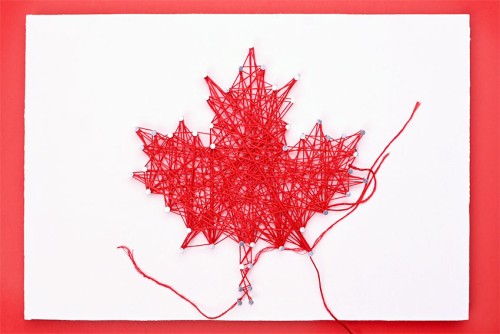
- When needed, tie off the first thread and start a new string on the same nail. Tie it in a double knot and leave a couple inches of extra string at the end, similar to how you started your first string.
- Continue going back and forth at random angles, making sure to cover all areas of the leaf until you’re happy with how it looks. Push the string down on the nails as needed.

Step 5: Outline and finish off the maple leaf string art
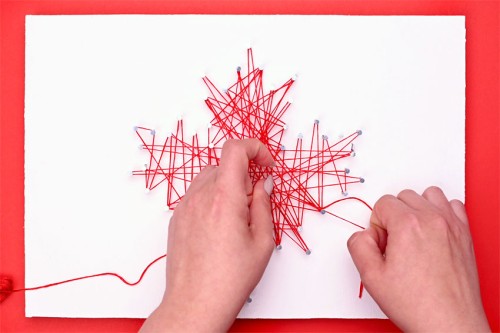
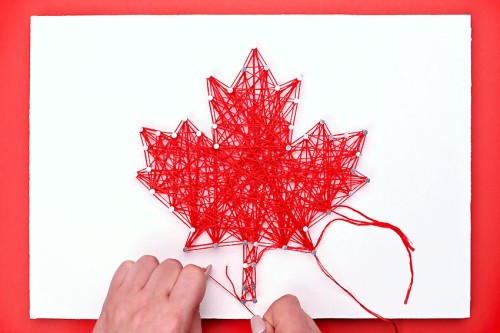
- Wrap the string once around the nearest nail, counter-clockwise. Move the string to the next nail in the outline and wrap around it, again counter-clockwise. Work your way around the outline of the leaf wrapping counter-clockwise around each nail so the string makes an outline around the outside of the nails.
- Once you’ve made your way around the border once, wrap the string around each nail to make an outline along the inside of the nails. This time, wrap the string clockwise around each nail.
- Finish the border on the same nail that you started with. Tie your string to the first loose string in a double knot.
- Tie off the other long strings to each other, and then cut off all the extra thread near the knots.
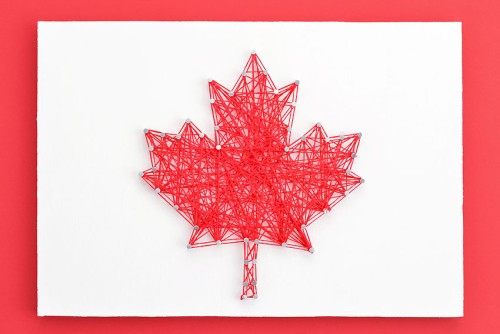
- Your maple leaf string art is complete!


Helpful Tips:
- Use pliers to hold the nail in place while you’re hammering if you’re worried about hitting your fingers, or if you need to add a nail in a small spot where your fingers don’t reach.
- Stain the wood or paint it red or white before adding the nails for a nicely finished board.
- Try to do your hammering on the floor or on a very stable surface. Your table will shake, and possibly move around, as you’re hammering.

Download our free maple leaf string art template:
Click on the link or image below to download our free, printable maple leaf string art template! The PDF file will open in a new window. Then simply print the template onto regular 8.5 x 11 (letter size) paper.
>>> Maple Leaf String Art Template <<<

What wood should I use for string art?
We recommend using wood that’s at least 1/2 inch thick or, ideally, the same thickness as your nails are long. This way, the nails can’t come through the other side of the board.
We used 3/4 inch thick plywood that was leftover from a shelving project. You can buy plain wood boards at craft stores like Michaels, and sometimes you can find them at the dollar store. Otherwise, buy a small sheet of wood at a building store, like Home Depot, and ask them to cut it down to size.
Try to use a piece of wood that gives you a 1 to 1-1/2 inch border around your string art design. One of our pieces of wood was 13.5 x 9 inches, while the other was 14 x 11 inches.

What kind of nails should I use for this maple leaf string art?
We used common nails that are 7/8 inch long (22 mm) and are 16 gauge thickness with a 3 mm wide flat head. Ideally we would have used 3/4 inch nails (to match the thickness of our board), but we used the nails we had on hand, leftover from making our Dad string art.
How many nails do you need for this maple leaf string art?
Our maple leaf string art template uses exactly 47 nails. We recommend having at least 55 nails on hand, though, just in case any of them bend or break.

What is the best thread for string art?
We prefer using embroidery floss for making string art. It has a nice, clean look to it, it’s easy to work with, and there’s a lot of colours to choose from.
However, you can use almost any type of string to make this maple leaf string art. For example, crochet cotton works well, or you could use baker’s twine, 2mm macrame cord, or even thin jute twine.
Regular yarn works as well, though it gives the string art a bit of a different look because of its thickness. If you use yarn to make your string art we suggest spacing your nails a bit further apart. You might also want to use longer nails, because the thicker the string, the more height it adds as it’s wound around the nails.

This super cute string art maple leaf is perfect for celebrating Canada’s birthday! It’s a fun craft for teens, adults, and even older kids (hammer in the nails for them if you’d like).
This maple leaf string art is also a fun fall craft! Make one as a hostess gift, or hang up your creation for some fun handmade Thanksgiving decor!

Here’s even more fun string art ideas:


Our book Low-Mess Crafts for Kids is loaded with 72 fun and simple craft ideas for kids! The projects are fun, easy and most importantly low-mess, so the clean up is simple!

Where to buy:
You can purchase Low-Mess Crafts for Kids from Amazon, or wherever books are sold:
Amazon | Barnes and Noble | Books-A-Million | Indiebound | Amazon Canada


Leave a Reply