Christmas salt painting is so much fun and it’s SO EASY to do! Trace shapes with white glue and sprinkle it with regular table salt. Then use liquid watercolor paint to create a magical painting!
This Christmas salt art is so festive, and it’s really mesmerizing to watch the paint ripple and spread across the salt. Download and print our FREE Christmas tree templates and star outlines to create this fun and colourful process art!

This post contains affiliate links. If you use these links to buy something we may earn a small commission which helps us run this website.
DIY Christmas Salt Painting
Materials:
Equipment:
- Small bowls (or deep paint palette)
Watch the step-by-step video tutorial:
Instructions:
Step 1: Find what you need
- Gather your supplies and materials.


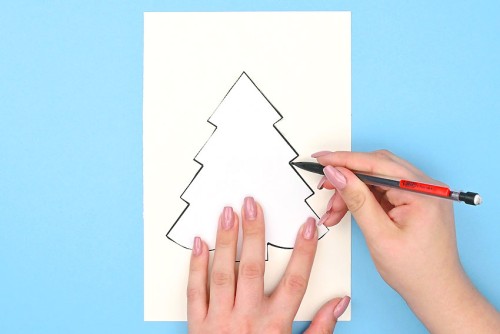
Step 2: Trace the template
- Print our FREE Christmas tree and star templates. Find the links in the materials list above, or get more details below the tutorial.
- Cut out your shape.
- Trace the shape onto a piece of watercolour paper. (We cut our paper in half so it was 6 x 9 inches.)

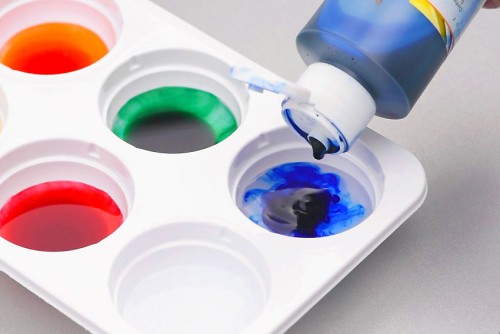
Step 3: Mix the paint and add glue and salt to the paper
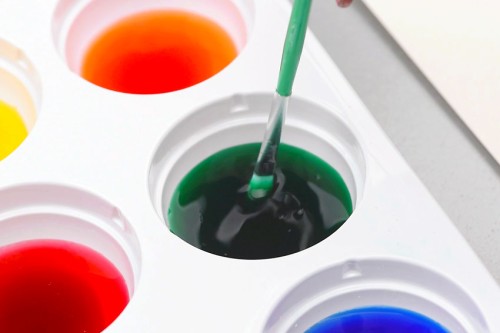
- Add water and liquid watercolour paint to small bowls, or to sections of a paint palette.The amount of paint to water will depend on how vibrant you’d like your colours to be. We added about 10 drops of paint per Tablespoon of water.
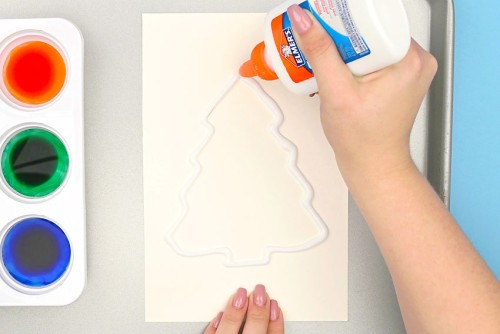
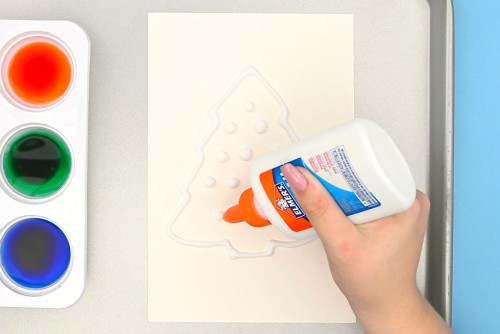
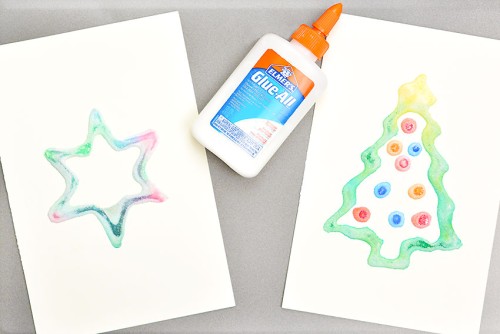
- Carefully squeeze glue out of the bottle to trace the shape drawn on the paper. Using a small bottle of glue, like a 4 ounce size, will make this step easier. The tip on the smaller bottles is also smaller, which will make it easier to control how much glue comes out and where it ends up.
- Then add dots of glue in the center of the tree. These will be the Christmas tree’s ornaments.
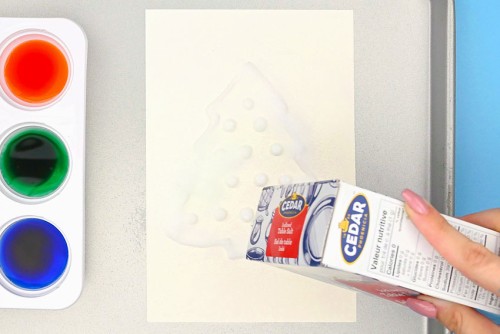
- Add a generous amount of salt on top of the glue, making sure all of the glue is covered.
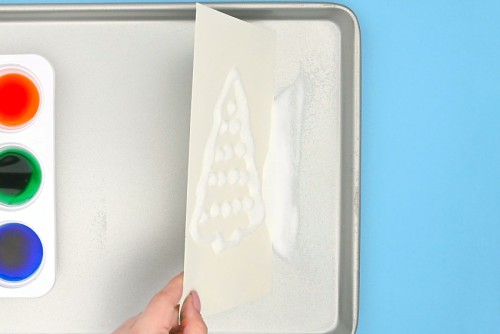
- Tip the paper to remove the extra salt.Don’t tap or shake the paper too much — it could make too much salt come off or even cause the glue to flatten.
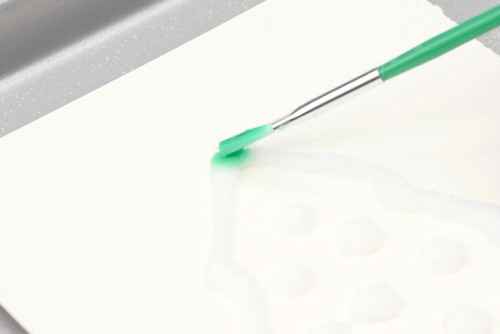
Step 4: Add paint to the raised salt lines
- Stir the paint with a paintbrush and then pick up some paint on your brush.

- Bring the brush over to the salt-covered glue and lightly set the brush down on the salt. Allow the paint to spread, like magic, across the salt.
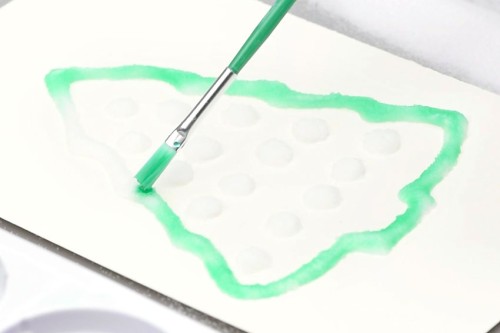
- Continue going around the outline of the tree, adding a little bit of paint at a time.
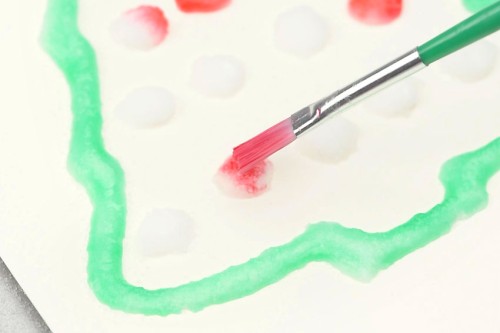
- Once the tree outline is complete, clean your brush and use a different colour for the round ornaments.
- Add different colours of paint onto the small dots and watch the paint spread.
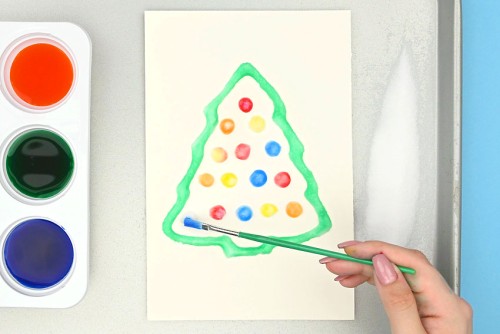
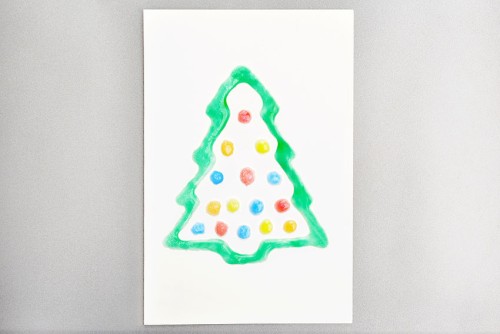
- Your Christmas salt painting is complete!
- Allow your picture to dry before handling it. It can take a day or two for the glue to dry completely.This is what the watercolor salt art looks like once it’s dry. You can see that the colour has faded and the salt is more crystalized looking, almost like ice.
Helpful Tips:
- A little paint goes a long way! Let your paint spread out before adding more to the picture.
- Similarly, try not to add too much water to the salt painting. The salt will begin to dissolve if too much water is added to the salt covered glue.
- The paint colours will become much more pastel as the glue dries (see the picture above).
- You can also use an eyedropper to add the paint.

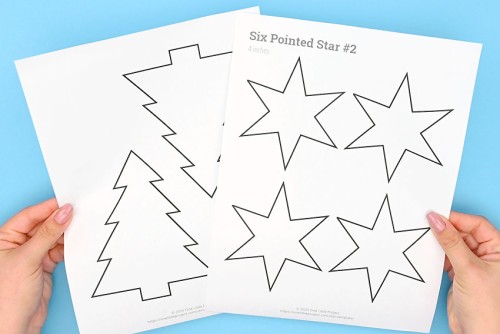
Free printable templates for Christmas salt painting:
Click the links below to find many great options for salt painting! The templates are free to download and print.
On our Christmas tree template page you can choose from 8 different Christmas tree outlines. We used Christmas Tree #2 and Christmas Tree #7 in the medium size:
>>> Christmas Tree Template <<<
On our star template page there are 8 different stars available, each one having 3 different sizes available, with a 4th option showing many sizes. We made our salt art with Star Outline #3 and Star Outline #5, each in the medium size:
>>> Star Template <<<

What type of paint is best for Christmas salt painting?
We used diluted liquid watercolour paint, but you can also use food coloring. You need to use a liquid paint that spreads across the salt easily.
You can also use undiluted watercolor paint or food coloring (ie. no water added). This will give you bright, bold colours.
What paper is best for Christmas salt painting?
You need to use a thick paper that won’t absorb too much of the glue and that can handle liquid without warping too much. We used watercolor paper, but you can also use cardstock.

What glue is used for salt art?
We used Elmer’s white school glue to make our salt paintings. We tried using dollar store glue in the past, and it was just too watery. Elmer’s or another reputable brand is definitely recommended for making your Christmas salt art.
Do I have to cut out the templates when making salt paintings?
No, you can hold the printed template up to a bright window and place the watercolor paper on top of the template page. Then you should be able to see the lines of the template through the paper, allowing you to trace them.
Or you can get creative and draw your own holiday themed shapes!

Christmas salt painting is such a fun and easy holiday craft for kids and adults alike! We love the crystal texture of this Christmas salt art, and the process itself is really cool.

Here’s even more salt painting ideas:
Magic Salt and Watercolor Snowflake Art


Our book Low-Mess Crafts for Kids is loaded with 72 fun and simple craft ideas for kids! The projects are fun, easy and most importantly low-mess, so the clean up is simple!

Where to buy:
You can purchase Low-Mess Crafts for Kids from Amazon, or wherever books are sold:
Amazon | Barnes and Noble | Books-A-Million | Indiebound | Amazon Canada


Leave a Reply