


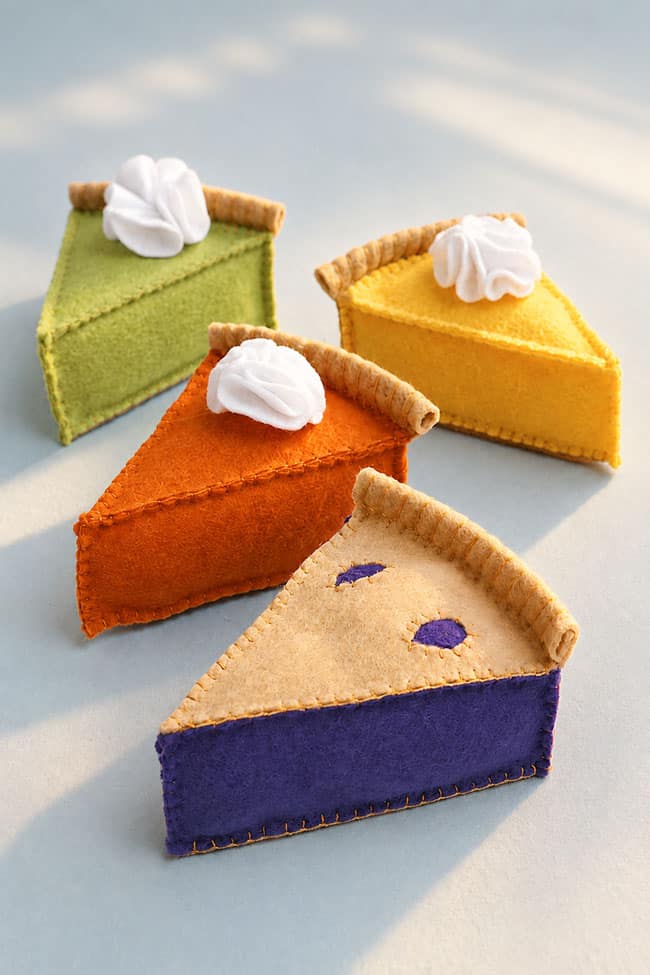
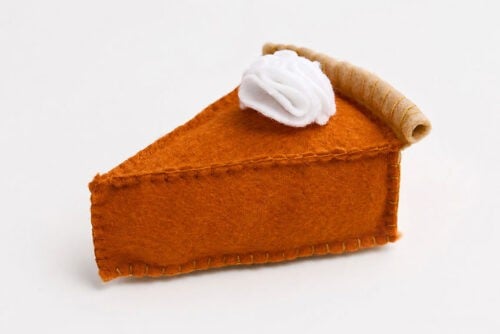
This felt pie is almost cute enough to eat! With its colourful filling, stitched crust, and fluffy felt whipped cream, each slice looks like a tiny bakery treat. Use our printable pattern to make classic pumpkin pie, bright key lime pie, or any delicious flavour you can dream up.
These soft felt pie slices are perfect for pretend play, play kitchens, tea parties, or handmade gifts for kids. The simple shapes make the project approachable, while the little stitched details give the finished pie such a polished, realistic look. Make one favourite flavour or sew a whole pie with a different colour in every slice!
This post contains affiliate links. If you use these links to buy something, we may earn a small commission at no extra cost to you. This helps support our website and allows us to keep creating fun, free content.
How to Make a Felt Pie Slice
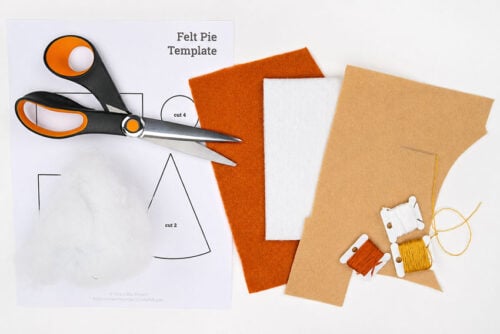
Materials:
- Free Printable Felt Pie Pattern
- Felt (tan, filling colour, white)
- Sewing thread (or embroidery floss)
- Polyester fiber fill
Equipment:
See the craft in action:
Instructions:
Step 1: Find what you need
- Gather your supplies and materials.
Step 2: Cut out the felt pieces
- Print our felt pie template (find the pattern link in the materials list above!) and cut out the pieces.
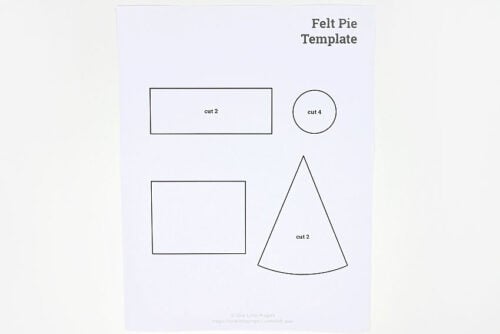
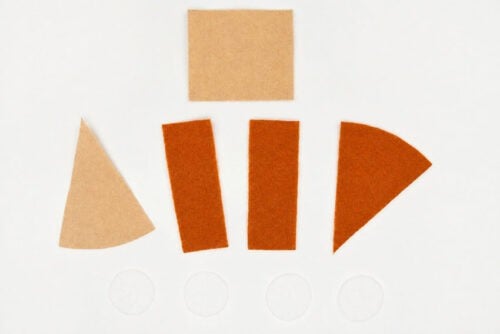
- Use the template pieces to cut out the felt pieces.Cut 1 triangle from the pie filling colour (pumpkin colour, here) and another in the crust colour. Cut the 2 rectangles from the filling colour, the square in the crust colour, and 4 circles in white.
Step 3: Sew the filling together
- Place 1 rectangle on top of the other, holding them together and especially lining up 1 end. These will be the sides of the pie slice.
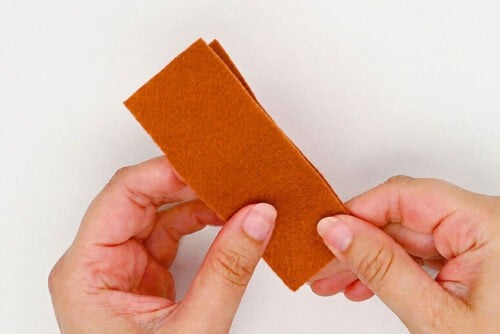
- Sew these short ends together with a blanket stitch.First tie a knot to connect the two pieces. Then bring the needle up about 1/8 inch away from the previous stitch. Before bringing the needle all the way through, wrap the thread around the needle. Repeat across.
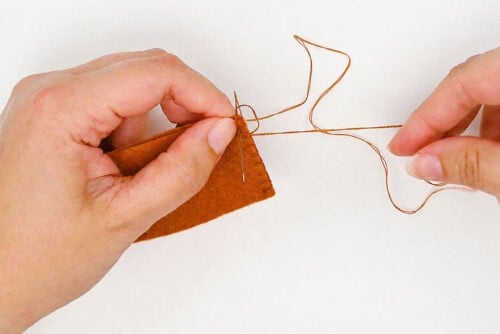
- Where you’ve sewn the pieces together will be the point of the pie slice.
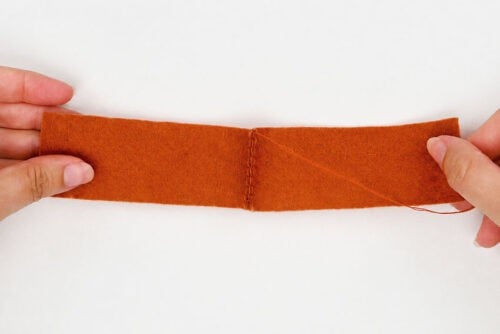
- Now you’ll want to sew the filling triangle to the sides. Line up the point of the triangle to the part you’ve just sewn.
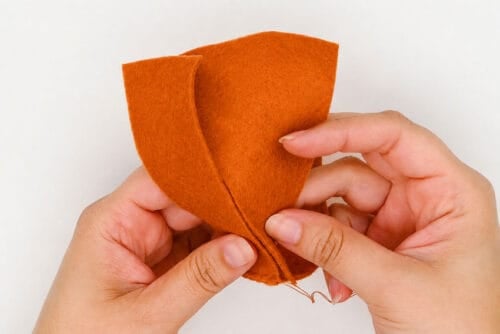
- Use a blanket stitch to connect this piece to both sides.
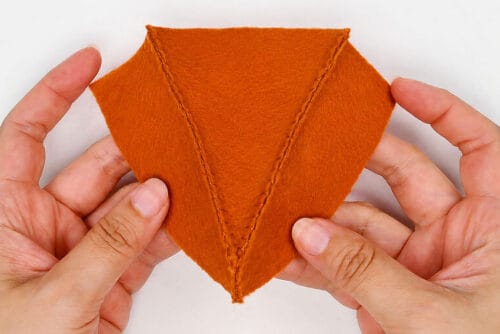
Step 4: Add the crust
- Roll one edge of square down so the unfolded part matches the height of the pie.
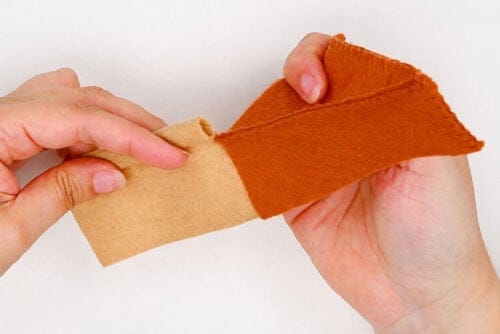
- Sew the folded edge in place, going around and around with the thread, to represent the crimped pie crust.
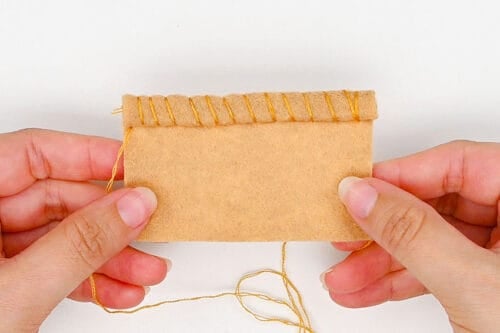
- Attach one side of this back crust to a side of the pie, ensuring that the folded edge is at the top.
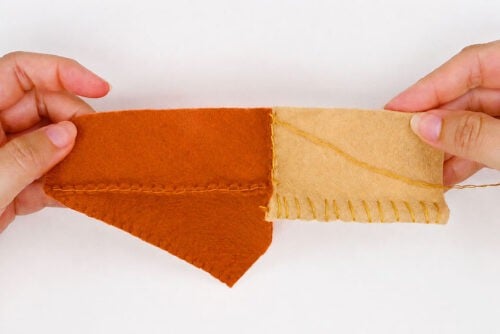
- Sew the pie crust triangle so it’s connected to both bottom edges of the pie filling.
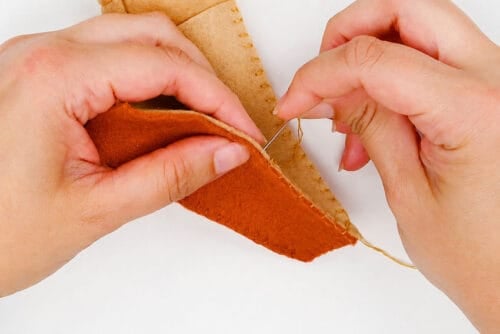
- Then sew the other side of the back crust to the end of the filling
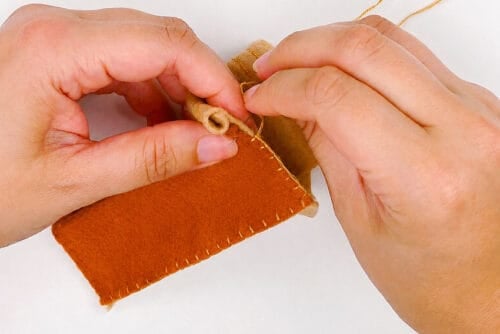
- Finally, sew the top of the filling to the back crust, below the crimping.
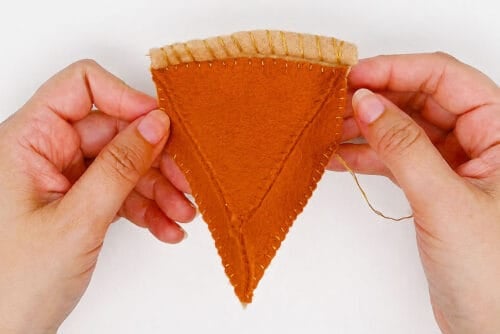
Step 5: Stuff the pie
- Add poly-fil stuffing into the pie until you’re happy with the firmness or softness.
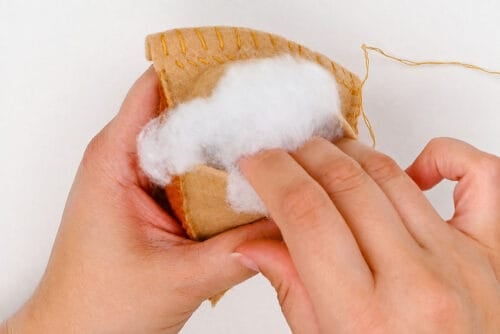
- Sew the last opening closed.
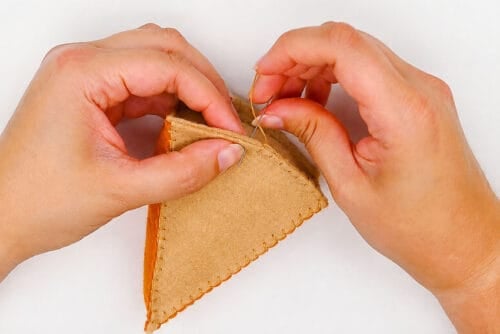
- Finish off the last thread by bringing the needle up through the middle of pie. Cut the thread close to the felt and then wiggle the felt around to hide the thread inside.
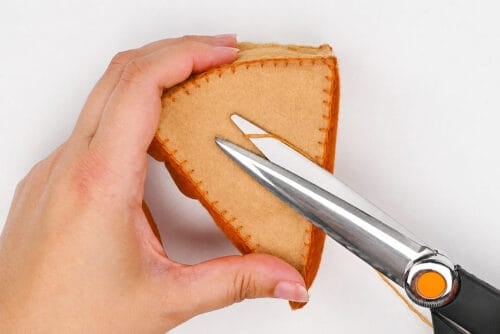
Step 6: Add the whipped cream
- Fold one of the white felt circles in half, and then in half again.
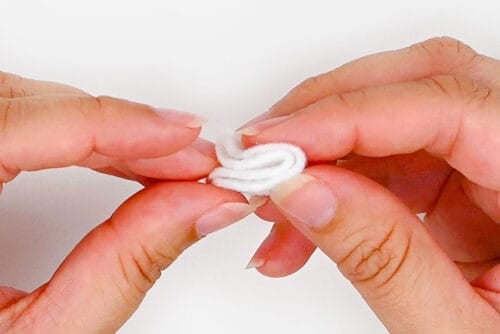
- Sew through the fold several times to secure it in place.
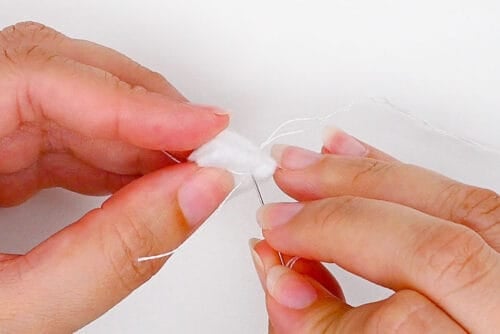
- Fold a second circle the same way. Sew it to the first circle so that they’re beside each other, with the folded ends beside each other.
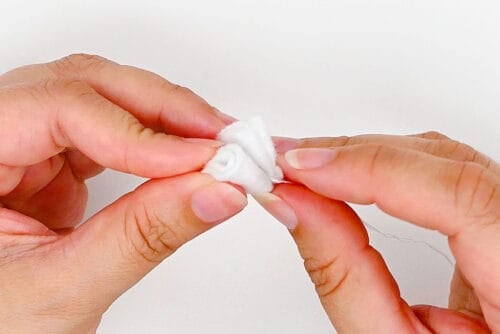
- Fold and sew the last 2 circles to the first ones, placing them so that these folded sides touch the first folds (so the folds are towards the inside of the bundle).
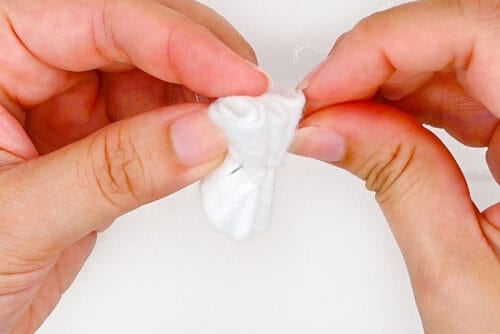
- Tie the 2 thread ends together in a double knot. Fluff the felt so it looks like a nice dollop of whipped cream.
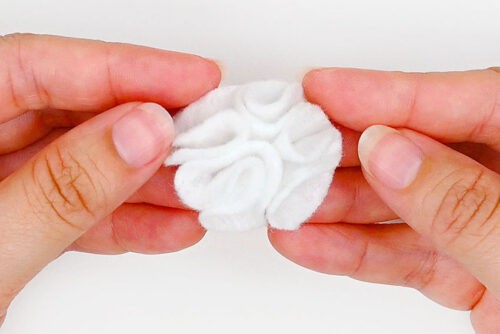
- Sew the whipped cream to the top of the pie. You can sew the thread through the top of the pie, attach the bottom of the whipped cream and then tie both ends of the thread together to secure it
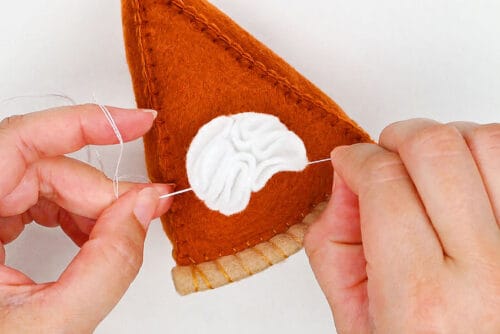
- Your felt pie slice is complete!
Helpful Tips:
- Don’t worry too much about the sewing order: There isn’t one perfect way to assemble the felt pie. As long as you match the correct pieces and sew all the edges securely, the slice will come together nicely!
- Make the whipped cream removable: Attach it with a snap or a small piece of hook-and-loop fastener instead of sewing it permanently in place. This makes the felt pie extra fun for a play kitchen, since kids can serve each slice with or without whipped cream.
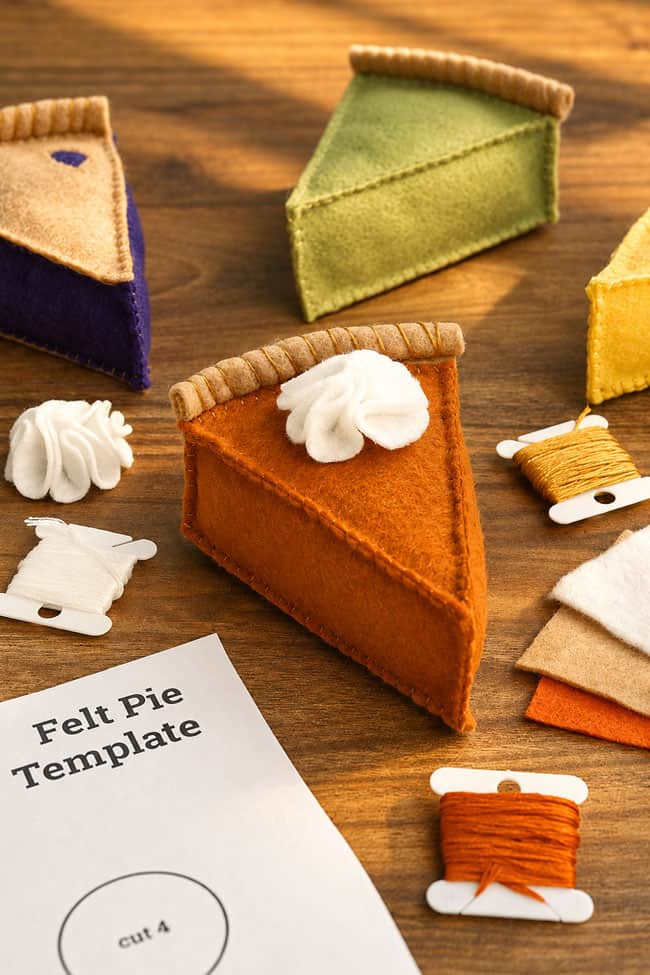
Download our free felt pie pattern:
Click on the link below to download our free, printable felt pie slice pattern! The PDF file will open in a new window. Then simply print the template on 8.5 x 11 (letter size) printer paper or cardstock.
>> Felt Pie Pattern <<
What types of felt pie can I make?
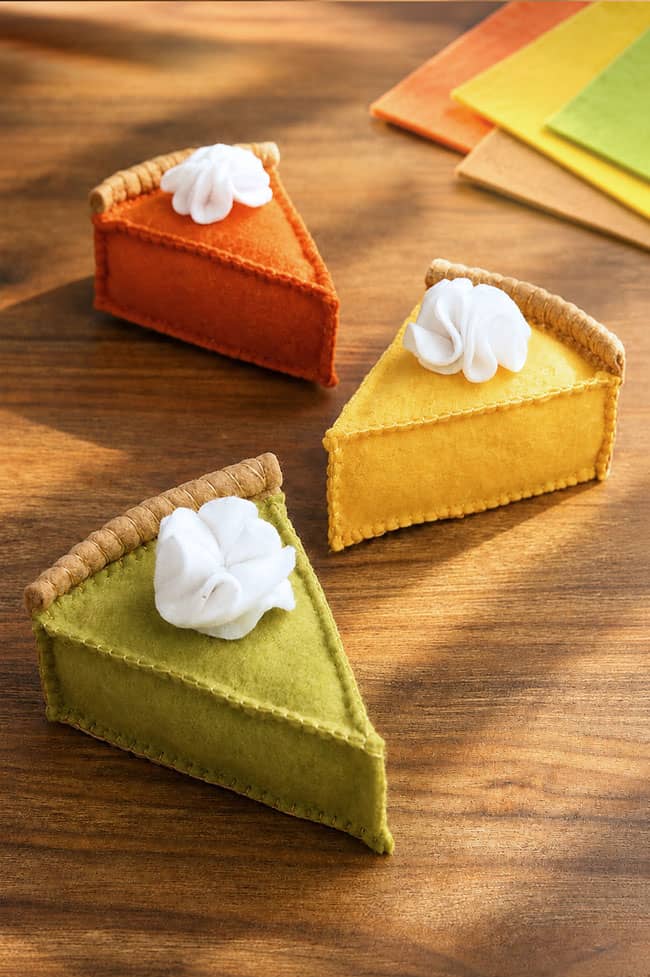
Change the filling colour to create all kinds of pretend pie flavours. Use yellow felt for lemon meringue pie, bright green for key lime, orangey brown for pumpkin, red for cherry, or light yellow for banana cream pie.
For a berry pie, use deep purple felt for blueberry or blackberry filling and add a full top crust. You can also experiment with pink, brown, or patterned felt to invent your own colourful flavours.
What can I use to stuff my felt pie slice?
Polyester fiber fill from the craft store works well because it’s soft, lightweight, and easy to shape inside the narrow pie slice.
You can also reuse clean stuffing from an inexpensive pillow or an old stuffed animal. For a scrap-friendly option, cut leftover felt, fabric, or yarn into small pieces and use those instead. Add the filling gradually so the pie looks plump without becoming overstuffed or uneven.
How do I make a felt pie with a top crust?
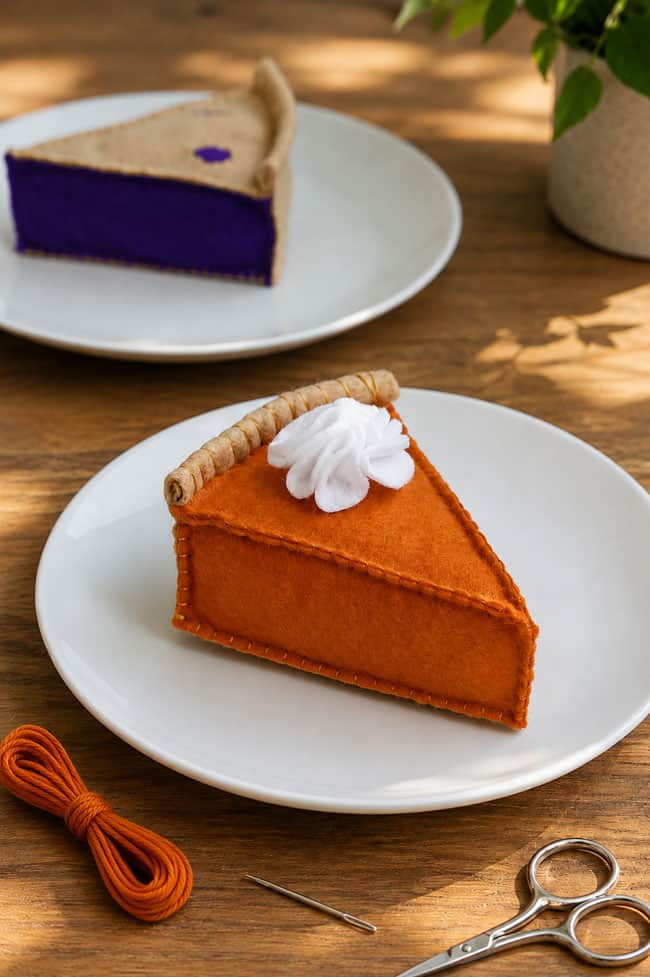
Cut both large triangle pieces from the crust-coloured felt instead of using one crust piece and one filling piece.
Fold the top triangle in half lengthwise and make a small snip through both layers. Carefully cut a teardrop-shaped opening from each side of the snip to create two decorative vents. Sew small pieces of filling-coloured felt behind the openings before attaching the top crust to the rest of the pie.
This creates a cute berry-pie look, with the colourful filling peeking through the crust.
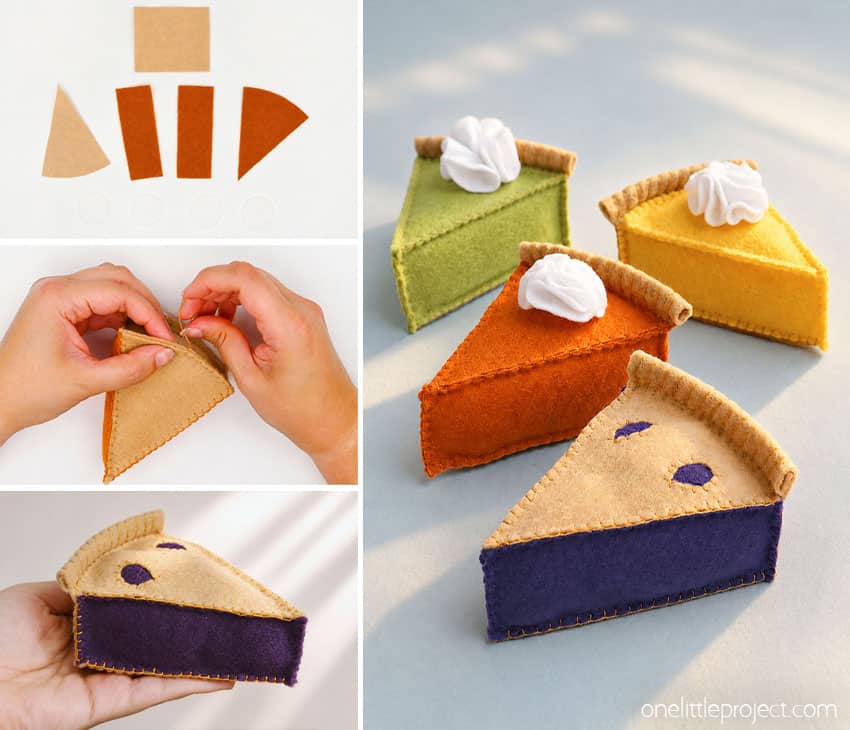
This felt pie is such a sweet addition to any play kitchen, tea party, or pretend bakery. The soft texture, colourful filling, and tiny crust details make each slice feel extra special, while the printable pattern keeps the shapes easy to recreate.
Choose one favourite flavour or mix several colours together to make a whole pie sampler. With removable whipped cream and plenty of room for creative details, these little slices are just as fun to serve as they are to sew!
Here’s even more play food ideas:

Now available
Low-Mess Crafts for Kids Book
72 cute and fun crafts that kids and parents alike can enjoy. All with as little mess as possible!
Where to buy:
You can purchase Low-Mess Crafts for Kids from Amazon, or wherever books are sold:
Amazon | Barnes and Noble | Books-A-Million | Indiebound | Amazon Canada







Leave a Reply