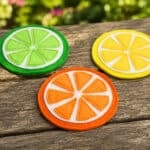
How to Make Felt Fruit Coasters
These felt fruit coasters are such a cute way to protect your tables! Make a whole colourful set for your home, camper, or picnic table. Simply print our fruit templates and follow the step-by-step instructions below!
Yield: 1 felt coaster
Cost: $2
Equipment
Materials
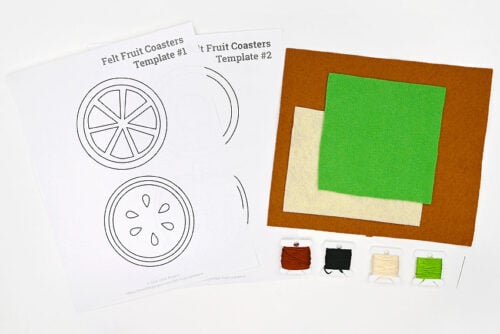
- Free Printable Felt Fruit Coasters Pattern
- Felt (brown, green, yellow -- or other fruit colours)
- Sewing thread (or embroidery floss - cream, black, green, brown)
Instructions
Step 1: Find what you need
- Gather your supplies and materials.
Step 2: Cut out the pieces
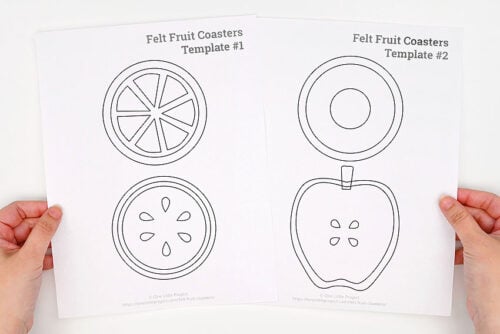
- Print one of our free fruit coaster templates. You can find the link in the materials list above, with more details below the tutorial.Choose your fruit and then cut out the pieces.
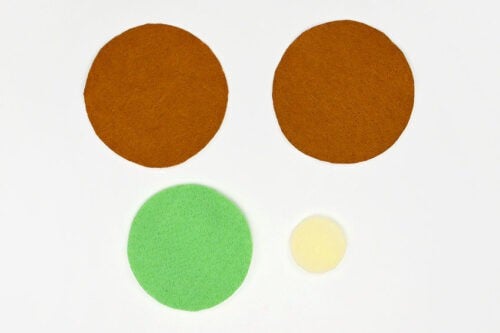
- Cut the template pieces from felt. For all of the coasters you'll need 2 of the largest circle.For our kiwi coaster we've used brown felt for the base, green for the smaller circle, and cream for the small center.
Step 3: Sew the fruit details
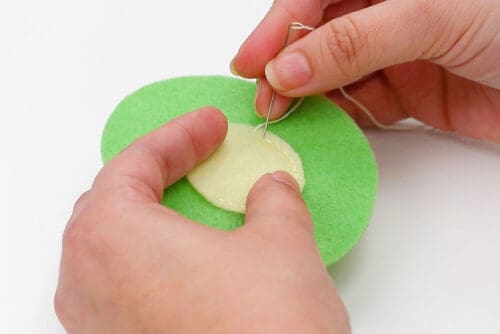
- Begin by placing the small circle in the center of the green one. Sew them together with embroidery floss, using a backstitch.To make a backstitch, bring your needle up a little ahead of your last stitch, then go back down where the previous stitch ended. Keep repeating to make a continuous line.
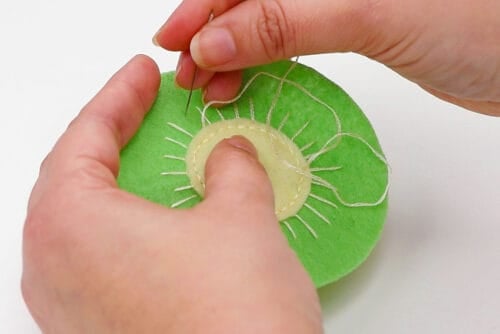
- Then use the same coloured thread to sew the line details that come out from the center of the kiwi.Space the lines roughly 1/4 inch apart and make them varying lengths. Bring your needle under the cream felt in the center to hide that end of the line.
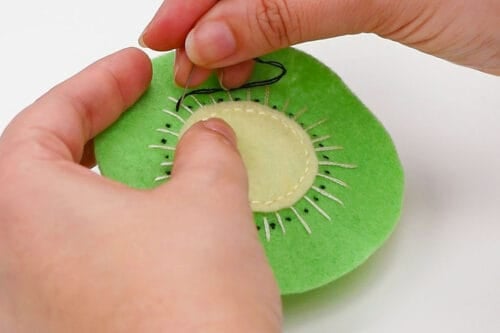
- Use black embroidery floss to make the kiwi seeds, putting 1 between each line. You can make French knots or keep the stitches flat by making small "X" shapes like we did.
Step 4: Connect the larger pieces
- Place the green circle on one of the brown circles, centering it as best you can. Use green embroidery floss to sew them together, using a backstitch.
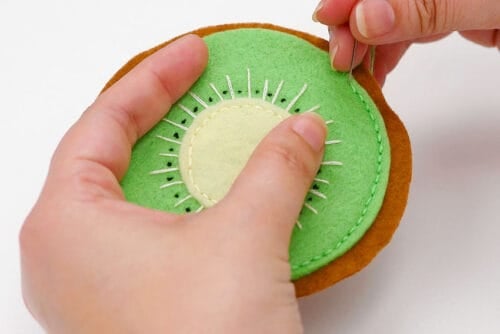
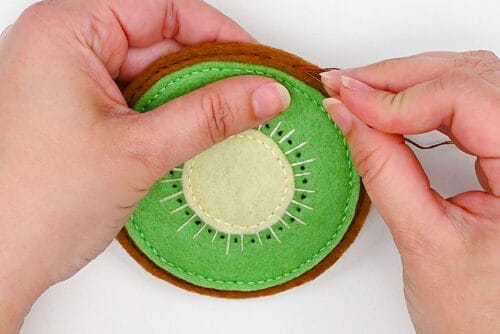
- Now set the kiwi on top of the other brown circle, lining up the edges nicely.
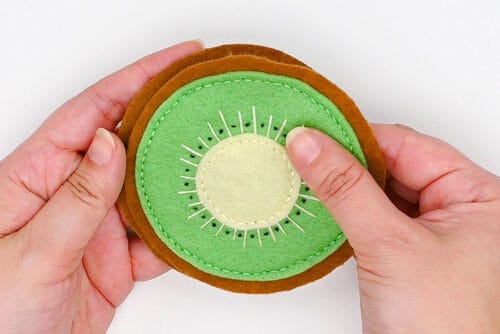
- Sew them together with brown embroidery floss, using a backstitch.
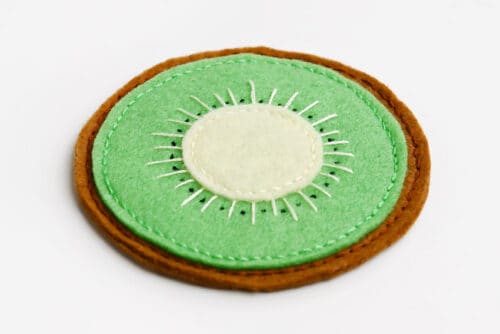
- Your felt fruit coaster is complete!
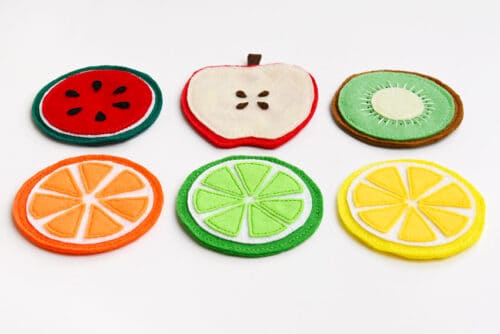
- Have fun making a whole set of coasters featuring different fruits!
Video
Notes
Looking for more DIY coaster ideas? Here's a few of our favourites:
Punch Needle Landscape Coasters
Crochet Succulent Coasters
Dutch Pour Painting Coasters