

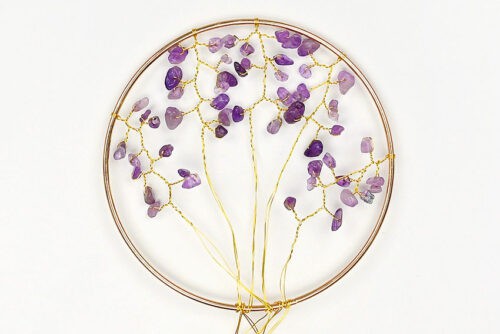
This tree of life suncatcher is such a beautiful and meaningful craft! It combines simple wire wrapping with colourful beads to create a stunning piece of home decor. With its delicate branches and sparkling “leaves,” it catches the light in a really eye-catching way, making it perfect for a sunny window. Each tree of life turns out a little different, giving your finished piece a unique feel.
This relaxing project uses basic materials like wire, beads, and a macrame hoop, making it perfect for beginners and experienced crafters alike. You can customize your tree with your favourite colours of gemstones, making it a lovely art piece to display or give as a thoughtful handmade gift.

This post contains affiliate links. If you use these links to buy something, we may earn a small commission at no extra cost to you. This helps support our website and allows us to keep creating fun, free content.
How to Make a Tree of Life Suncatcher
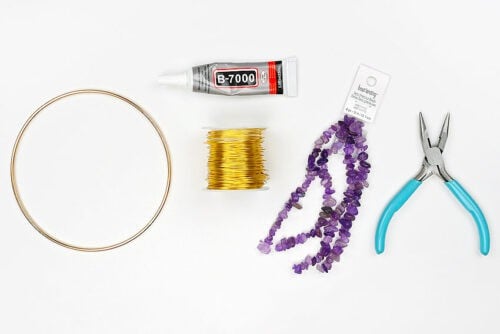
Materials:
- 24 gauge Wire (gold; or colour of choice)
- Metal hoop (5 inches)
- Chip beads
- Super glue
Equipment:
See the craft in action:
Instructions:
Step 1: Find what you need
- Gather your supplies and materials.

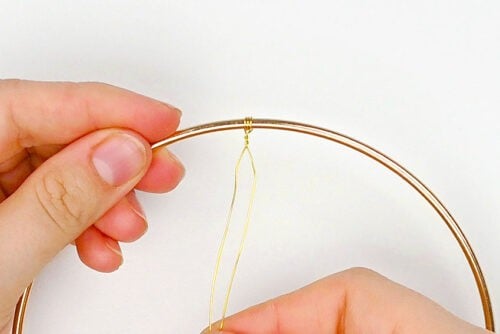
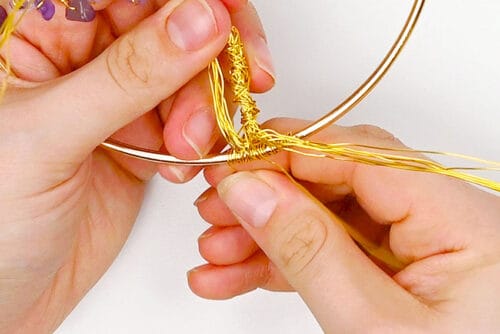
Step 2: Create the beaded branches
- Cut a piece of 24 gauge wrapping wire to be about 36 inches long. Fold the wire in half.
- Open the wire back up and wrap the center fold around the metal hoop a couple of times. Then twist the 2 sections of wire together several times, going towards the inside of the hoop.
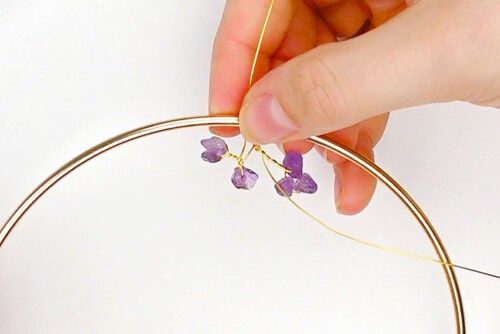
- Add a few beads to one of the wires.
- Fold the wire back up towards the top of the hoop, twisting it around itself, going all the way back to the first twists.This will create a little branch with a cluster of beads (“leaves”) at the end.
- Add a larger bead (or several more beads — whatever you’re feeling) to the other wire. Twist the wire back on itself again, but this time only go halfway back to the middle (leaving some unwrapped wire).
- Slide another bead or 2 onto the same wire. Fold and twist it back until it meets the previous branch, creating an offshoot.
- Then twist the wire together until you get back to the center.
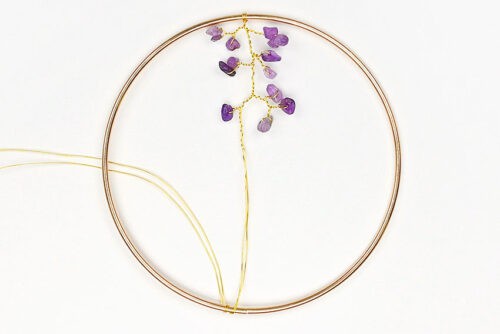
- Twist both wires together, going down at least 1/2 inch. Add a couple more branches on either side, repeating the same process from before.Continue adding branches until they reach about 1/3 of the way down the hoop. You can play around with adding more branches on one side compared to the other, or adding fewer or more beads on each branch.
- Cut 4 more pieces of wire the same length as before (36 inches).Repeat all steps to create 5 branch paths total, spacing them out across the top and around the sides of the hoop.


Step 3: Connect the branches
- Flip the left 3 branches so they’re outside the hoop. Join the right 2 branches by twisting the 4 wires together.This creates one larger branch that branches off into 2 smaller branches.
- Bring the left 2 branches in and connect them in the same way.

- You should now have 3 sections of wire — the combined left, the center, and the combined right.Twist these sections together to form the start of the tree trunk.
- Wrap the excess wire around the bottom to keep it out of the way for now.


Step 4: Add more small branches
- Cut another 36 inch piece of wire, fold it in half, and attach it in between 2 of the existing branches. This is going to create a filler branch.
- Wrap one of the new wire strands around one of the existing branches. Wrap until you get to a natural place for a new small branch to sprout.
- Add beads to this strand and use the same technique as before to create a branch that connects to one of the existing ones.Repeat, going down the whole branch to add new ones where there’s space for beads.
- Repeat again with the second strand of wire. Follow the same path initially and then branch off to create new sub-branches.
- Wrap the remainder of these strands around the trunk of the tree, working down towards the bottom of the hoop.Wrap the wire ends around the ring like the others, to keep them in place and out of the way.
- Repeat this step several times, adding more branches to other areas until you’re happy with how full your tree looks.


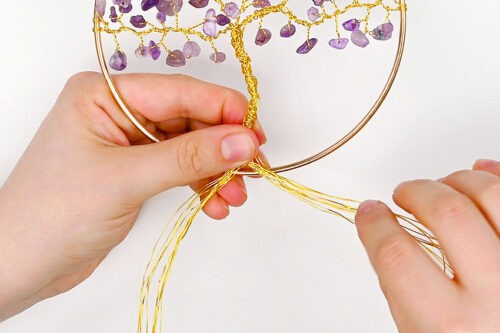
Step 5: Begin making the trunk
- Unwrap the wires from the bottom of the hoop. Twist all the wires together neatly until the trunk is about 1/2 inch from the bottom of the hoop.
- Separate the wires into 2 bundles, placing a relatively even amount on each side.
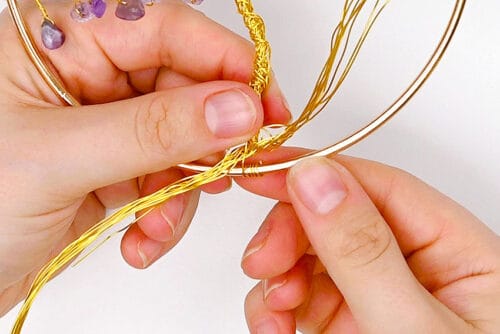
- Starting with the shortest strand on one side, wrap the whole rest of the wire tightly around the bottom of the hoop.
- Grab a second wire from the same bundle. Wrap it several times next to the first wraps (but don’t wrap all of it).
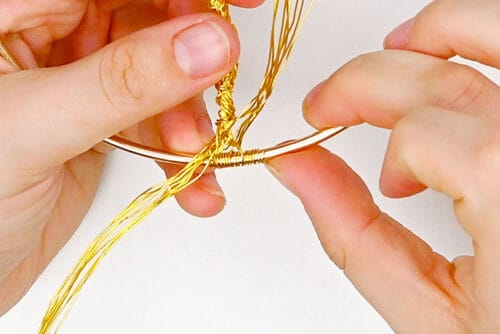
- Take that same wire and fold it up towards the trunk.
- Wrap it around the trunk, going up and down until there’s only about 1-1/2 inches left.
- Bring the wire back down and wrap the remainder around the hoop. Repeat with a third wire from the same bundle.
- Wrap a few wires from the other bundle in the same way, going around the hoop and up and down the trunk.
- Fold the right side bundle behind the trunk so it’s now pointing to the left. And take the left bundle and fold it across the front of the tree, so it’s pointing to the right.


Step 6: Finish making the trunk and add a hanger
- Grab one of the wires and follow the same steps (wrap around hoop several times, wrap around trunk, secure on the hoop).
- Once you’ve wrapped another 3 or so wires on each side, fold the bundles around the trunk again.
- Repeat these steps until all the wires are wrapped around the trunk and bottom of the hoop.
- Use pliers to flatten any wires that are sticking up, and to shape the trunk how you’d like.
- Cut a new piece of wire to be about 12 inches long (or however long you want the hanger to be).Wrap the ends of the wire around the hoop at the 10 and 2 positions (if you were looking at a clock).
- Add a dot of super glue to each of these wraps on the back, to secure them in place permanently.Allow the glue to dry completely before hanging.
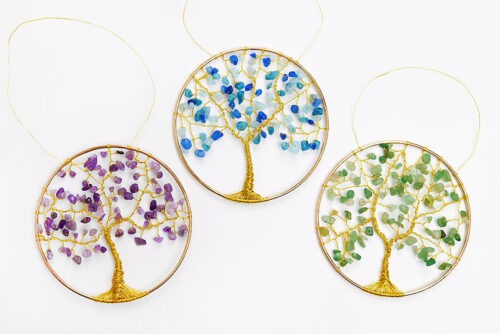
- Your tree of life suncatcher is complete!
- These suncatchers make great homemade gifts, and they’re so easy to personalize with your favourite colours!


Helpful Tips:
- If you’d like your suncatcher to sparkle even more, try attaching a short length of jewelry chain and a few crystals to the bottom of the hoop. This adds extra movement and catches the light beautifully.
- Don’t worry about making your tree perfectly symmetrical. Real trees have uneven branches and slightly crooked trunks, so feel free to bend and shape the wire naturally as you go.
- You can also hang the suncatcher from a chain, attaching it to the hoop with jump rings.

What type of beads do I need to make a tree of life suncatcher?
Chip beads work best for this project because their small, irregular shapes look just like natural leaves. We used purple amethyst, blue quartzite, and green aventurine on our suncatchers, but you can mix and match colours or even add glass beads for extra sparkle.
For a more natural look, use shades of green, or try red and orange for a fall-inspired tree. You can also use birthstone colours to create a meaningful, personalized gift!

What wire is used to make this tree of life?
We recommend 24-gauge jewelry wire. It’s thin, flexible, and easy to twist and wrap. We used gold wire for a warm finish, but silver or copper wire would work just as well depending on the look you prefer.
How much wire do I need to make a suncatcher tree of life?
For a 5-inch suncatcher like ours, you’ll need about 10 yards of wire (approximately 31 feet, or just over 370 inches).

How long does it take to make tree of life suncatchers?
This is a more detailed craft that requires a bit of patience. Plan for at least 3 hours to complete one suncatcher, depending on your speed and how intricate you make your design.
What type of hoop is used to make this DIY suncatcher?
A metal macrame hoop works great for this project. We used a 5-inch gold hoop to match our wire, but you can also use a wooden floral ring for a more natural look.

These tree of life suncatchers are such a meditative and beautiful craft, and they’re really addictive to make. The delicate wire branches and colourful beads come together to create a piece that’s not only eye-catching, but also completely unique to you!
While they do take a bit of time and patience, the end result is well worth it. Whether you hang your handmade suncatcher in your own window or give it as a thoughtful personalized gift, these DIY trees are sure to find a place of pride where they’ll hang for years to come.
Here’s even more wire wrapping craft ideas:


Wrapped Wire Snowflake Ornaments

Now available
Low-Mess Crafts for Kids Book
72 cute and fun crafts that kids and parents alike can enjoy. All with as little mess as possible!
Where to buy:
You can purchase Low-Mess Crafts for Kids from Amazon, or wherever books are sold:
Amazon | Barnes and Noble | Books-A-Million | Indiebound | Amazon Canada


Leave a Reply