
How to Make a Tree of Life Suncatcher
This tree of life suncatcher is SO PRETTY! It looks complicated, but it's honestly quite easy to make! All you need is some wire, beads, and a bit of patience. Follow our step-by-step tutorial to make your own!
Yield: 1 tree of life suncatcher
Cost: $15
Equipment
Materials
- 24 gauge Wire (gold; or colour of choice)
- Metal hoop (5 inches)
- Chip beads
- Super glue
Instructions
Step 1: Find what you need
- Gather your supplies and materials.
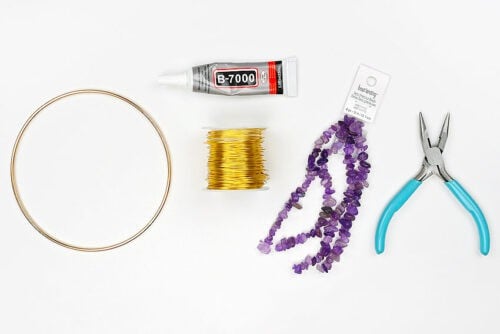
Step 2: Create the beaded branches
- Cut a piece of 24 gauge wrapping wire to be about 36 inches long. Fold the wire in half.
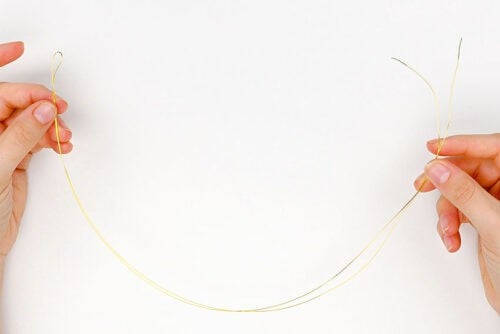
- Open the wire back up and wrap the center fold around the metal hoop a couple of times. Then twist the 2 sections of wire together several times, going towards the inside of the hoop.
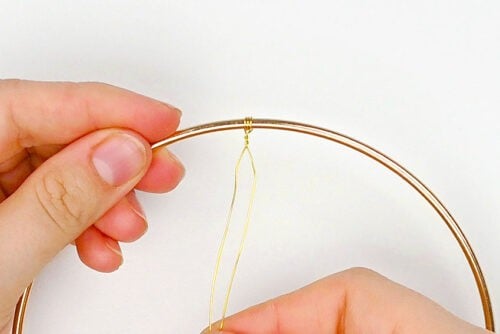
- Add a few beads to one of the wires.
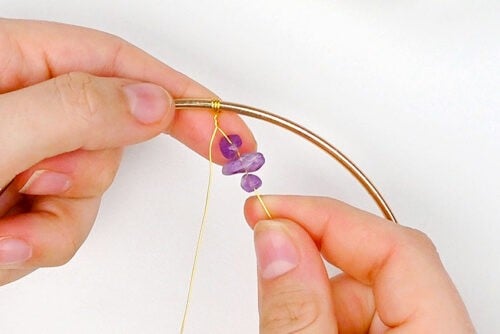
- Fold the wire back up towards the top of the hoop, twisting it around itself, going all the way back to the first twists.This will create a little branch with a cluster of beads ("leaves") at the end.

- Add a larger bead (or several more beads -- whatever you're feeling) to the other wire. Twist the wire back on itself again, but this time only go halfway back to the middle (leaving some unwrapped wire).

- Slide another bead or 2 onto the same wire. Fold and twist it back until it meets the previous branch, creating an offshoot.
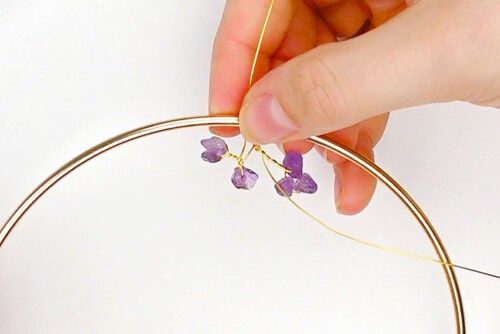
- Then twist the wire together until you get back to the center.

- Twist both wires together, going down at least 1/2 inch. Add a couple more branches on either side, repeating the same process from before.Continue adding branches until they reach about 1/3 of the way down the hoop. You can play around with adding more branches on one side compared to the other, or adding fewer or more beads on each branch.

- Cut 4 more pieces of wire the same length as before (36 inches).Repeat all steps to create 5 branch paths total, spacing them out across the top and around the sides of the hoop.

Step 3: Connect the branches
- Flip the left 3 branches so they're outside the hoop. Join the right 2 branches by twisting the 4 wires together.This creates one larger branch that branches off into 2 smaller branches.

- Bring the left 2 branches in and connect them in the same way.

- You should now have 3 sections of wire -- the combined left, the center, and the combined right.Twist these sections together to form the start of the tree trunk.

- Wrap the excess wire around the bottom to keep it out of the way for now.

Step 4: Add more small branches
- Cut another 36 inch piece of wire, fold it in half, and attach it in between 2 of the existing branches. This is going to create a filler branch.

- Wrap one of the new wire strands around one of the existing branches. Wrap until you get to a natural place for a new small branch to sprout.

- Add beads to this strand and use the same technique as before to create a branch that connects to one of the existing ones.Repeat, going down the whole branch to add new ones where there's space for beads.

- Repeat again with the second strand of wire. Follow the same path initially and then branch off to create new sub-branches.

- Wrap the remainder of these strands around the trunk of the tree, working down towards the bottom of the hoop.Wrap the wire ends around the ring like the others, to keep them in place and out of the way.

- Repeat this step several times, adding more branches to other areas until you're happy with how full your tree looks.

Step 5: Begin making the trunk
- Unwrap the wires from the bottom of the hoop. Twist all the wires together neatly until the trunk is about 1/2 inch from the bottom of the hoop.

- Separate the wires into 2 bundles, placing a relatively even amount on each side.
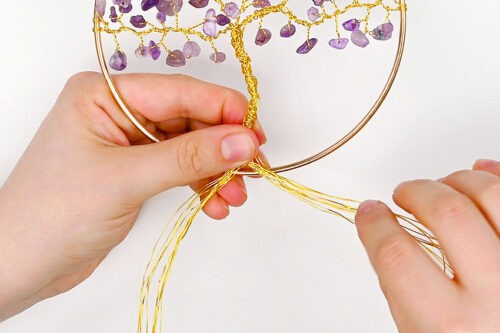
- Starting with the shortest strand on one side, wrap the whole rest of the wire tightly around the bottom of the hoop.
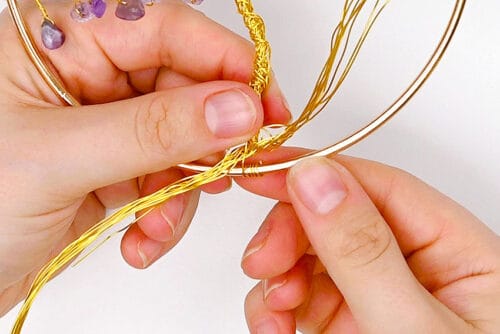
- Grab a second wire from the same bundle. Wrap it several times next to the first wraps (but don't wrap all of it).

- Take that same wire and fold it up towards the trunk.

- Wrap it around the trunk, going up and down until there's only about 1-1/2 inches left.

- Bring the wire back down and wrap the remainder around the hoop. Repeat with a third wire from the same bundle.
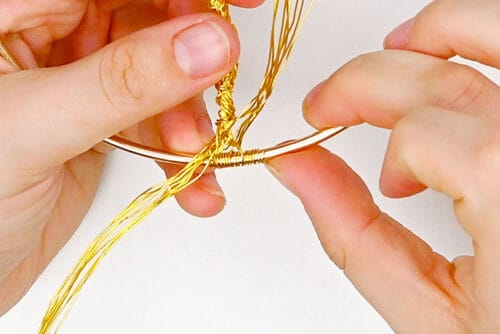
- Wrap a few wires from the other bundle in the same way, going around the hoop and up and down the trunk.
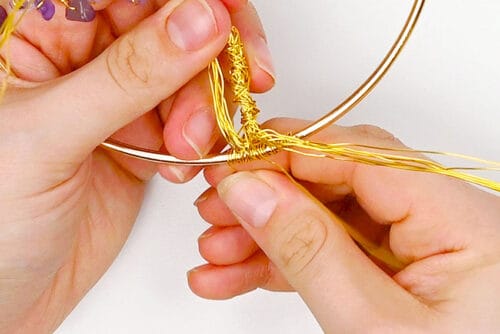
- Fold the right side bundle behind the trunk so it's now pointing to the left. And take the left bundle and fold it across the front of the tree, so it's pointing to the right.

Step 6: Finish making the trunk and add a hanger
- Grab one of the wires and follow the same steps (wrap around hoop several times, wrap around trunk, secure on the hoop).

- Once you've wrapped another 3 or so wires on each side, fold the bundles around the trunk again.

- Repeat these steps until all the wires are wrapped around the trunk and bottom of the hoop.

- Use pliers to flatten any wires that are sticking up, and to shape the trunk how you'd like.

- Cut a new piece of wire to be about 12 inches long (or however long you want the hanger to be).Wrap the ends of the wire around the hoop at the 10 and 2 positions (if you were looking at a clock).

- Add a dot of super glue to each of these wraps on the back, to secure them in place permanently.Allow the glue to dry completely before hanging.
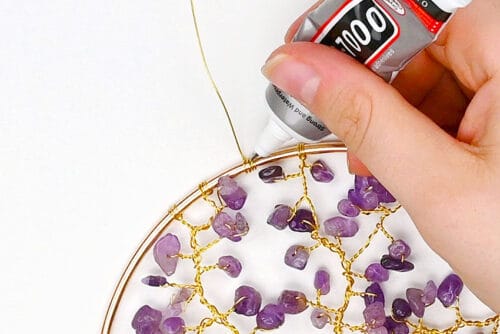
- Your tree of life suncatcher is complete!

- These suncatchers make great homemade gifts, and they're so easy to personalize with your favourite colours!

Video
Notes
Looking for more DIY suncatcher crafts? Here's a few of our favourites:
DIY Pressed Flower Suncatcher
Butterfly Window Clings
Glass Bead Suncatcher