These tie dye Easter eggs were so easy to make! I have to admit, I was a little nervous about the idea of tie dying something. It sounds like it should be scary. Or complicated. Or at the very least, messy. But you know what? It wasn’t any of those things! As long as you wear rubber gloves… if you choose not wear rubber gloves and you get food colouring all over your hands, don’t say I didn’t warn you.
I don’t have very many Easter posts on the blog. How crazy is that!? Last year I had to go back to work after maternity leave around this time. The year before that I had a newborn plus two kids under 5. And then three years ago I found out I was pregnant with our little guy, baby #3. (Ah, March 2013 when we only had two babies, and I still had time to work on the blog every night after the kids went to bed. Those were good times…) Now, when I look at the handful of posts I published the month after I found out I was pregnant, I have flashbacks of nausea. Like real ones, where I swear I’m going to gag.
Have you ever had that problem!? I had a different logo on the blog that I used during that brief period of time, and just looking at that logo STILL makes me feel sick to my stomach. Along with one of the songs from Tangled that my daughter listened to on repeat for months. You’re either going to be thinking,”Yes! I know exactly what you’re talking about!” Or you’re going to be part of the other team, “Um, Debbie, you’re crazy. Can you just move on??”. Okay, fine.
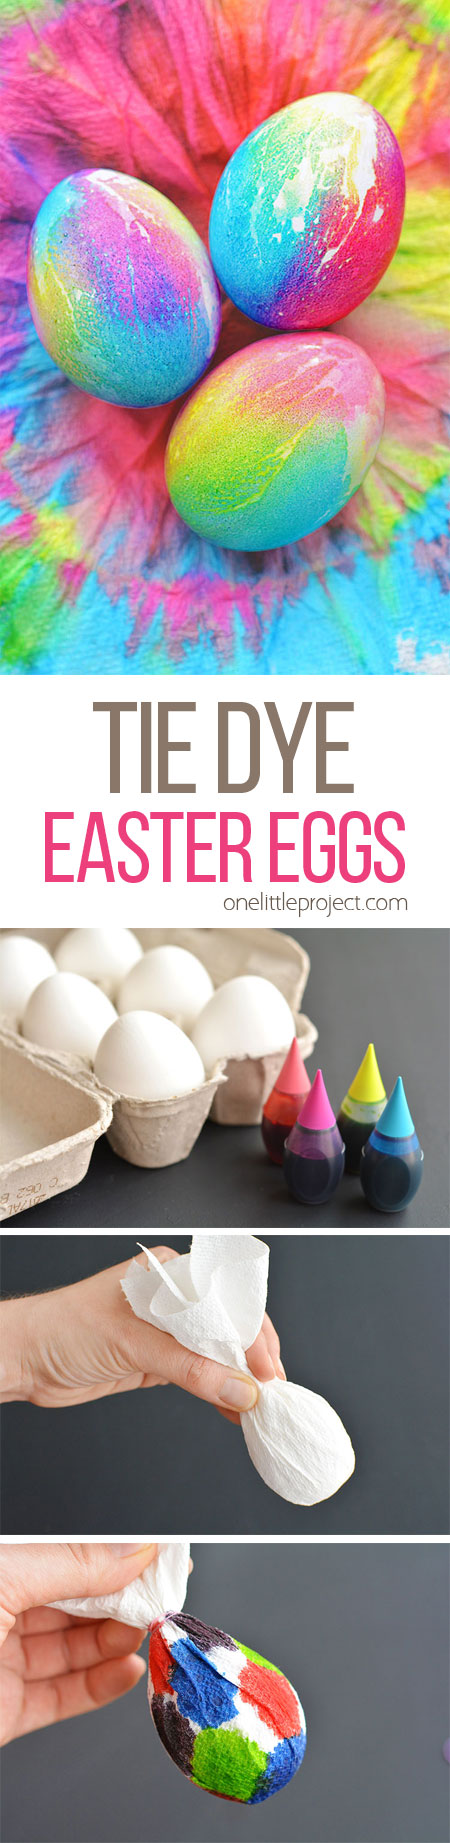

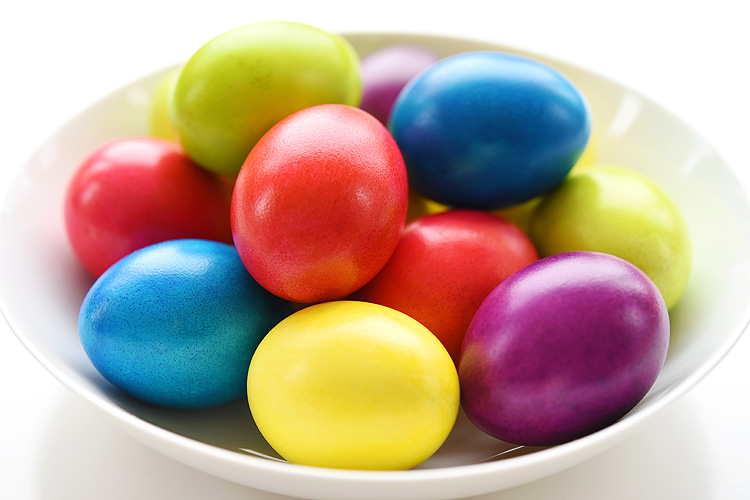
I’ve been a blogger for 4 and a half years and this is the first Easter egg post I’ve ever written. You can just ignore that as a craft blogger I’m shaking my head in disbelief that I could have let that happen. And instead, check out how awesome these tie dye Easter eggs turned out! I had no idea what to expect when I was making them, but they are bright, gorgeous and so much fun!
Check out our video on How to Make Tie Dye Easter Eggs:
If you love this “egg-cellent” Easter craft, you’ll love these too!
Tie Dye Easter Eggs
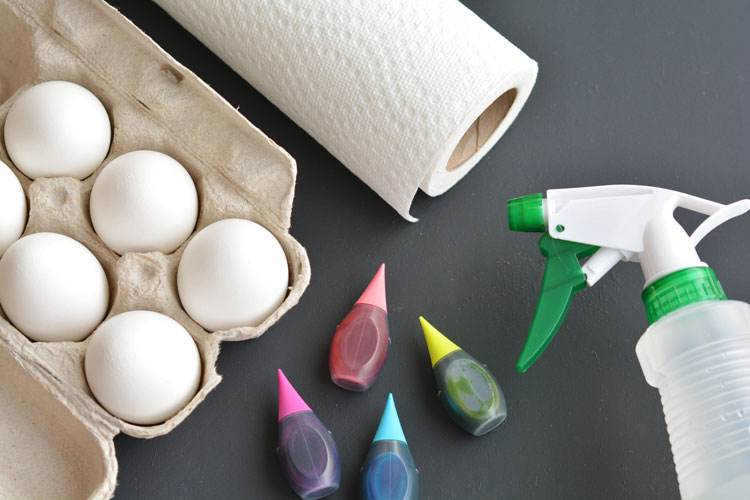
The full printable instructions are at the end of this post, but here’s what you’ll need:
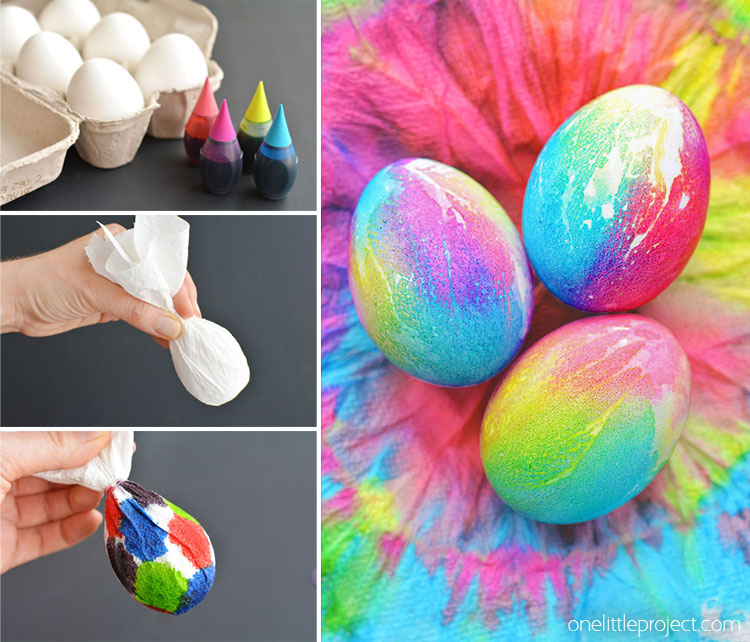
- Hard Boiled Eggs
- Food Colouring
- Paper Towel
- Water Spray Bottle
- Tiny Elastics or Twist Ties
- Table Fan
Go ahead and hard boil your eggs. Did you know that you can make hard boil eggs by baking them in the oven!? I’ve been doing it for about 3 years now and I’ve never had a single egg crack!
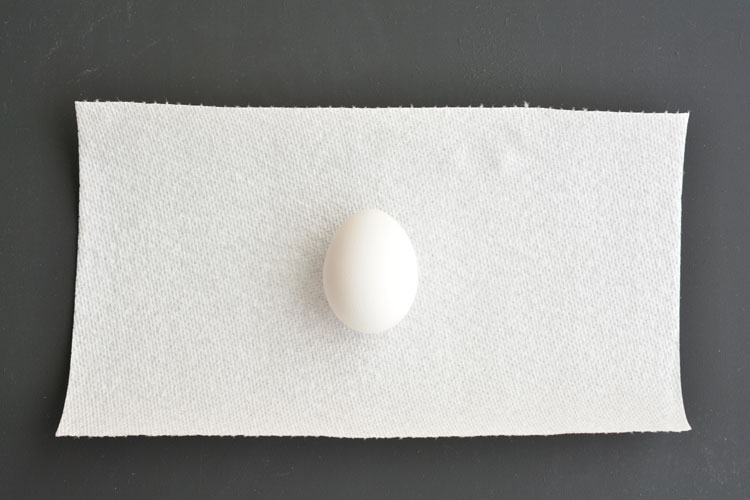
Once the eggs have cooled off, rip apart the paper towels into small sections and place your egg in the middle.
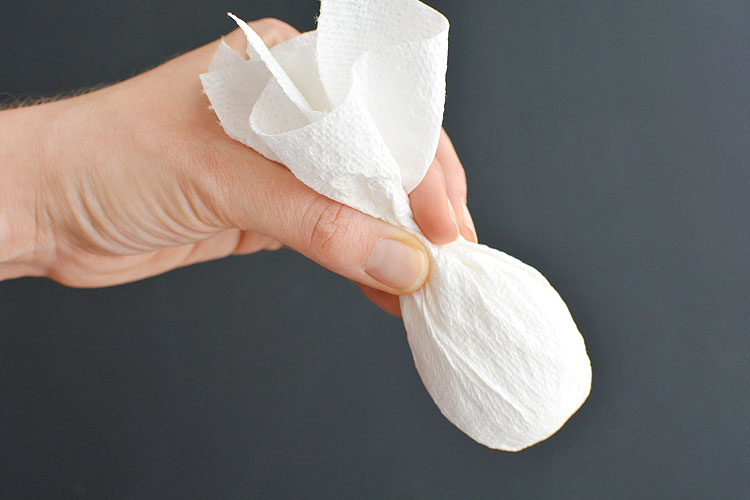
Bunch up the paper towel around the egg so it’s completely covered. Twist the end as tightly as you can and secure it with a tiny elastic or a twist tie. I get my tiny elastics in the hair and accessories section at the dollar store.
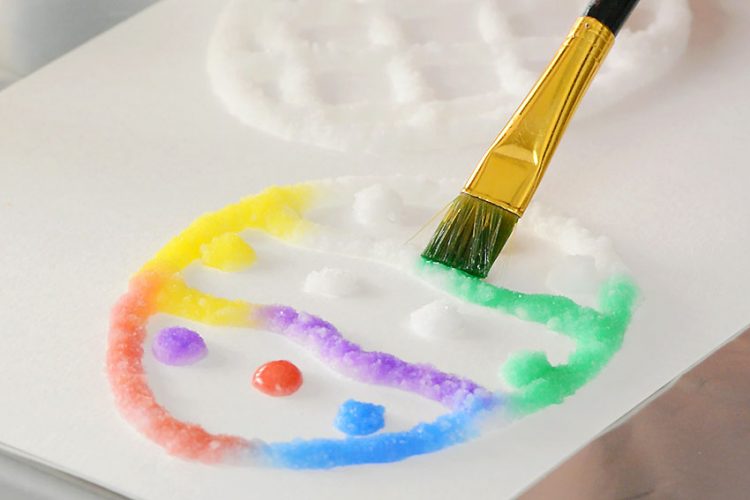
Squeeze drops of food colouring directy onto the paper towel.
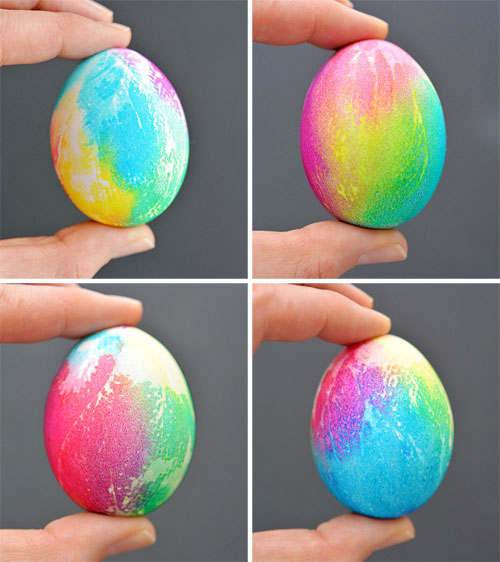
You’re probably going to want to hold the egg in your hand. I would have needed a third hand to take a photo of me doing that so this was the best I could do. You get the idea though.
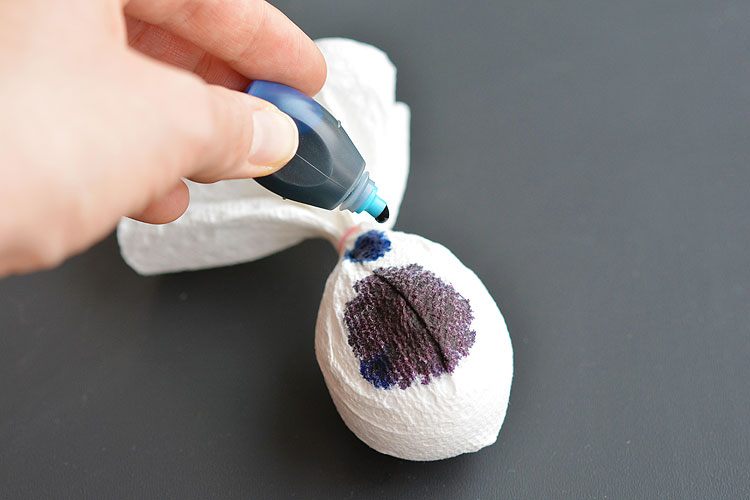
Try to separate the food colouring drops so that there is some white space between them. You definitely don’t have to leave the space, but it helps to keep the colours from completely mixing into one another if you leave some room.
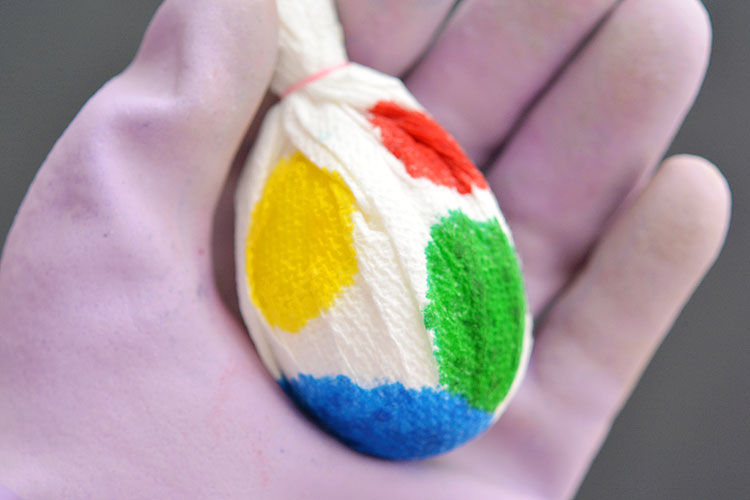
Take your spray bottle of water and squirt a small amount of water into the middle of each of the food colouring drops. If you can still see white paper towel, the egg underneath will be white in that area, so keep spraying until the paper towel is completely coloured. But keep in mind, the more water you spray, the less bright the colour on the egg will be. It’s a balance.

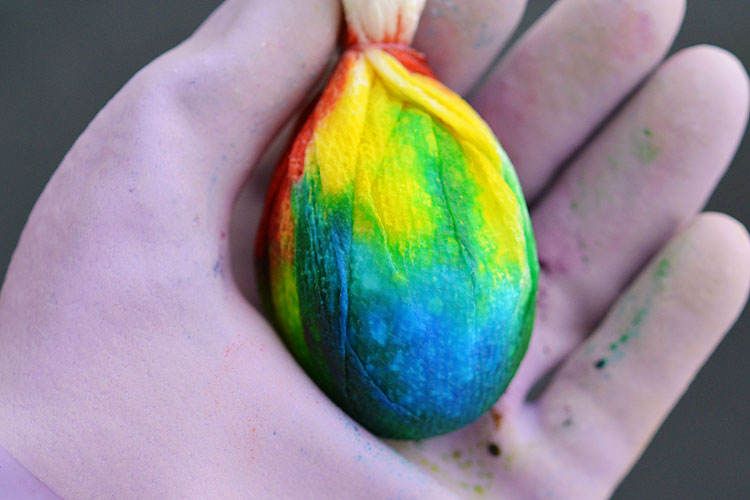
Gently squeeze the egg over the sink if there’s any extra water. Even if there isn’t, squeeze it gently anyway to make sure the colours on the paper towel transfer to the egg underneath.
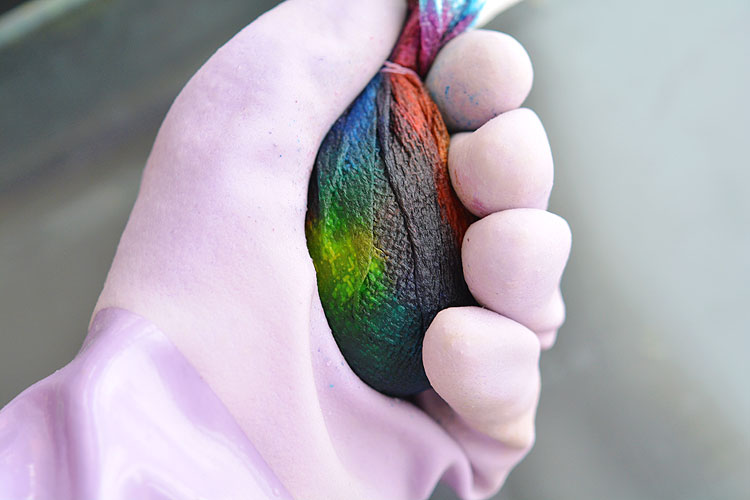
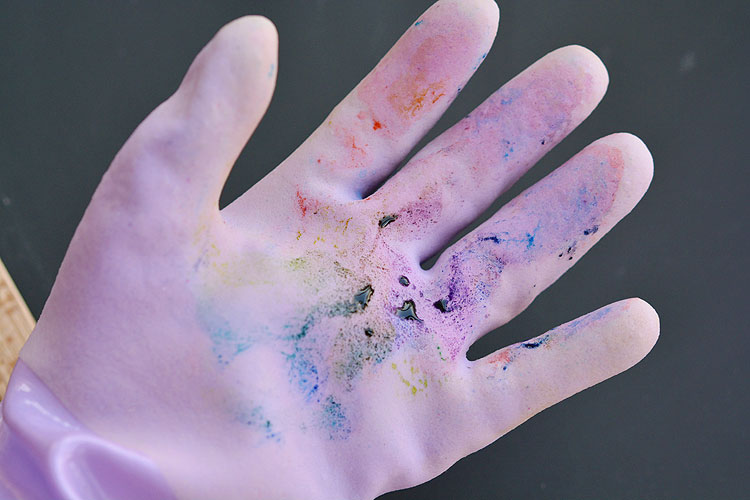
This is why you want to wear rubber gloves. It’s just food colouring, so if you don’t have gloves, it will definitely come off your hands in a day or two, but this is what my gloves looked like after one egg:
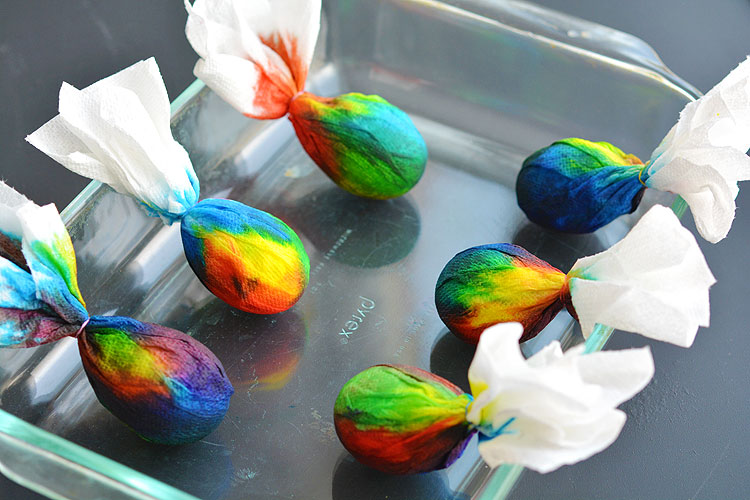
Set the eggs in a glass dish or on a baking sheet to dry. I was impatient so I pointed a table fan directly at my eggs and they were completely dry in about 3 hours. I definitely recommend you do the same, otherwise you’ll need to leave them overnight to dry.
This is going to sound cheesy, but it was like unwrapping a present.

What’s inside? Are you excited? Because I was getting pretty excited…
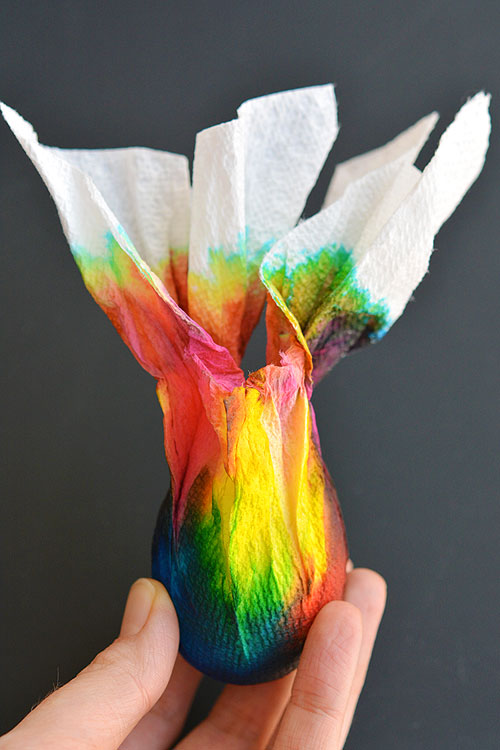
Ta-da! I love how the texture from the paper towel made an impression on the eggs!
There has to be something you can do with the beautiful tie dyed paper towels you’re left with at the end so you don’t just throw them away?? What if you cut out a square of each paper towel, pinch it together in the middle with a pipe cleaner or clothes pin and turn it into a super simple tie dyed butterfly when you’re done? I wish I had thought of that yesterday!
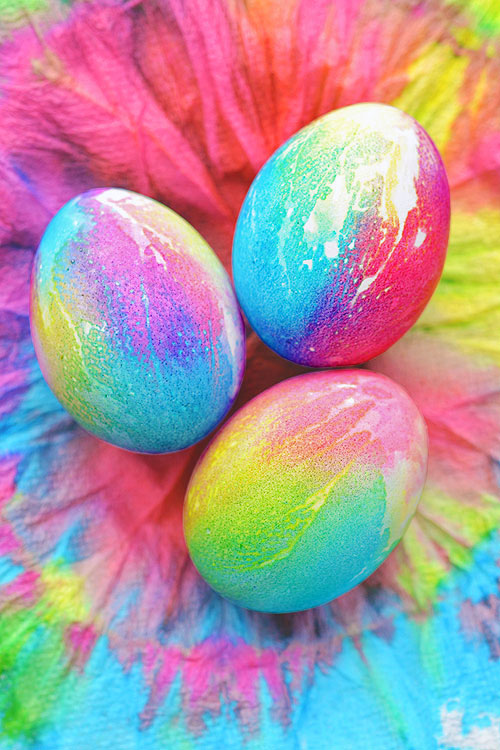
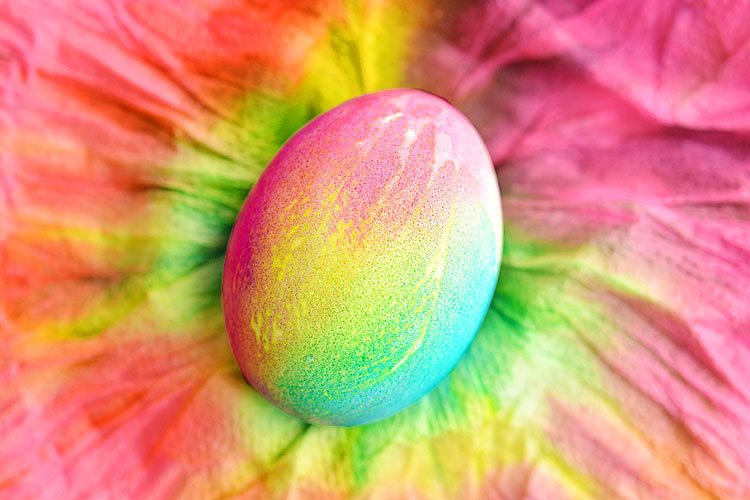
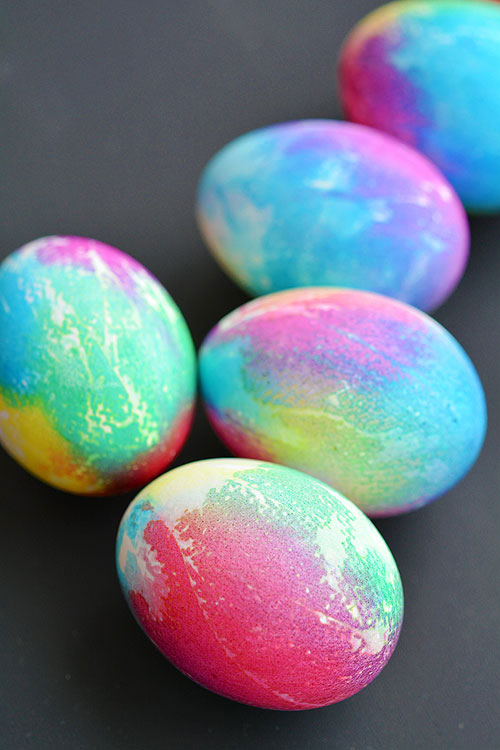
The colours were bright and beautiful, and even though I used the same technique on all of them, each egg looked completely different.
In case you’re wondering, yes, the food colouring does leach through the egg shell a little bit. But only a few dots here and there. It’s food colouring, so the eggs are still completely safe to eat.
Tie Dye Easter Eggs
Materials:
- Hard Boiled Eggs
- Food colouring
- Paper towel
- Water Spray Bottle
- Tiny Elastics or Twist Ties
- Table Fan
Instructions:
- Tear apart the paper towels into small rectangles. Place a cool, dry egg in the middle of the paper towel.
- Wrap the paper towel up and around the egg so it’s completely covered. Twist the top of the paper towel so it’s tight against the egg and secure it with a tiny hair elastic or a twist tie.
- Wearing rubber gloves, gently squeeze drops of food colouring directly onto the paper towel wrapped egg (3 or 4 drops at a time), leaving some white space between each colour. Repeat until there are large food colouring dots around the whole egg.
- Using a spray bottle, gently spray a small amount of water into the center of each food colouring dot. Keep spraying until the colours bleed and there is no more white space. The less water you spray, the brighter the colours on the egg will be.
- Gently squeeze the wet paper towel wrapped egg over the sink to drain any excess water. Even if there’s no extra water, gently squeeze the egg to make sure the colour on the paper towel transfers to the egg.
- Place the wet, paper towel wrapped eggs in a baking dish. Point a table fan at the eggs and allow them to dry for 3 to 4 hours. (Without a table fan, you’ll have to wait overnight for them to dry).
- When the paper towels are completely dry, remove the elastics and unwrap each egg.
These tie dye Easter eggs are SO FUN and they’re so simple to make! The colours are bright and beautiful and since it’s just food colouring, the eggs are completely safe to eat! And if you wear rubber gloves and make them over top of a large baking sheet, it’s shockingly easy to clean up too! These are lots of fun!
Here are even MORE Easter inspired craft ideas!

Our book Low-Mess Crafts for Kids is loaded with 72 fun and simple craft ideas for kids! The projects are fun, easy and most importantly low-mess, so the clean up is simple!

Where to buy:
You can purchase Low-Mess Crafts for Kids from Amazon, or wherever books are sold:
Amazon | Barnes and Noble | Books- A- Million | Indiebound | Indigo | Amazon Canada


Leave a Reply