String paint art is SO PRETTY and it’s really simple to create! This is such a fun and easy art technique and a great art project for people of all skill levels. You can make pull string art with any kind of acrylic paint and either string or yarn.

Pull String Art With Acrylic Paint
String paint art using acrylic paint is a great art project for kids, tweens, teens, adults and seniors! I love how bright and bold the acrylic paint looks on the black paper. This is such a pretty art technique – and it’s SO EASY!
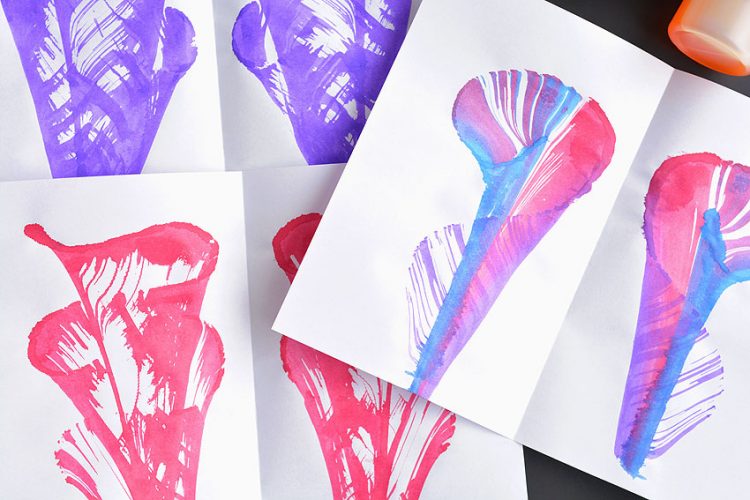
We tried string painting using liquid watercolors a few weeks ago and it was so fun and easy! We used plain white printer paper and they looked really cool when we were done!
This time we used thick black paper so we could really see the acrylic paint “pop” off the page. And it really does! The acrylic paint shows up beautifully on the dark paper. It’s so easy to make gorgeous painted flowers using this technique!
String Pull Painting Video Tutorial:
*Note: Scroll down for the step-by-step photo tutorial.
Looking for even more easy painting techniques? Here’s a few of our favourites:
String Painting with Liquid Watercolors
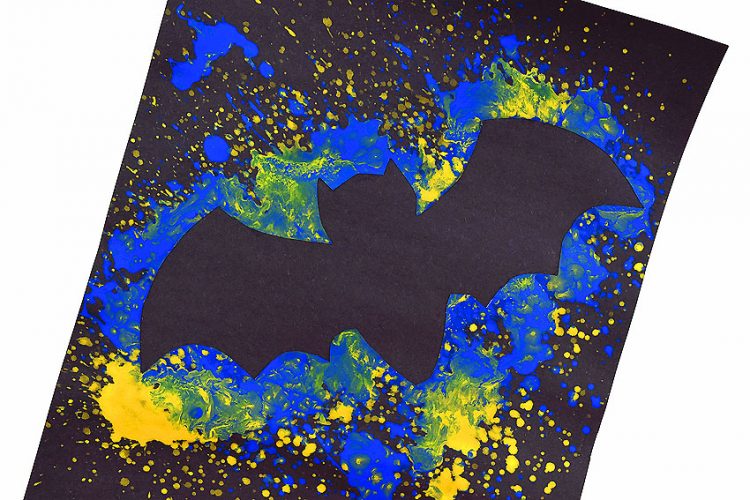
Splatter Paint Artwork Using a Spray Bottle
Here’s What You’ll Need to Make String Paint Art:
The full printable list of instructions and supplies are below, but here’s a list of affiliate links that will take you to products on Amazon that are similar to what we used to make this art:
- Black Drawing Paper
- Acrylic Paint (assorted colours)
- Yarn
- Paper Plate
- Wooden Stir Stick or Popsicle Stick
You can use string, yarn, thread, twine, baker’s string, ribbon, or thick yarn to make these paintings. Try different thicknesses of string to get different effects.

What’s the best type of paint to use for string art?
You can use any kind of squeezable paint to make string art. Acrylic paint – even if it’s just from the dollar store – will work beautifully.
Tempera paint, washable paint, or liquid water colors will also work well.
What’s the best type of paper to use for string art?
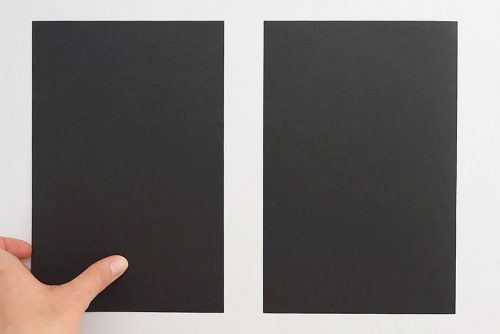
I used black drawing paper to make this art (it’s fairly heavy), but you could also use black card stock. I don’t recommend using black construction paper because it isn’t thick enough.
You need 2 identical pieces of black paper.
My black drawing paper was 9 inch x 12 inch. So I cut one piece in half to make two pieces that were 9 inch x 6 inch in size.

Want to make your painting look more like flowers?
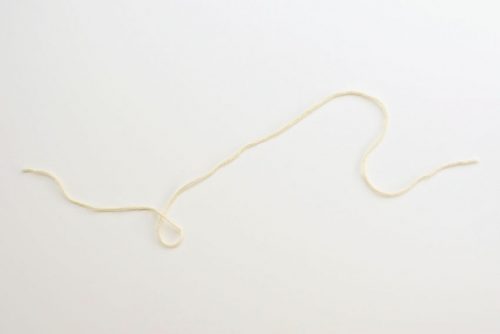
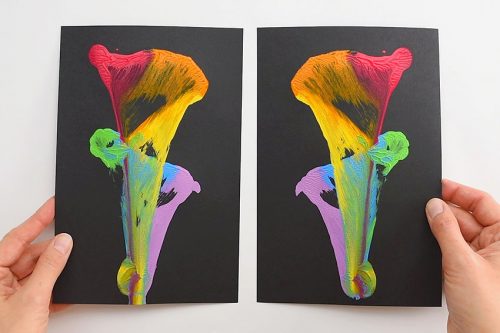
To make your painting look more like a flower, make sure you include a loop or two when you lay out your string on the paper.
Keeping your string under a single arch shape, and adding a small loop right in the middle will make it look like a calla lily.

Pull String Art With Acrylic Paint
It’s super simple to create professional looking artwork using super simple supplies! Turn them into greeting cards. Hang them on the wall… or even just the fridge. It’s easy to be proud of the string paint art you create!
String Paint Art with Acrylic Paint
Materials:
- 2 pieces heavy black paper same size (about 9″ x 6″)
- acrylic paint (multiple colours)
- 18 inches string or yarn
- 1 Paper plate
- wooden stir stick or popsicle stick
Equipment:
- Tissue box
See the craft in action:
Instructions:
- Cut a piece of string or yarn to be about 18 inches long.

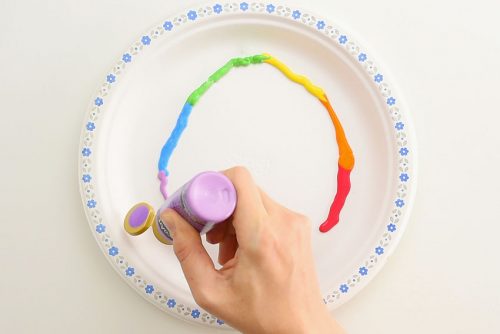
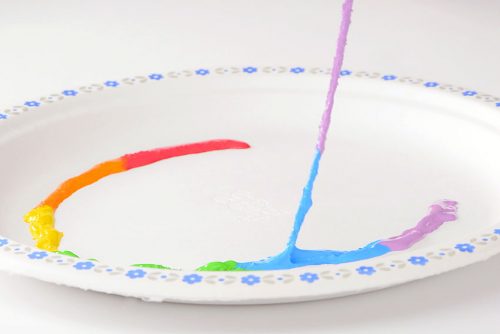
- Squeeze a line of paint onto a paper plate, plastic lid or aluminum foil. Make sure each paint colour connects to the next so there are no gaps.
- Place the end of the string on the end of the line of paint. Then lay the string carefully on top of the entire line of paint.
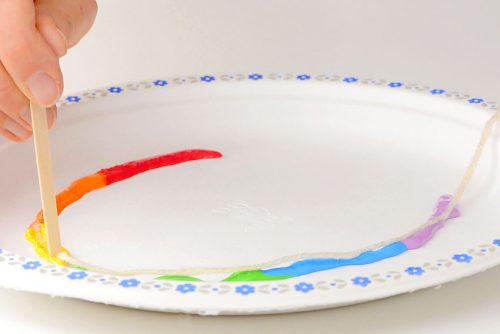
- Use a wooden stir stick or popsicle stick to push the string into the paint. We used a wooden stir stick that was cut in half – a clean end for each colour. (A popsicle stick would also work well).
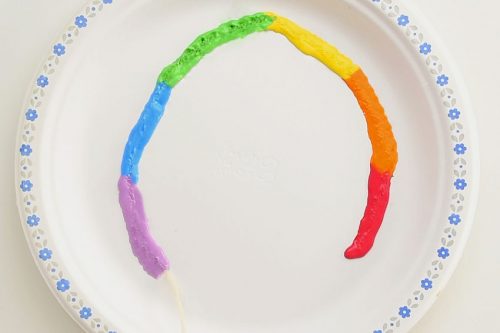
- Work your way through the line of paint, pressing the string into the paint until it’s completely covered. Other than the clean end of string (you’ll use that to pick up the string in a moment), you want the entire string to have paint on it.

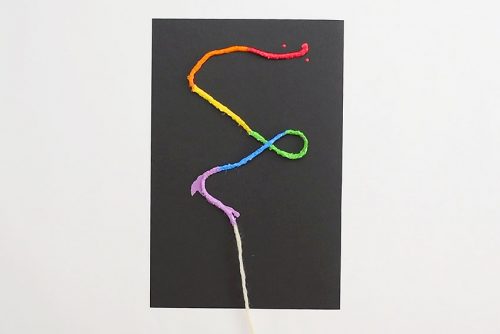
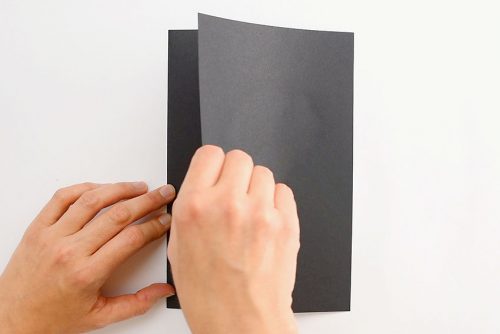
- Lay one piece of black paper on a protected surface.
- Carefully lift the clean end of the string and pull the entire length of string out of the paint.
- Lay the paint covered string on the piece of paper, moving it back and forth, making loops as you go. The clean end of the string should come out at the middle of the bottom of the paper. It’s okay if the paint on the string doesn’t reach the bottom edge of the paper.
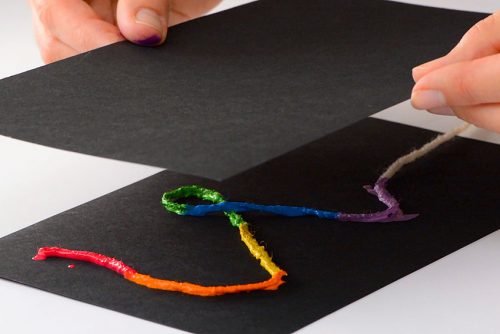
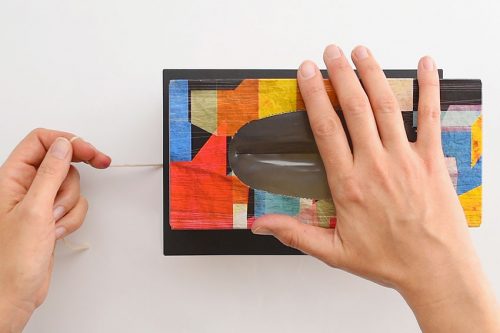
- Place the second piece of black paper on top of the first, sandwiching the painted string in between. Be sure to line up the edges.
- Place a tissue box, or a small cracker box on top of the 2 pieces of paper. The tissue box might get some paint on it, so I recommend using something from the recycling bin.Place one hand on top of the tissue box. Use the other hand to slowly pull the clean end of the string. Pull the string as straight as possible, trying to keep it in the same position as you pull.
- When you finish pulling the string out from between the pieces of paper, carefully pull apart the two pieces of black paper to reveal your design.
- You’ll have mirror images of your design on each side!

I used the same paint a second time, but I should have added a little more paint – my second string pulled painting didn’t quite have enough paint on the string.
Still beautiful though! And so much fun to see the designs created by the string layout!

String pull painting is really easy – No special skills or talent required!

There are so many awesome shapes you can create – with a simple string covered in paint!

Here’s even more simple and fun art projects for you to try out!

String Painting with Liquid Watercolors
Splatter Paint Artwork Using a Spray Bottle
For more fun craft ideas, check out our book Low-Mess Crafts for Kids for 72 fun and simple craft ideas for kids! The projects are fun, easy and most importantly low-mess, so the clean up is simple!

Where to buy:
You can purchase Low-Mess Crafts for Kids from Amazon, or wherever books are sold:
Amazon | Barnes and Noble | Books- A- Million | Indiebound | Indigo | Amazon Canada


Leave a Reply