
Boo-tiful and slightly spooky, this resin ghost is the perfect mix of eerie and enchanting! With their drippy shapes, glittery shimmer, and haunting little faces, these ghouls are a Halloween craft that feels part decoration, part magical experiment. The best part? No two ghosties will ever turn out the same — making every single one a haunting surprise.
Whether you’re new to resin or already love working with it, this project is such a fun way to play with colour, sparkle, and shape. You’ll love watching the resin transform from a colourful puddle into a ghostly little figure. The finished creations are truly mesmerizing! These glowing, glittery spirits will definitely add a touch of spooky charm to your Halloween decor — and they’re way more cute than they are scary!

This post contains affiliate links. If you use these links to buy something, we may earn a small commission at no extra cost to you. This helps support our website and allows us to keep creating fun, free content.
How to Make a Resin Ghost
Materials:
- Casting resin
- Mica powder (2 shades of 1 colour)
- Chunky glitter (silver)
- Black Sharpie marker
Equipment:
- Popsicle sticks (or resin stir stick)
Instructions:
Step 1: Find what you need
- Gather your supplies and materials.


Step 2: Mix the epoxy resin
- Protect your working surface with a drop cloth or silicone mat before working with resin. Always wear protective nitrile gloves and eye protection.Work in a well-ventilated space and wear a respirator if your resin requires it. Read your resin’s label for safety requirements.
- Mix the amount of resin needed to make the ghost. We mixed 150 ml total, but had a bit left over.Begin by adding 1 part of Part A to a silicone measuring cup. The amount of Part A should be half the total amount needed. (In our case, 75 ml.)Follow your specific resin’s instructions for ratios, drying times, and curing times.

- Add an equal amount of Part B (or whatever ratio your brand of resin suggests) to the measuring cup. In our case, we added 75 ml.
- Mix the resin and hardener together with a popsicle stick or reusable resin stir stick.Stir slowly, scraping down the sides and bottom of the measuring cup. Continue mixing for 3 to 5 minutes or until the mixture is clear.


Step 3: Divide and colour the resin
- Divide the resin into 2 mixing cups, pouring a little bit more into one of them.
- Add 2 different shades of mica powder to each cup, in the colour of your choice. Add a lighter shade to the cup with more resin. Stir until well combined.(Note: We’re using 1 ounce cups here because that’s all we had. If you use this small size you’ll need to mix at least several cups worth of each colour, so we recommend using larger mixing cups.)


Step 4: Add resin to a covered plate
- Set a 12 inch paper plate on your working surface. Cover it with plastic food wrap.
- Add the lighter colour of resin to the center of the plate, until it covers about 2/3 of the plate.
- Then add a ring of the darker colour around the outside, so the two colours are touching. There should still be about an inch of clear space around the outside of the plate.
- Add chunky silver glitter to the resin cup with the darker colour. Stir to combine.
- Pour the glitter resin around the outside, on top of the darker resin.
- Finish by pouring the rest of the light colour into the middle of the plate, so it becomes the dominant colour.


Step 5: Let the resin sit and create a mold
- Allow the resin to cure until it’s no longer liquidy, but is still soft and moldable. It should be tacky to the touch, but not sticky enough to come off on your gloves.The exact time needed will really vary, based on the temperature and humidity of your room and the resin you’re using. Ours took between 3 and 4 hours to reach this state, but we recommend setting a timer for 2-1/2 hours and then checking it every 20 minutes after.
- While the resin hardens, create a form for your ghost. You’ll need a Styrofoam ball (or another round object) for the ghost’s head and a small jar for the body.
- Secure the ball to the top of the jar with painter’s tape.


Step 6: Shape the ghost
- Here’s what our resin looked like when it was ready to mold.This is the hardest part of the process, finding the exact right time where the resin can be shaped nicely, and not be too drippy or too hard. (Read more information below the tutorial!)
- Lift the plastic wrap from the plate and place it over the mold. The center of the resin should go on the ghost’s head.
- Let the ghost form naturally as the resin falls down onto the mold, and then make small adjustments to the shape by arranging the plastic wrap.Note: The resin will still droop down a bit and “melt” into the shape of the jar mold and onto the mat. If you want the resin to stay in the current shape, allow to cure longer first.
- Now allow the resin to harden overnight, or for the amount of time listed on your resin’s instructions.


Step 7: Remove the plastic and add a face
- Here’s what our ghost looked like the next day. At this point the resin should still be a little bit malleable.
- Remove the ghost from the jar mold.
- Now peel off as much of the plastic wrap as you can. Use tweezers to pick off stubborn pieces. Some of it may have cured to the resin, which is fine, just do your best.
- Choose which side of your ghost you like the best, and draw a face, using black permanent marker or a paint pen.
- Your resin ghost is complete!
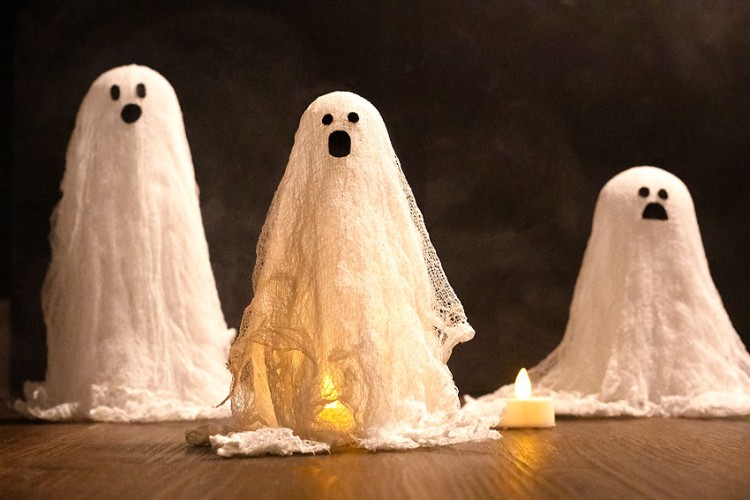
- Have fun making ghosts in different colours. Then place them over a flameless tea light and turn out the lights to watch them flicker and glow!


Helpful Tips:
- Be safe and wear PPE: Only pour resin in a well ventilated area and be sure to protect your working surface. Wear nitrile gloves, eye protection, and long sleeves. Some resin also requires wearing a respirator.
- Get rid of air bubbles: Spray rubbing alcohol on the surface of the resin to remove any air bubbles. You can also use a heat gun, as long as you’re careful not to blow the resin around too much.

How will I know when the resin is ready to shape into a ghost?
The resin is ready to mold when it’s no longer runny, but still soft and flexible. It should feel tacky to the touch but not come off on your glove, and it shouldn’t dent or squish when you touch it lightly.
The exact timing will depend on your resin brand, room temperature, and humidity, so start checking around the 2-1/2 hour mark and test every 15 to 20 minutes until it reaches the right consistency.
You’ll be able to tell if the resin is still too runny if you try to move it. And if the resin is set a bit too much, no worries. It may not have the same “melted” look, but you can still shape it into a ghost.

What type of resin is best for making resin ghosts?
Epoxy resin works best for this project because it cures slowly enough for you to shape it at just the right stage. UV resin cures too quickly and won’t give you the working time you need.
Look for a clear-casting epoxy resin that’s designed for art projects, since these often produce fewer bubbles and a glossy finish.
Can I put my resin ghost outside?
It’s best to keep your resin ghost indoors. Sunlight can cause resin to yellow over time, and changes in temperature or moisture may make it brittle.
If you want to display your ghost decorations outdoors (say, on a covered porch for Halloween night), bring them inside afterwards to keep them looking their best.

How can I add colour to my resin ghost?
We used mica powder and glitter, which are very popular choices in resin art. But there are lots of other fun ways to colour your ghost!
Alcohol inks create vibrant, transparent shades, while acrylic paint gives more opaque coverage. Glow in the dark pigment is another great option — perfect for making your ghosts extra spooky when the lights go out. You can even mix different methods (like glitter with glow powder) for a layered, magical effect.

Once it’s fully cured, try placing your resin ghost over a battery-operated tea light. The gentle flicker shining through the translucent resin makes it look like real floating spirit!
These resin ghosts are such a fun mix of spooky and sparkly, and they’re the perfect way to add a little handmade charm to your Halloween decor. Whether you display them on a mantel or use them as a table centerpiece, these little ghosts are sure to light up the night with their hauntingly cute vibe!
Here’s even more resin craft ideas:


Now available
Low-Mess Crafts for Kids Book
72 cute and fun crafts that kids and parents alike can enjoy. All with as little mess as possible!
Where to buy:
You can purchase Low-Mess Crafts for Kids from Amazon, or wherever books are sold:
Amazon | Barnes and Noble | Books-A-Million | Indiebound | Amazon Canada


Leave a Reply