
Looking for a simple and creative Easter craft? These potato stamp Easter eggs are a fun and engaging activity, perfect for kids and adults alike! This spring craft is a great way to celebrate Easter while encouraging creativity. Adults can safely carve the potato stamps, while kids have fun stamping and creating beautiful Easter-themed artwork!
By carving a potato stamp, you can make unique, colourful patterns on paper, fabric, or homemade cards. With just a few supplies, you’ll have eye-catching Easter decorations in no time! Whether you go for classic polka dots or other custom designs, this easy technique allows for festive prints without intricate painting skills.

This post contains affiliate links. If you use these links to buy something, we may earn a small commission at no extra cost to you. This helps support our website and allows us to keep creating fun, free content.
DIY Potato Stamp Easter Eggs
Materials:
- 1 Potato (for 2 stamps)
- Pastel acrylic paint
- White cardstock (or watercolour paper)
Equipment:
- Paper towel (or kitchen towel)
- Foam sheet (stacked craft foam, foam packaging, etc)
- Paintbrushes (1 per colour of paint)
Watch the step-by-step video tutorial:
Instructions:
Step 1: Find what you need
- Gather your supplies and materials.


Step 2: Cut the potato stamps
- Cut a potato in half with a paring knife.
- Use a paper towel (or tea towel) to remove excess moisture from the potato. Set one half aside for later.
- Make a cut in the potato half, going about 1/4 inch down into it.

- To create a stripe, make another cut about 1/4 inch below the last one.
- Bring your knife straight down into the cut areas and wiggle it back and forth. Then, from the first cut, bring your knife towards the second cut on an angle.
- Remove the slice of potato (if it doesn’t come out on its own), and clean up the cuts, if necessary, so they make a crisp line.
- Repeat, making another stripe about 3/4 inch below the first.

- On the second half of the potato, cut a different design. You can make angled lines using the same technique, or use other tools to make a polka dot pattern (read more below).


Step 3: Prepare your workspace
- Add different colours of paint to small dishes, a paper plate, or a paint palette.
- Then place a piece of foam on your working surface. This is optional, but it will make your stamps transfer a lot more cleanly.
- Set a piece of cardstock or watercolor paper on top of the foam.We recommend these because they’re thicker papers that can absorb the paint without warping too much.


Step 4: Paint the potato stamp
- Use a paintbrush to add paint to one of the raised sections of the potato.Add a good amount of paint so it’s covered nicely, but isn’t too thick and gloopy.
- Repeat, adding different colours of paint to each section. Use a clean paintbrush for each colour, or wash well in-between.


Step 5: Stamp the Easter egg designs
- Carefully flip the potato upside-down and stamp it onto the paper. Use generous pressure to make the stamp transfer evenly, and try not to have it slip around the paper.
- Lift the potato up carefully.(Again, it can slide around if you’re not careful, which will smudge the stamp.)
- Repeat, stamping one more time.You should be able to stamp at least twice before adding more paint to your potato stamp.
- Add different colours of paint to the second half of the potato and fill your page with more Easter egg designs.Allow to dry.
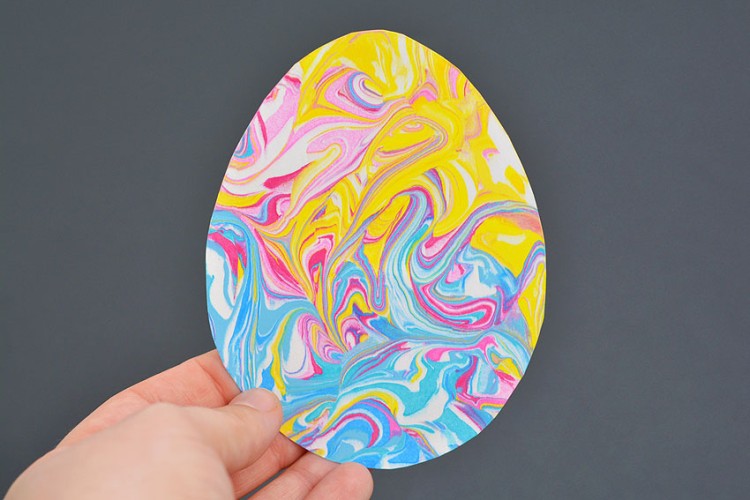
- Your potato stamp Easter eggs are complete!You can also cut out the egg shapes and make a garland from your prints.


Helpful Tips:
- Maximize your stamps: You can typically get two stamps per paint application before needing to reapply.
- Cutting the potato: You can cut the potato in half either crosswise or lengthwise. We usually cut crosswise for a more egg-shaped stamp, but lengthwise works well for some potato shapes!
- Use potato stamps for more than just Easter eggs: Try different shapes and patterns to make floral prints, abstract designs, or personalized artwork. Experiment with different paint colours and layering techniques for even more creative possibilities!

Can potato stamps be re-used?
Yes! You can stamp two or three times before needing to reapply paint.
And if you want to switch colours, rinse the stamp under running water, dry with a paper towel, and repaint.
How long do potato stamps last?
Potato stamps are definitely best if used on the same day they’re cut.
However, if you do want to use them again the next day, wipe off any leftover paint and wrap them in plastic wrap before storing them in the fridge overnight.

What tools do I need for Easter egg potato stamping?
You only need a few basic tools to make fun designs on your potato stamp Easter eggs. In fact, a simple paring knife is the only thing required to make basic striped stamps.
Check around your house for other items that can make fun designs. A toothpick can be used to add simple details, while mini cookie cutters can cut out shapes (use a knife to help remove the cut potato).
You can also use polymer clay tools, a melon baller, or even the tip of a pencil to create designs!

Is painting on the potato stamp Easter eggs better than dipping them into paint?
Yes! We tested both methods, and applying paint with a brush is much neater. When dipping, it’s harder to control how much paint sticks, which can lead to messy and/or uneven stamps.
How do I make a polka dot Easter egg potato stamp?
We used a ribbon tool from a polymer clay tool set to make the dotted designs on our potato stamps. Simply press the tool into the potato and move it in a circular motion to create a hole. Then use the tool to smooth out the edges of the polka dots.
You can also press a metal straw into the potato to make perfect circular cutouts.

Making potato stamp Easter eggs is a wonderful way to bond with family, develop artistic skills, and enjoy hands-on creativity. Whether you’re making festive Easter decorations or simply enjoying a fun afternoon project, potato stamping is a budget-friendly and accessible activity for all ages.
Try it out this Easter and discover new ways to bring DIY art and stamping fun into your celebrations!
Here’s even more Easter egg craft ideas:


Now available
Low-Mess Crafts for Kids Book
72 cute and fun crafts that kids and parents alike can enjoy. All with as little mess as possible!
Where to buy:
You can purchase Low-Mess Crafts for Kids from Amazon, or wherever books are sold:
Amazon | Barnes and Noble | Books-A-Million | Indiebound | Amazon Canada


Leave a Reply