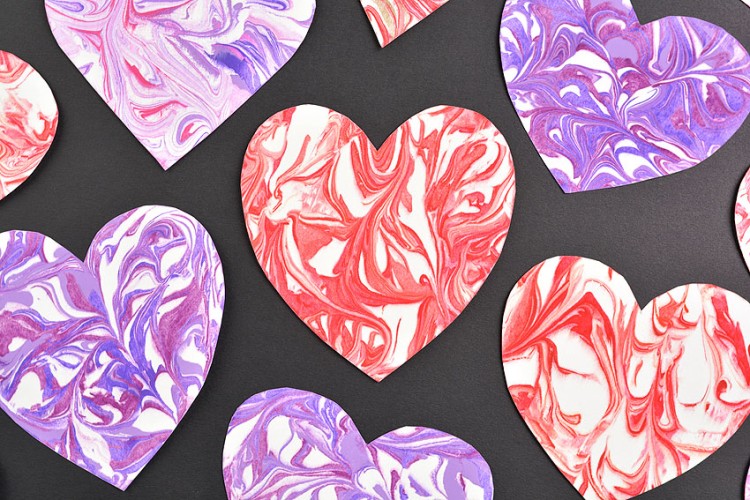
These marbled Easter eggs are really pretty, and they’re SO EASY to make! Simply dip cardstock Easter eggs into shaving cream and swirled paint to create these colourful Easter eggs.
These paint swirled paper eggs make awesome Easter decorations on their own, but they also look great as part of a banner or attached to a homemade Easter card. So cute!

This post contains affiliate links. If you use these links to buy something we may earn a small commission which helps us run this website.
How to Make Marbled Paper Easter Eggs
Materials:
- Free Printable Egg template
- White cardstock
- Shaving cream (foam, not gel)
- Acrylic paint (various colours)
- Pastel blue ribbon (or other matching colour)
Equipment:
- Stir stick (or popsicle stick, butter knife, etc)
Watch the step-by-step video tutorial:
Instructions:
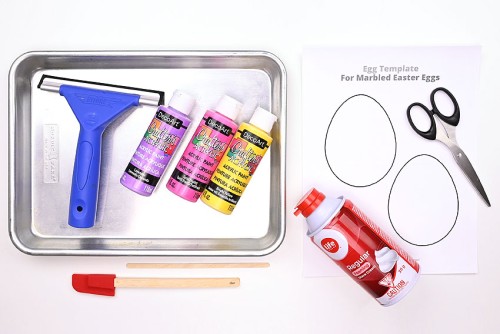
Step 1: Find what you need
- Gather your supplies and materials.

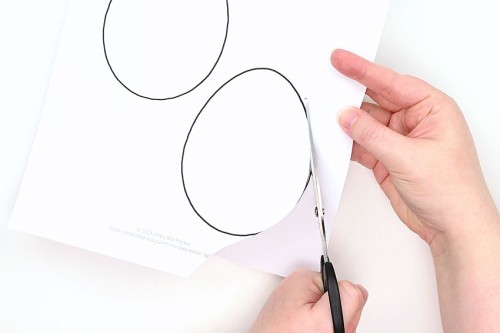
Step 2: Cut out egg shapes
- Print the Easter egg template onto white cardstock and cut them out. You can also draw your own shapes on cardstock.

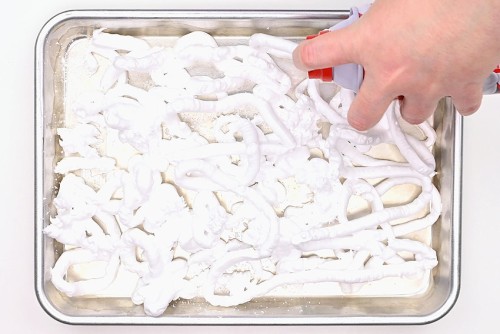
Step 3: Prepare the tray
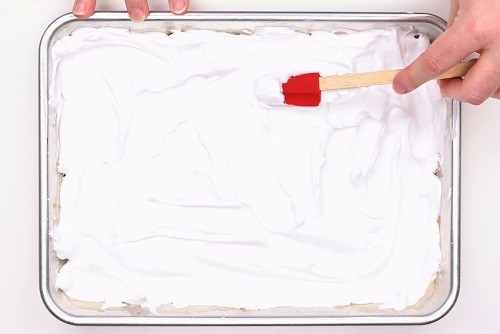
- Add shaving cream to a baking tray.
- Spread the shaving cream with a spatula to even it out.
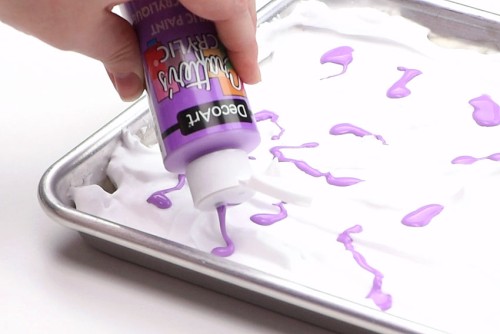
- Squeeze lines and dots of paint on top of the shaving cream in a random pattern.
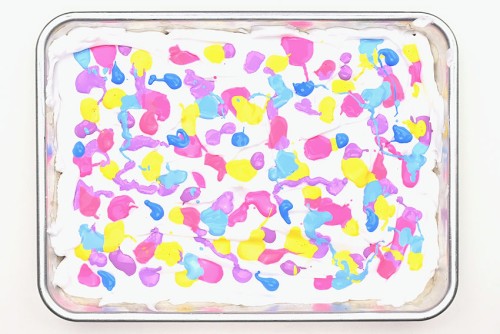
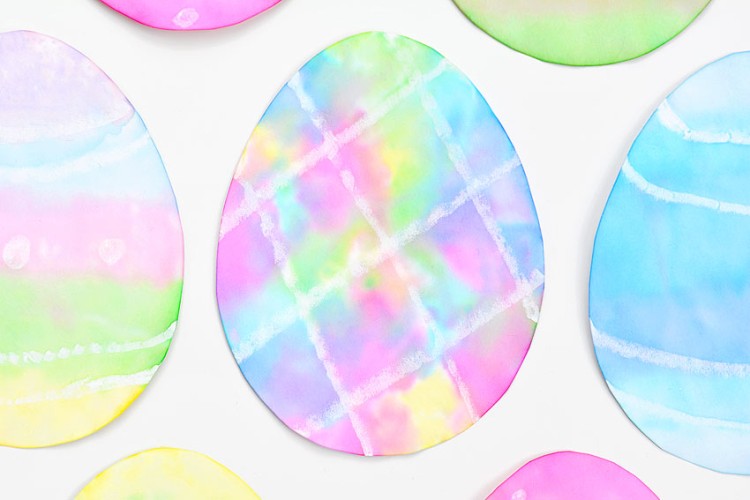
- Continue adding paint to the tray in one colour or different colours until it’s evenly covered, as shown in the photo below.We used different shades of purple, blue, yellow, and pink, but you can add any colours you like!
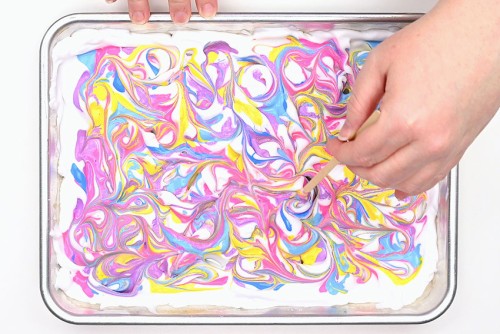
- Use a stir stick to swirl the paint around. Move up and down across the tray, and also side to side.Then move the stir stick in a curved motion until most of the shaving cream is covered in paint, with only small areas of white showing.
Step 4: Make the marbled Easter eggs
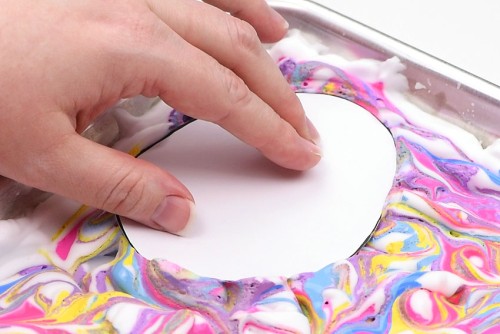
- Place a cardstock egg into the paint with the black outline side facing up (if you used our template). Press down the egg to make sure the whole shape gets covered.Let the egg sit in the shaving cream and paint for a few seconds.
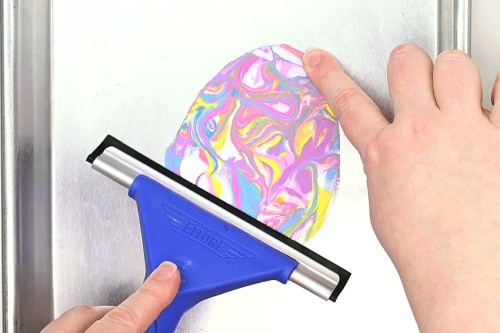
- Carefully peel the cardstock egg off the shaving cream and place it on a clean tray, shaving cream side up.Grab an edge of the egg with a fingertip and use a squeegee (or plastic ruler) to remove any extra shaving cream and paint. Use firm pressure for best results.Let the eggs dry for about 30 minutes on a paper towel before handling.
Step 5: Make a homemade Easter card (optional)
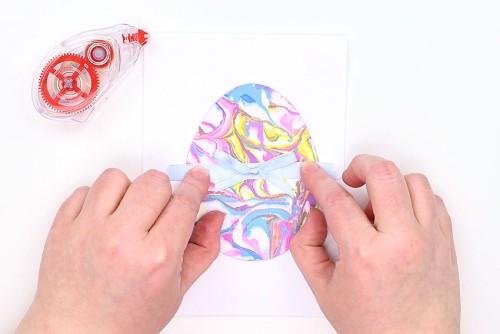
- Cut a piece of ribbon about 4 inches long. Tie a bow and use glue tape to attach it to the center.Then put glue tape on the back of the ribbon and attach it to a marbled Easter egg, with the bow centered.
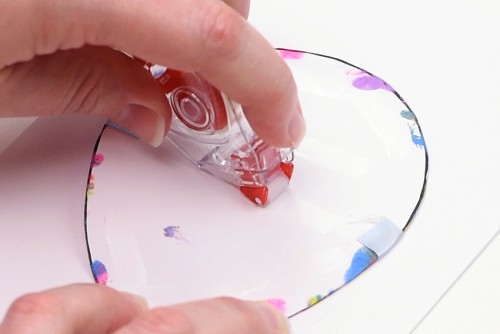
- Attach the ends of the ribbon to the back of the marbled Easter egg with glue tape. Then add more glue tape all over the back of the egg.
- Center the marbled Easter egg and press it down on the front of a blank card.We cut white cardstock to 7 x 10 inches and then folded it in half lengthwise, making a 5 x 7 blank card.
- Write your Easter message inside the card.
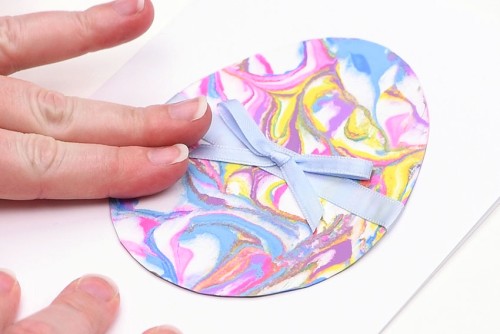
- Your marbled Easter egg card is complete!


Helpful Tips:
- Make sure to keep paper towels or a wet rag handy while you make your marbled eggs – it can definitely get messy!
- You can also marble a whole piece of paper and cut out Easter egg shapes after the cardstock has dried.

Download our free Easter egg template:
Click on the link below to open a PDF file. Print the marbled Easter eggs template on 8.5 x 11 (letter size) white cardstock. Or print it on regular printer paper and trace the egg onto thicker paper or cardboard.
>>> Marbled Easter Egg Template <<<

What paint is best for making marbled Easter eggs?
We like using acrylic paint from the dollar store, mostly because it’s so inexpensive and there are so many different colours available! You can also use tempera paint, which is washable, making it great for younger kids.
You can also drop liquid watercolour paint or food colouring into the shaving cream to make marbled shaving cream art.
What if I don’t have a squeegee?
A squeegee works really well to make the marbled Easter eggs, because you have a lot of control over the pressure used, and it’s easy to grip the handle.
If you don’t have a squeegee, though, don’t worry! You can also use a plastic ruler or an expired gift card to scrape the paint off the cardstock Easter egg.

How many trays can you make with a can of shaving cream?
We were able to use an 11 ounce (311 gram) can of shaving cream to fill 3 trays (12 x 18 inches) before it was empty. This size of tray fits 8 Easter eggs from our printable template.
How many times can you use the paint to make marbled Easter eggs?
The Easter eggs definitely look the best when they’re pressed into the freshly swirled paint, but you can use the same spot a second time — the marbling effect just isn’t quite as clear.

These marbled Easter eggs look so pretty, and we always have so much fun playing around with shaving cream art! For a fun change, try adding white washi tape (or making tape) on the eggs to make some fun designs.

Here’s even more shaving cream art ideas:

Our book Low-Mess Crafts for Kids is loaded with 72 fun and simple craft ideas for kids! The projects are fun, easy and most importantly low-mess, so the clean up is simple!

Where to buy:
You can purchase Low-Mess Crafts for Kids from Amazon, or wherever books are sold:
Amazon | Barnes and Noble | Books-A-Million | Indiebound | Amazon Canada


Leave a Reply