It’s SO EASY to make a paper ninja star! Just grab two sheets of paper and follow our simple step by step tutorial to make these ninja stars, using basic origami folds.
These “shuriken” (more on that below!) are so cool looking! Kids and adults will have tons of fun making this simple paper craft. We had a blast folding these colourful throwing stars and watching them fly through the air!

This post contains affiliate links. If you use these links to buy something we may earn a small commission which helps us run this website.
How to Make a Ninja Star
Materials:
- 2 pieces Origami paper (or other thin paper cut into a square)
Watch the step-by-step video tutorial:
Instructions:
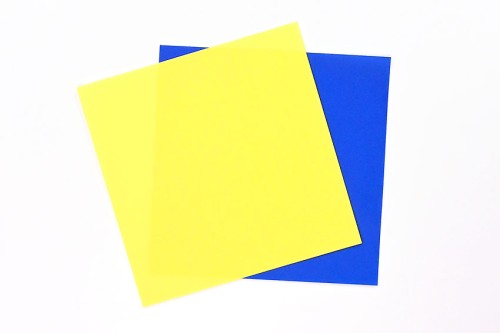
Step 1: Find what you need
- All you need to make a ninja star is two square pieces of paper!

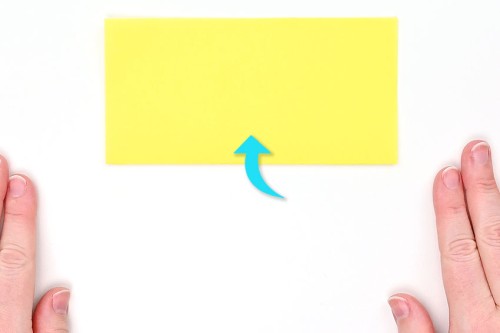
Step 2: Fold both papers into rectangles
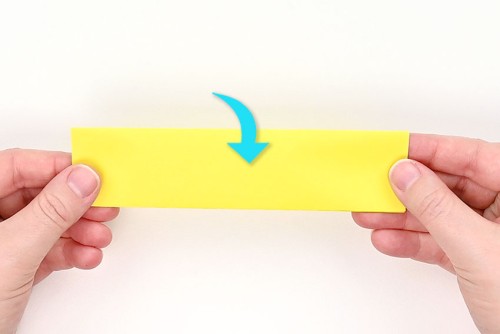
- Take one piece of paper and fold it in half from bottom to top.If you’re using single sided origami paper, start with the coloured side down.
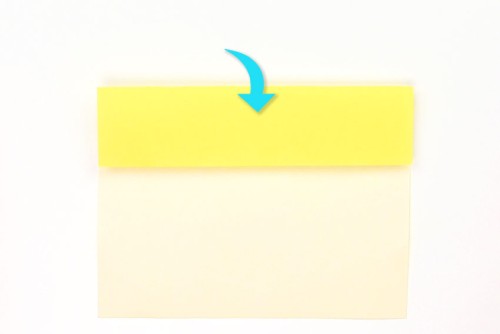
- Open the paper up and fold the top edge of the paper down to the center fold.

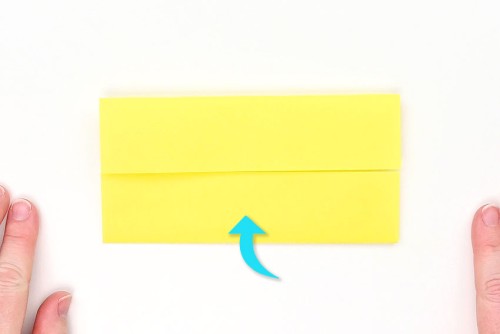
- Now fold the bottom edge of the paper up to the center fold.
- Fold the paper in half again on the first center fold line.To do this, bring the top edge down to the bottom, with the previous folds inside.
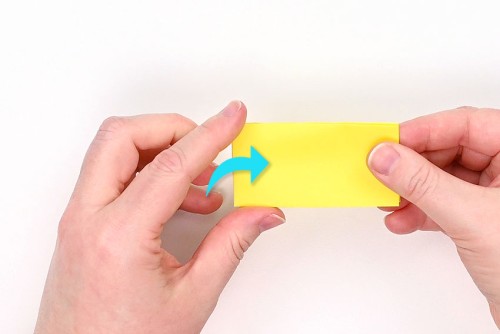
- Now fold the paper in half the other way, from left to right.
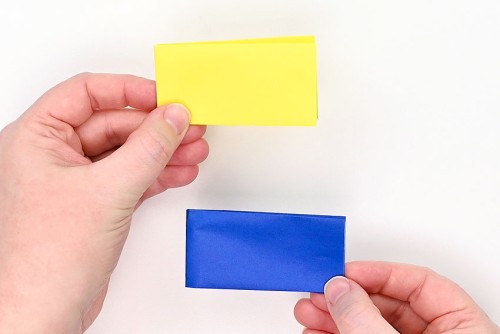
- Repeat all of Step 2 with a second piece of paper.Try using a different colour for this second paper — it will make it easier to keep track of the folds.
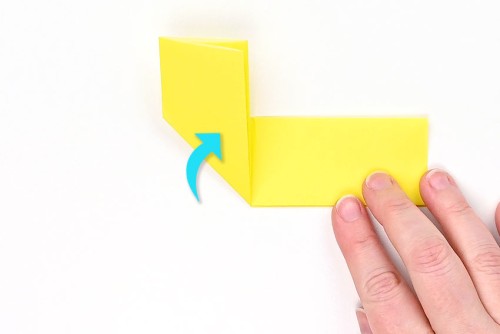
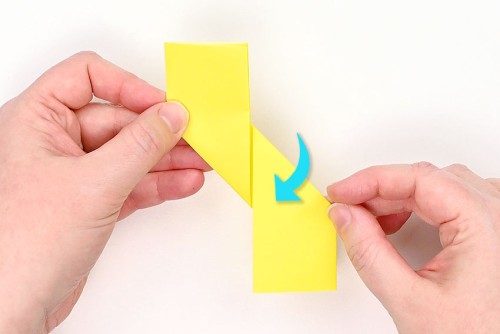
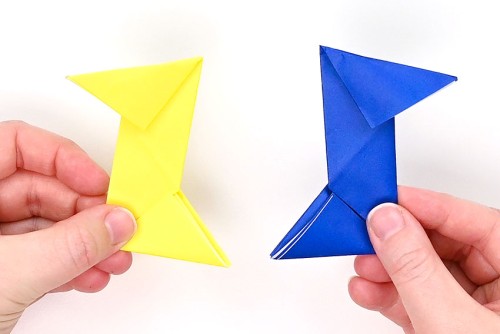
Step 3: Fold the ends in opposite directions
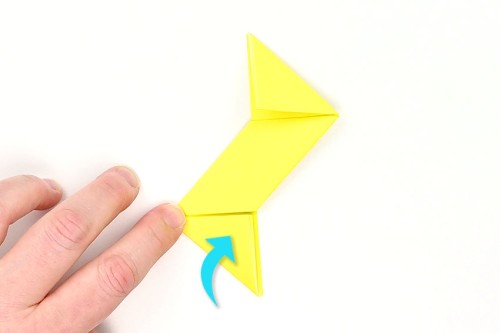
- Open up paper 1 (the yellow paper) and fold the bottom left edge up so it lines up with the fold in the middle.
- Fold the top right edge down so it lines up with the fold in the middle – it should go in the opposite direction of the previous fold.
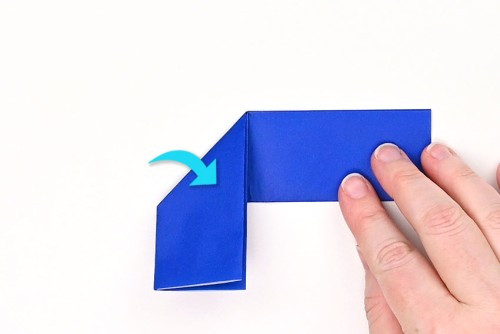
- Fold paper 2 (blue) opposite to the folds on paper 1 (yellow). To start, fold the top left edge down so it lines up with the middle fold.
- Then fold the bottom right edge of paper 2 up.Your two papers should look like the picture below.
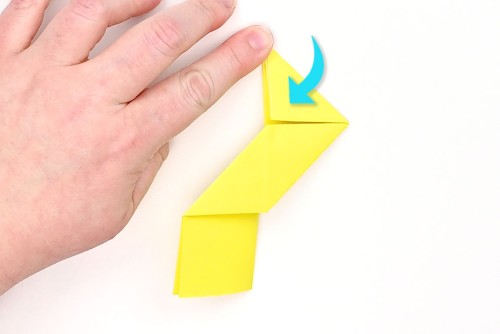
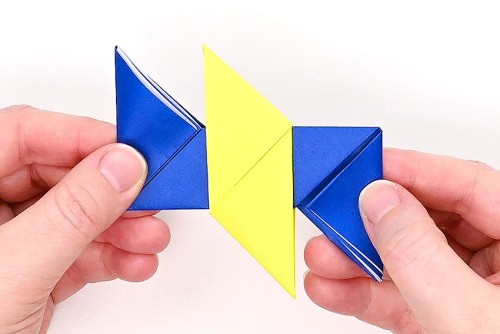
Step 4: Fold the corners into triangles
- Flip paper 1 (yellow) over and fold the top right corner down so that the top edge lines up with the left edge.
- Fold the bottom left corner of paper 1 up so that the bottom edge lines up with the right edge.
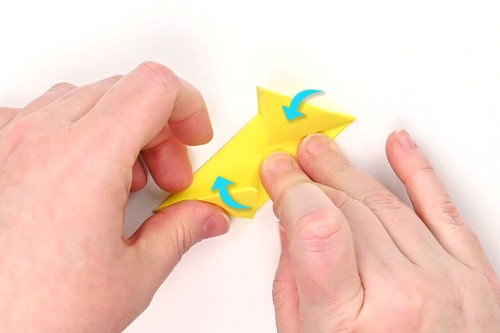
- Fold both the end triangles in toward the center, then release the folds. You don’t want them to stay folded over yet, but these folds will help the ninja star come together in the next step.
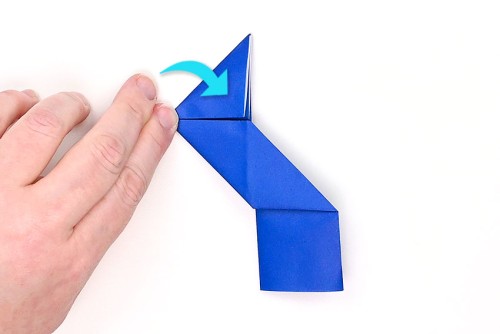
- Flip paper 2 (blue) over and, again, make the opposite fold from paper 1. Fold the top left corner down so that the top edge lines up with the right edge.
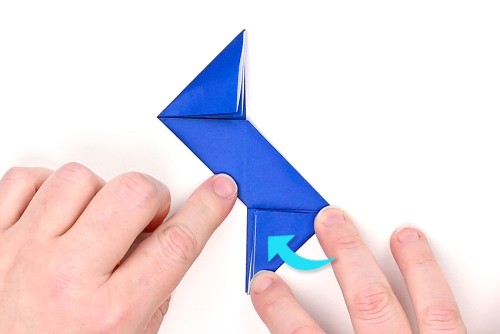
- Fold the bottom right corner of paper 2 so that the bottom edge lines up with the left edge.Fold both the end triangles in toward the center, then release the folds.
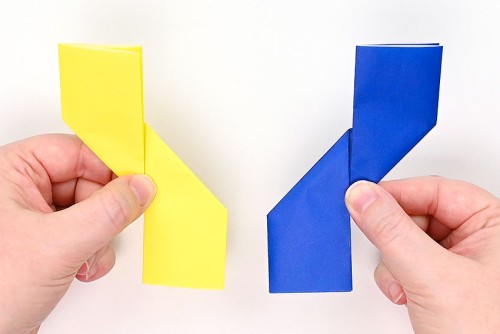
- You should now have two lightning bolt shape papers, going in opposite directions (or, a ‘Z’ and a backwards ‘Z’).
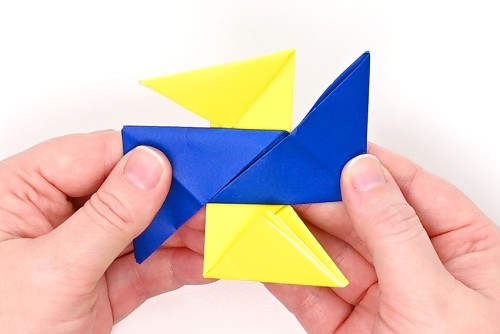
Step 5: Combine the two papers
- Flip paper 2 (blue) over and rotate it 90 degrees. Center paper 2 on top of paper 1.
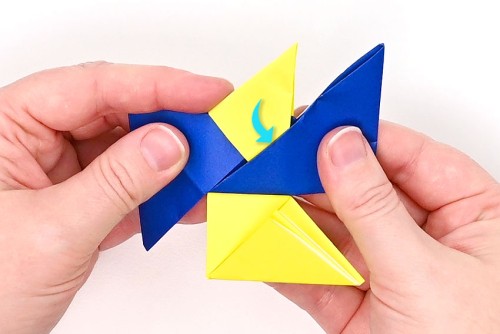
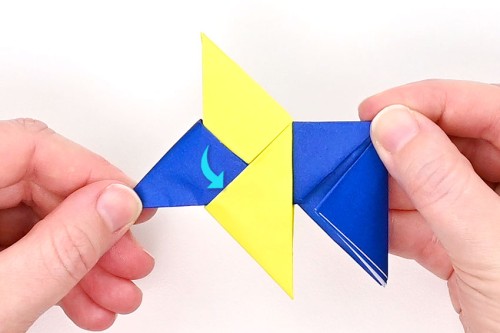
- Fold the top left triangle of paper 1 (yellow) down and right, slipping it inside the top layer of paper 2 (blue).
- Fold the bottom right triangle of paper 1 (yellow) up and left, slipping it inside the top layer of paper 2 (blue).
- Flip the papers over.
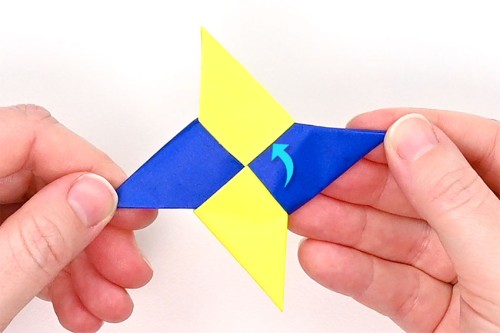
- Fold the top left triangle of paper 2 (blue) down and right, slipping it inside the top layer of paper 1 (yellow).
- Fold the bottom right triangle of paper 2 (blue) into the top layer of paper 1 (yellow).This may be a tight fit, so stick your finger or a pencil in this fold first to open it up and allow paper 2 to slide in neatly.
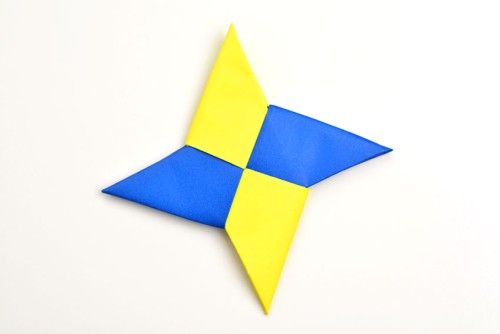
- Your ninja star is complete!

Helpful Tips:
- Fold carefully for crisp and precise creases. This will give you the nicest looking ninja star!
- If you’re having trouble getting the last triangles folded in neatly, use a pencil to open up the folds.

What is a ninja star?
“Ninja star” is an informal name for the Japanese concealed weapon known as a shuriken, which literally means “hidden hand blade”. Despite the ninja name, these throwing stars were actually used by the legendary samurai warriors.
Paper ninja stars are a classic origami project that are tons of fun to make and play with!
Is it difficult to make a ninja star?
No, it’s actually really easy to make a ninja star of your own! Simply follow our step-by-step photo tutorial (or watch the video!) and you should be able to follow along easily.
One of the most important things is to keep track of Paper 1 and Paper 2, so you’re making the correct folds on each paper. It definitely helps to make a ninja star with two different colours of paper! Or, if you’re using the same colour, keep Paper 1 on the left and Paper 2 on the right.
Making the final folds to put the ninja star together is the only part that’s a bit challenging. Be sure to watch the tutorial video if you’re having trouble, and you should be able to easily understand where each corner is going!

What type of paper is best for making a ninja star?
We had the best luck making our ninja stars with origami paper. It’s easy to use because it’s already a square shape, and the paper is nice and thin. Try making your ninja star from thin paper like lined writing paper, magazine pages, or wrapping paper.
You can also use regular printer paper cut into a square, but it’s a little harder to fold than origami paper. We don’t recommend paper any thicker than 20 lb. The thicker the paper, the harder it is to make precise folds.

What size are these ninja stars?
We made our origami ninja stars using 5-7/8 inch (15 cm) square origami paper. This makes a ninja star that is just over 3-1/4 inches from tip to tip.
You can use any size of paper to make a ninja star, as long as it’s square when you start folding.
How do you throw an origami ninja star?
These ninja stars don’t have a lot of power behind them (they are paper, after all), but they do fly nicely across a room! There are two ways to throw these paper ninja stars.
Overhand: You can throw the ninja star overhand, like a baseball. To do this, grip one corner of the star between your thumb and index finger. Hold your arm up, pull back, and then release!
Frisbee style: Stand sideways, with your feet at 90 degrees from your target. Hold a tip of the ninja star between your thumb and index finger. Hold your hand sideways so the star is parallel to the floor. Bring your wrist in towards your body and then flick it out, letting go of the star.
Make sure not to throw your ninja star at people or animals. Even though these ninja stars are made of paper, the corners could still hurt someone!

Prepare for ninja training with these super cool origami ninja stars! It’s so much fun to make a ninja star, you’ll want to make them in all different colours!

Here’s even more paper craft ideas:


Our book Low-Mess Crafts for Kids is loaded with 72 fun and simple craft ideas for kids! The projects are fun, easy and most importantly low-mess, so the clean up is simple!

Where to buy:
You can purchase Low-Mess Crafts for Kids from Amazon, or wherever books are sold:
Amazon | Barnes and Noble | Books-A-Million | Indiebound | Amazon Canada


Leave a Reply