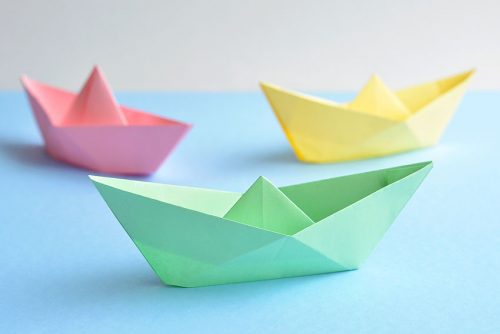
Learning how to make a paper boat is SO FUN and really easy! With just five minutes and a sheet of regular printer paper, you can fold a cute little origami boat that actually floats on water.
This is such a classic craft project that’s quick and simple, and it’s a really fun introduction to origami! Follow the step-by-step tutorial below, or watch the quick video to learn how to make a paper boat. You’ll be an expert in no time!

How to Make a Paper Boat
Materials:
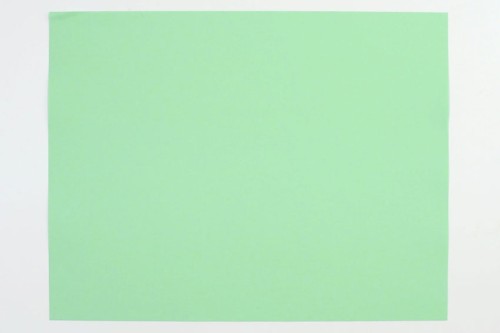
- 1 piece Letter sized printer paper (8-1/2 by 11 inches size; any colour)
Watch the step-by-step video tutorial:
Instructions:
Step 1: Find what you need
- Grab a piece of letter sized printer paper. That’s all that you need to make a paper boat!

Step 2: Make the first folds
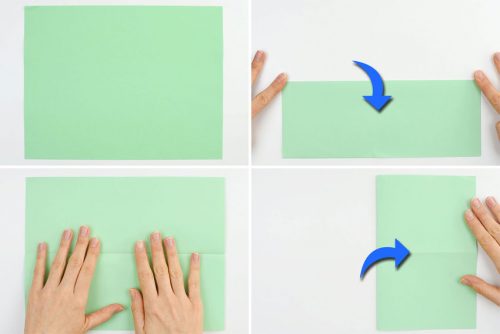
- Start by folding your piece of paper in half lengthwise, then open it up again.Then fold it width-wise, as shown in the photos below.

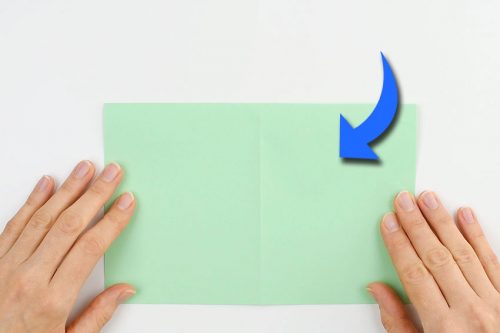
- Rotate the paper as shown in the photo below, so that the fold is at the top.
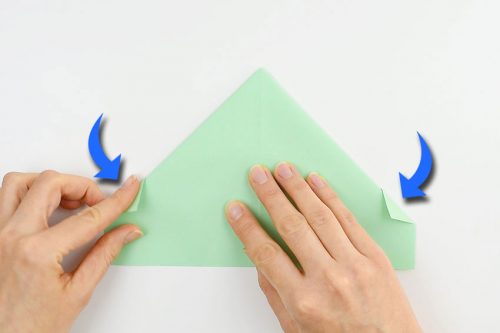
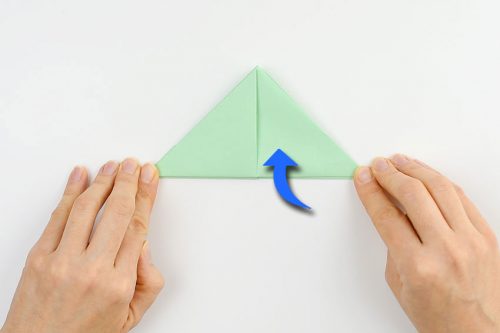
- Take each of the top corners and fold them downwards so that the edges line up with the center fold.
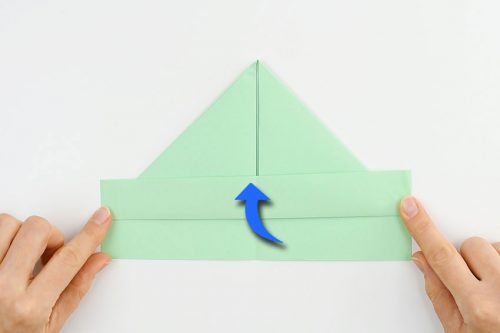
- Take one layer of the bottom flap and fold it upwards.
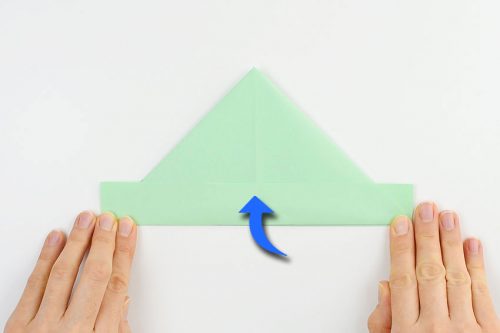
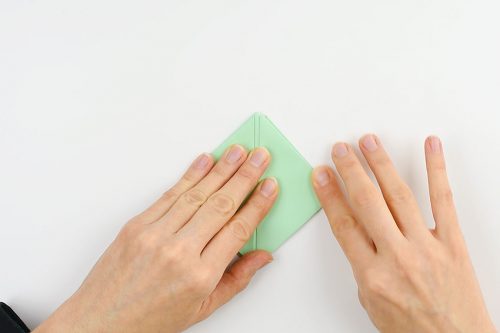
- Flip the folded paper over. There should be two little flaps showing behind the triangle shape. Fold those little flaps over diagonally as shown in the photo below.
- Take the remaining bottom flap and fold it upwards.

Step 3: Continue folding
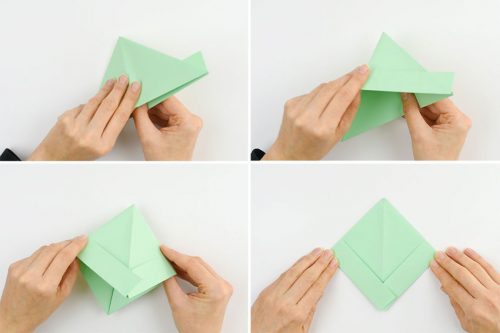
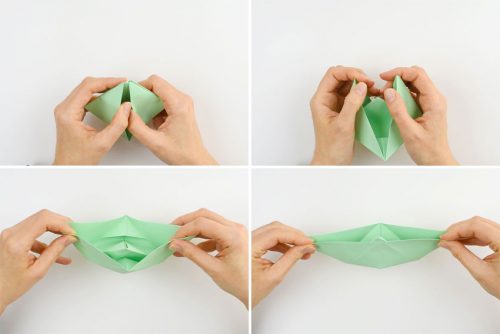
- Pick up the folded paper and place your thumbs into the opening at the bottom. Slowly pull your thumbs apart from one another, pulling apart the paper as you go.When you finish pulling, the paper should be flat again, as shown in the photo below. Run your fingers along all of the folds, pressing to make sure it’s completely flat and all the edges are folded.
- Starting at the bottom point, take one layer of the folded paper and bring the bottom point up to meet the top point, making sure all of the edges line up. Press along the edge to make a fold.
- Flip the paper over. Then take the remaining bottom point and bring it up to meet the top point, again making sure all of the edges line up. Press along the edge to make a fold.
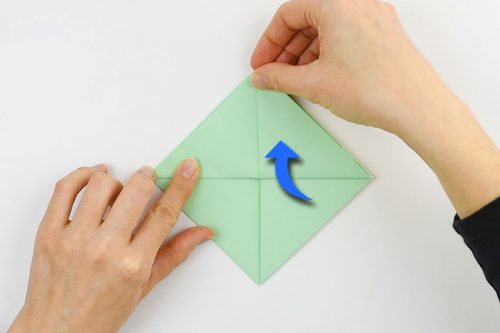
- Pick up the folded paper and place your thumbs into the opening at the bottom. Again, slowly pull your thumbs apart from one another, pulling apart the paper as you go.When you finish pulling, the paper should be flat again, as shown in the photo below.
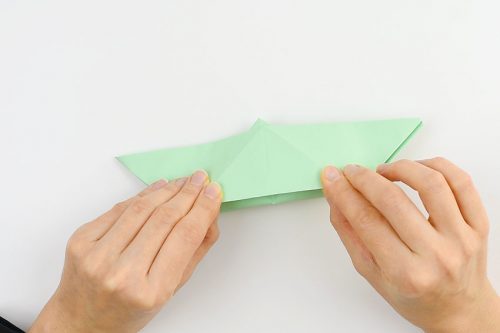
- Once again, run your fingers along all of the folds, pressing to make sure it’s completely flat and all the edges are folded.

Step 4: Make the final folds and adjustments
- Pick up the folded piece of paper. At the top point, pull apart the 2 sides of folded paper. As you pull it apart, it should open up into a boat shape, as shown in the photo below.
- Adjust the paper if needed to make sure it’s boat-shaped, then pinch along the bottom edges to make a fold on each side.
- Your paper boat is complete!
Do paper boats float in water?
Yes! These boats will float in water. But since they’re made out of paper, they can really only go in the water once. The boats should last in water for at least 10 minutes before they get waterlogged. Once they’re soaked with water, it will be hard to keep them upright, and they might even sink.
If you want them to last longer in the water, add a layer of tape to the bottom of your boat to make it waterproof.
What kind of paper do you need to make a paper boat?
I find it easiest to use regular printer paper or construction paper, since most people have those at home already. Printer paper comes in all sorts of fun colours, or you can colour or draw on white paper to add colour to your boat.
You can also use origami paper if you have it. You just have to cut it to make sure the proportions are right, since most origami paper is square.
Want your boat to last longer in the water? Make a waterproof boat out of waxed paper or aluminum foil!

Can you put things in paper boats?
Sort of. If you’re planning to put your boats in water, whatever you put into the boats has to be really light, otherwise the boats will tip over. You could cut out paper people to put in your boats… or possibly teeny tiny toys. But I can’t promise that the boats will stay upright in the water with toys in them.
If you’re playing with the boats on the floor (and not in the water), you can load them up with all sorts of fun, small toys. Try Lego figures, small Hatchimals, or even Polly Pockets!
Where can I play with these paper boats?
You can play with paper boats in the bath, in the sink, or even outside in a puddle. Or you can keep them dry and play with them on the floor so they last longer. A blue towel or blanket makes a great ocean!

How can I customize my origami boat?
Use brightly coloured paper, and decorate them with markers, pencil crayons, and stickers. Don’t forget to give your boat a name when you’re done!

We hope you’ll have a great time learning how to make a paper boat, because these boats are SO FUN and they’re really simple to make! All you need is one piece of regular sized printer paper and in 5 minutes you can fold an awesome boat that actually floats in water!
This is such a fun kids craft and a great introduction to origami for kids. Such a fun activity for summer or any time!

When my kids got home from school, they saw all my paper boats on the office floor (because that’s where all my best crafting is done!), and they got so excited to make them! My 5 year old is a little too young to make the folds, so I just gave him one of my paper boats. But my 7 and 9 year olds folded theirs all by themselves and they looked awesome!
Then my 3 kids gathered all the sofa cushions and made a giant fort for their paper boats. Because why not make an ocean fort for your paper boats!? They loaded their boats with tiny little toys and I heard all sorts of playing with “LOOK THERE’S LAND OVER THERE!” the whole time I was making dinner.
This post was originally published on January 16, 2020.

Here’s even more fun craft ideas:


Our book Low-Mess Crafts for Kids is loaded with 72 fun and simple craft ideas for kids! The projects are fun, easy and most importantly low-mess, so the clean up is simple!

Where to buy:
You can purchase Low-Mess Crafts for Kids from Amazon, or wherever books are sold:
Amazon | Barnes and Noble | Books- A- Million | Indiebound | Indigo | Amazon Canada


Leave a Reply